Webhook Configuration
Extend the functionality of your app by allowing your customers to subscribe to events that happen in your application.
We know how hard it is to build a complete webhook notification system, especially when you are focusing on building your core features.
So we take care of sending webhook notifications for you.
First, create events in the Builder and connect them to your application using code. An event can be virtually anything that happens in your application. For instance, let's say that your application is a server monitoring application. You could create an event that sends a webhook notification when the server is down.
Then, your customers can subscribe to those events through the Admin Portal to receive a notification when the event occurs.
Add webhook functionality to your application to send notifications to your customers when certain events happen in your application.
It takes just a few easy steps.
Read below to learn how to set up your Frontegg Admin portal to provide webhook notifications to your customers.
Login Box Webhooks
Access Frontegg user management flows using prehooks and webhooks.
Step 1: Enable Webhooks
Enable Webhooks in the Builder to work with them in the Admin Portal.
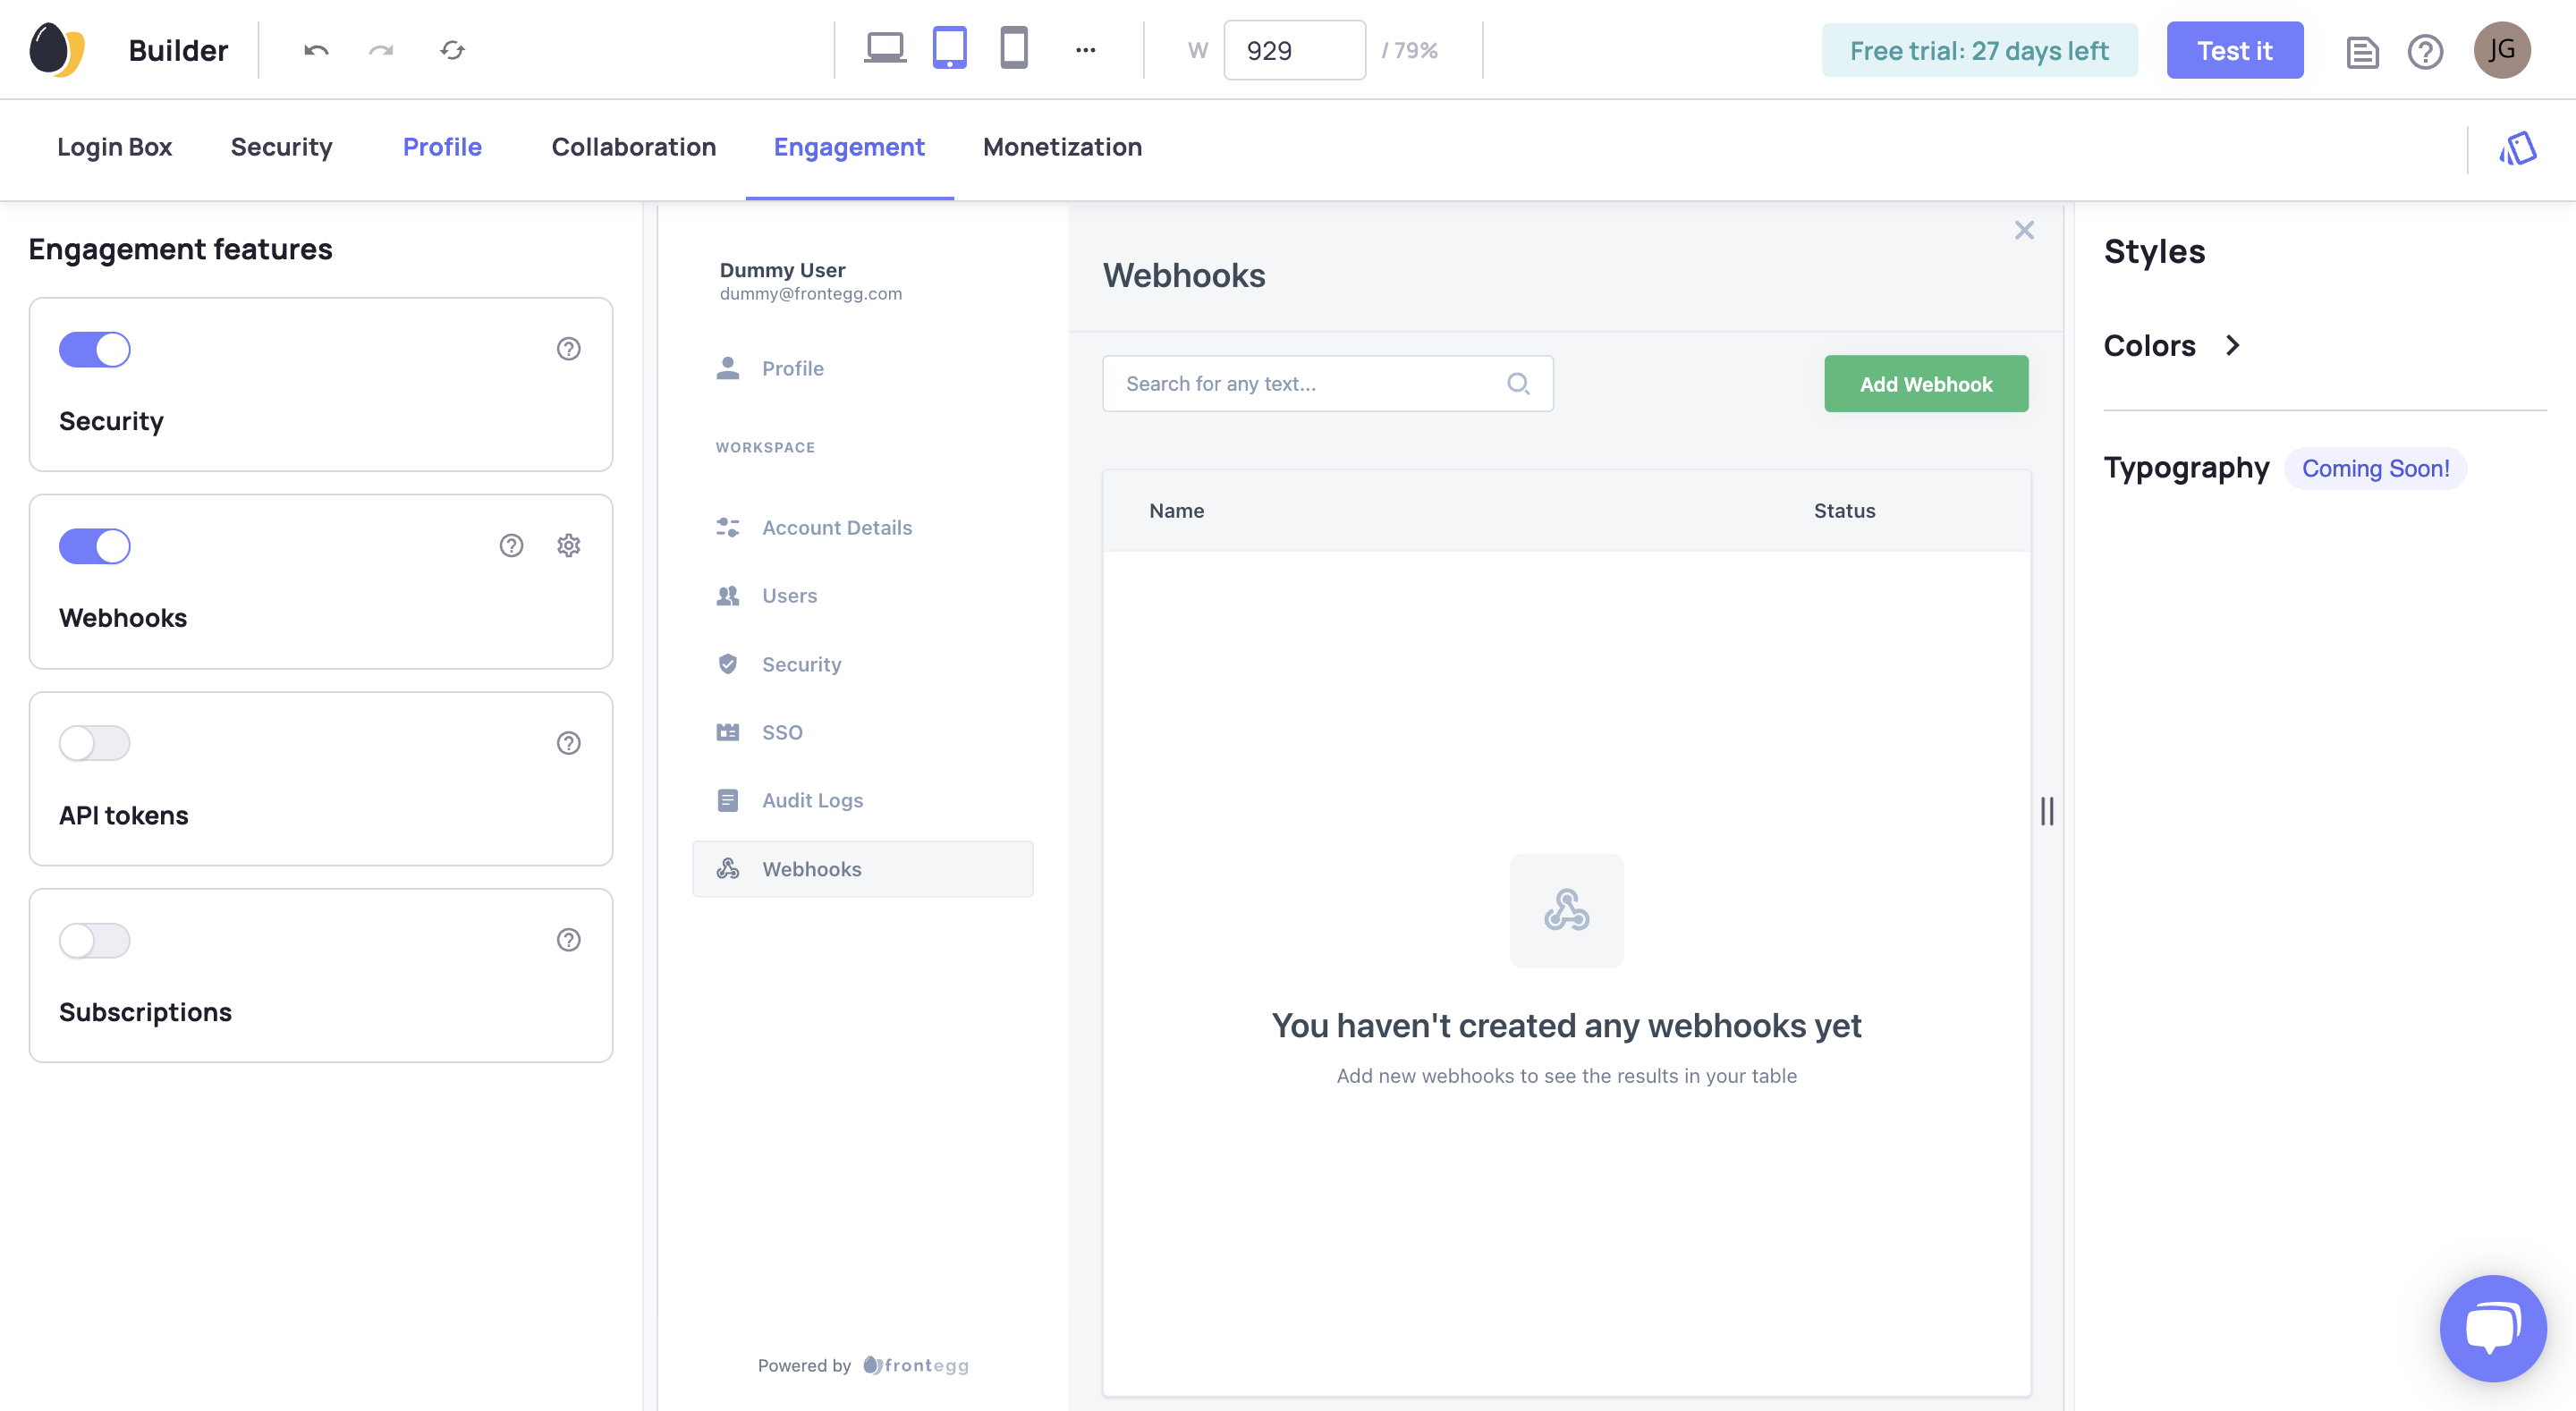
Go to Home ➜ Builder ➜ Engagement.
Find the Webhooks switch and toggle to on.
Step 2: Create Webhook Events
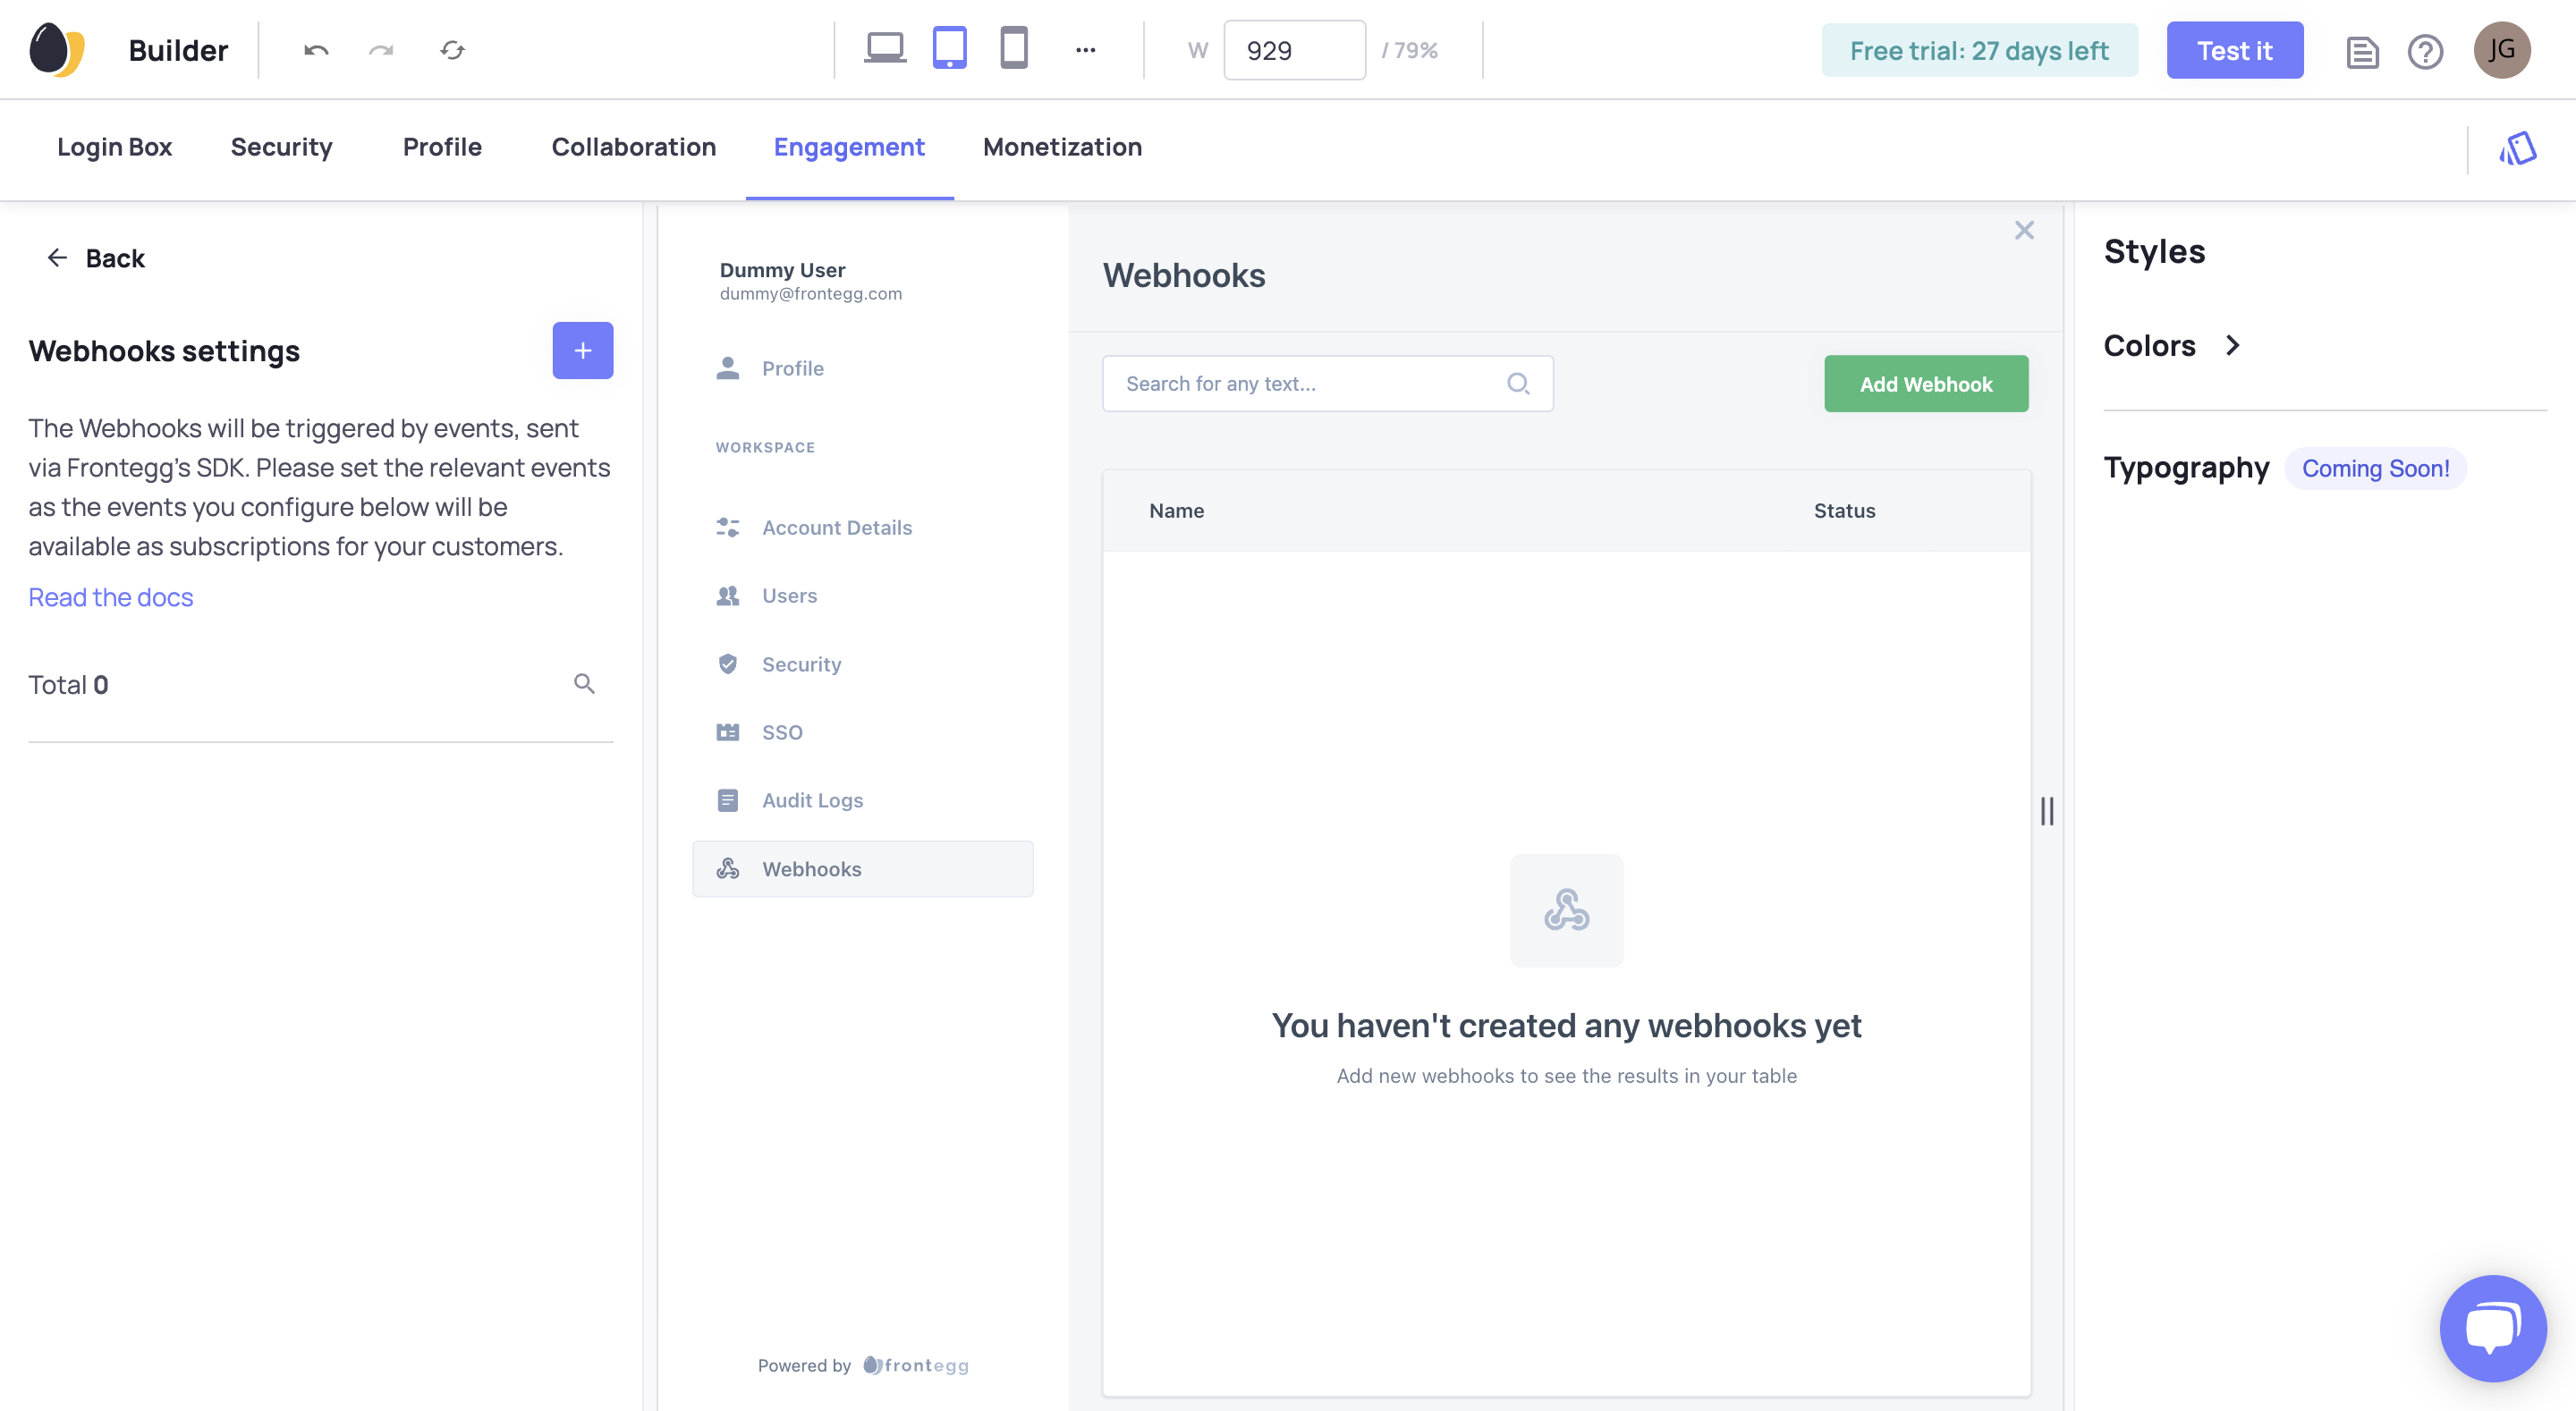
On Home ➜ Builder ➜ Engagement, click the gear (⚙️) next to Webhooks.
This is where you create and view events that trigger webhook notifications. The events you configure here are available as subscriptions for your customers.
Click the plus button to add a new event.
Fill out the form.
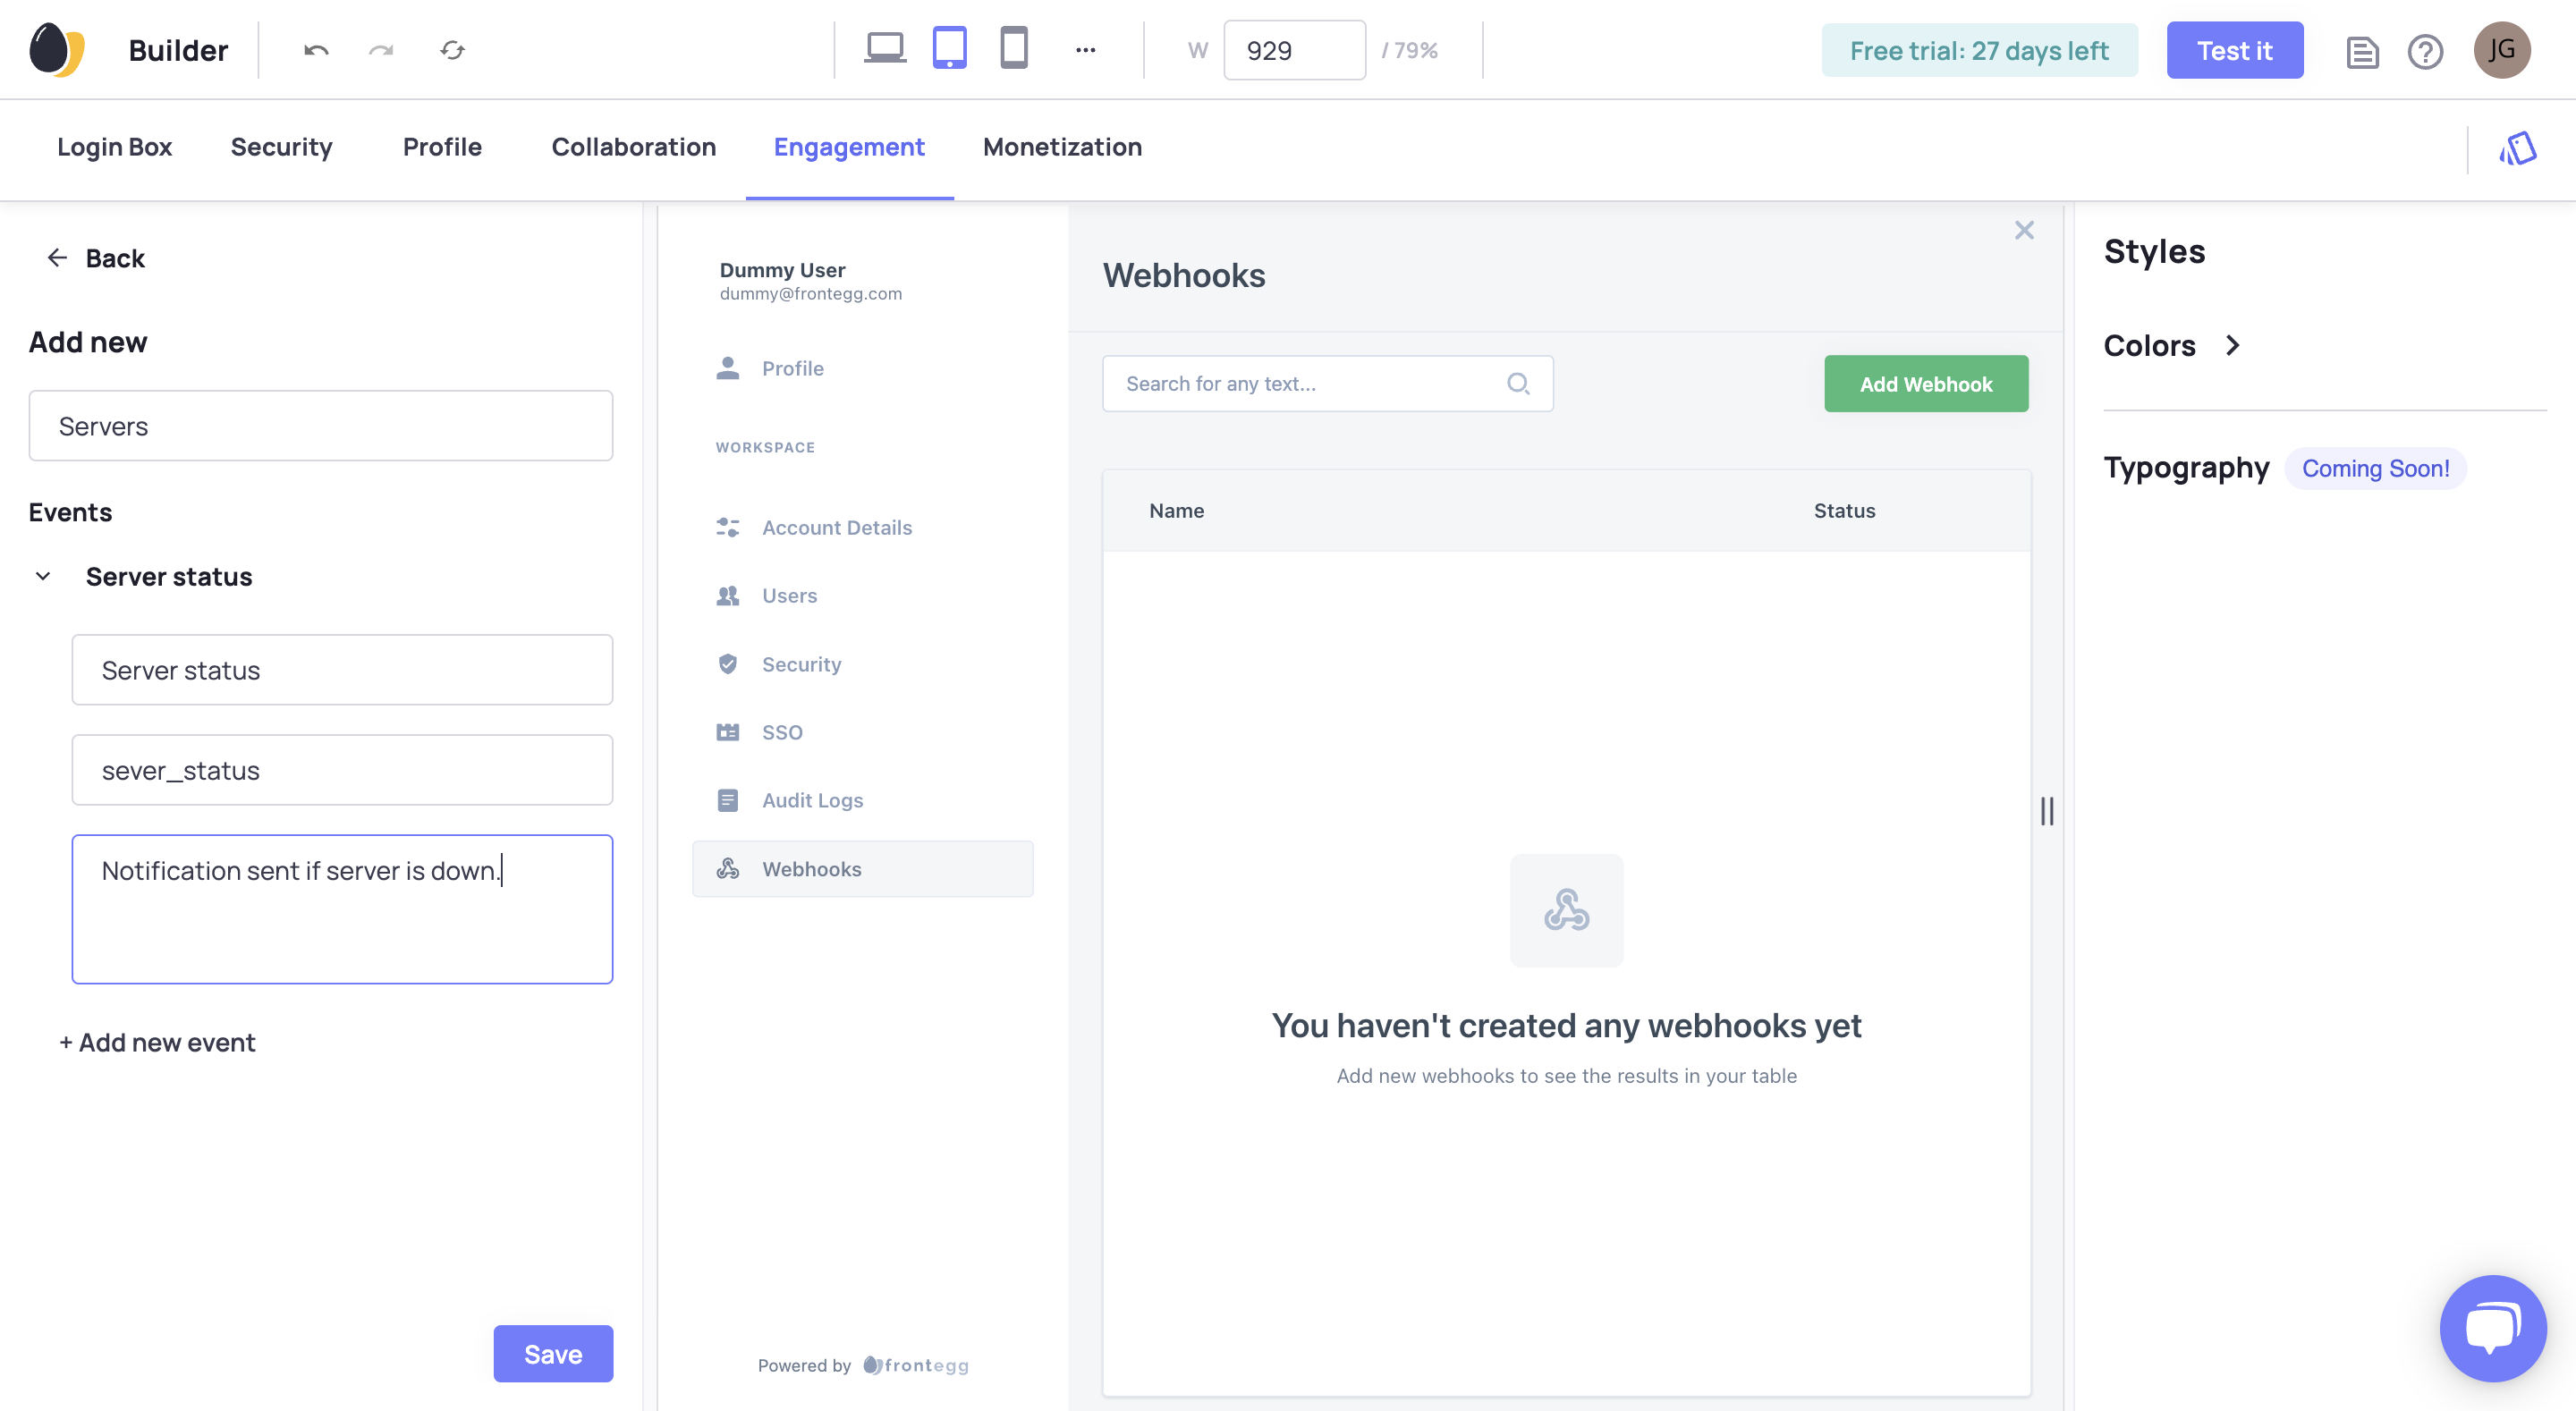
The form requires you add the event to a category. Categories help you organize your events. Choose a name that describes what the events have in common.
Each individual event has its own webhook, even if other events share the same category.
Enter information for other inputs. The information is sent in the webhook payload to your application.
Copy and paste this code into your application in the file and location where the code is for the event that you want to trigger a webhook notification.
import { EventsClient } from '@frontegg/client'

// Init the events SDK with the clientId and api key
const eventsClient = new EventsClient();
await eventsClient.init('YOUR-CLIENT-ID', 'YOUR-API-KEY');

eventsClient.trigger({
 // A unique event key for the event
  eventKey: 'event-key',

  /* Title and description are required properties
     and will be sent in the request payload */
  properties: {
    title: 'Welcome To Our App',
    description: 'This is our new app',
  },

  /* Add additional properties to the request payload
     or use webhook:true to send only default properties */
  channels: {
    webhook: {
      someKey: 'some value',
    },
  },

  // Trigger the event for a specific tenantId.
  tenantId: 'my-tenant-id',
});
The code triggers the event that that you pass into the Event Client's trigger method. You pass an object containing the eventKey, properties for title and description of the event, additional properties, and the receiver's tenant id. The trigger method sends a payload from your application to Frontegg.
Here are descriptions for the properties you need for the code:
| Property Name | Description |
|---|---|
| Client Id | Environments ➜ [NAME OF ENVIRONMENT] ➜ Settings |
| API Key | Environments ➜ [NAME OF ENVIRONMENT] ➜ Settings |
| Event Key | You defined in Frontegg Portal |
| Title | A title for your webhook |
| Description | A description for your webhook |
| Additional properties | You can add key: value pairs of your choosing to the payload that your customer receives at their callback URL or use webhook: true to send only default properties |
| Tenant Id | TenantId for the webhook receiver |
Step 3: Enable Customers to See Webhooks Section
Customers should now see Webhooks in the Admin Portal.
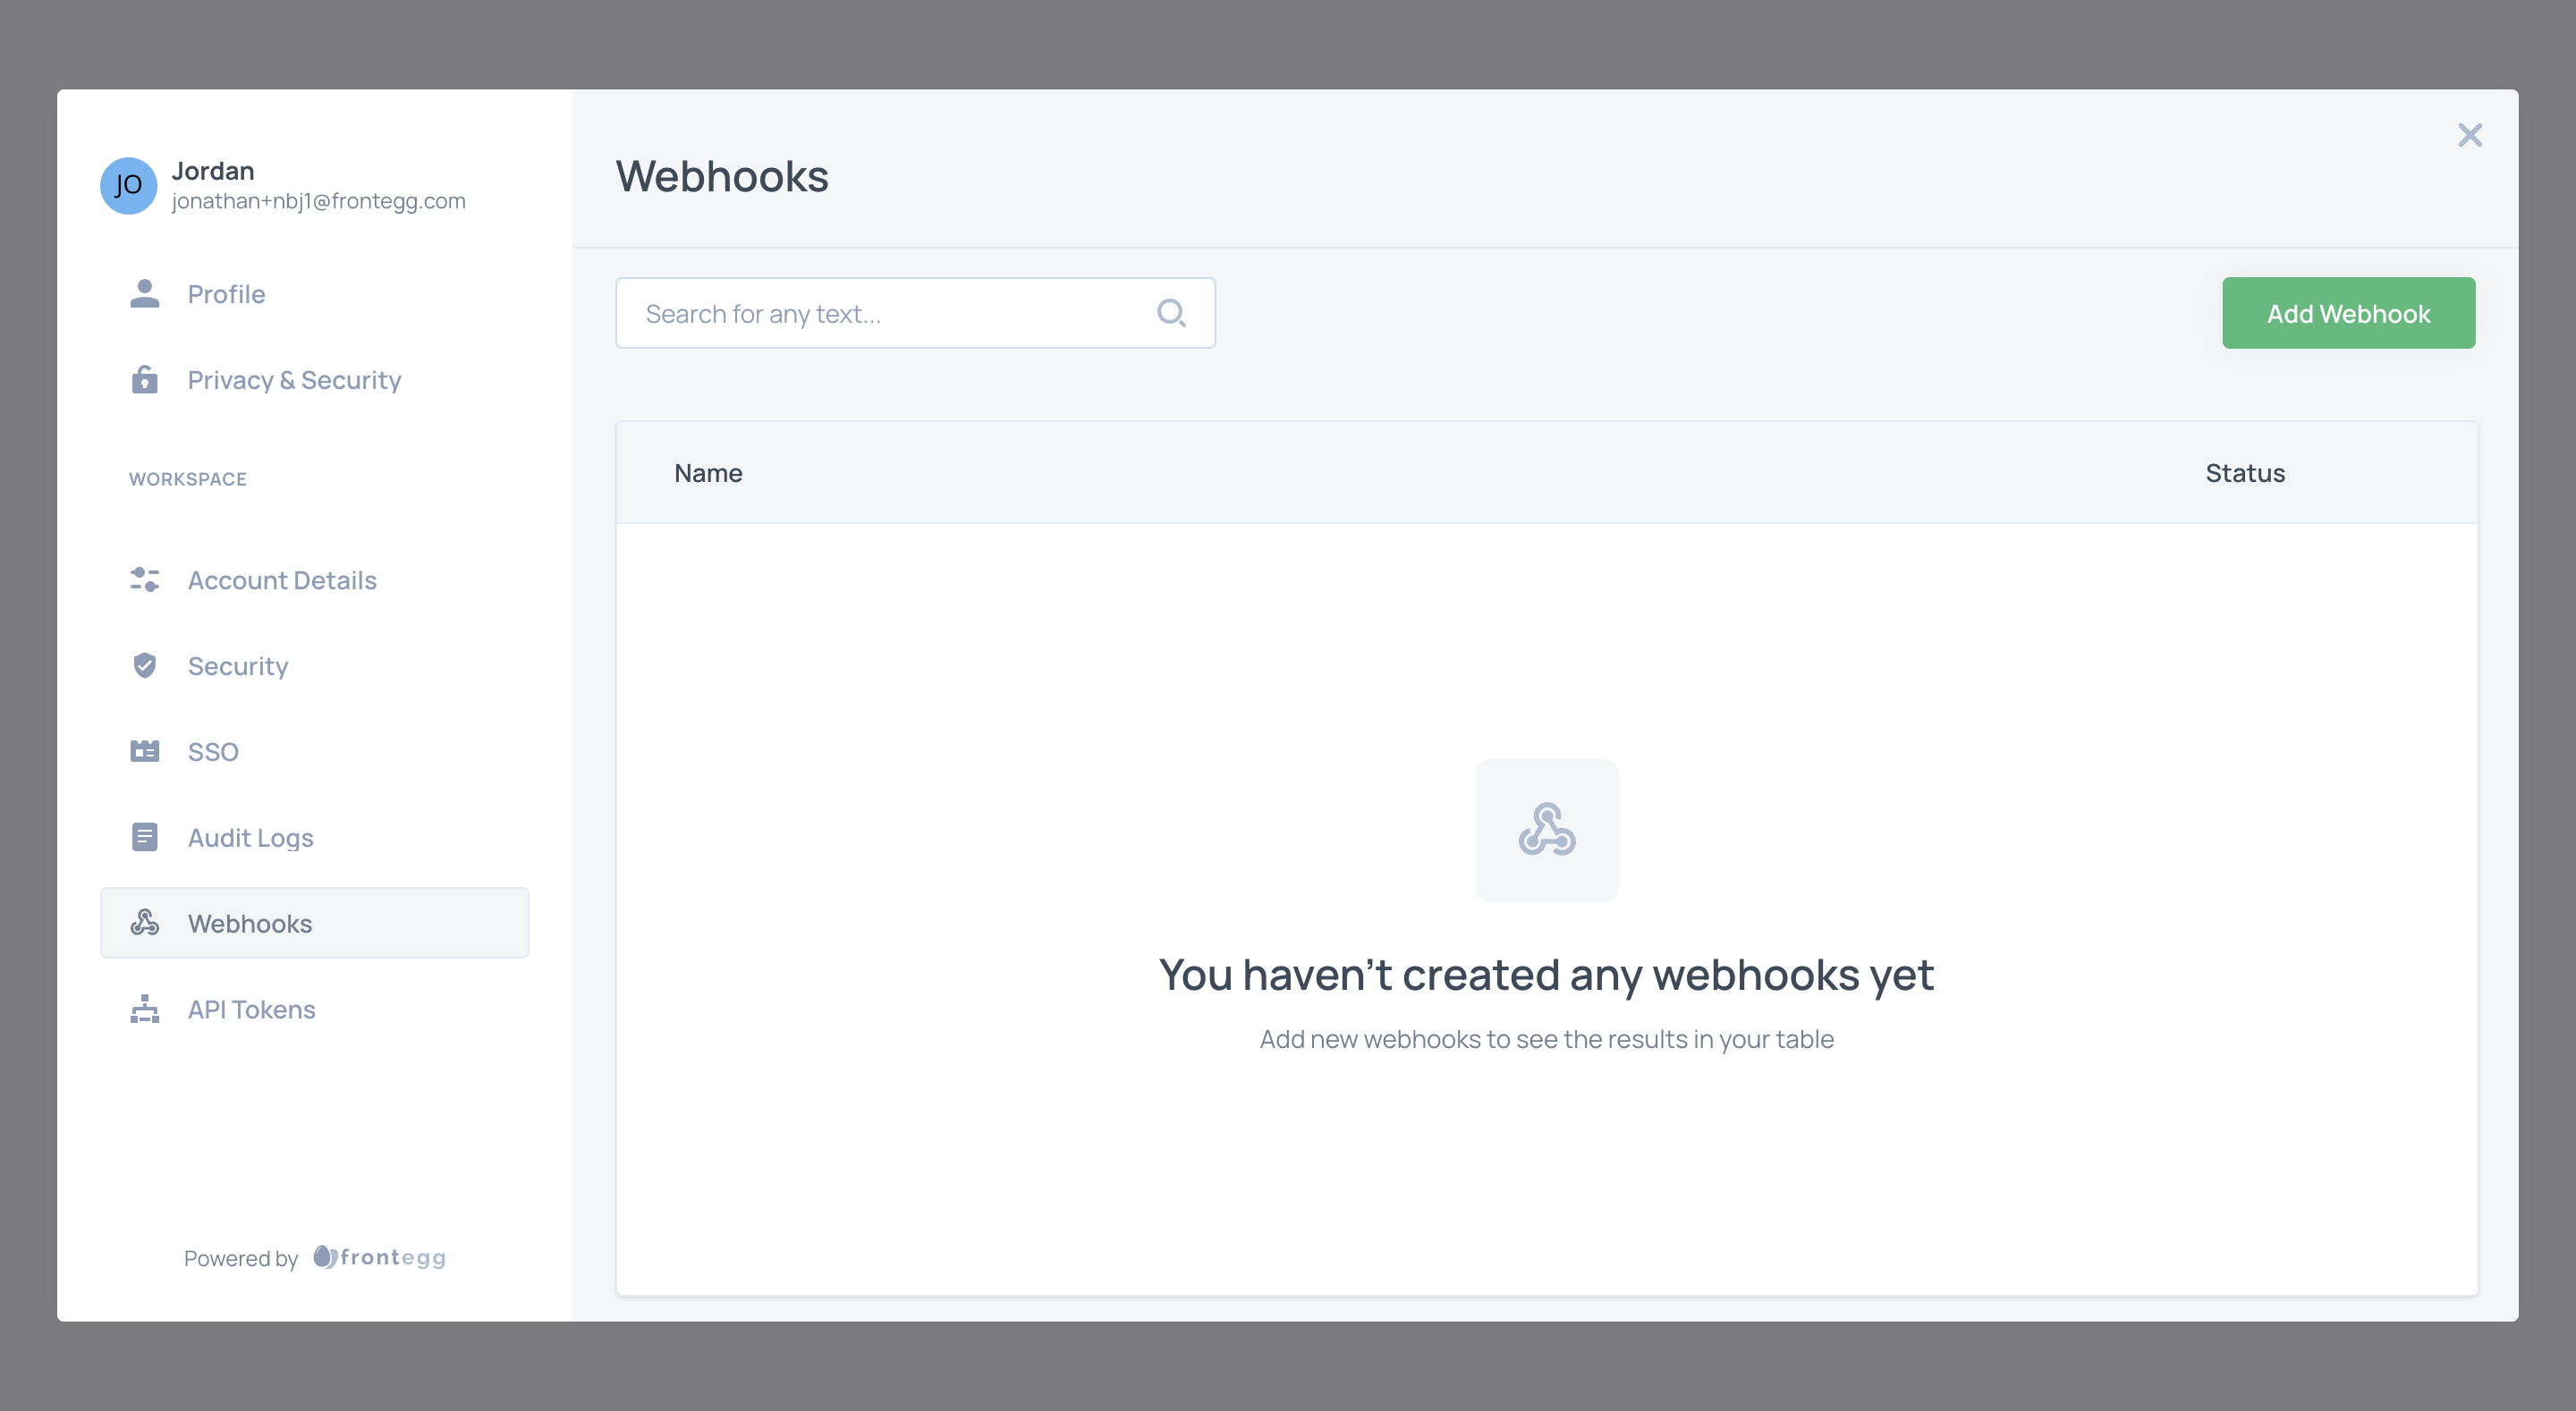
To access the Admin Portal, review the Admin Portal introductory guide.
Webhooks Permissions
Ensure that a user can access Webhooks in the Admin Portal by assigning them a role with Webhooks permissions.
Customers can subscribe to an event by clicking the add webhook button and completing the form.
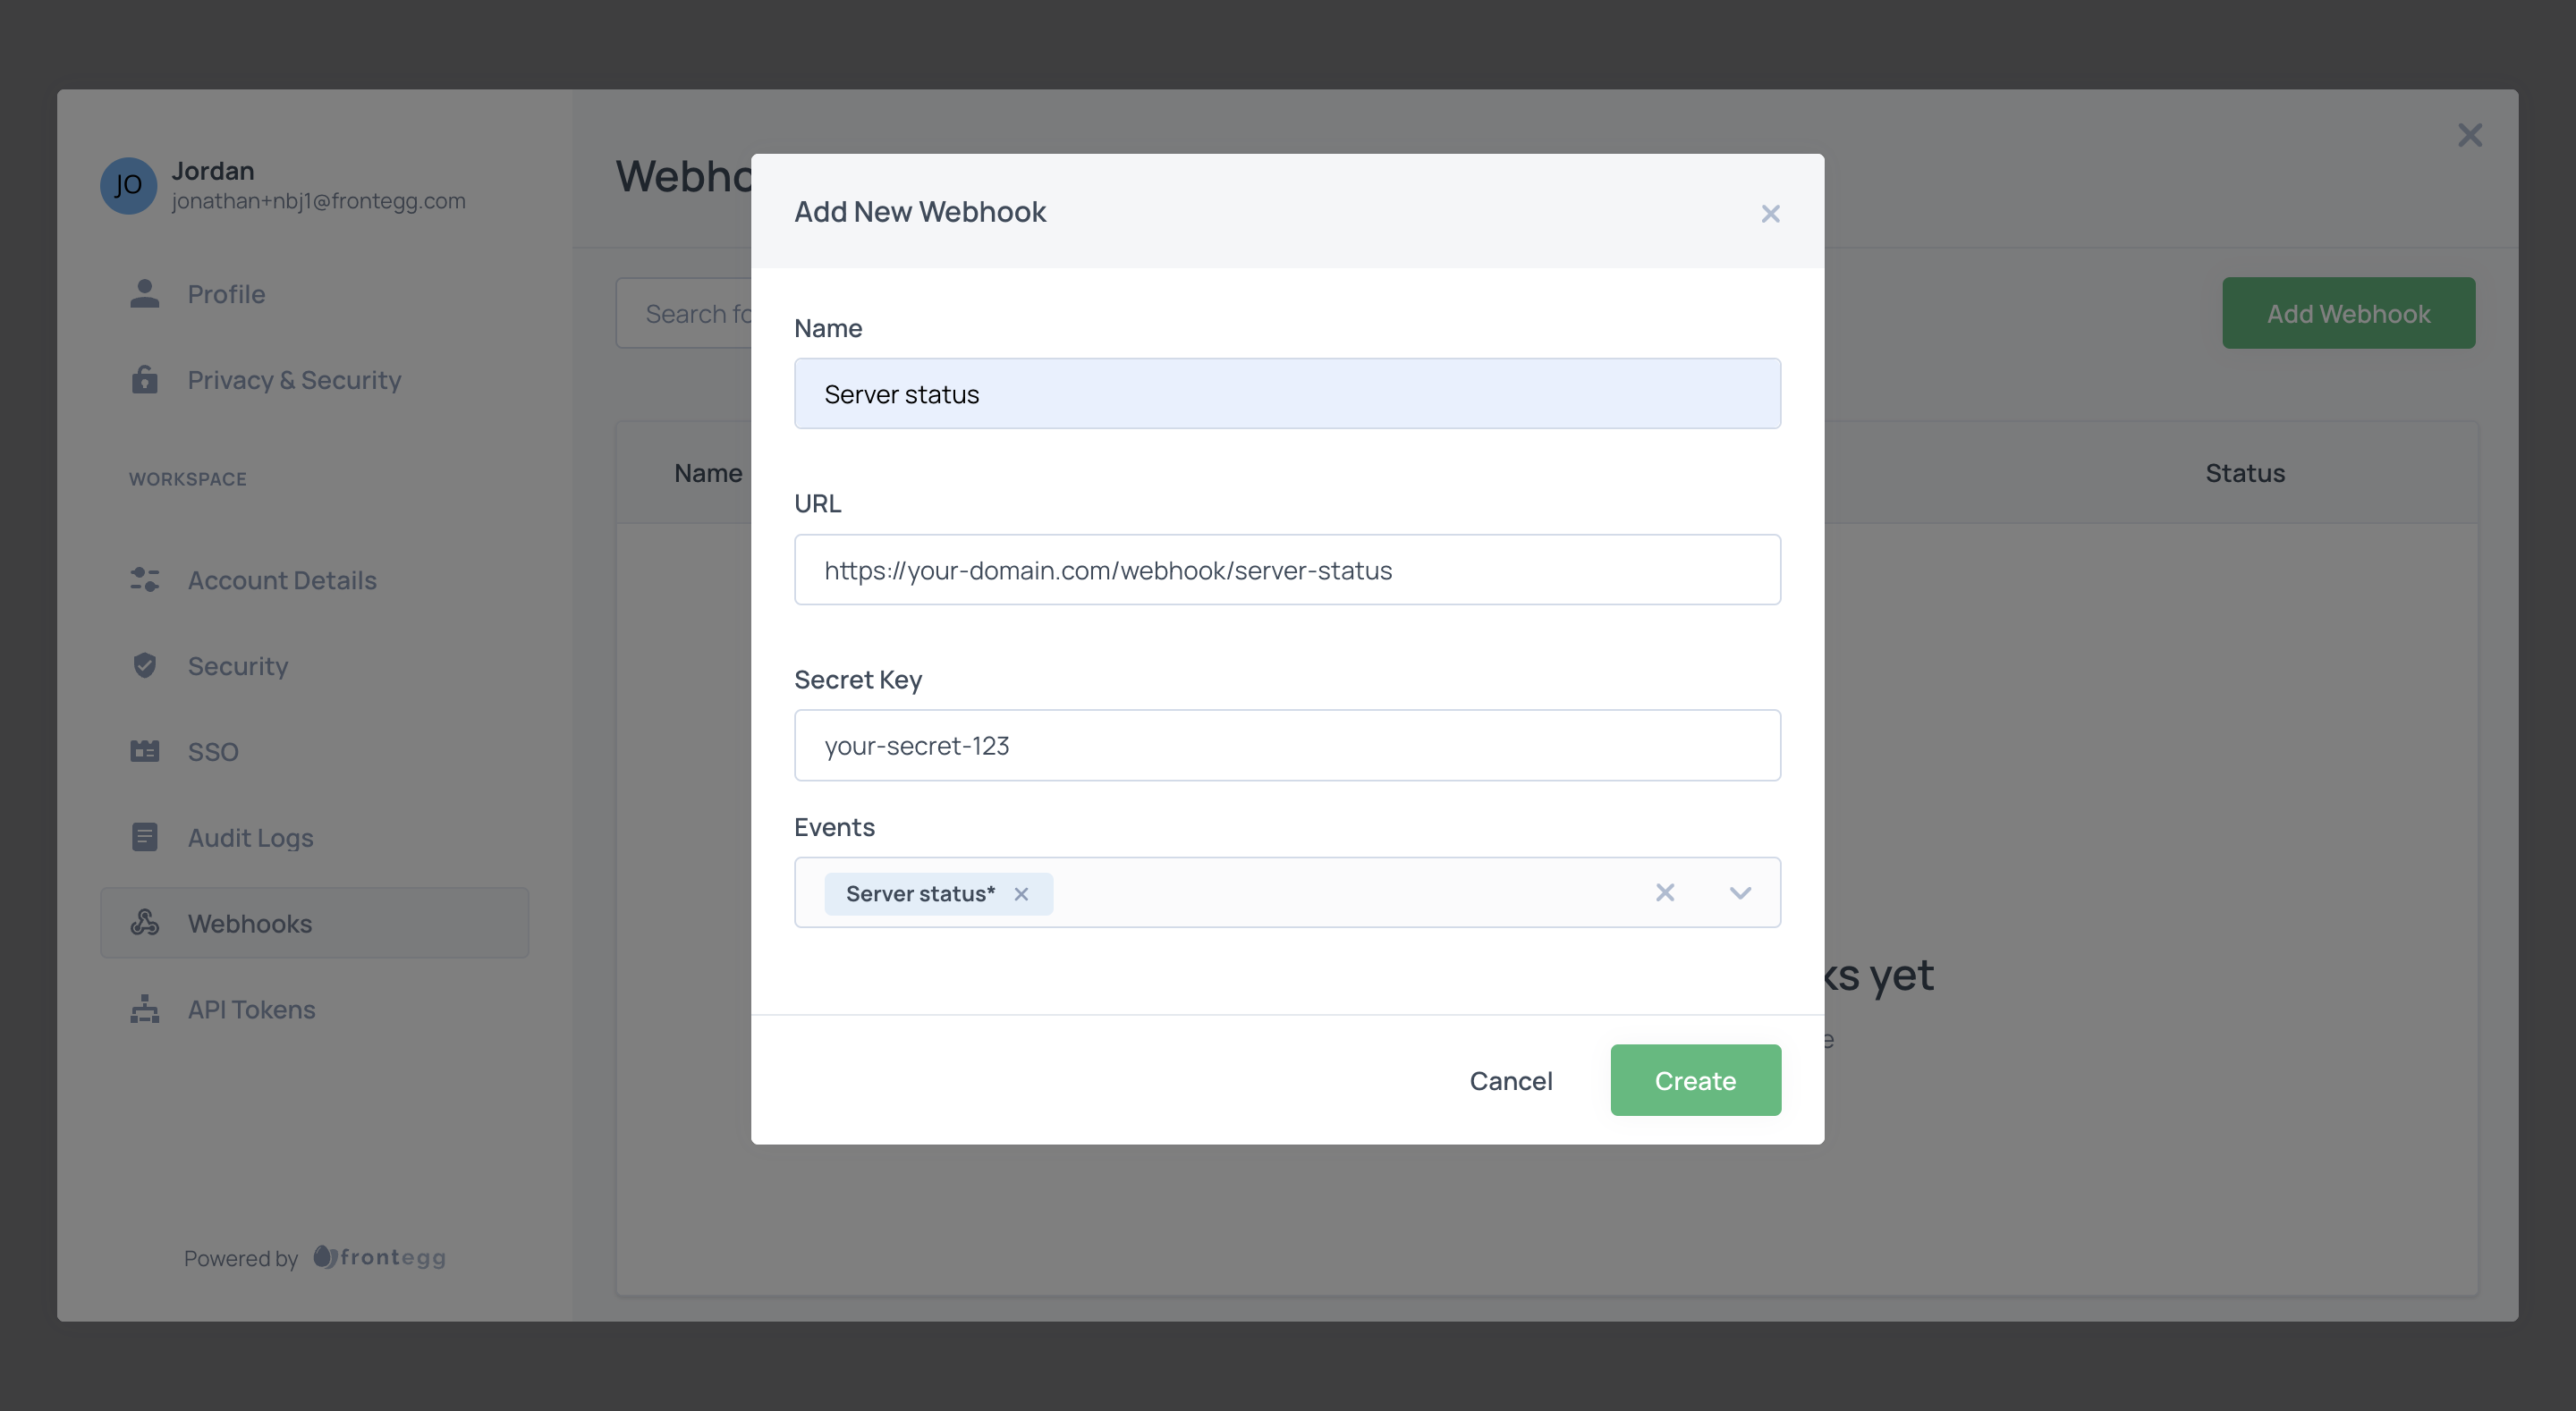
URL
Frontegg sends the webhook notification to your customers at this URL. Subscribers should make it the URL where they write the code to consume the notification.
Secret Key
Enter a value that is confidential. Subscribers should not share this value. Frontegg uses it to secure the transaction.
Events
Select an event from the dropdown. Subscribers can choose from the events created in the previous step.
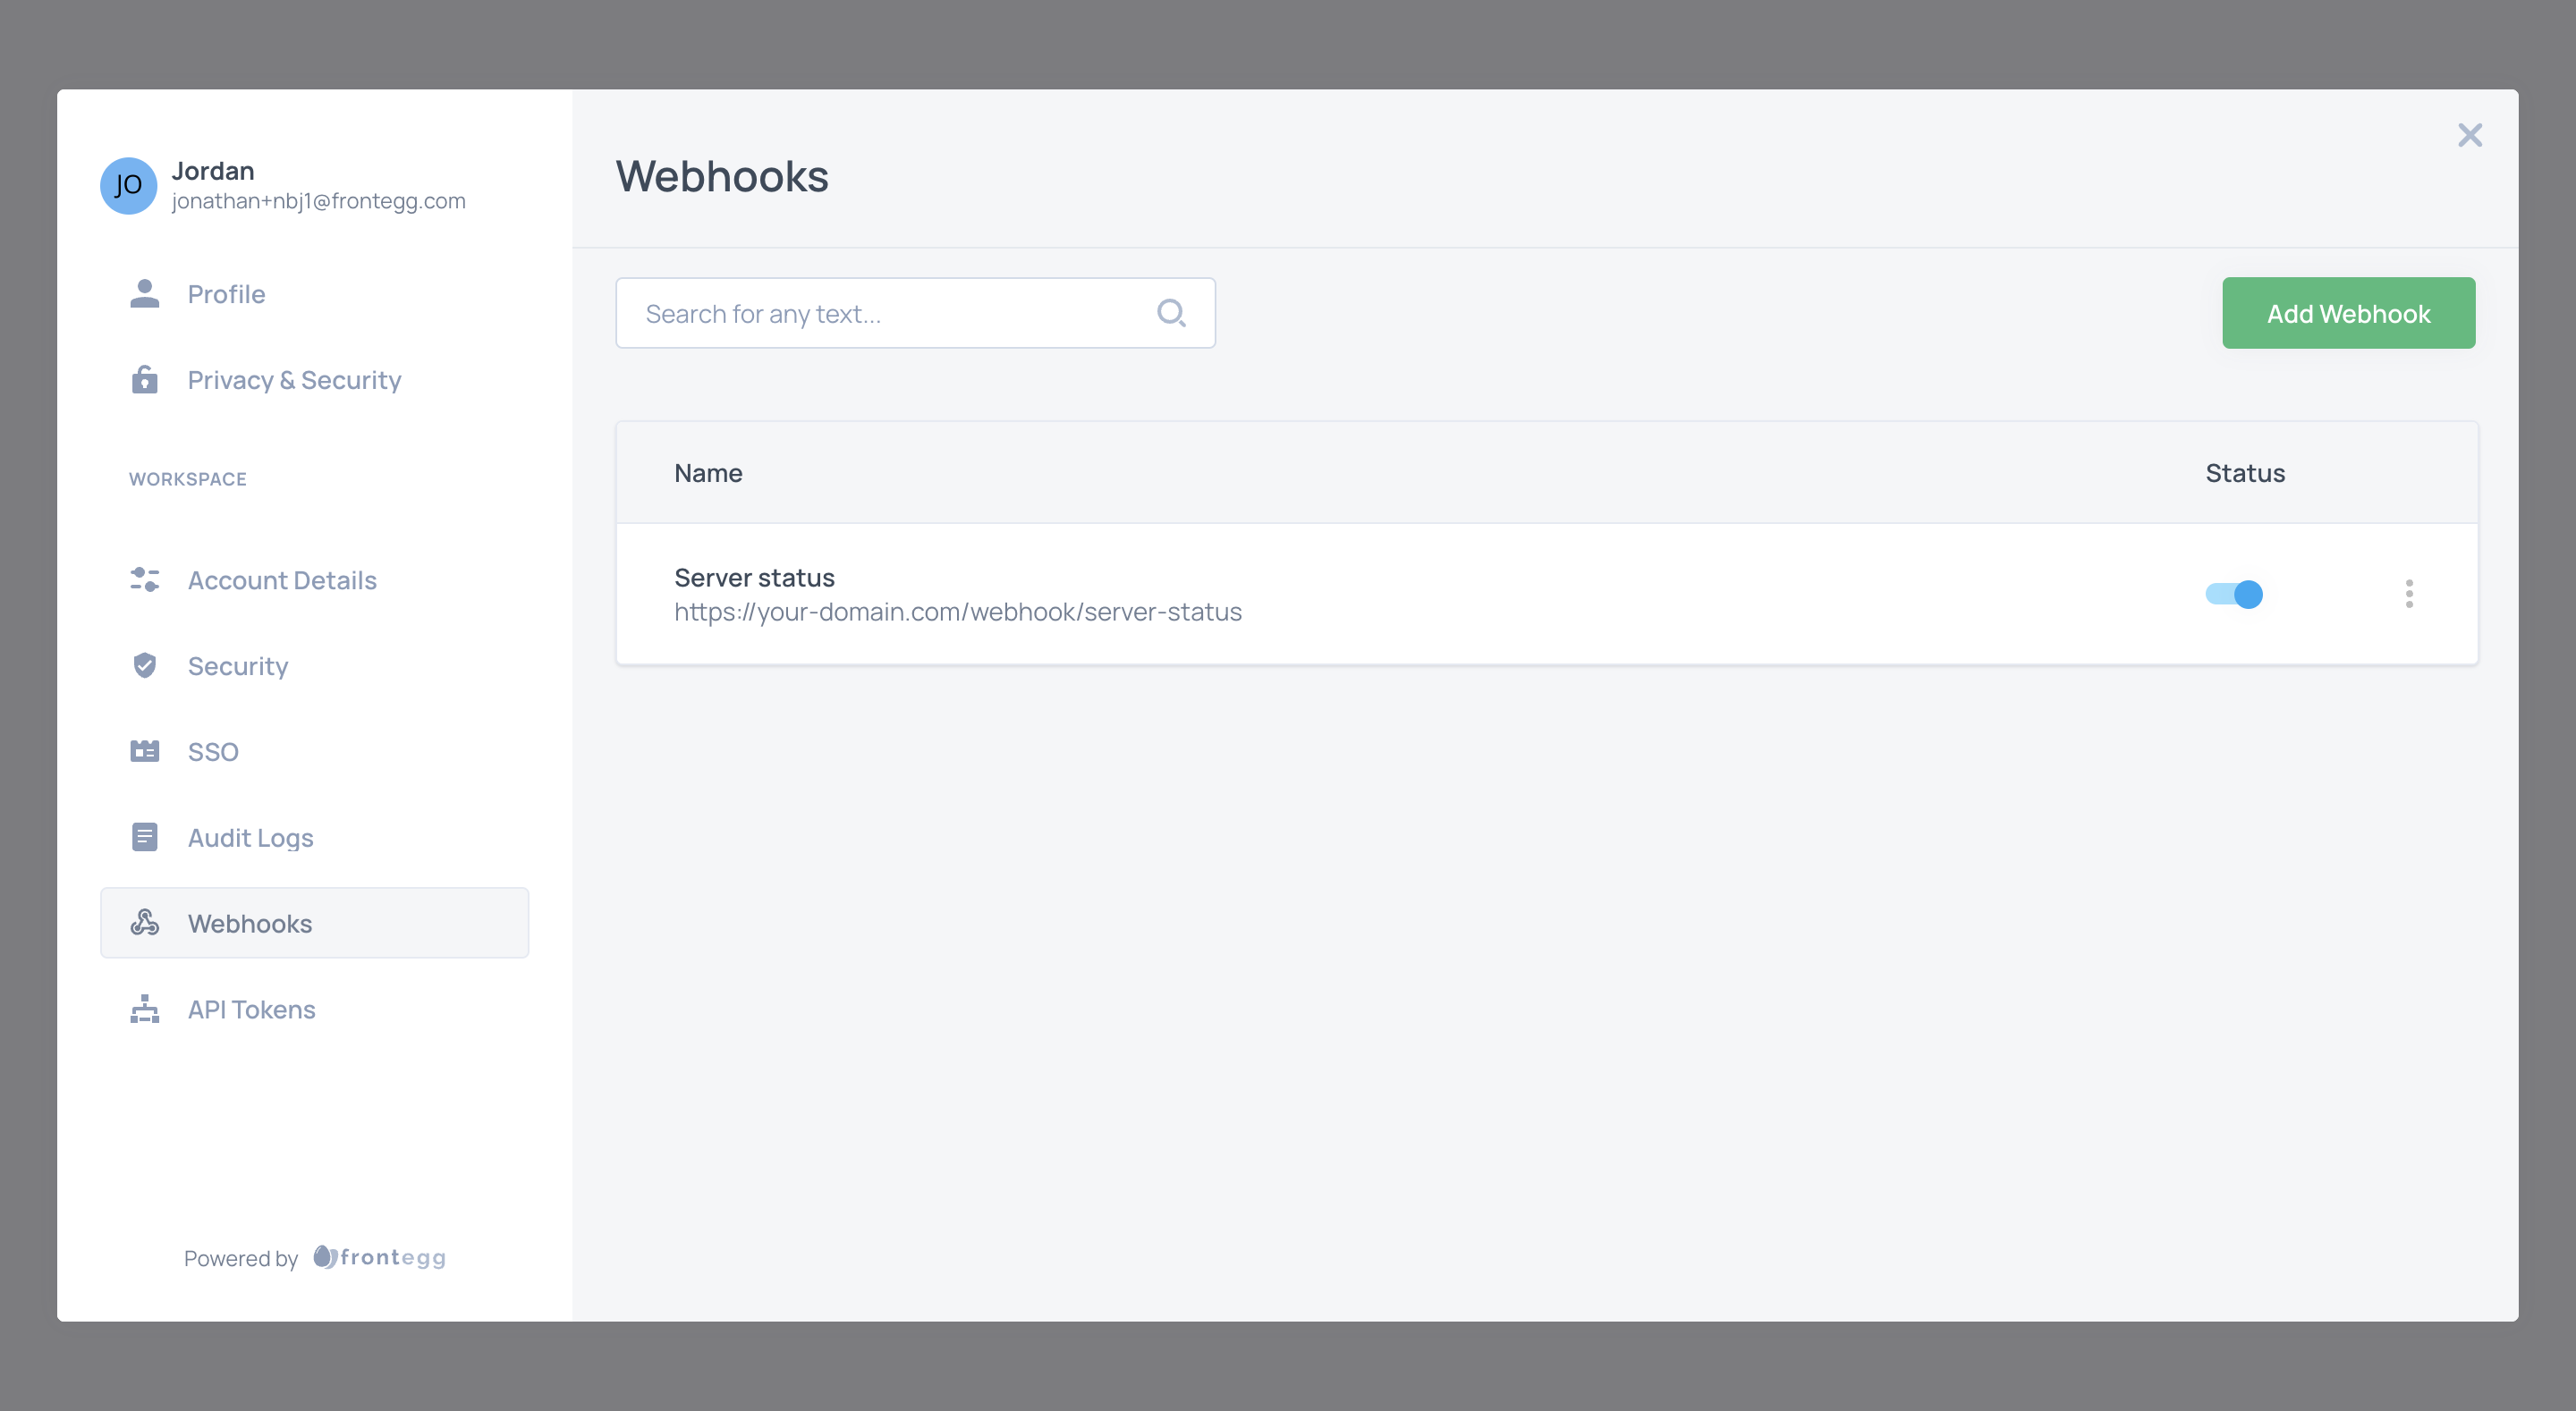
After creating the webhook, customers should see the webhook in the Admin Portal.
Toggle it on to activate notifications.
Learn more about Creating Custom Webhooks
Updated 4 months ago