Permissions

What are Permissions in Frontegg?)
Permissions are essential for controlling user access to information and functionality in your application.
Permissions represent the ability to do something in your app, e.g., deleting users or editing a profile page. Permissions are strongly linked to Roles, since a role is essentially a group of permissions. Each user has one or more roles that define what they can perform in your app.
To get you started quickly, Frontegg comes with a robust collection of default permissions that are related to the features we give you within the admin box. Additionally, you can set Custom Permissions to use in addition to or instead of your preset Frontegg Permissions. Read below to learn more.
Enabling in the portal
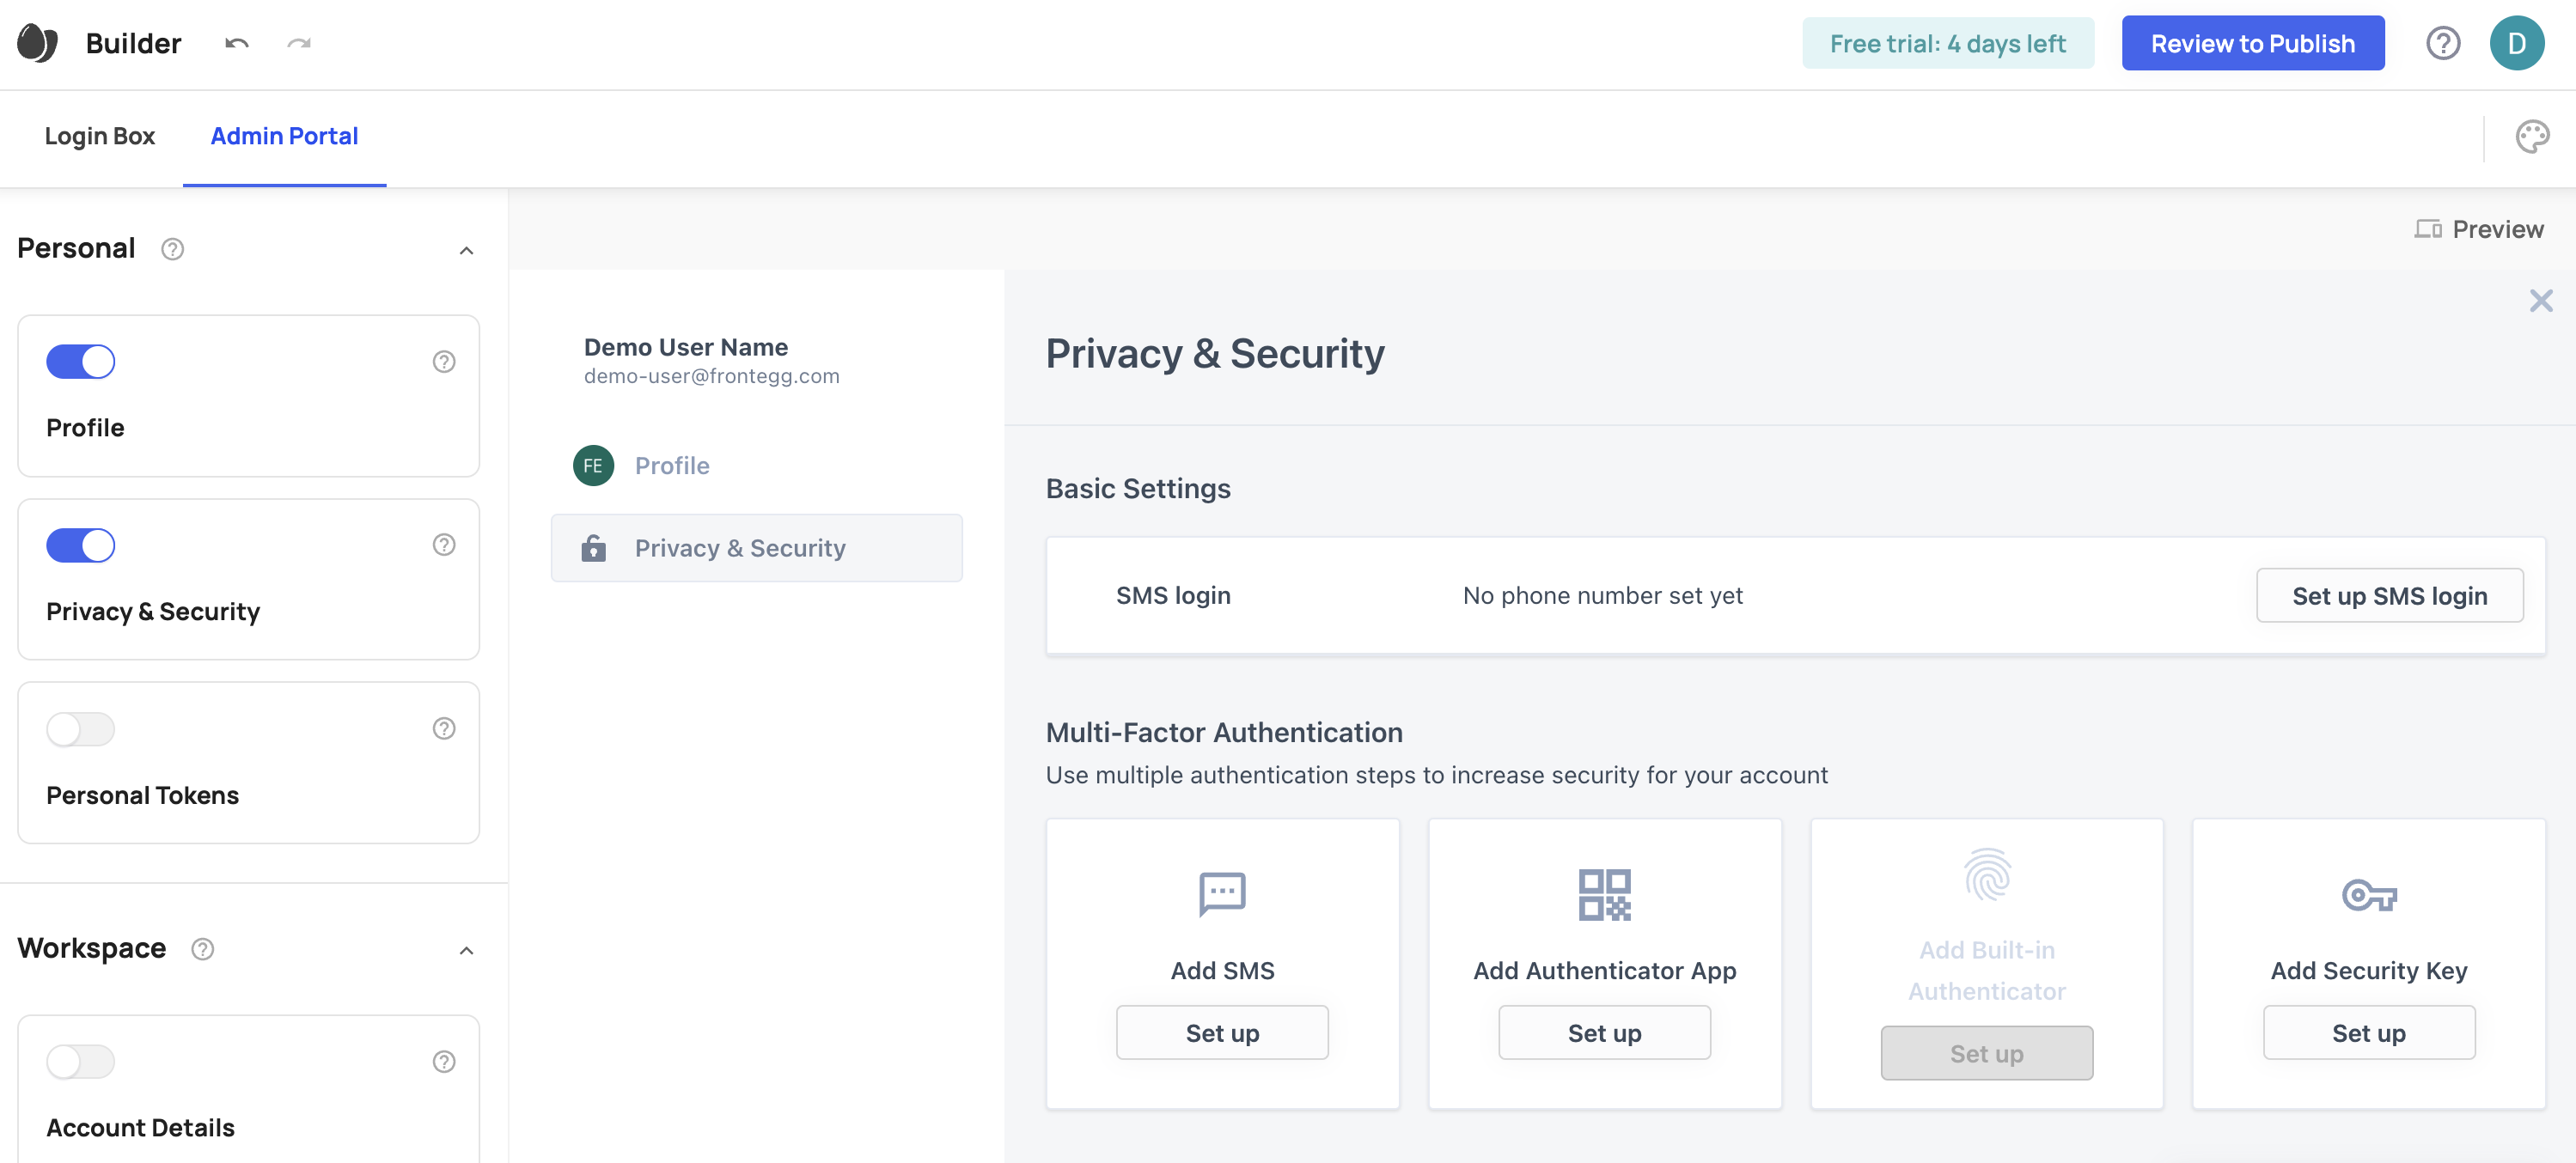
Note that you need to enable (toggle-on) the Admin Portal areas you want to give users access to. Otherwise, giving them permissions or roles including specific permissions will have no effect as the areas will remain hidden.
Creating and Granting Permissions
As mentioned in the Prerequisite box above, giving users access to Admin Portal areas is essential for them to see these tabs. The first step before granting them permissions is, therefore, to toggle on the different areas in your app you want them to access, like so:
Where to manage permissions for your app
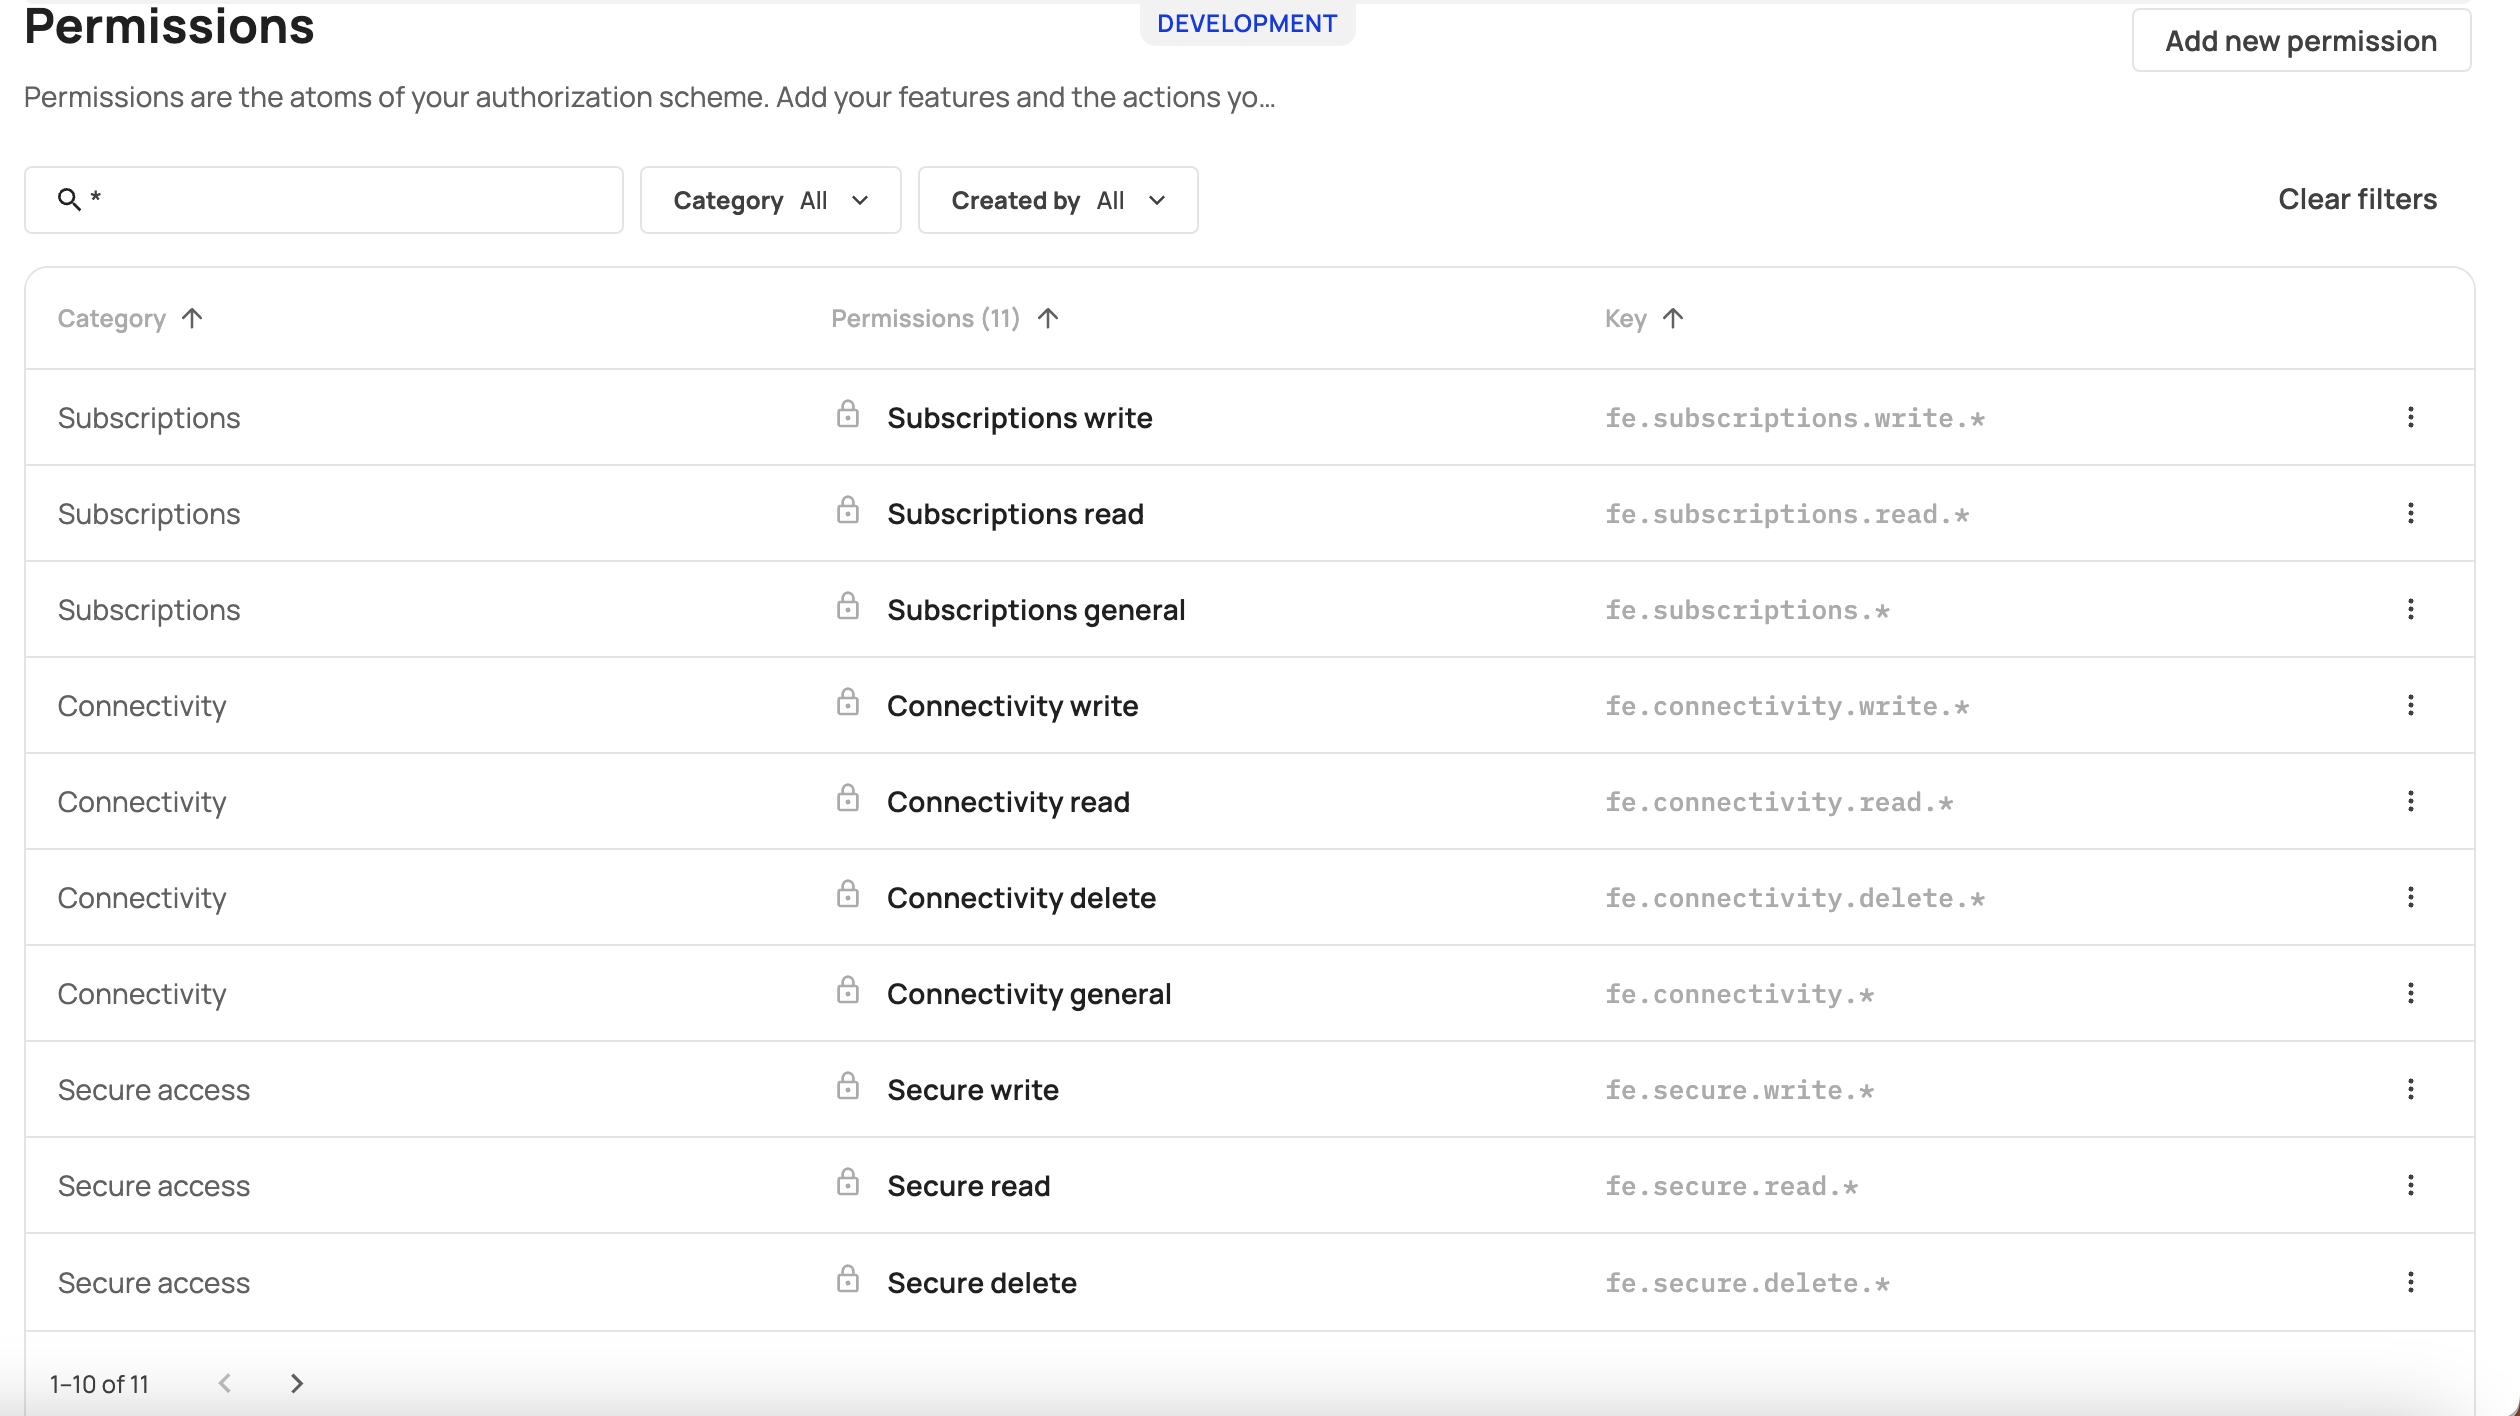
Permissions exist for every environment. The permission tab is located at {Environment Name} → Entitlements → Permissions

Frontegg Permissions and Default Settings
Frontegg's set of permissions provides you and your customer the granularity to select which users can do what from within your admin box.
Examples include permissions to perform actions such as Give access to sub accounts, Edit group roles, Delegation, etc.
Permissions impact the actions your users can take in the admin portal in your application. Frontegg's Permissions list is fixed and cannot be edited or deleted. All Frontegg permissions begin with an fe prefix (such as fe.connectivity.read.eventCategories).
User and Tenant Permissions in the Admin Portal
Check out the Granular Admin Portal Access for entitling users to specific permissions related to the Admin Portal.
You can assign permissions to users that determine their access and scope of actions (read, write, etc.) they can perform in the Admin Portal. See the table below for a quick reference on which permission controls what tab (note that the following refers to read permissions; there are write and delete permissions as well (for example, fe.secure.read.users also has fe.secure.write.users and fe.secure.delete.users). You can always use the search bar to see all available permissions under each category.
| Category | Permission | Key | Location in Portal |
|---|---|---|---|
| Security Policies | Read* securityPolicies | fe.secure.read.securityPolicy | Privacy & Security |
| Audits | Read* audits | fe.secure.read.audits | Audit logs |
| API Tokens | Read* tenant API tokens | fe.secure.read.tenantApiTokens | API tokens |
| API Tokens | Read* user API tokens | fe.secure.read.userApiTokens | Personal tokens |
| User Management | Read* users | fe.secure.read.users | Users |
| Account Settings | Read* securityPolicies | fe.secure.read.accountSettings | Account details |
| Webhook Integration | Read* webhooks | fe.connectivity.read.webhooks | Webhooks |
| SAML | Read* SAML configuration | fe.secure.read.samlConfiguration | fe.secure.read.audits |
- Note that you can switch
readwithwriteordeleteto get the corresponding permissions—fe.secure.write.usersandfe.secure.delete.users.
Wildcard and Global Permissions
In addition to individual permissions, you can add global permissions to users. Use the * in the search bar to see all permissions supported for this functionality. When granting a user with an fe.secure.read.* permission, you are granting the user with global read permissions (in comparison tofe.secure.read.samlDefaultRoles which grants a much more granular capability). fe.secure.* permission, for example, will grant users complete read and write permissions.
Permission Properties
Each permission has the following properties:
| Property | Description |
|---|---|
| Name | The permission name. |
| Description | The description is intended to help you and your teammates understand the permission internally. |
| Category | Categories serve as simple holding folders for a group of related permissions. This is true of both Frontegg Permissions and Custom Permissions. Each Frontegg Permission is already assigned to a category and cannot be reassigned to a different one. For each Custom Permission, you must assign it to a category, and you can edit which category it belongs to. Although organized in categories, each permission must be edited individually. |
| Key | An internal identifier that must be unique. As a best practice, a permissions key should include the name of the resource and the action it is protecting. For example, If I want to protect SAML configuration with permissions, I would add three permissions with different actions:fe.secure.delete.samlConfigurationfe.secure.read.samlConfigurationfe.secure.write.samlConfiguration |
| ID | Each permission has a unique ID that is generated automatically upon creation |
Permissions table and actions
In the permissions dashboard, you can view all supported permissions, search for specific ones and assign them roles.
- Search bar - gives you the option to search for a specific permission
- Filters - you can filter permissions by category and the creator (you or Frontegg)
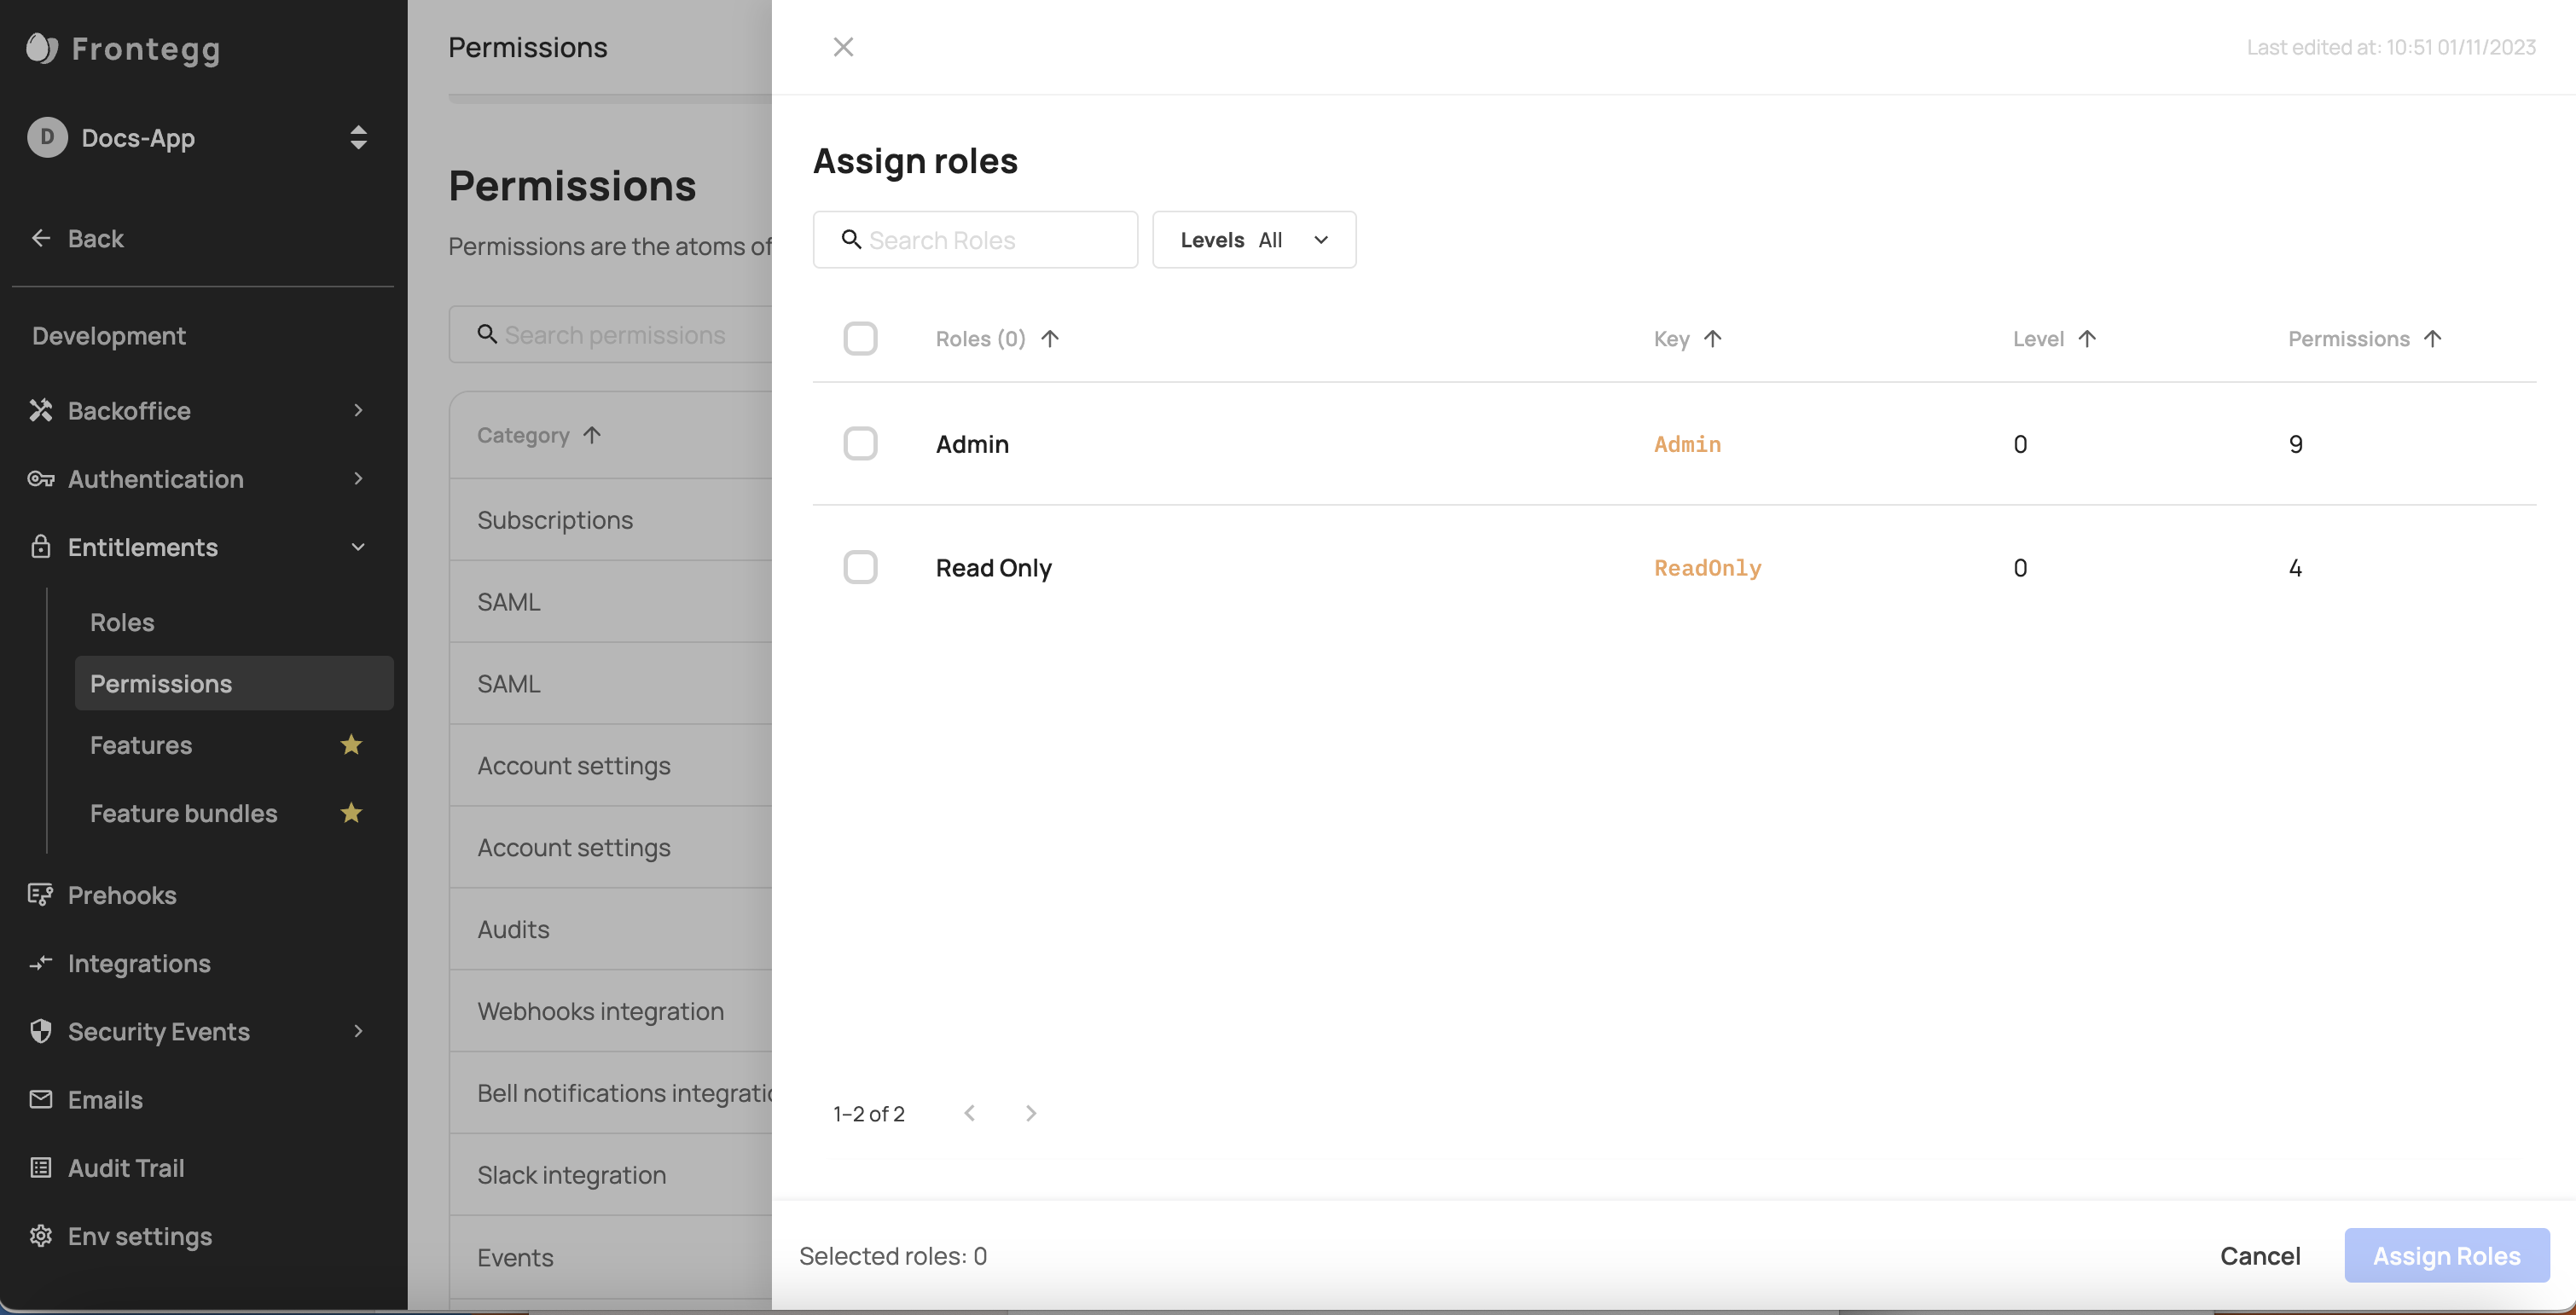
- Assign Roles - Assign roles to permissions. When roles are assigned to permissions, the permissions become part of the Roles' subset features— I.e., every user assigned with that specific role will be entitled to perform its subset set of permissions.
- Delete a permission - use the three dots on the right side of each permission to delete it.
Creating and Editing Permissions
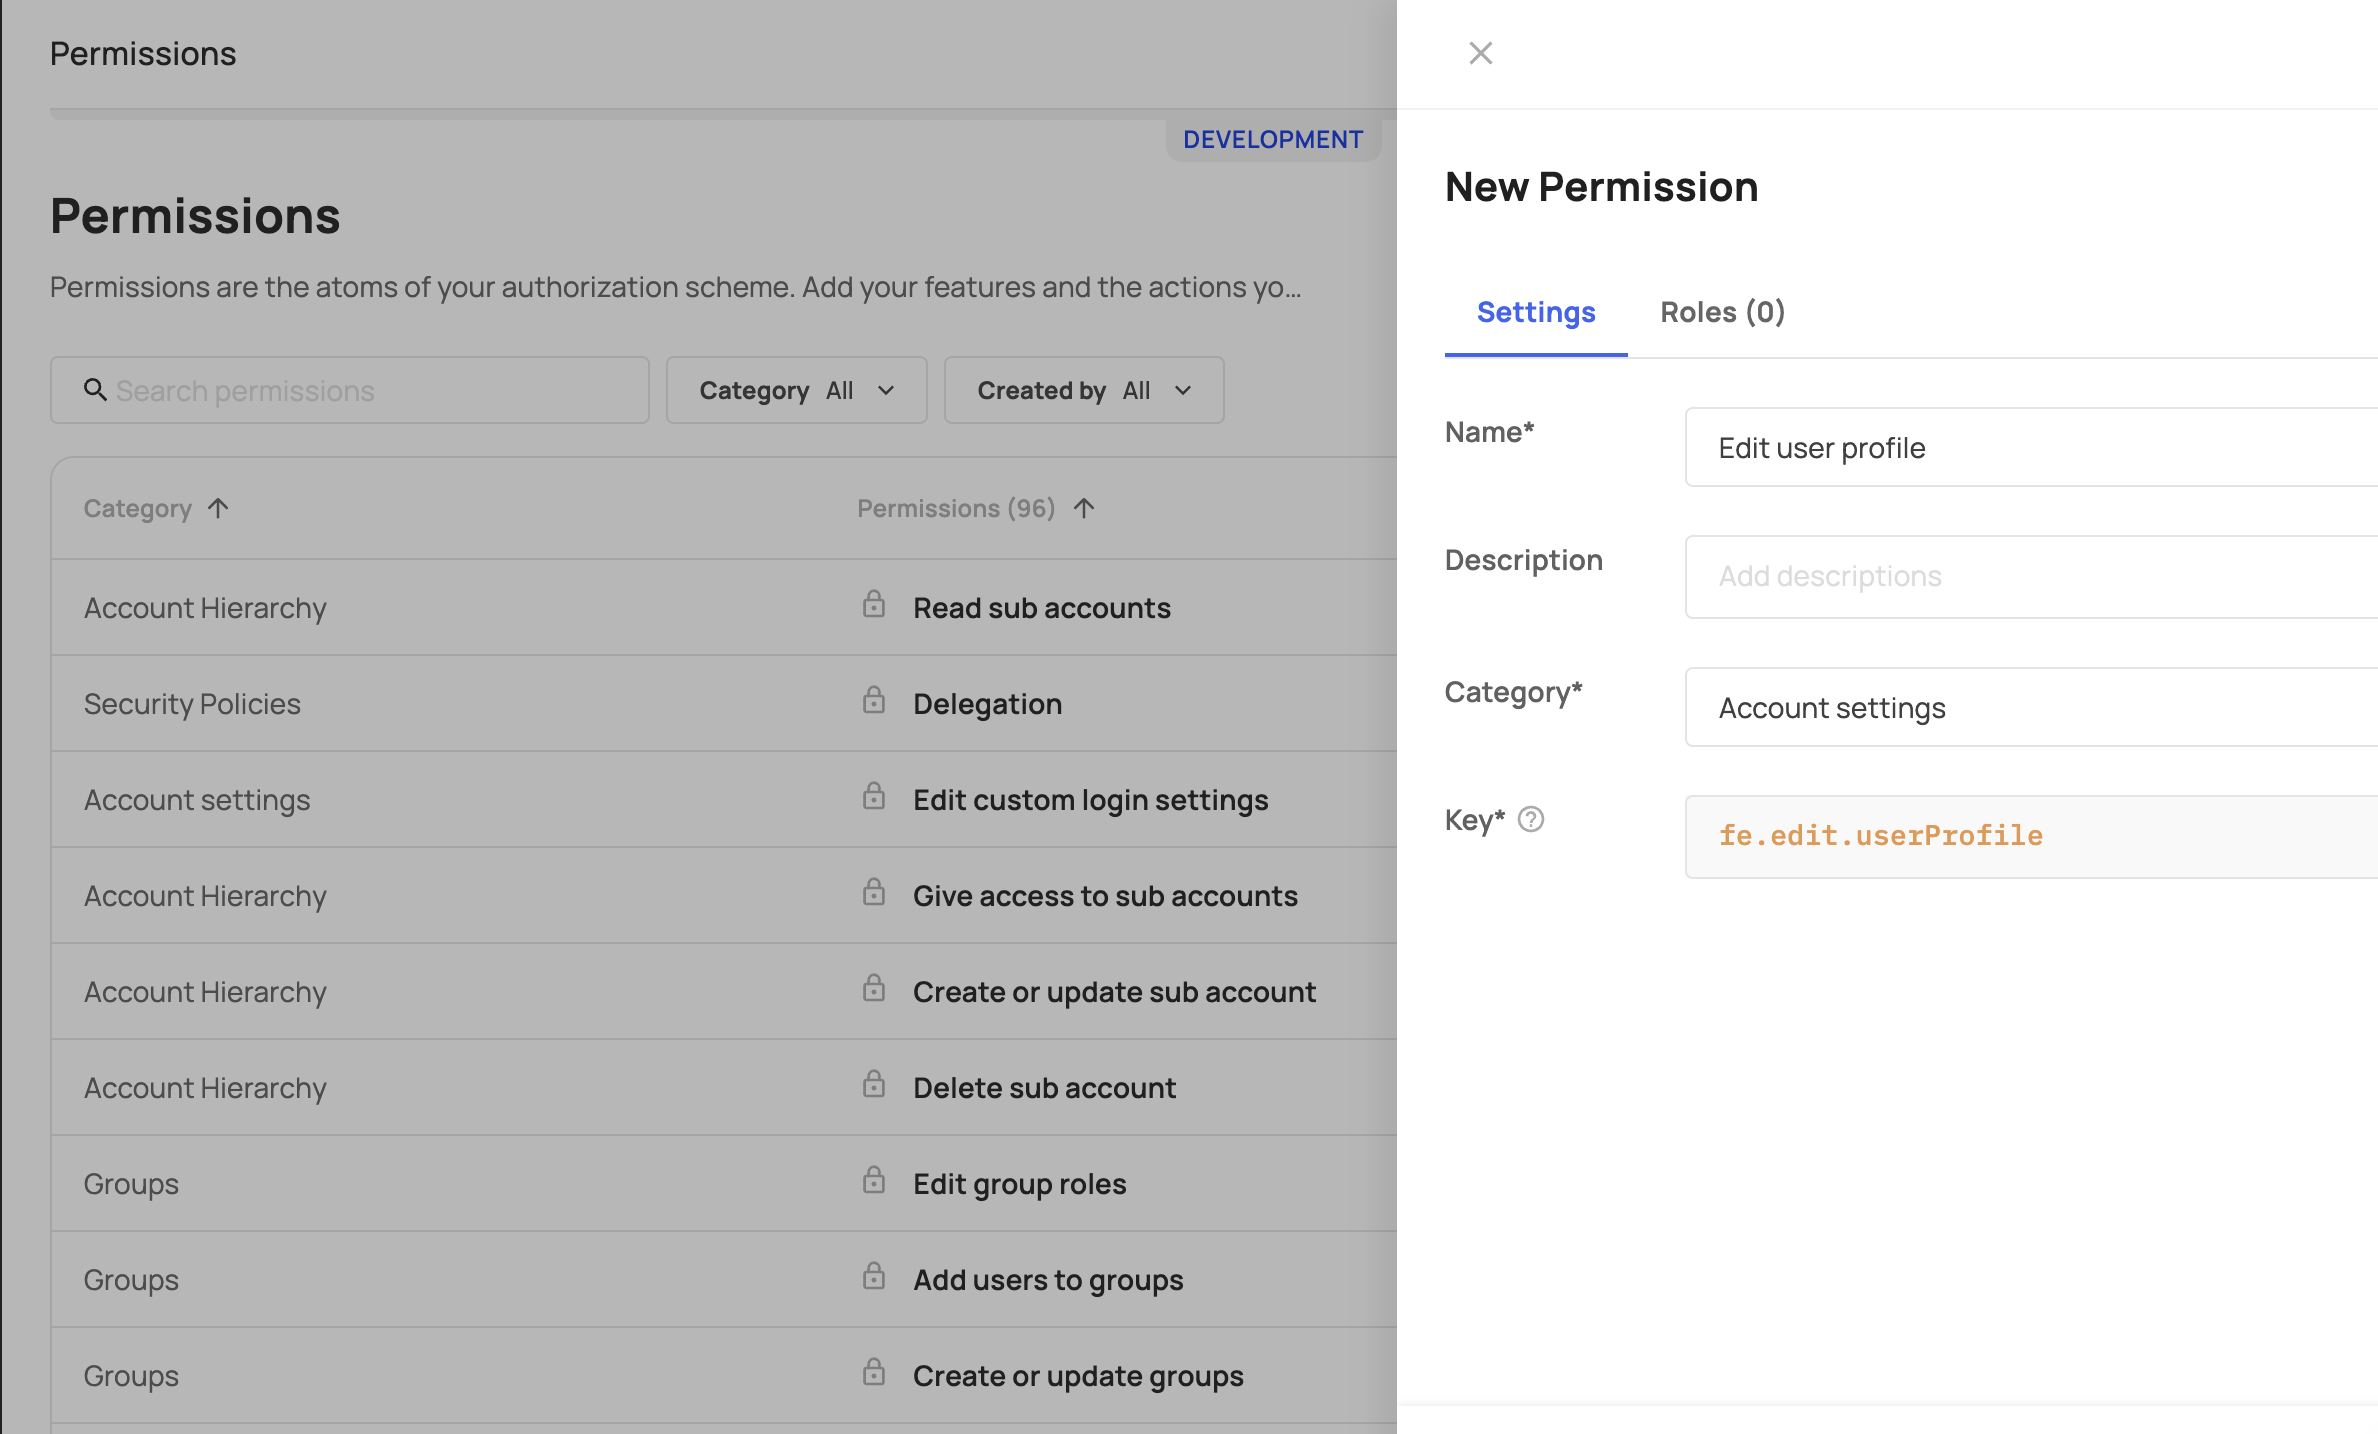
Create a new permission by clicking the "Add New Permission" button.
The Settings tab includes the following fields:
| Field | Description |
|---|---|
| Name (required) | Add a descriptive name for your permission |
| Description | We advise you to add a description that will help you and other teammates manage the permissions. |
| Category (required) | Choose a category from the category list. You can assign an existing category, or create a new one. |
| Key (required) | add a unique key, which will be used to identify the permission and will be added to your code. |
To add new permission, press the Add new permission button, and fill in the Name, Category, and Key _fields. The _Key field is the unique identifier stored in the user JWT.
Permissions dependency
Permissions can be created without any role attached— Roles can be added later on.
Permissions via APIs
You can perform multiple actions relating to permissions via API. Explore the collection here.
Updated 8 days ago