Hosted OAuth Integration flows
Authenticate users with hosted login. Using Frontegg's pre-configured Login Box, customers can signup and login to your application. Hosted login is aligned with OpenID Connect protocol and is how Frontegg's hosted login authenticates users.
Add hosted login to your application with just a few simple modifications to your code.
Step 1: Configure Hosted Login
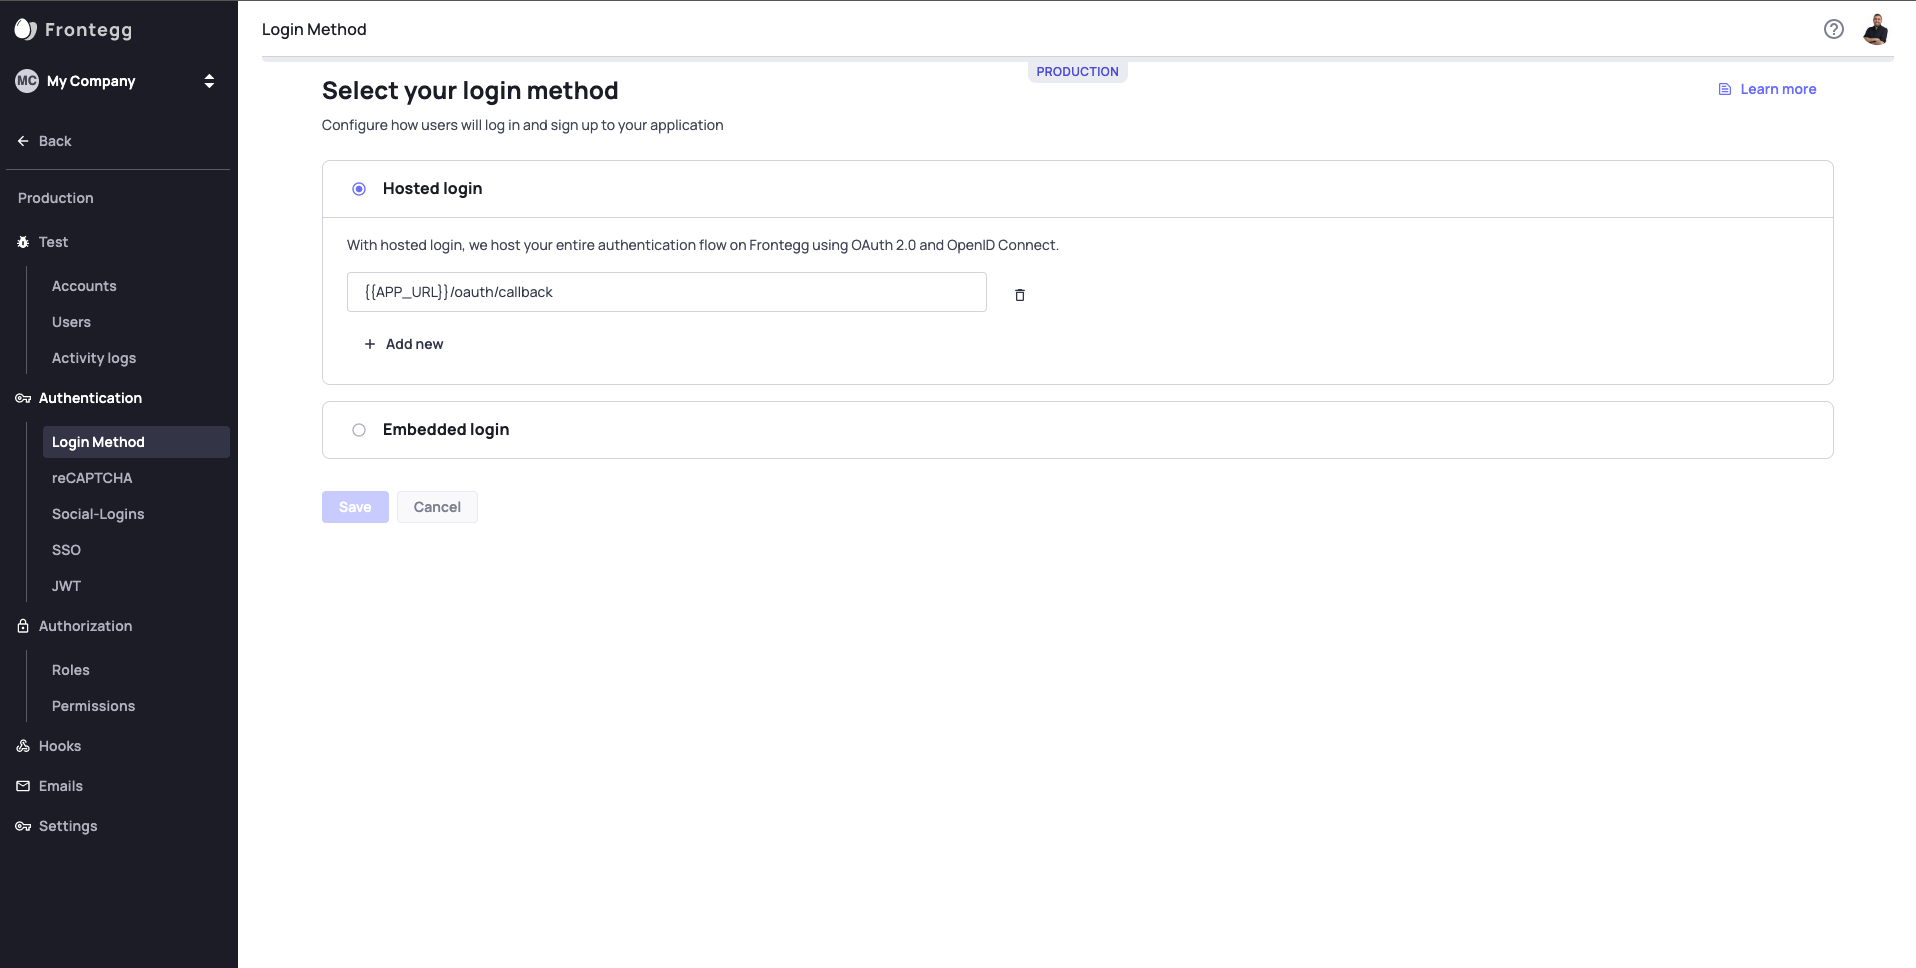
In the Frontegg portal, navigate to the relevant Environment -> Authentication -> Login Method and ensure that Hosted Login is selected.

Next, enter the redirect URLs that you are redirecting users to after they login. If a request comes in to redirect the user to a URL that is not in that list, the user will not be redirected.
Step 2: Request Auth Code
Your application needs a way for the user to request an authentication code. Here is a basic flow.
On your application's signup and login pages, add a button for the customer to click when logging in using hosted login. When your customers click that button, redirect them to the following redirect URL.
GET {gateway}.frontegg.com/oauth/authorize?
  response_type=code
  &scope=openId
  &client_id=${clientId}
  &state={state}
  &redirect_uri={redirect_uri}
  &code_challenge={code_challenge}
In the URL above, fill in values for several parameters using the table below as a guide.
| Parameter | Description | Required |
|---|---|---|
| gateway | The unique part of your Frontegg domain. In your-application.frontegg.com, the gateway is your-application. | required |
| client_id | Your client id from the Administration page of the Frontegg portal | required |
| redirect_uri | One of the redirect URLs you configured in your Frontegg portal | required |
| state | A value that you provide here, and that will be returned to you in the token exchange (Step 3). State can be any string value you want. Use a randomly generated unique value to prevent cross-site request forgery attacks. State also can be used to encode information about the user sending the authentication request, like what page they are visiting in the application. | optional |
| code_challenge | A value that you provide so that you can use it in the token exchange (Step 3) for additional security | optional |
| app_id | An app identifier for accounts with multiple applications. Can be copied from [Environment] > Applications > [App_Name] > ID | optional |
Generating verifier and challenge code
The PKCE flow requires the token exchange to be protected by a verifier which should match a challenge code that was generated on the initial
/authorizerequest.Below is a snippet on how to generate the verifier and challenge code
export function createRandomString(length: number = 16): string {
  let text = '';
  const possible = 'ABCDEFGHIJKLMNOPQRSTUVWXYZabcdefghijklmnopqrstuvwxyz0123456789';

  for (let i = 0; i < length; i++) {
    text += possible.charAt(Math.floor(Math.random() * possible.length));
  }

  return text;
}

export async function generateCodeChallenge(codeVerifier: string): Promise<string> {
  const digest = await crypto.subtle.digest('SHA-256',
    new TextEncoder().encode(codeVerifier));

  // @ts-ignore
  return btoa(String.fromCharCode(...new Uint8Array(digest)))
    .replace(/=/g, '')
    .replace(/\+/g, '-')
    .replace(/\//g, '_');
}

const code_verifier = createRandomString();
const code_challenge = await generateCodeChallenge(code_verifier);
Response
A successful response redirects to the redirect_uri with an authorization code and, if provided, a state.
{redirect_uri}?
  code={authorization_code}
  &state={state}
There it is! You now have the authorization code that you requested. Use the authorization code to request an access token, as explained below.
If you included a state parameter in the request, you should receive the same value here in the response. It is a good idea to compare the state here to the state you sent in the request to make sure that the values are identical.
Step 3: Exchange tokens
The next step is to send a POST request to exchange tokens. With the authorization code in your possession, exchange the code for an access token for the page that your customer is accessing.
Send the POST request from the page that you were redirected to above to the following address:
POST {gateway}.frontegg.com/oauth/token
Your POST request should have the following request body:
{
	grant_type: authorization_code,
	code: {authorization_code},
	redirect_uri: {redirect_uri},
	code_verifier: {code_verifier}
}
For grant_type, the value authorization_code is what you should put. It is a value, not a parameter for you to fill in. For the remaining keys, for the values to insert into the body of your POST request, please see the following table:
| Parameter | Description | Required vs Optional |
|---|---|---|
| authorization_code | The authorization code is the authorization_code you receive after being redirected at the end of Step 2 above | required |
| redirect_uri | This must be the same redirect URL that you provided for the authorization request | required |
| code_challenge | This must be the code_challenge from the authorization request | required if code_challenge was sent in the authorization request |
Request authorization
When sending your POST request, you need to request authorization. The preferred way to request authorization is to send a request header with your POST request, like the following:
Authorization: "Basic {secret}"
where secret is a base64 encoded result of your Frontegg clientId and API Key. The secret needs to be in the following format when you encode it:
clientId:APIKey
If you request authorization this way, you do not need the code_challenge or code_verifier in the previous steps.
Although we strongly recommend you request authorization using the Authorization header, you instead can rely on just the code_challenge and code_verifier. To do so, instead of requesting authorization using the Authorization header like above, you need to include in Steps 2 and 3 the code_challenge and code_verifier.
Response
If your POST request is successful, you should see a response with an id_token and access_token, like the following:
{
	id_token=JWT has the user auth info
	access_token=JWT
}
Voila! Now you have the customer's id_token and access_token. You can decode the JWT to request information about the user who signed in.
Updated 4 months ago