Email Templates
Emails sent from your app are triggered by app events and are the primary communication method you use with your customers. Frontegg comes with email templates enabled from the start.
When an important event occurs, your application automatically emails the user the corresponding email template.
Frontegg comes with pre-set email templates for each time a user:
- Activates their account
- Resets their password
- Invited to join a tenant
- Uses a breached password
- Requests a magic link
- Requests a one-time code
- Connects to a new device
- Used an invitation to join a tenant
Additionally, you can customize the content and design of each individual email template so that you can deliver your own message and match your brand.
Read below to learn how to send customized emails about important account-related information in real-time.
Mirroring Configurations Between Environments
When shifting from one environment to another, Frontegg moves the email configurations for you. For instance, if you change your environment from development to production, Frontegg moves the development email configurations to production automatically.
Customizing Email Templates
Follow the steps below to customize your email templates.
Step 1: Select Email Templates
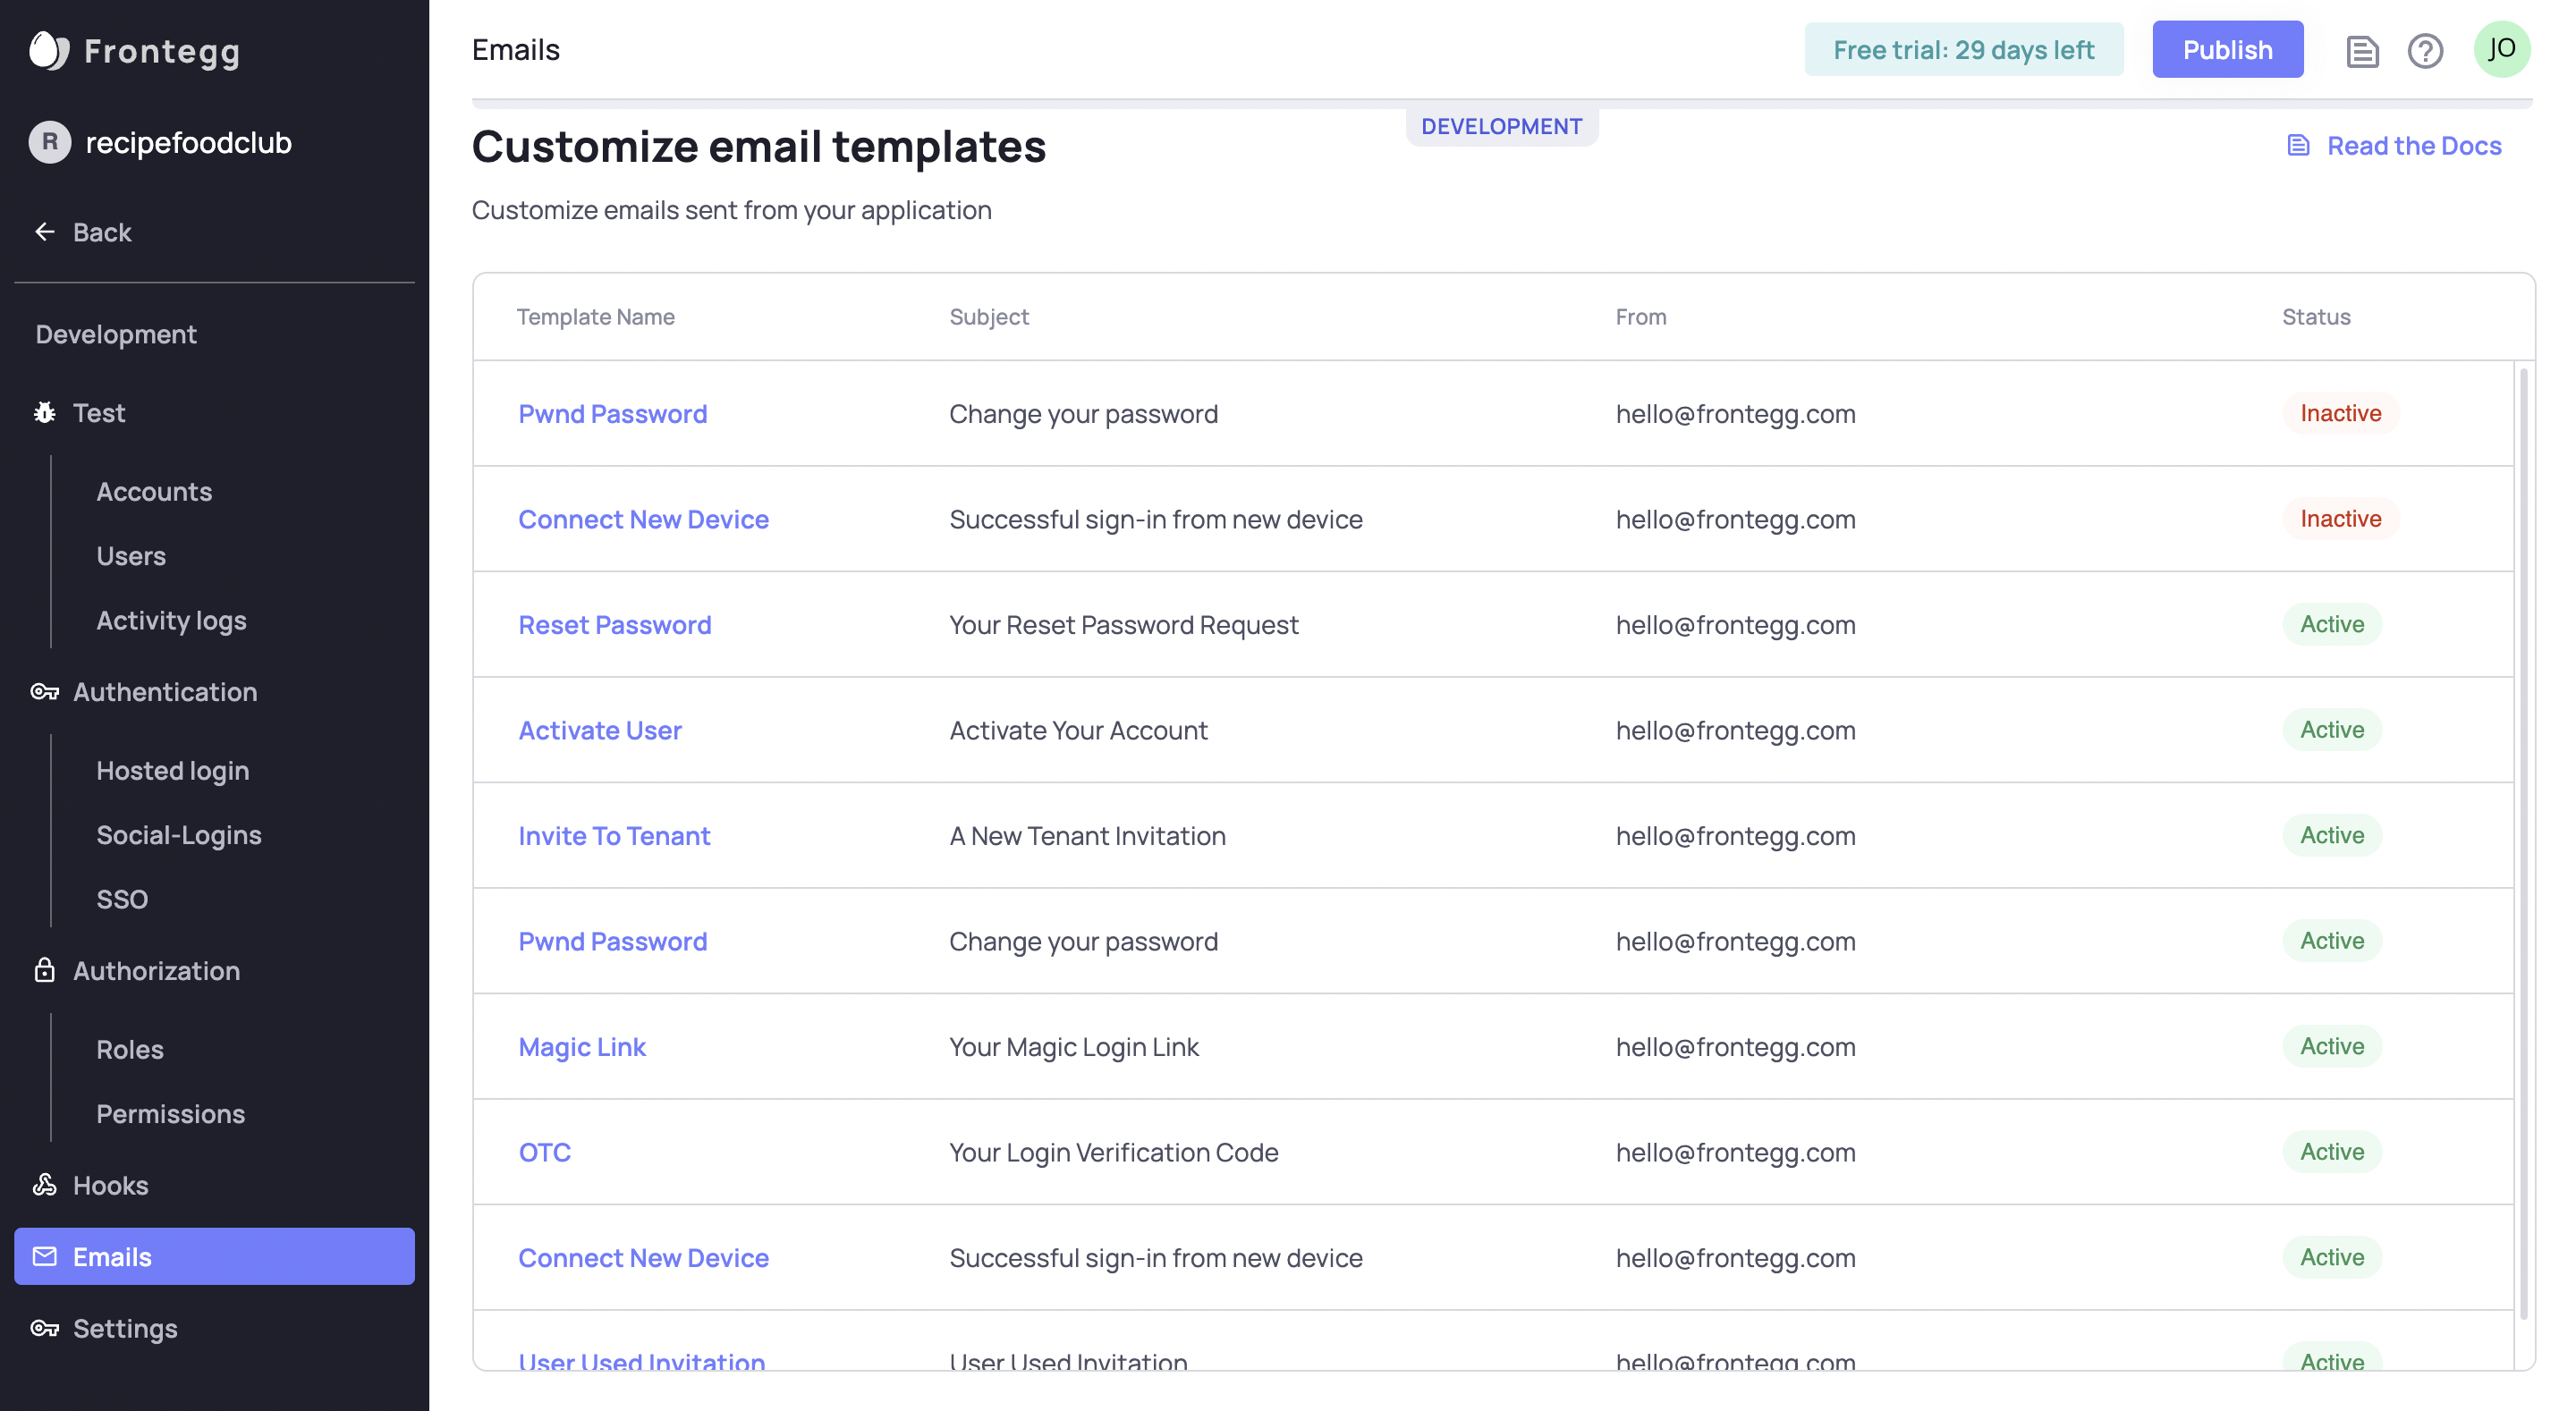
In your Frontegg Portal, go to Environments ➜ [NAME OF ENVIRONMENT] ➜ Emails.
On the email page is a list of email templates. Almost all templates are enabled by default.
You can see the status of each in the table.
To change whether a template is enabled, click on the template and toggle it on or off.

Email Templates in Different Environments
Be sure to manage the email templates in each environment separately.
Leave on as many or as few templates as you want. For each enabled template, your application will email the template to a user when the corresponding event occurs.
Here is a table with a list of template names, descriptions, and triggering events:
| Template Name | Description | Event | Available Variables |
|---|---|---|---|
| Pwned Password | When a user signs up with a password or changes it, Frontegg checks if the password is pwned. A pwned password is one that has previously been exposed in a data breach. Pwned passwords make your user accounts more vulnerable. | Login and signup | name phoneNumber profilePictureUrl timesPwned |
| ActivateUser | Email a user when they activate their account. | Account activation | name phoneNumber profilePictureUrl redirectURL |
| ResetPassword | Email a user when they reset their password. | Password reset | name phoneNumber profilePictureUrl redirectURL |
| MagicLink | One passwordless authentication method is using magic link. When a user logs in or signs up, they request a magic link that they then receive in their email and can click to authenticate. | Login and signup | name phoneNumber profilePictureUrl redirectURL expires |
| OTC | Another passwordless authentication method is using a one-time code. When a user logs in or signs up, they request a code that they then receive in their email and use to authenticate. | Login and signup | name phoneNumber profilePictureUrl code |
| ConnectNewDevice | This feature adds security to user account by notifying the user when someone logs in from a device for the first time. | Login and signup | name phoneNumber profilePictureUrl metadata.ipAddress metadata.userAgent metadata.timestamp |
| InviteToTenant | Email a user when they are invited to join a tenant. | Join tenant invitation sent | name phoneNumber profilePictureUrl issuerName issuerEmail issuerMetadata issuerProfilePictureUrl |
| UserUsedInvitation | Email the tenant manager when a user accepts an invitation to join the tenant. | Tenant invitation accepted | name phoneNumber profilePictureUrl |
| Email verification | Email a user that signed up via Microsoft Social login method, to verify the email address | Login and signup | redirectURL |
Opting for Default?
There is no harm in leaving email templates in their default configuration. However, not all the templates will necessarily apply to your application depending upon how you configure it and some might require some configuration to work properly.
After enabling an email template, you can use the default content and styles or customize it. Read below to learn how to customize the email templates.
Webhooks
Frontegg offers webhook notifications, too. Read about subscribing to webhooks.
Step 2: Customize Email Template
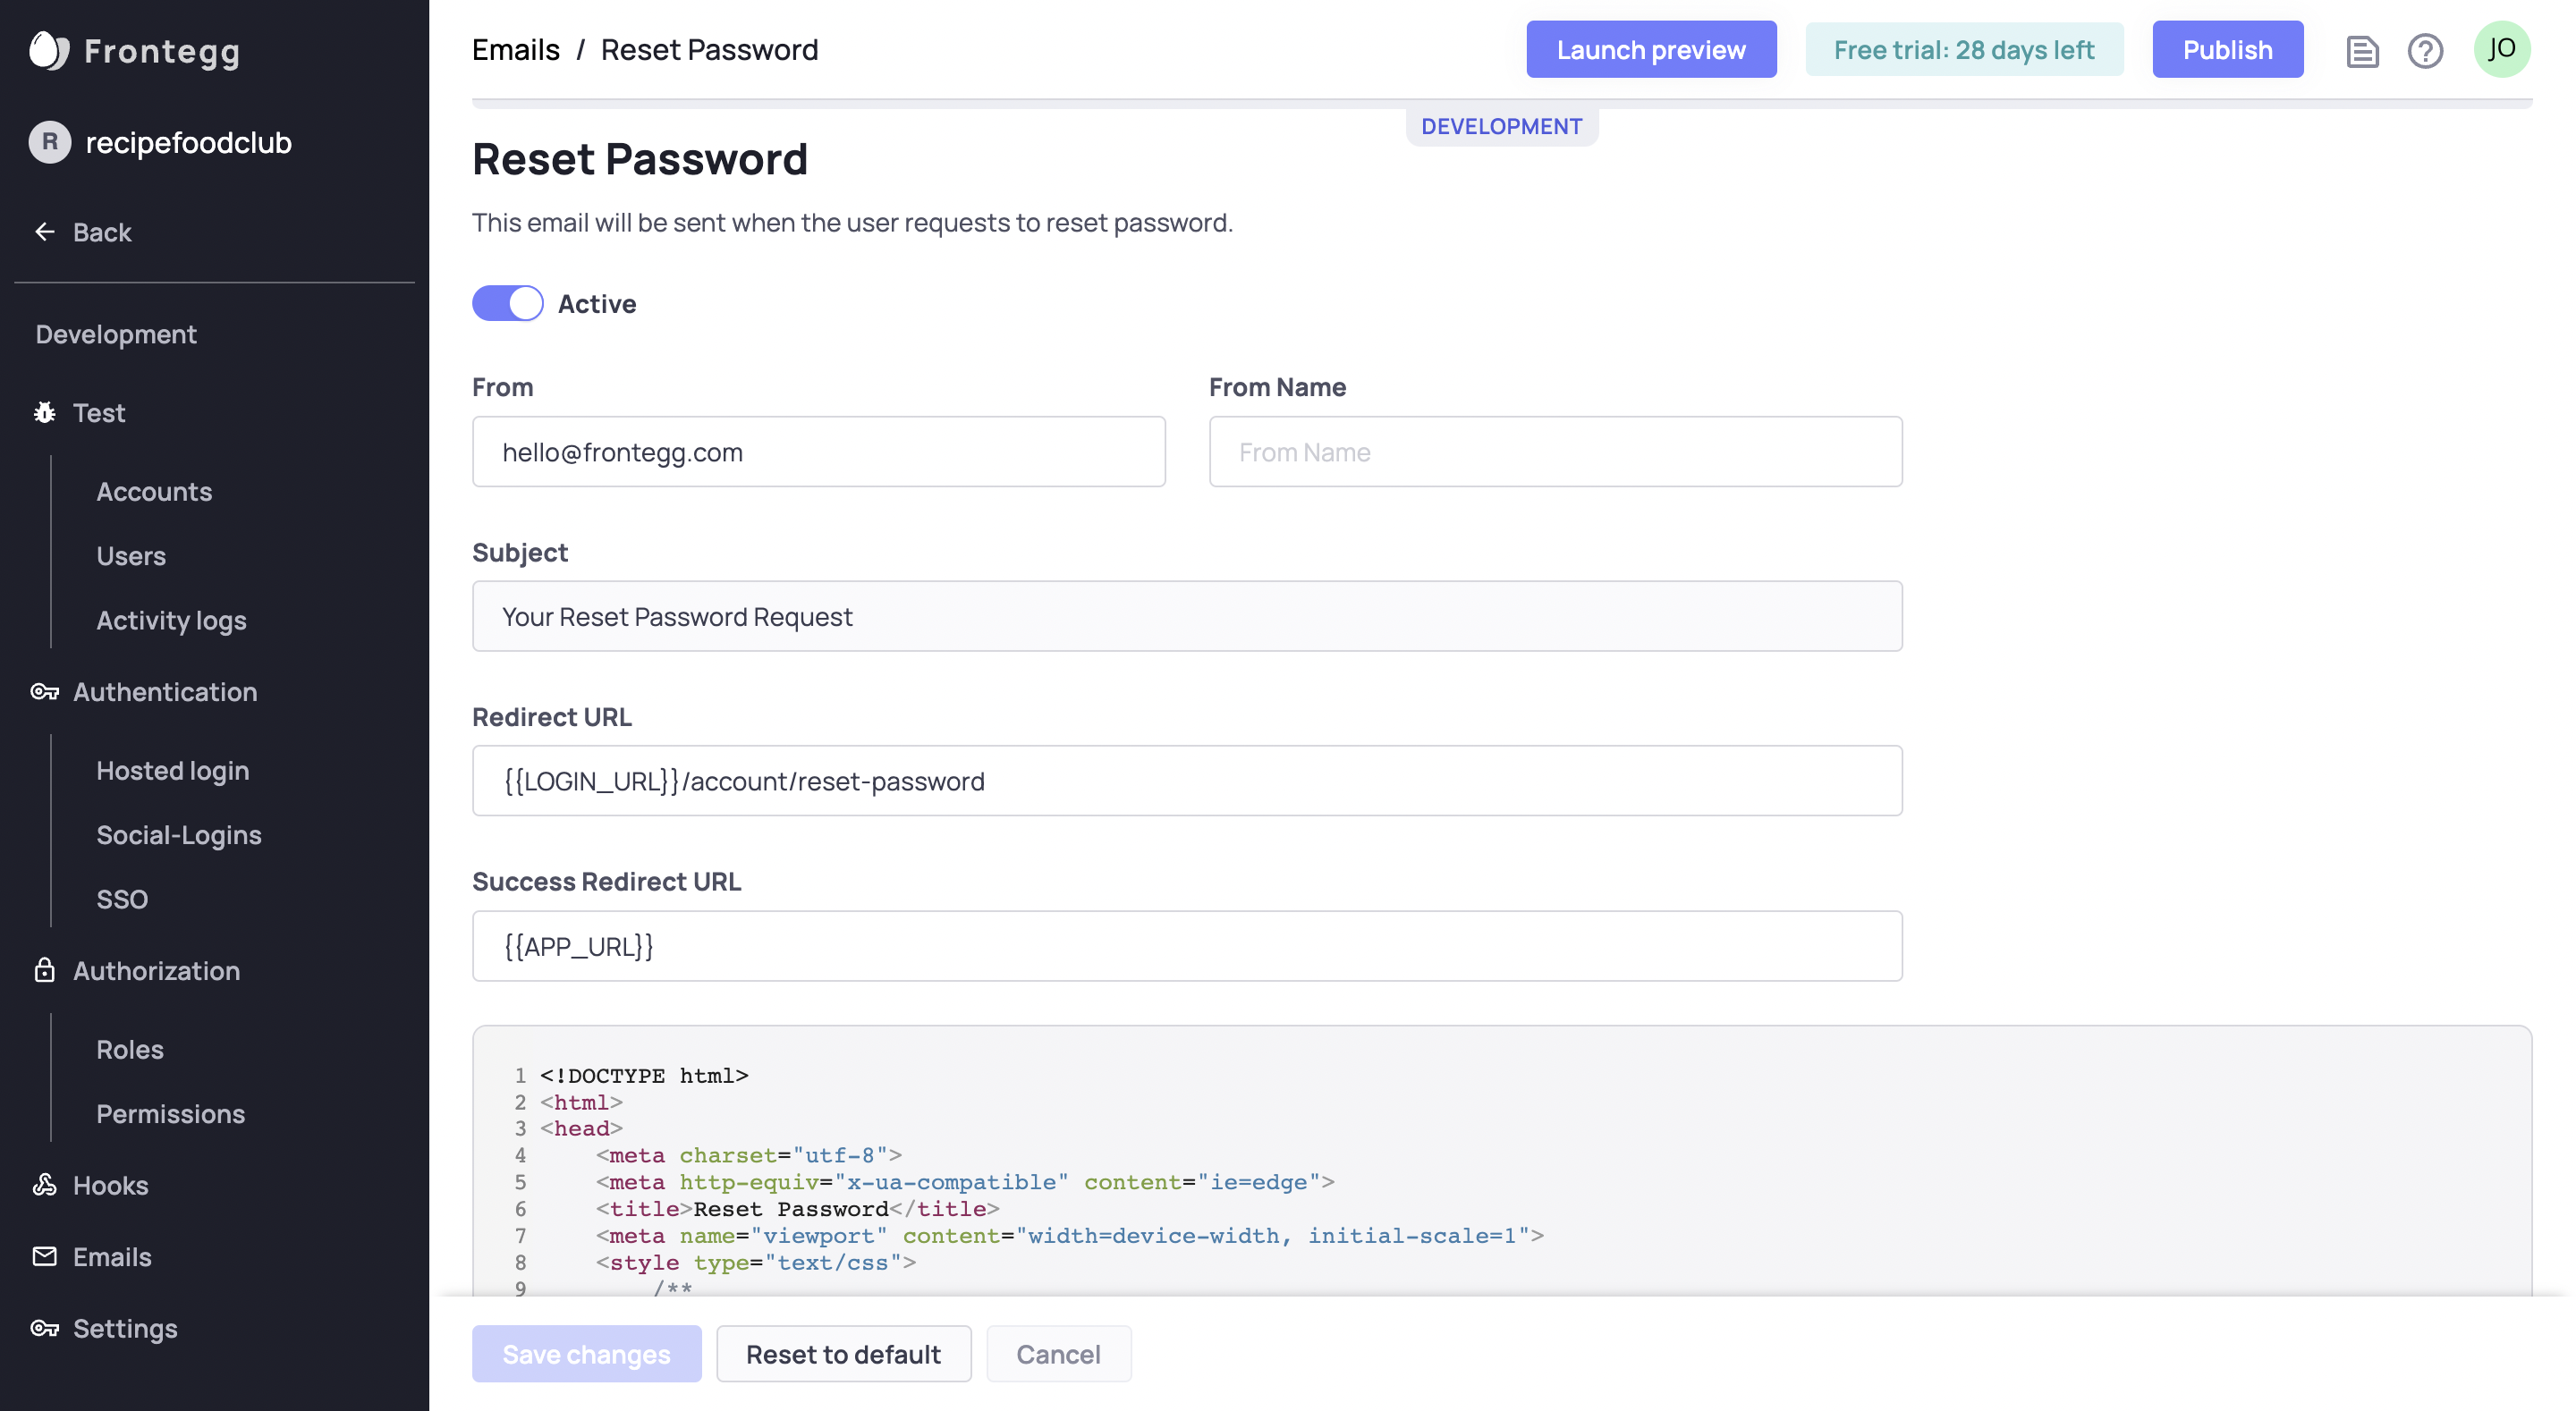
Our easy-to-use email template forms give you maximum customization capabilities for each template with minimal effort.
Using our email template forms, you can set the content and appearance for each template individually.
For instance, you can set the sender address, subject, redirect URL, message content, message format, logo, and more.
You can even edit the HTML to give it the layout and design you want.

Form Inputs
Each template has its own set of form inputs.
You will find some of the inputs are the same across all templates. Like from, from name, subject, and message. For each template, you can customize the value for each input.
Some templates have additional inputs. For instance, several template forms include inputs for redirect URLs and some have an input for a message.
You need to update each template separately.
Here is a table of additional inputs in some of the templates.
| Input | Description |
|---|---|
| Redirect URL | The root part of each redirect URL is:http://localhost:3000/. For instance, http://localhost:3000/account/reset-password.Replace "localhost:3000" with the URL of your app. Leave the second part of the default , for instance account/reset-password, exactly as is. The URL will be used in the email template for {redirectURL}. |
| Success Redirect URL | After completing the operation flow the user will be redirected to this URL. |
| Message | HTML content of the template. Read more below. |
Change Email Redirect Link
Read the detailed guide on how to change the email redirect link.
Message Content
Set your email message content, layout, and design.
Content
You can completely adjust the content of your email template's HTML with a few exceptions (see info box below) .
Handlebars
Frontegg email templates are using standard handlebars and support
{{if}}and{{else}}statements inside the templates. For more details on conditional emails, we recommend following the official handlebars documentation.
Content Customization Exceptions
The
{name}must appear within each template and the{redirectURL}must appear in each email that has an input for redirect URL.
Email Variables
Make your email templates dynamic and personalized using variables. Below is a list of variables you can inject into your emails.
| Variable | Description |
|---|---|
| name | Email recipient's name. Required in each HTML template that has an input for redirect URL. |
| Email recipient's email. | |
| phoneNumber | Email recipient's phone number. |
| profilePictureUrl | Email recipient's profile picture url. |
| redirectURL | Redirect url. See above. |
| tenantName | Name of the tenant sending the email. |
| tenant.xxx | Any attribute on the tenant object that has a value. |
| metadata | Email recipient's user metadata. |
| metadata.xxx | Custom attributes you're saving on the user's metadata. |
| timesPwned | For the pwned password template only, include the number of times the password has been breached. |
| issuerName | The name of the user who triggered the email. |
| issuerEmail | The email of the user who triggered the email. |
| issuerMetadata | The metadata of the user who triggered the email. |
| issuerProfilePictureUrl | The profile picture url of the user who triggered the email. |
To use a variable, in the body of your HTML content, wrap the variable name in double curly braces like {{name}} or {{tenantName}} to the HTML template.
Layout and Design
Use the HTML Editor to set the layout and design for each template. Anything you can do in HTML, you can do here.
Customized vs. Default
All email templates come ready to go, so no need to customize any of them. You also probably do not need to customize all of them. For instance, if you enable passwordless authentication, the MagicLink and OTC email templates make sense for you to customize, but you will not use the ResetPassword template, so no use in customizing it.
SendGrid and Limitations
Emails sent through Frontegg are delivered via SendGrid. To prevent domain abuse, the sending limit from Frontegg domains is capped at 100 emails per day.
To avoid potential error messages and ensure uninterrupted email delivery, you can use your SendGrid account and send emails using your SendGrid credentials. This option requires an existing SendGrid account and the creation of a SendGrid API Key with 'Send email' permissions, which can be integrated with Frontegg via the MailConfigController_CreateOrUpdateMailConfig endpoint.
Should you prefer to send emails using Frontegg’s SendGrid account, kindly forward the domain you wish to use to [email protected]. Our team will then associate your domain with our SendGrid account and provide you with the necessary TXT records for your DNS configuration. Upon adding these records to your DNS, please notify us so we can verify the domain on our end. After verification, you will be able to modify the email sender in your email templates accordingly.
Updated about 2 months ago