Single Account Management
From the general Accounts dashboard, you can access and edit settings for specific accounts. After clicking a specific account name, you will reach a single account management dashboard.
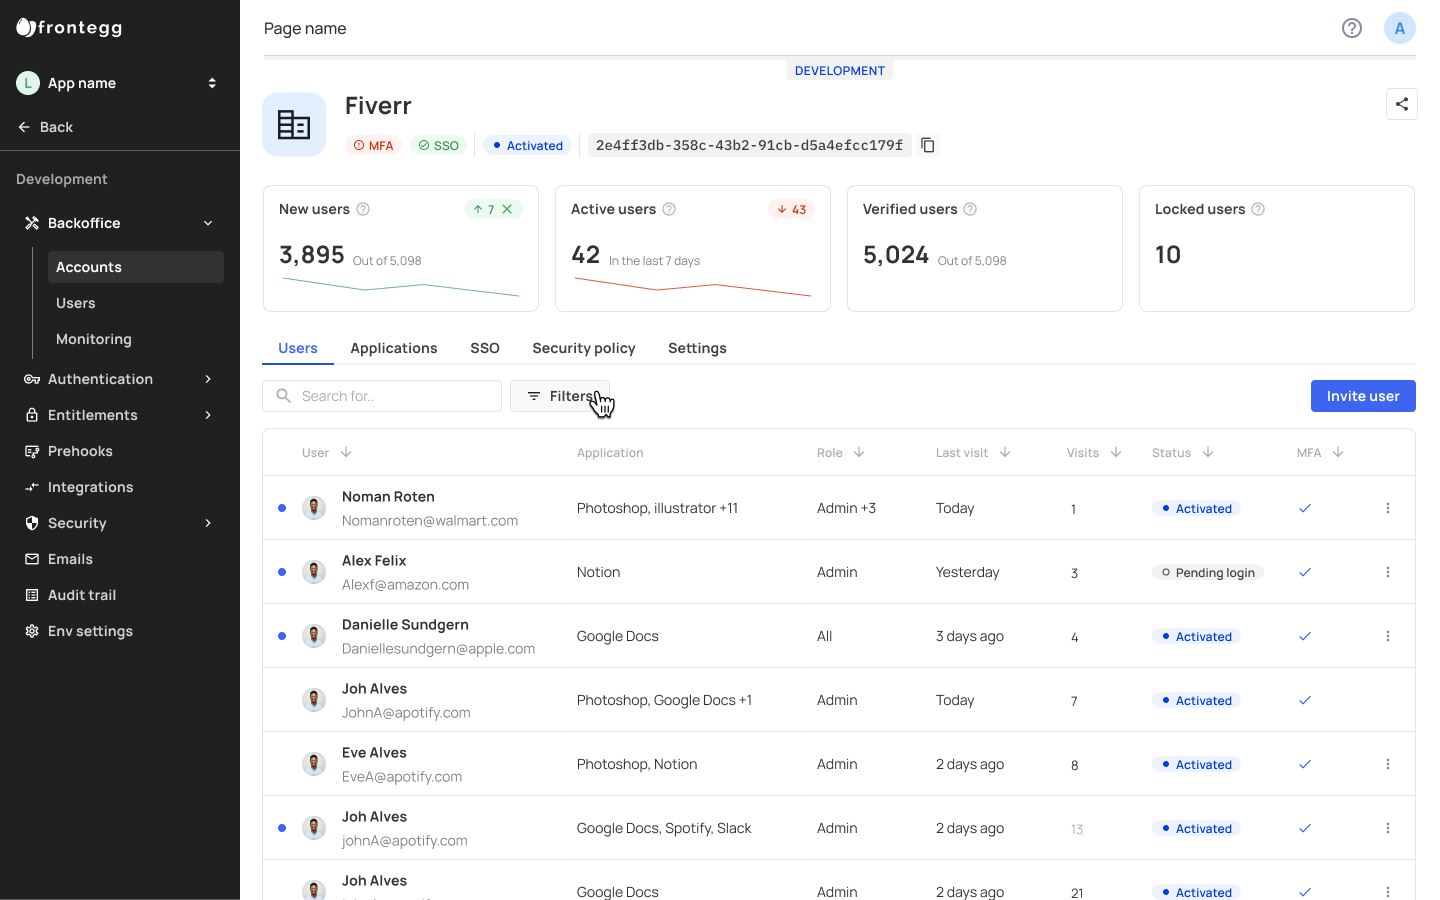
The single account view shows a breakdown of KPIs and information reflecting the performance of that specific account.
Each account has 5 distinct tabs (Users, Applications, SSO, Security Policy, and Settings) , via which you can perform multiple options, such as:
- Inviting and editing user information
- Adding and assigning applications
- Configuring SSO and SSO-related user roles
- Adding a security policy
- Configuring account settings, customizing login box for that specific account, and setting sub-account management
Let's explore the different tabs.

Account ID
Each account ID is located under the account name. You can easily copy it from there and use it in API calls etc.
Users Tab
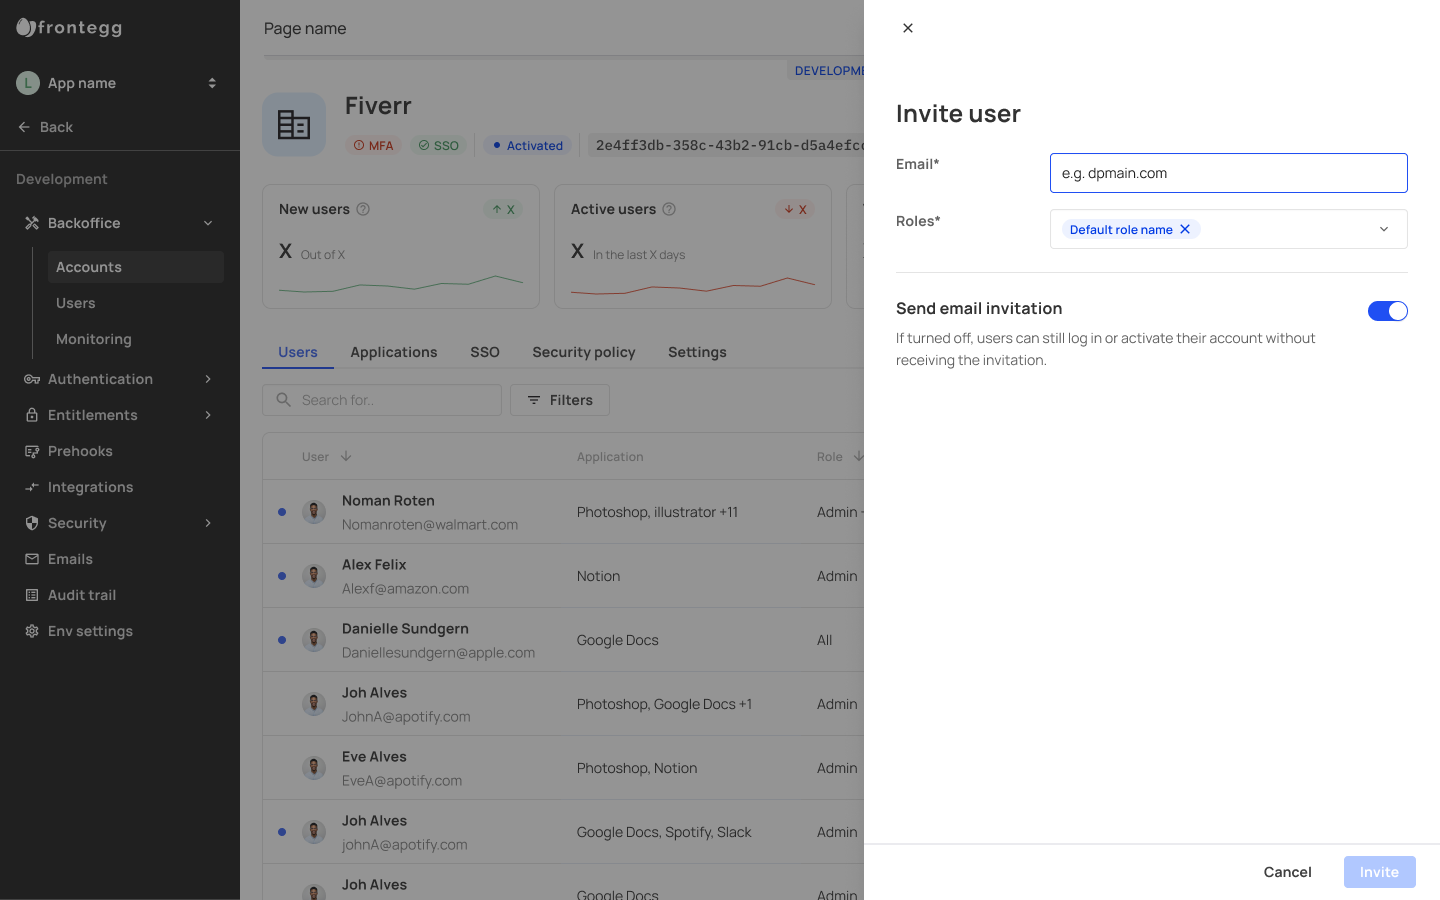
The Users tab lists all the users that belong to the specific account. To add a new user, click the Invite user button.
User Invites and Application Access
Accounts with multiple applications wil have their applications listed under the Application column. When new users are invited to accounts, they will inherit access to applciation(s) set as default according to what you configured in the applications settings page..
Enter the user's email and the role you wish to give them. Then click Invite.
SSO Configurations Tab
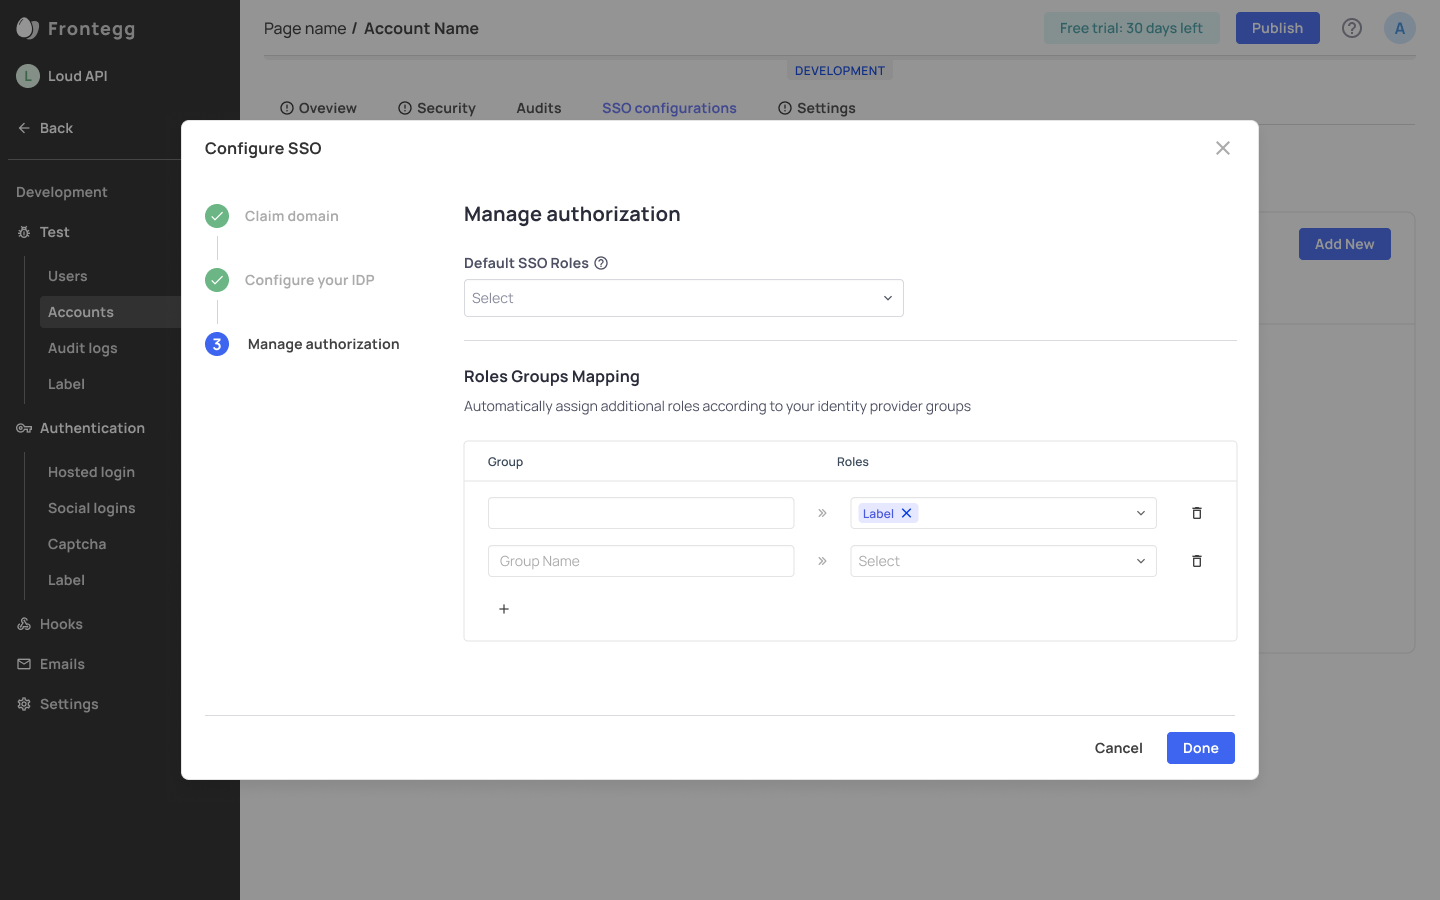
To add SSO Configuration for an account, head over to the SSO Configurations tab. The Backoffice configuration consists of three essential steps: entering your domains, Configuring your IDP, and Managing authorization.
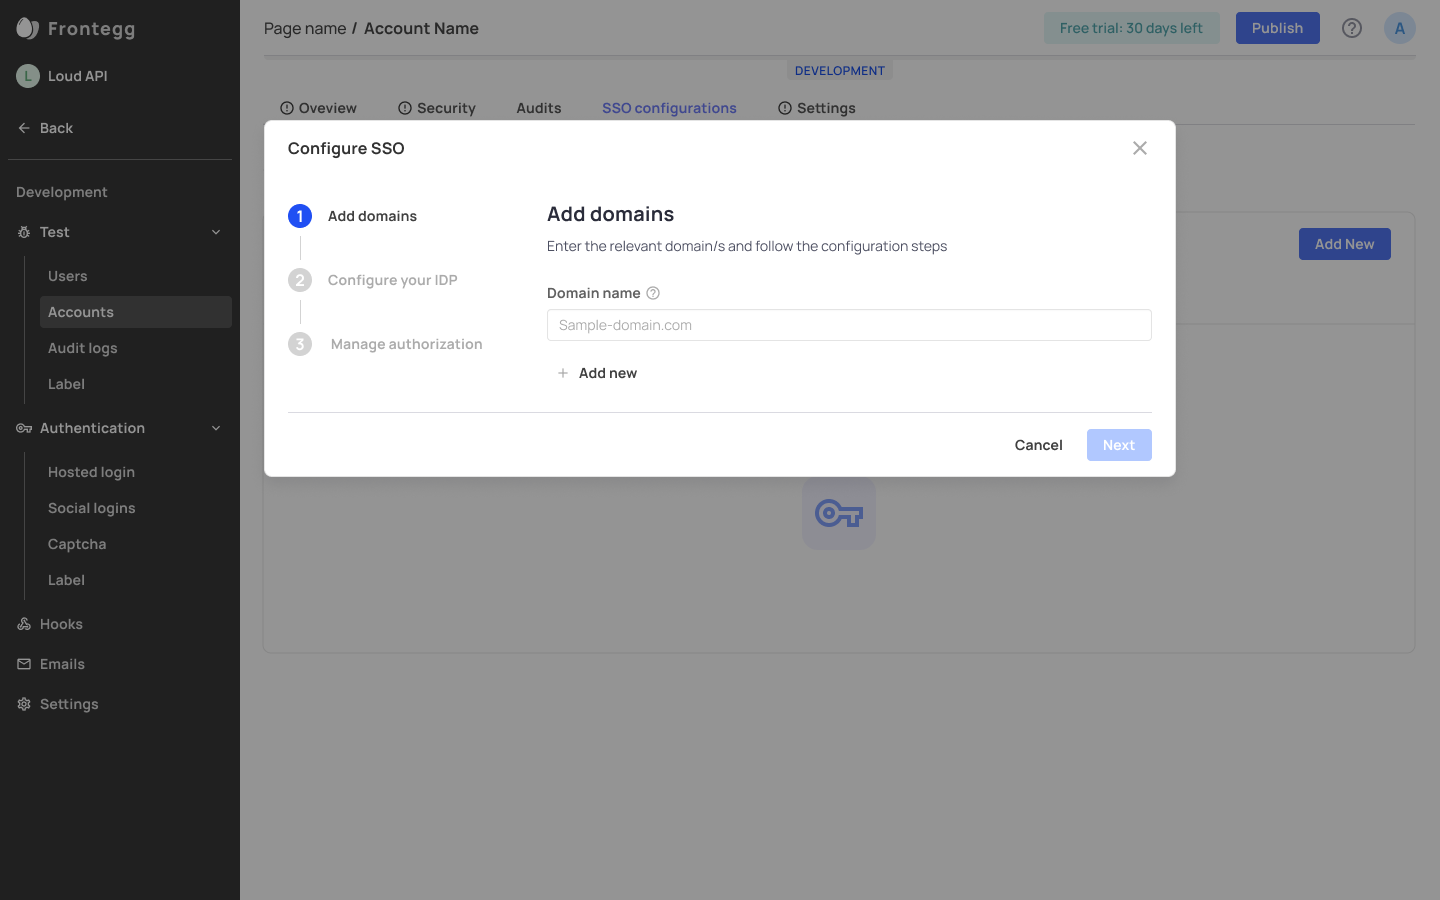
Add Domain Information
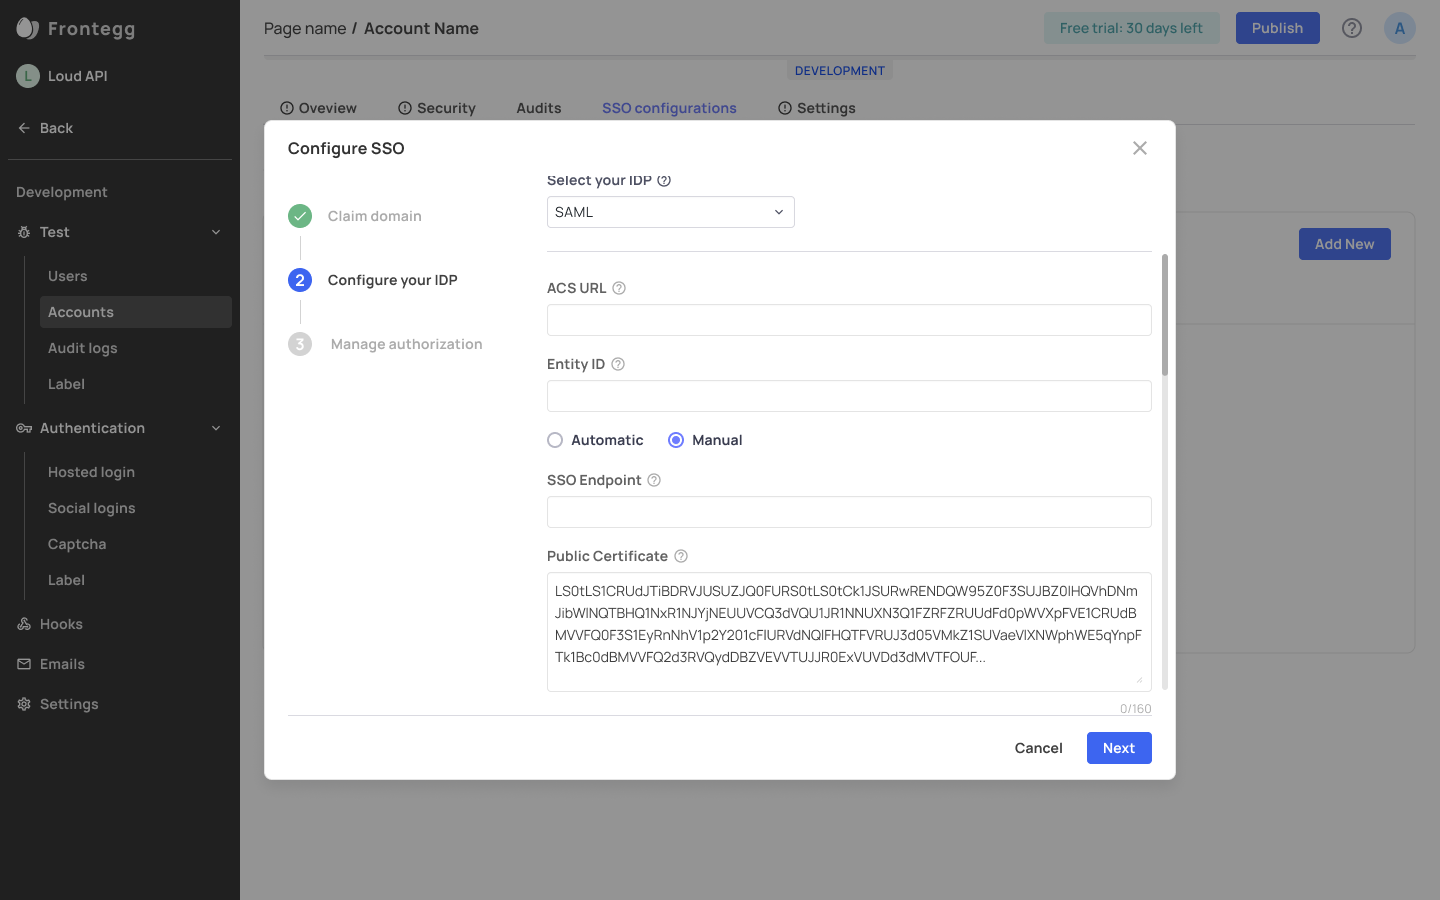
Configure IDP Settings
After you've successfully configured your IDP, you can manage authorization for your users based on their role or the group they belong to in the identity provider configuration—e.g., you can decide that every user that's part of a 'Dev-success' group in Okta, will automatically get the role of an Admin in Frontegg.
Next Steps
After configuring your SSO connectivity, you need to enable SSO in your portal so account users can log in via this method in their login box.
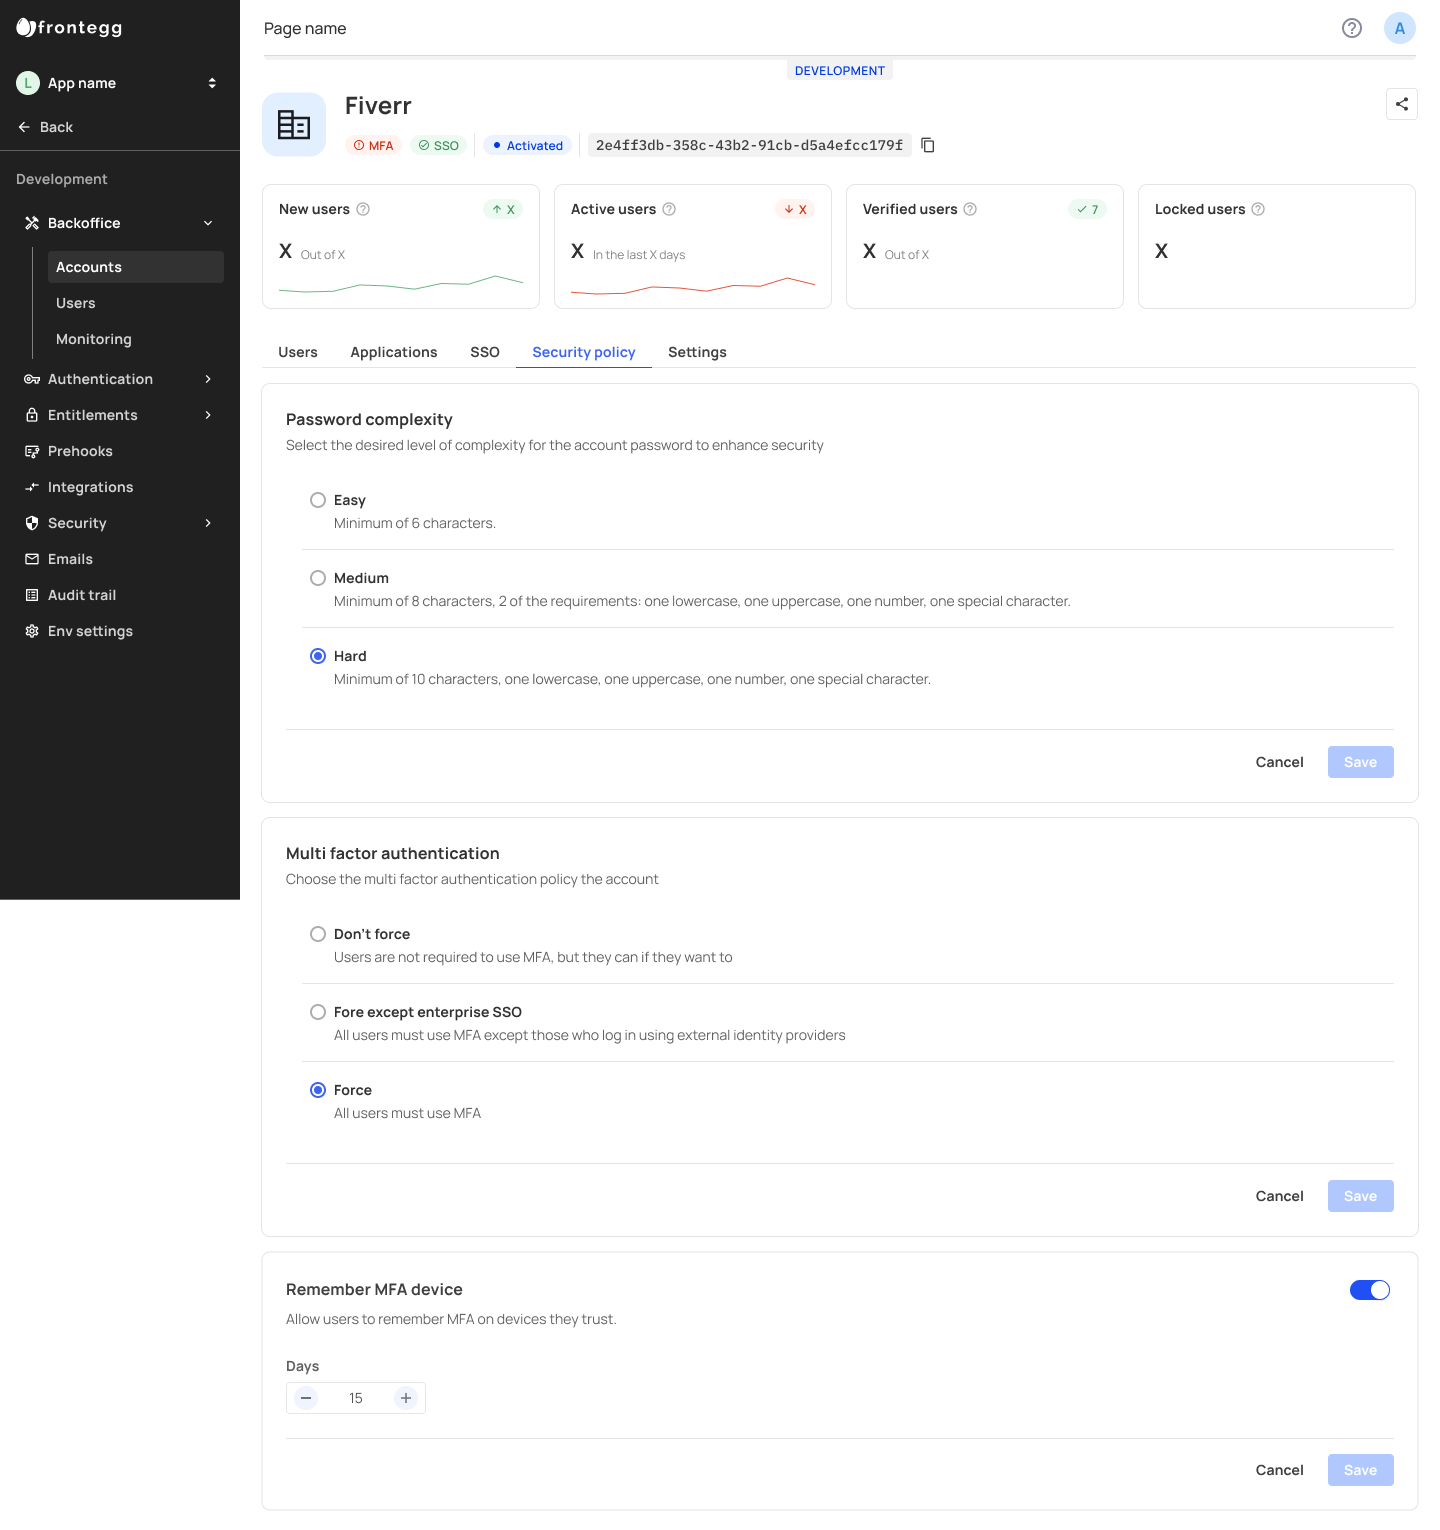
Security Policy Tab
Configure the security policy for individual accounts. From your single account view, head over to the Security policy tab.
Choose the security policies for the account:
- Choose the password complexity
- Configure MFA policy
- Enable Multi-Factor Authentication
MFA Further Exploration
Learn more about MFA policies and configuring MFA in our guide about Multi-factor Authentication
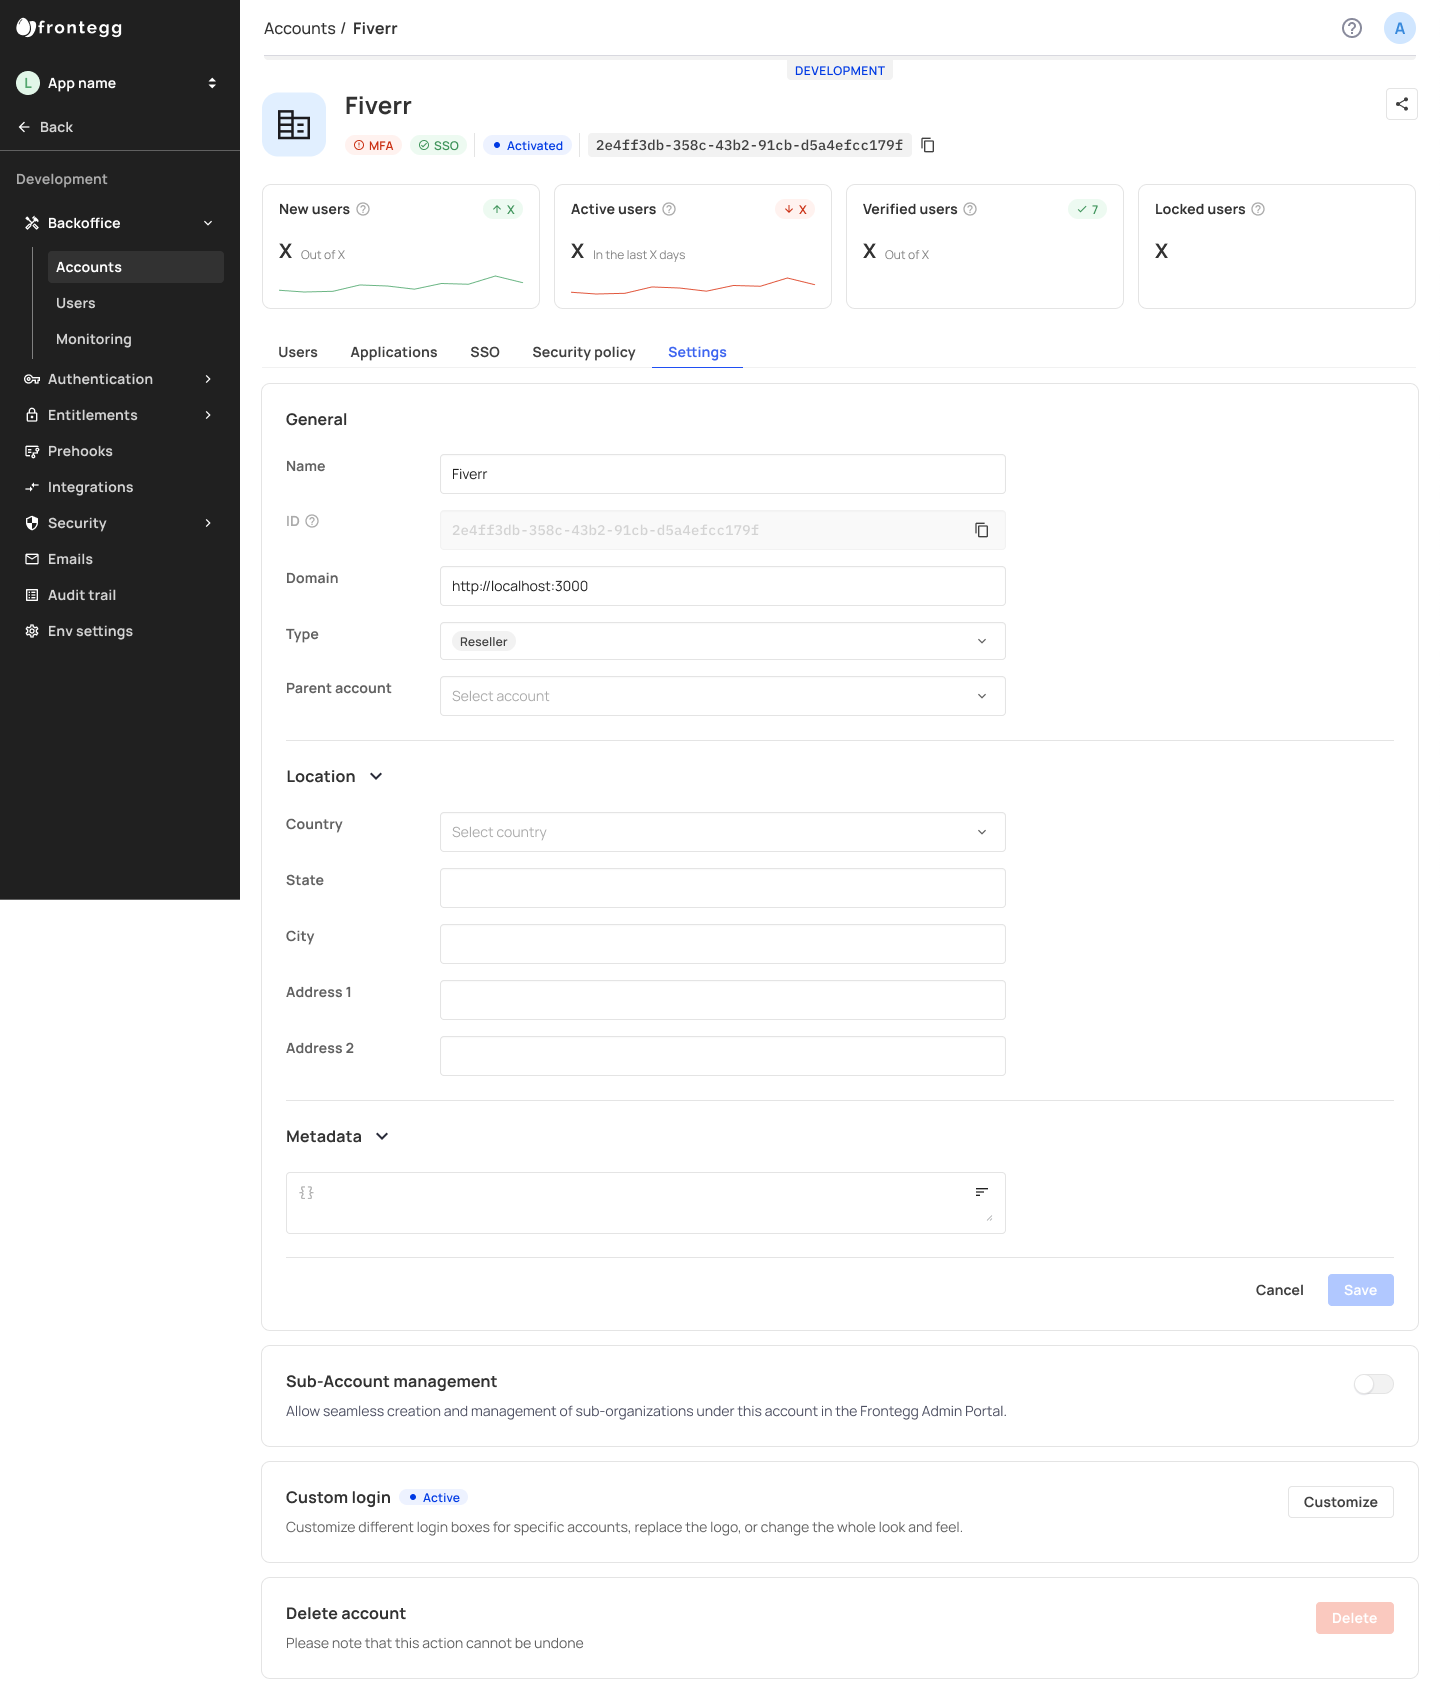
Settings Tab
The settings tab allows you to edit and set multiple configurations for individual accounts. Other than general settings such as Name, Location, etc., you can also set a Parent account for individual accounts as part of Hierarchies (Sub-account Management) models.
Sub-account Management Tab
You can allow accounts to manage their own accounts by toggling on the Sub-account management setting.
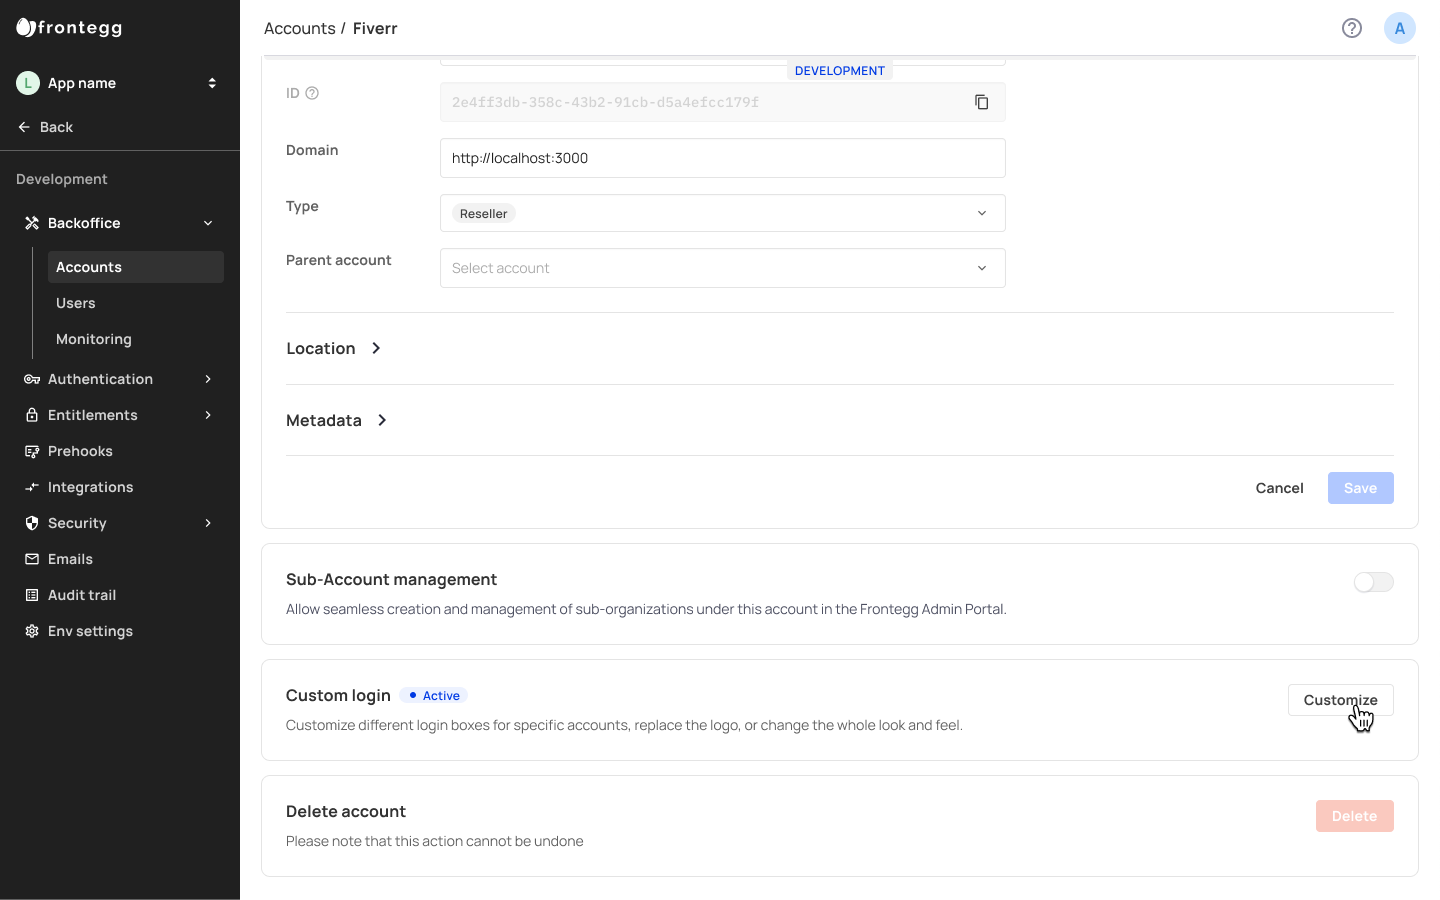
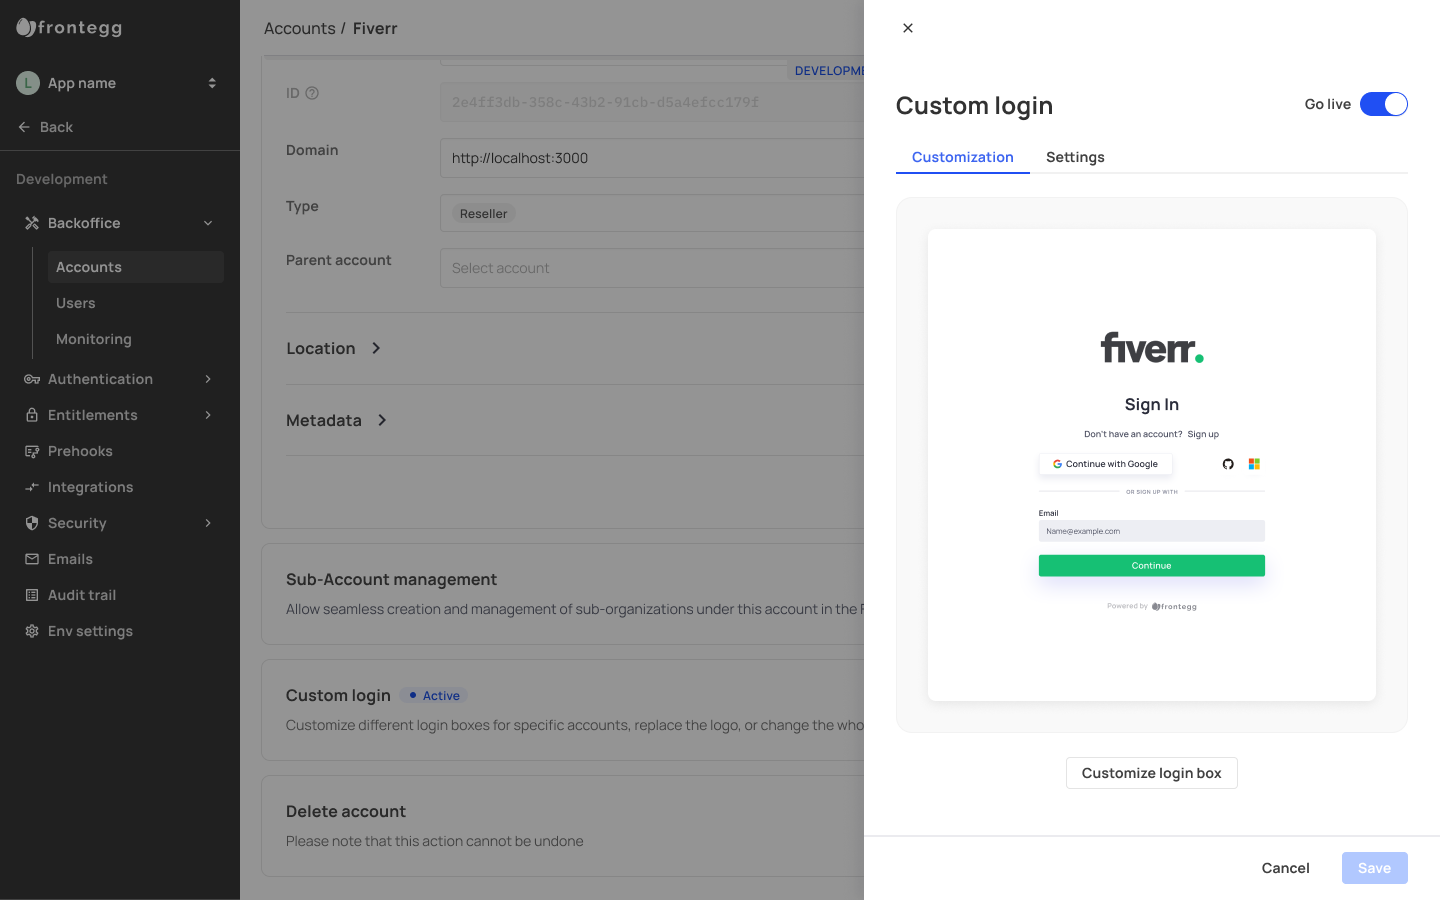
Custom login box
Customize the login box for specific accounts, replace their logo, enable/disable specific login methods , and more.
Updated 3 months ago