User Management
Give your tenants the option to invite and manage user properties in the admin portal. That way, they can freely collaborate with team members, give access (temporary or permanent) to contractors, etc. Via Frontegg's Admin Portal, you can give your users the management capabilities to control/perform other User-related functionalities.
No admin portal? no problem
If you choose don't integrate Frontegg's Admin Portal, you can still manage your customers' users via Frontegg's Backoffice
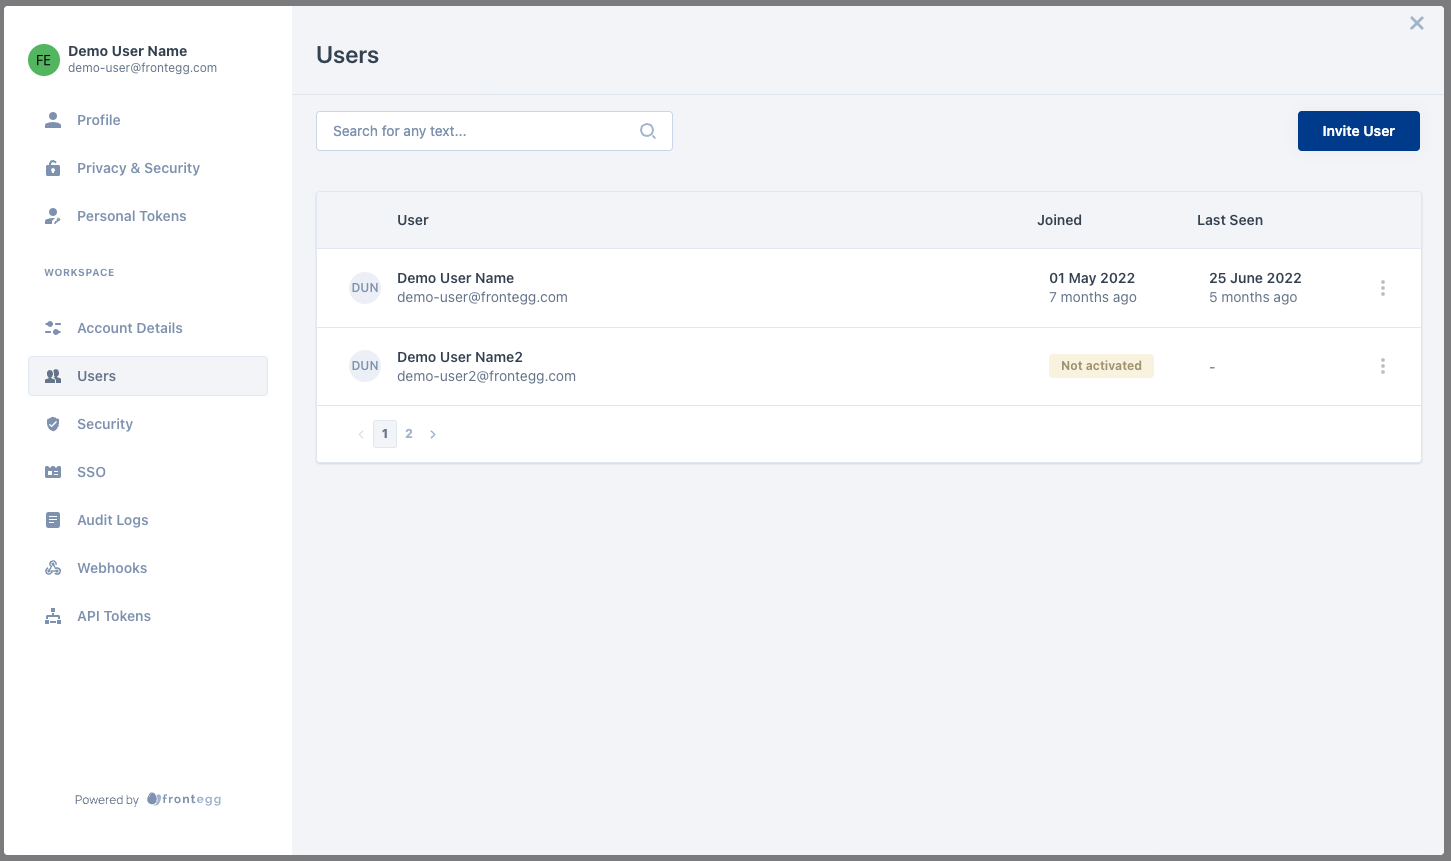
Enabling User Management
To allow your tenants to manage and invite users independently, go to your Builder ➜ Admin Portal and Toggle ON the Users tab. Your tenants should now see a Users tab in their Admin Portal.
Your tenants won't be able to manage users and invite them by themselves if you keep this option toggled off. Remember that you can always manage users for your tenants via your Backoffice .
Additionally, for a user to perform any action
User Management in the App
In addition to inviting new users to your app, tenants can perform additional user management options. These actions can be performed via the menu next to each user entry. For each user, they can:
- Edit user roles
- Resend activation email
- Log users out of their sessions
- Delete users
Email Invitation
You can invite users to your account via email or via a link. To invite users by email, you will need to fill in the invitee's name, email, and role— and the invitee will receive an email with instructions.
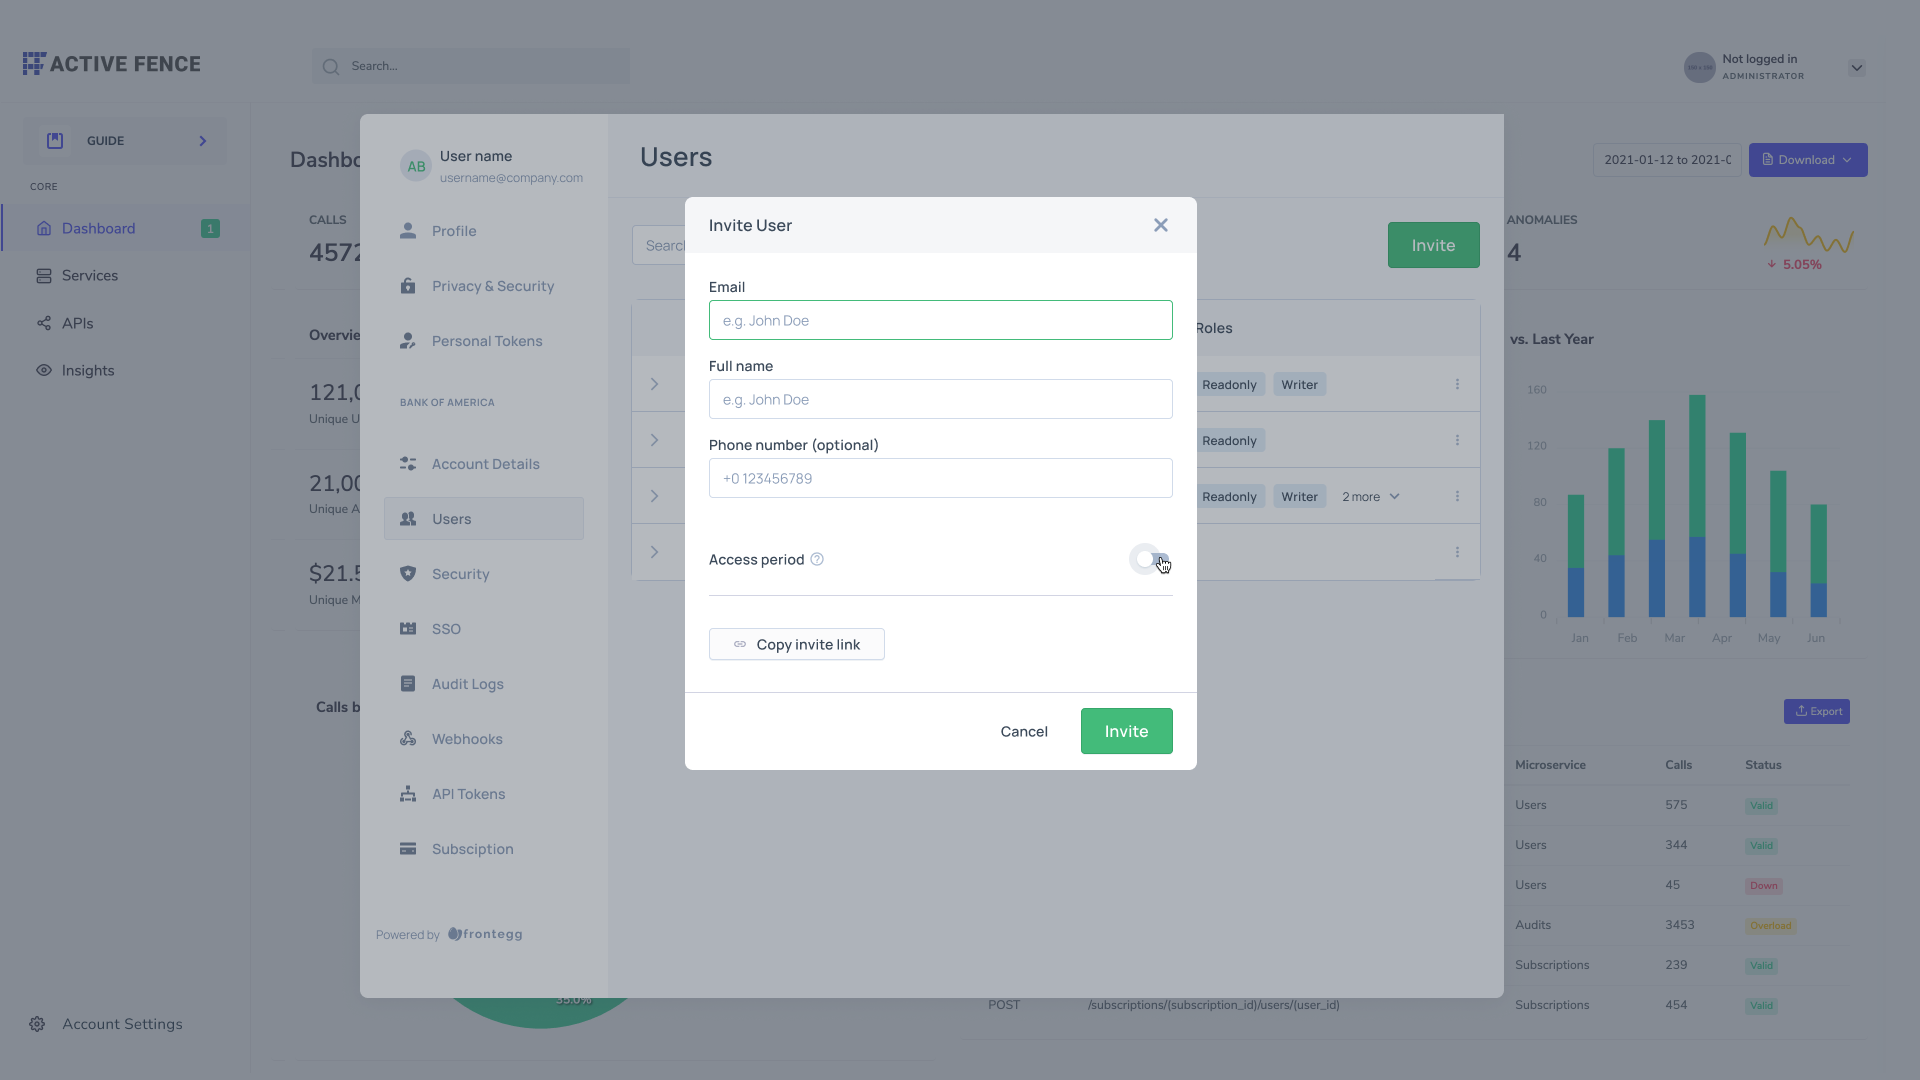
Inviting Users
When a user is invited by email, they will receive one of the following emails:
- If they are a new user, they will receive an Activate Account email.
- If they already belong to another account, they will receive an Invite to Account email.
Both emails can be edited for every environment via the Emails tab.
Limiting Customers to Email Invitations Alone
You can limit your customers to invite users by email alone, which is more controlable.
Guest Users: Allowing Limited Time Access
Prerequisites
The minimum Frontegg SDK required versions for this feature are:
React - 6.0.18
Vanilla.JS - 6.166.0
Angular - 6.14.0
Guest users can perform actions in your app for a limited time. To set time limitations, go to the Users tab in the Admin Portal. You can either invite new users and set them as Guest Users or change a permanent user's status to Guest by enacting an Access Period for their account. Guest users will have an indicator next to their user profile showing the date when their access period expires.
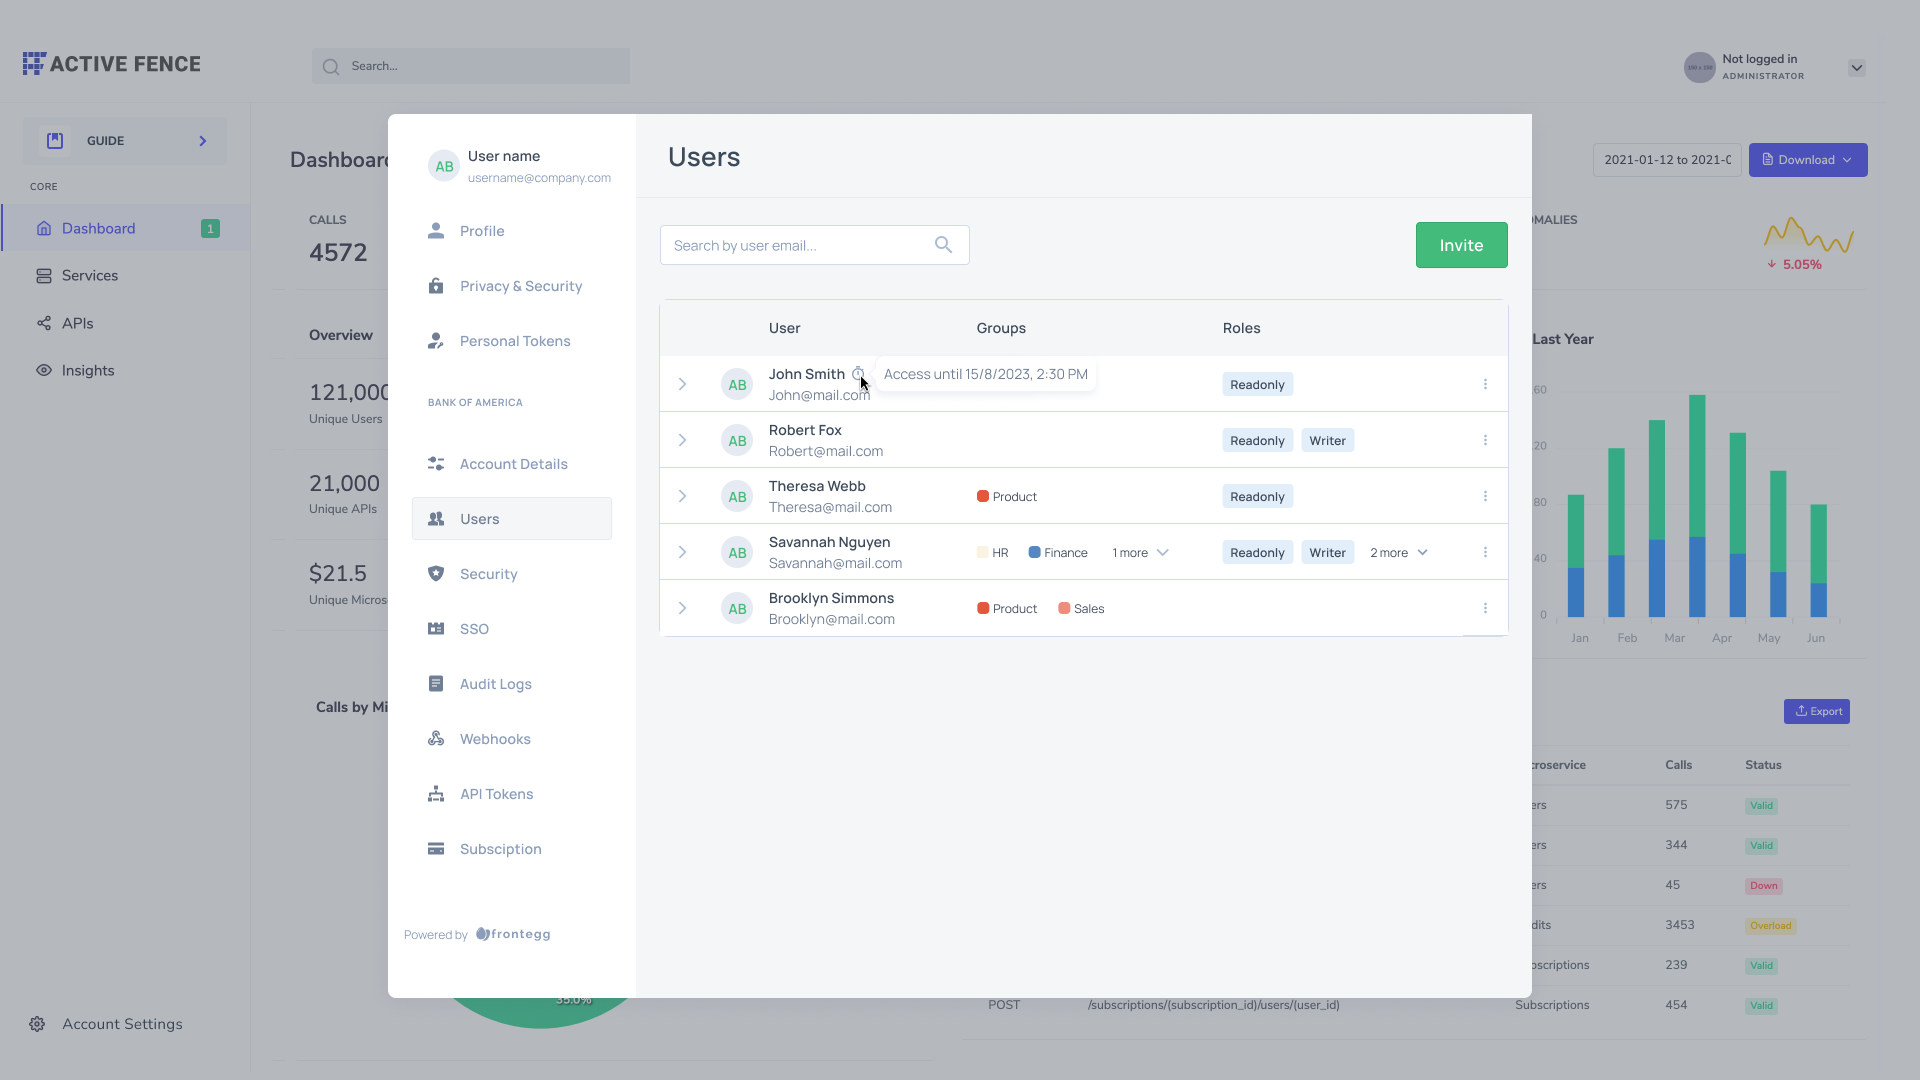
Temporary vs. Permanent Access.
You can decide whether your users will have temporary or permanent access. Access can be changed according to your preference.
Setting Access Period for New Users
If you wish to invite new users and set them as Guests , you will need to enable the Access Period toggle and choose the time frame you want them to have access for:

Enabling Access Period
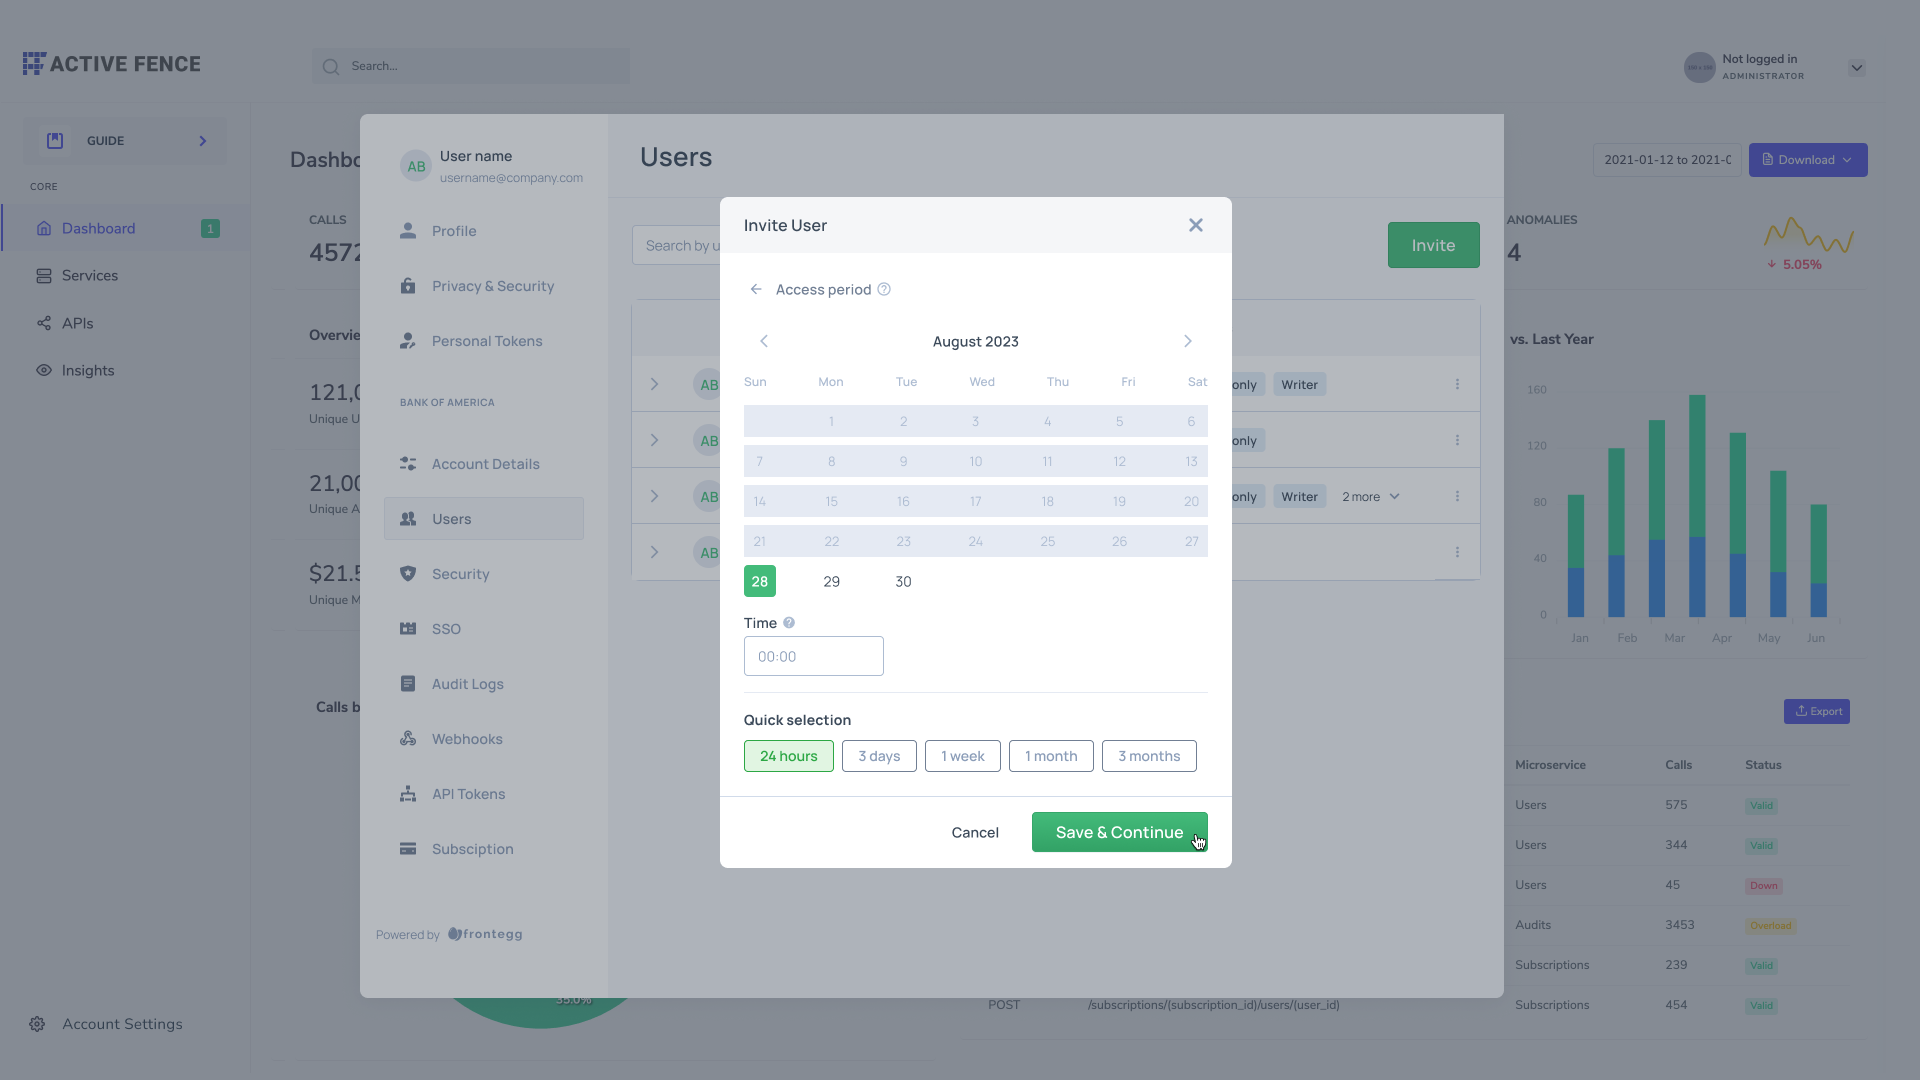
Setting User Access Period
Setting Access Period for New Users (Via API)
You can set guest user status via API. Note that when setting the access period for a guest user, the expiration time should be stated in seconds, with a minimum of 300 seconds (5 minutes).
 "TemporaryUserDto": {
        "type": "object",
        "properties": {
          "expirationInSeconds": {
            "type": "number",
            "minimum": 300
          }
        },
        "required": [
          "expirationInSeconds"
        ]
      },
Switching user status between guest and permanent
To switch a guest user status from guest to permanent, use the menu next to the user's name and choose the Get permanent access option. To take away permanent user status, set an access period for an existing user, and they will automatically receive a temporary status.
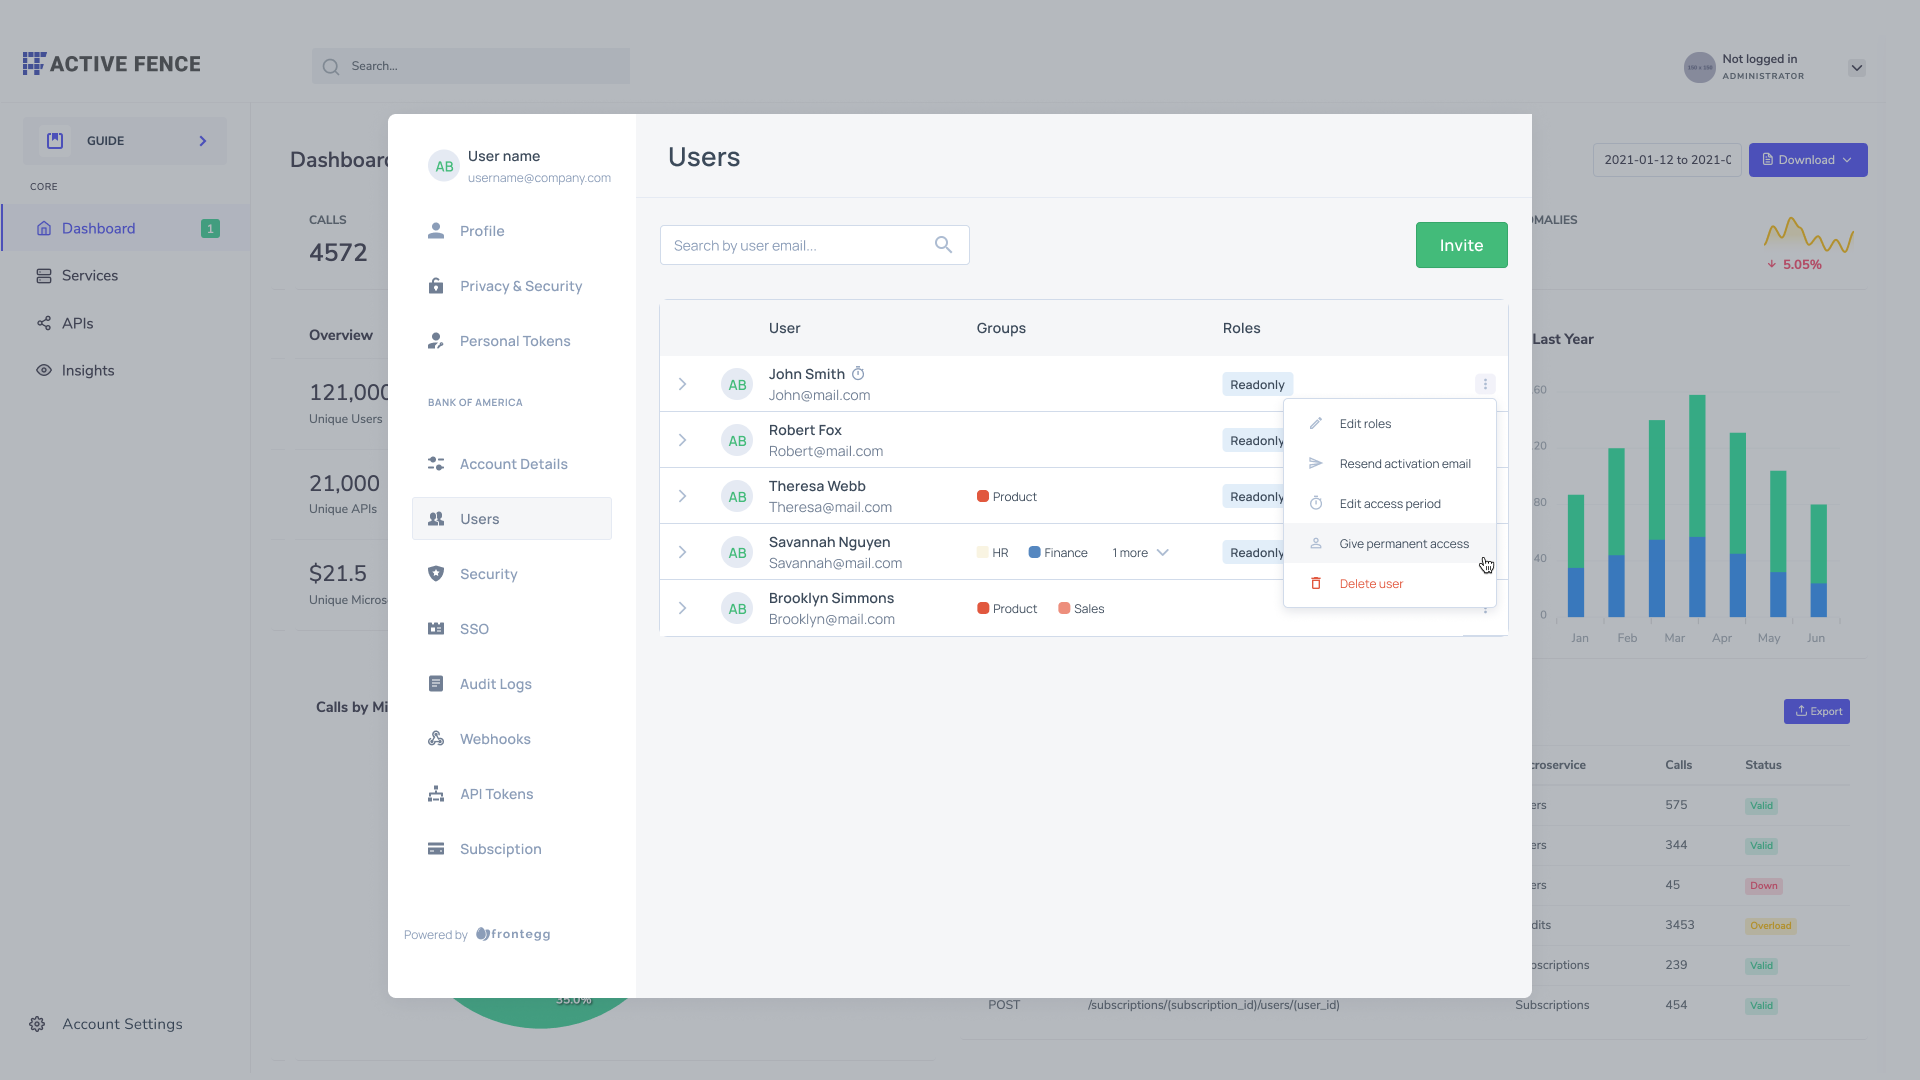
Granting Permanent Access to Temporary Users
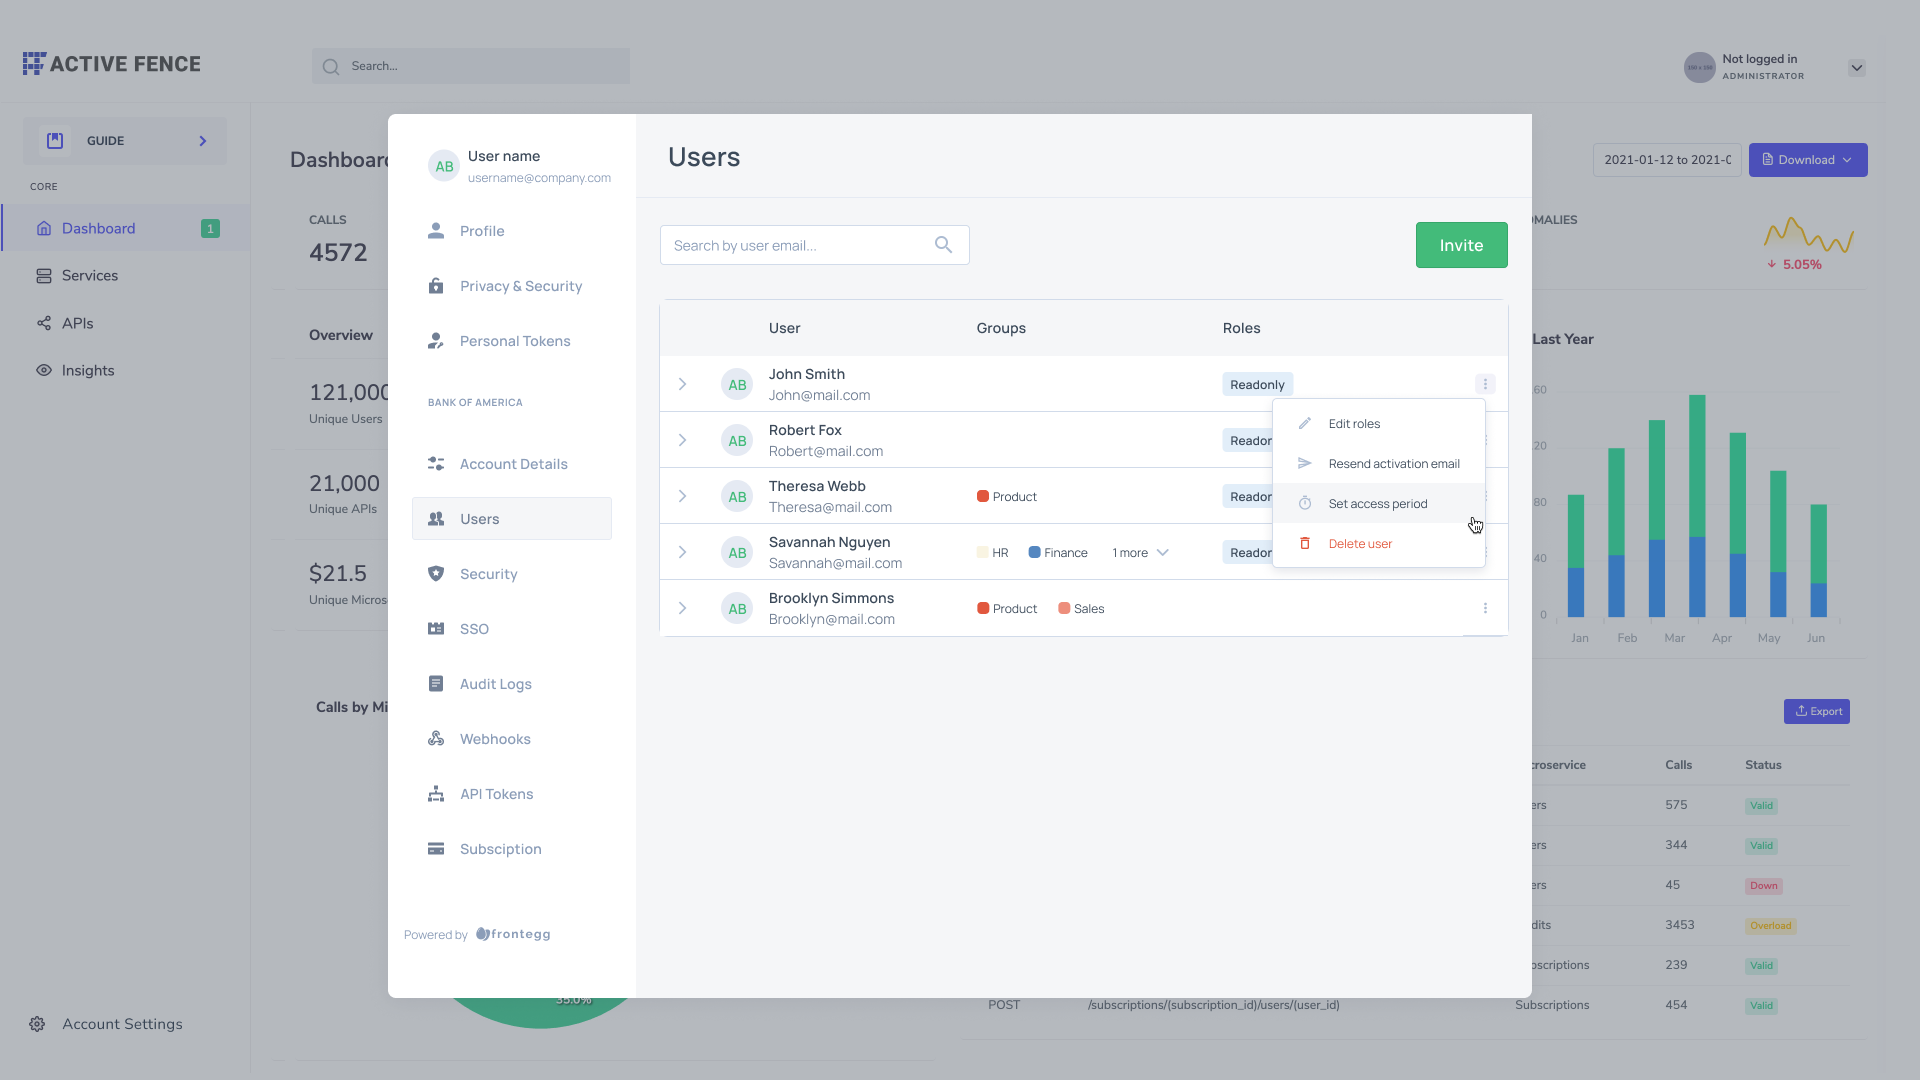
Converting Permanent Users to Guest Users
Inviting multiple guest users (bulk invitation)
You can streamline user invitations by inviting up to 5 users at a time. Note that the access period you set will apply to all users you invite in bulk.
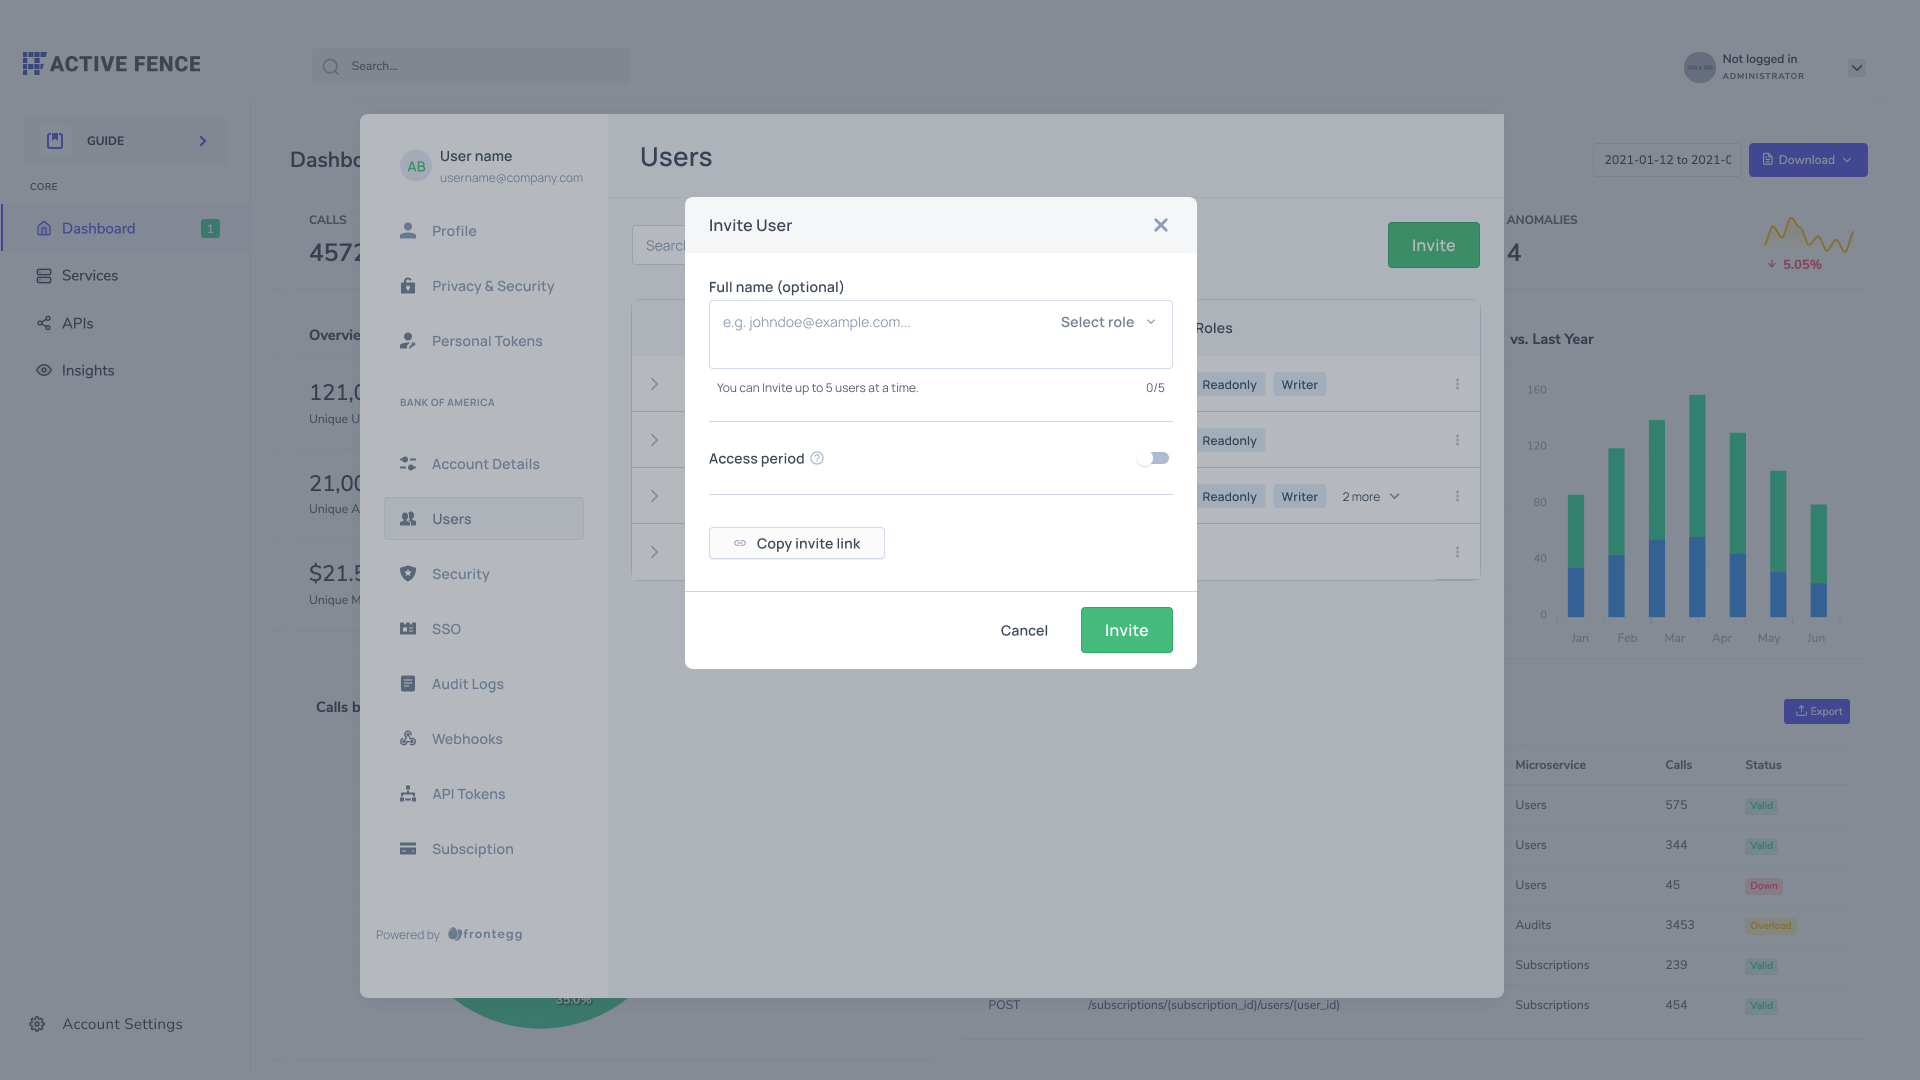
Inviting Multiple Guest Users
To enable the option to invite users in bulk, you will need to set theinviteBulk field to true:
import React from "react";
import {FronteggProvider, FronteggThemeOptions} from "@frontegg/react";
import contextOptions from './context-options';

const themeOptions: FronteggThemeOptions = {
	adminPortal: {
       pages: {
         users: {
           inviteUserModal: {
             inviteByEmail: {
               enabled: true,
               inviteBulk: {
                 enabled: true,
               },
             },
           },
	       },
      },
   },
};

const Provider = () => (
    <FronteggProvider contextOptions={contextOptions} themeOptions={themeOptions}>
        <div />
    </FronteggProvider>
);

export default Provider;
Link Invitation
This invite method allows you to invite users to your app by generating and sending them an invite link. When users join the app via an invite link, they will receive the default roles that were configured in Rolesand Permissions.
If you disable the invite with email mode, you will get a modal with the invite with link mode as the only option to invite users. To disable this option, set the inviteByEmail field to false.
import React from "react";
import {FronteggProvider, FronteggThemeOptions} from "@frontegg/react";
import contextOptions from './context-options';

const themeOptions: FronteggThemeOptions = {
	adminPortal: {
     pages: {
       users: {
         inviteUserModal: {
           inviteByEmail: {
             enabled: false,
           },
         },
       },
    },
  },
};

const Provider = () => (
    <FronteggProvider contextOptions={contextOptions} themeOptions={themeOptions}>
        <div />
    </FronteggProvider>
);

export default Provider;
Working with Invitation Links
Using invitation links is as easy as copy the link and sending it to the relevant user.

To change the link's expiration, use the Edit button to the right and change it to your liking. Click Save.
You can check the Send me an email each time someone joins using this invitation link box to receive an email after each link usage:
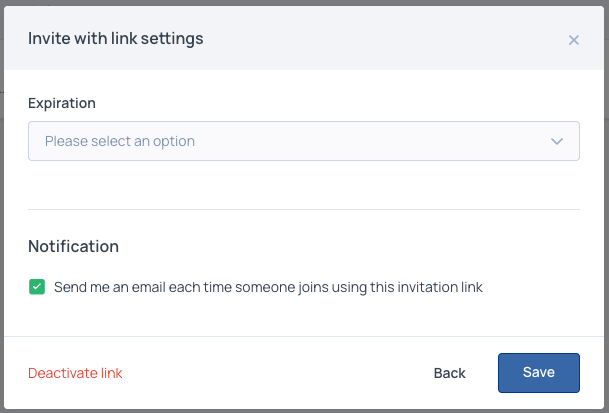
You can deactivate this email by going to any Environment -> Emails and toggling off the User Used Invitation.
You can also deactivate the link at any time.
Domain Restrictions When Inviting Users
When inviting users by email, or when users try joining an account through an invite link, the invited user may be blocked if their email domain is not allowed according to domain restrictions. Domain restrictions can be configured in the security tab of the Admin Portal.
User Management and Permissions in the App
Allowing users to invite users
To allow users to invite people to their app with an invitation link, toggle the invite link option in the Users settings option, like so:
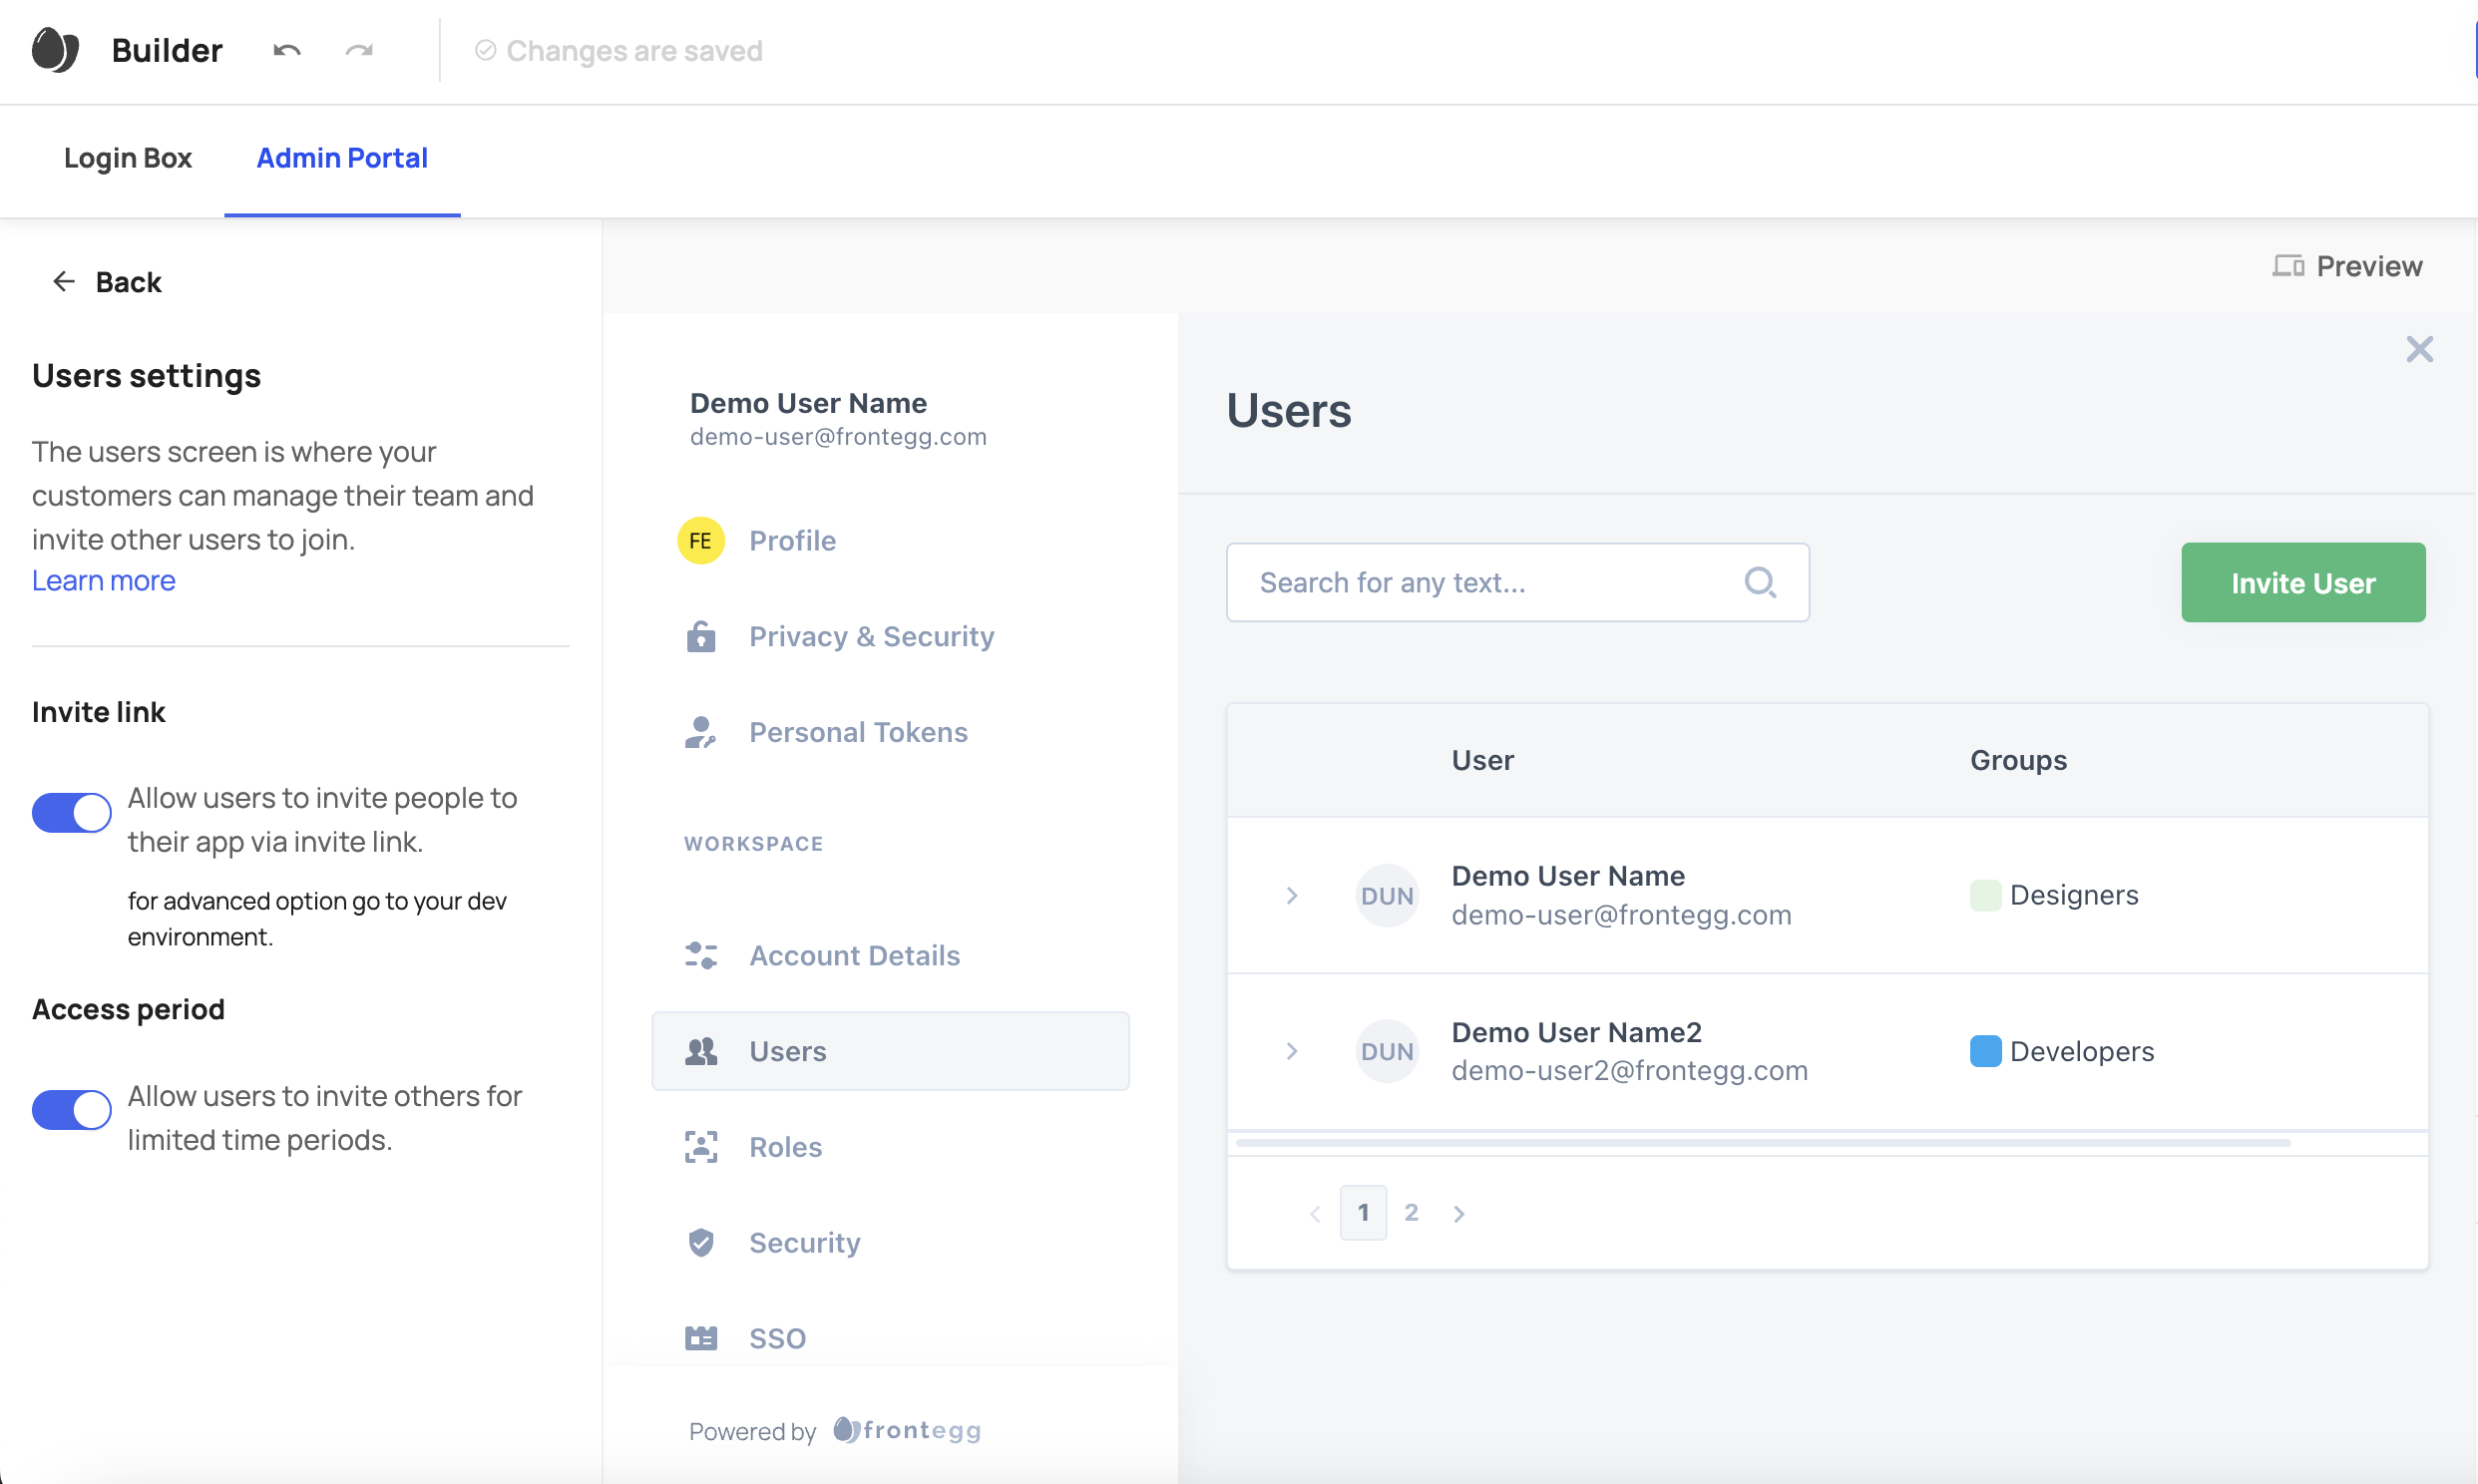
You can allow your users to invite other users with limited time access invitation. To do so, go to your Admin Portal and toggle-on the Access Period option.
Managing applications in the portal
Users can be assigned roles with permissions to view/remove/assign other users' applications (see relevant permissions in the table below). Learn more about accounts with multiple applications here.
Allowing users to disable or enable users
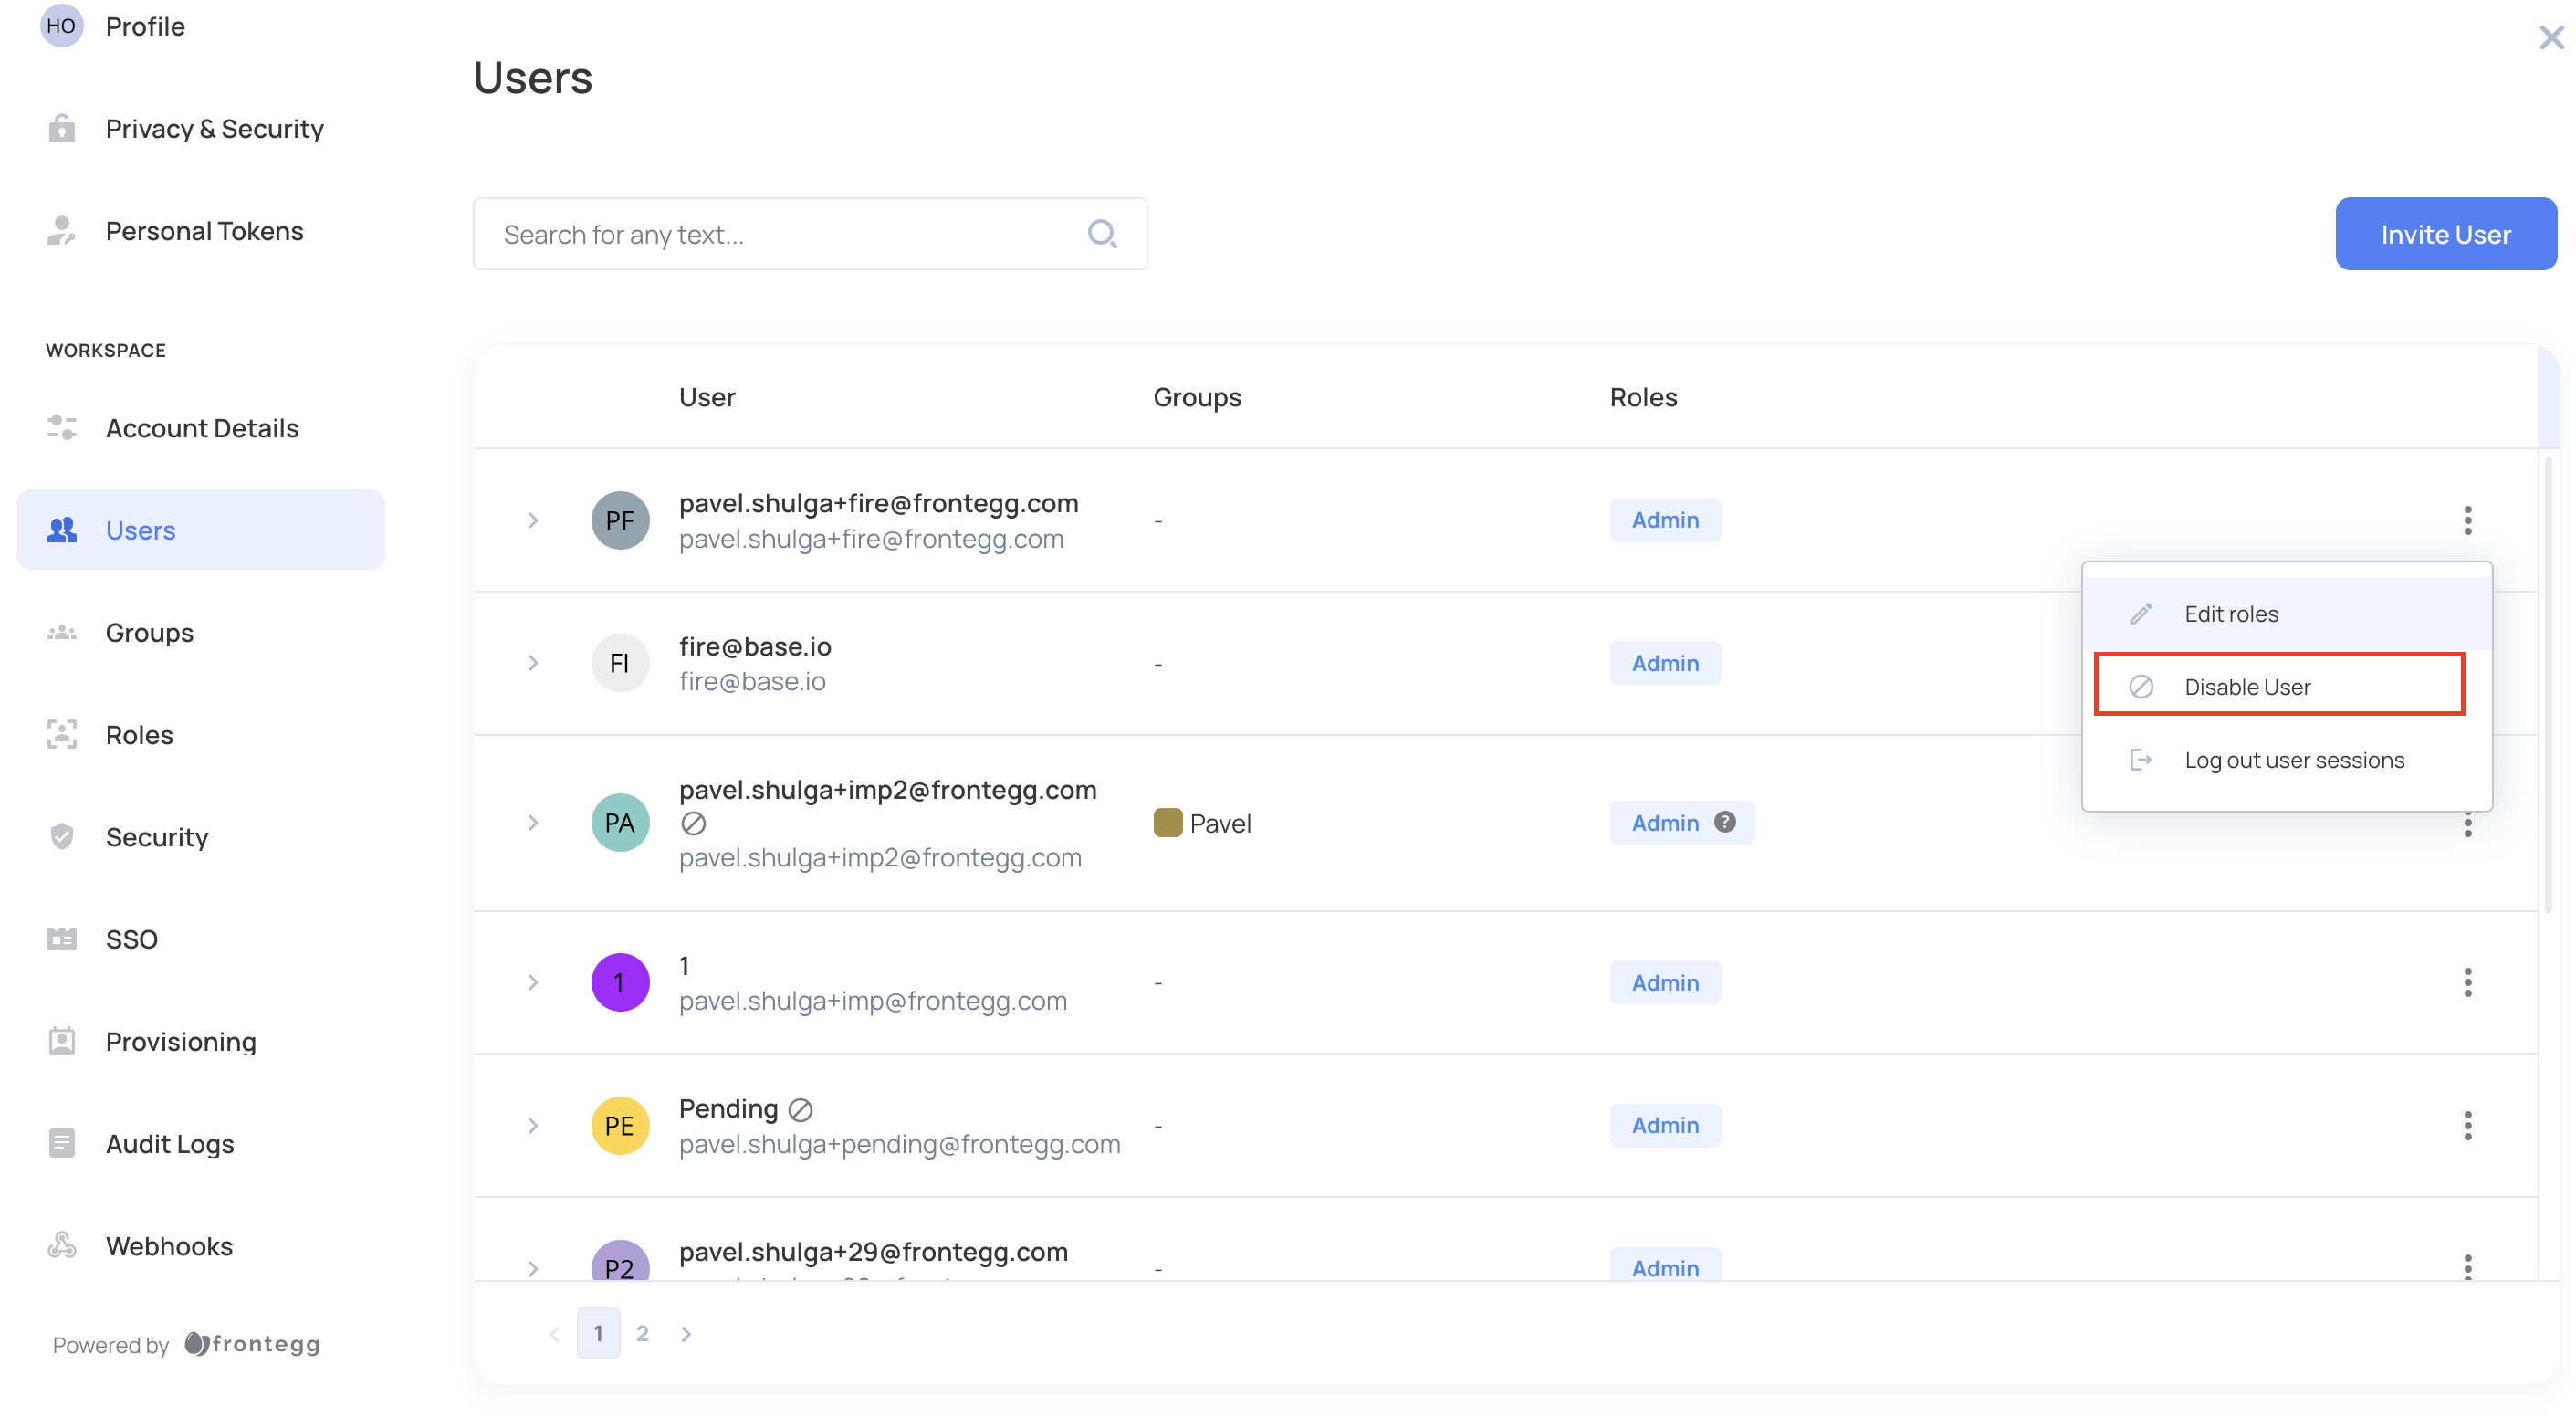
You can allow your users to disable/enable users per account. You can either perform this via API (See below) or assign roles with the fe.secure.write.enableDisable permission. Subsequently, users will be able to go to the admin portal and enable/disable users in an account (via the Workspace-> Users tab). Disabled users won't be able to log into their account when they next try to. This option allows your users to toggle between enabling/disabling other users easily.
Users with
invitedandpending approvalstatusesNote that when users with an
invitedorpending approvalstatuses are disabled from loging-in, then a "Resend activation email" option will not appear as a viable option in the 'more information' (three dots) next to their name.
Disabling/enabling users via API
To disable/enable users via API, you will need to invoke an API request to https://api.{domain}/identity/resources/tenants/users/v1/:userId/{enable/disable}.
To perform the request, use your vendor token as your bearer. In your header, include the following:
frontegg-vendor-id: This is yourclientIdthat you can fetch from your [Environment]-> Env settings -> clientId.frontegg-tenant-id: Go to your [Environment]-> Backoffice -> Accounts -> [name_of_your_account]userId: Go to [Environment]-> Backoffice-> Users -> More details -> userId (you can also copy this field from the users table in your workspace).
User Permissions
You can assign designated user management Permissions to a specific Role. Permissions will mirror the actions users can perform in the Users tab. Refer to the table below for the permissions and their respective keys.
| Category | Permission | Key | Location in Portal | Comments |
|---|---|---|---|---|
| User Management | Revoking user sessions (logging users out) | fe.secure.delete.sessions | Users | |
| User Management | Deleting invite links | fe.secure.delete.users | Users | |
| User Management | Deleting roles from users | fe.secure.delete.usersRoles | Users | |
| User Management | Resending activation email to a non-verified user | fe.secure.write.resendActivationEmail | Users | |
| User Management | Allowing users to enable/disable users from the app | fe.secure.write.enableDisable | Users | |
| User Management | Creating and editing invite links | fe.secure.write.tenantInvites | Users | |
| User Management | Adding users to accounts | fe.secure.write.users | Users | |
| User Management | Assigning roles to users | fe.secure.write.usersRoles | Users | |
| Account settings | Read user application* | fe.account-settings.read.app | Users | *Relevant to accounts with Multi Apps |
| Applications | Assign users to application* | fe.secure.write.appsUsers | Users | *Relevant to accounts with Multi Apps |
| Applications | Remove user from application* | fe.secure.delete.appsUsers | Users | *Relevant to accounts with Multi Apps |
Updated 4 months ago