Prehooks
What are Prehooks?
Frontegg empowers you to control crucial aspects of your user management with prehooks.
Thanks to our comprehensive user management platform, Frontegg records and monitors vital user-related processes, including but not limited to user signup and user invites. Prehooks help you devise the desired responses after pivotal events happen in your app and gain the utmost control over your users' flow.
By configuring prehooks, your application receives a REST call whenever the associated event occurs. This call - coupled with the ensuing response - allows your application to make informed decisions. For example, by leveraging prehooks, you can dynamically determine whether to proceed with a specific user management flow or terminate it— all based on the logic embedded within your application.
Prehook Usage
When should prehooks be utilized? Prehooks can be set in various scenarios where you wish to control the continuation or termination of a user's flow (See the last section of this guide for examples).
Prehook use cases may include the following:
- Preventing user signup if a user's email is listed on a denied list.
- Preventing new member invitations based on a pre-set number or trial period.
- Adding custom claims to JWTs.
- Preventing users to signup from from specific IPs.
When a user opts to login, you can set a triggered event prehook, upon which the user is enrolled in a specific scenario, according to the prehook's configuration:
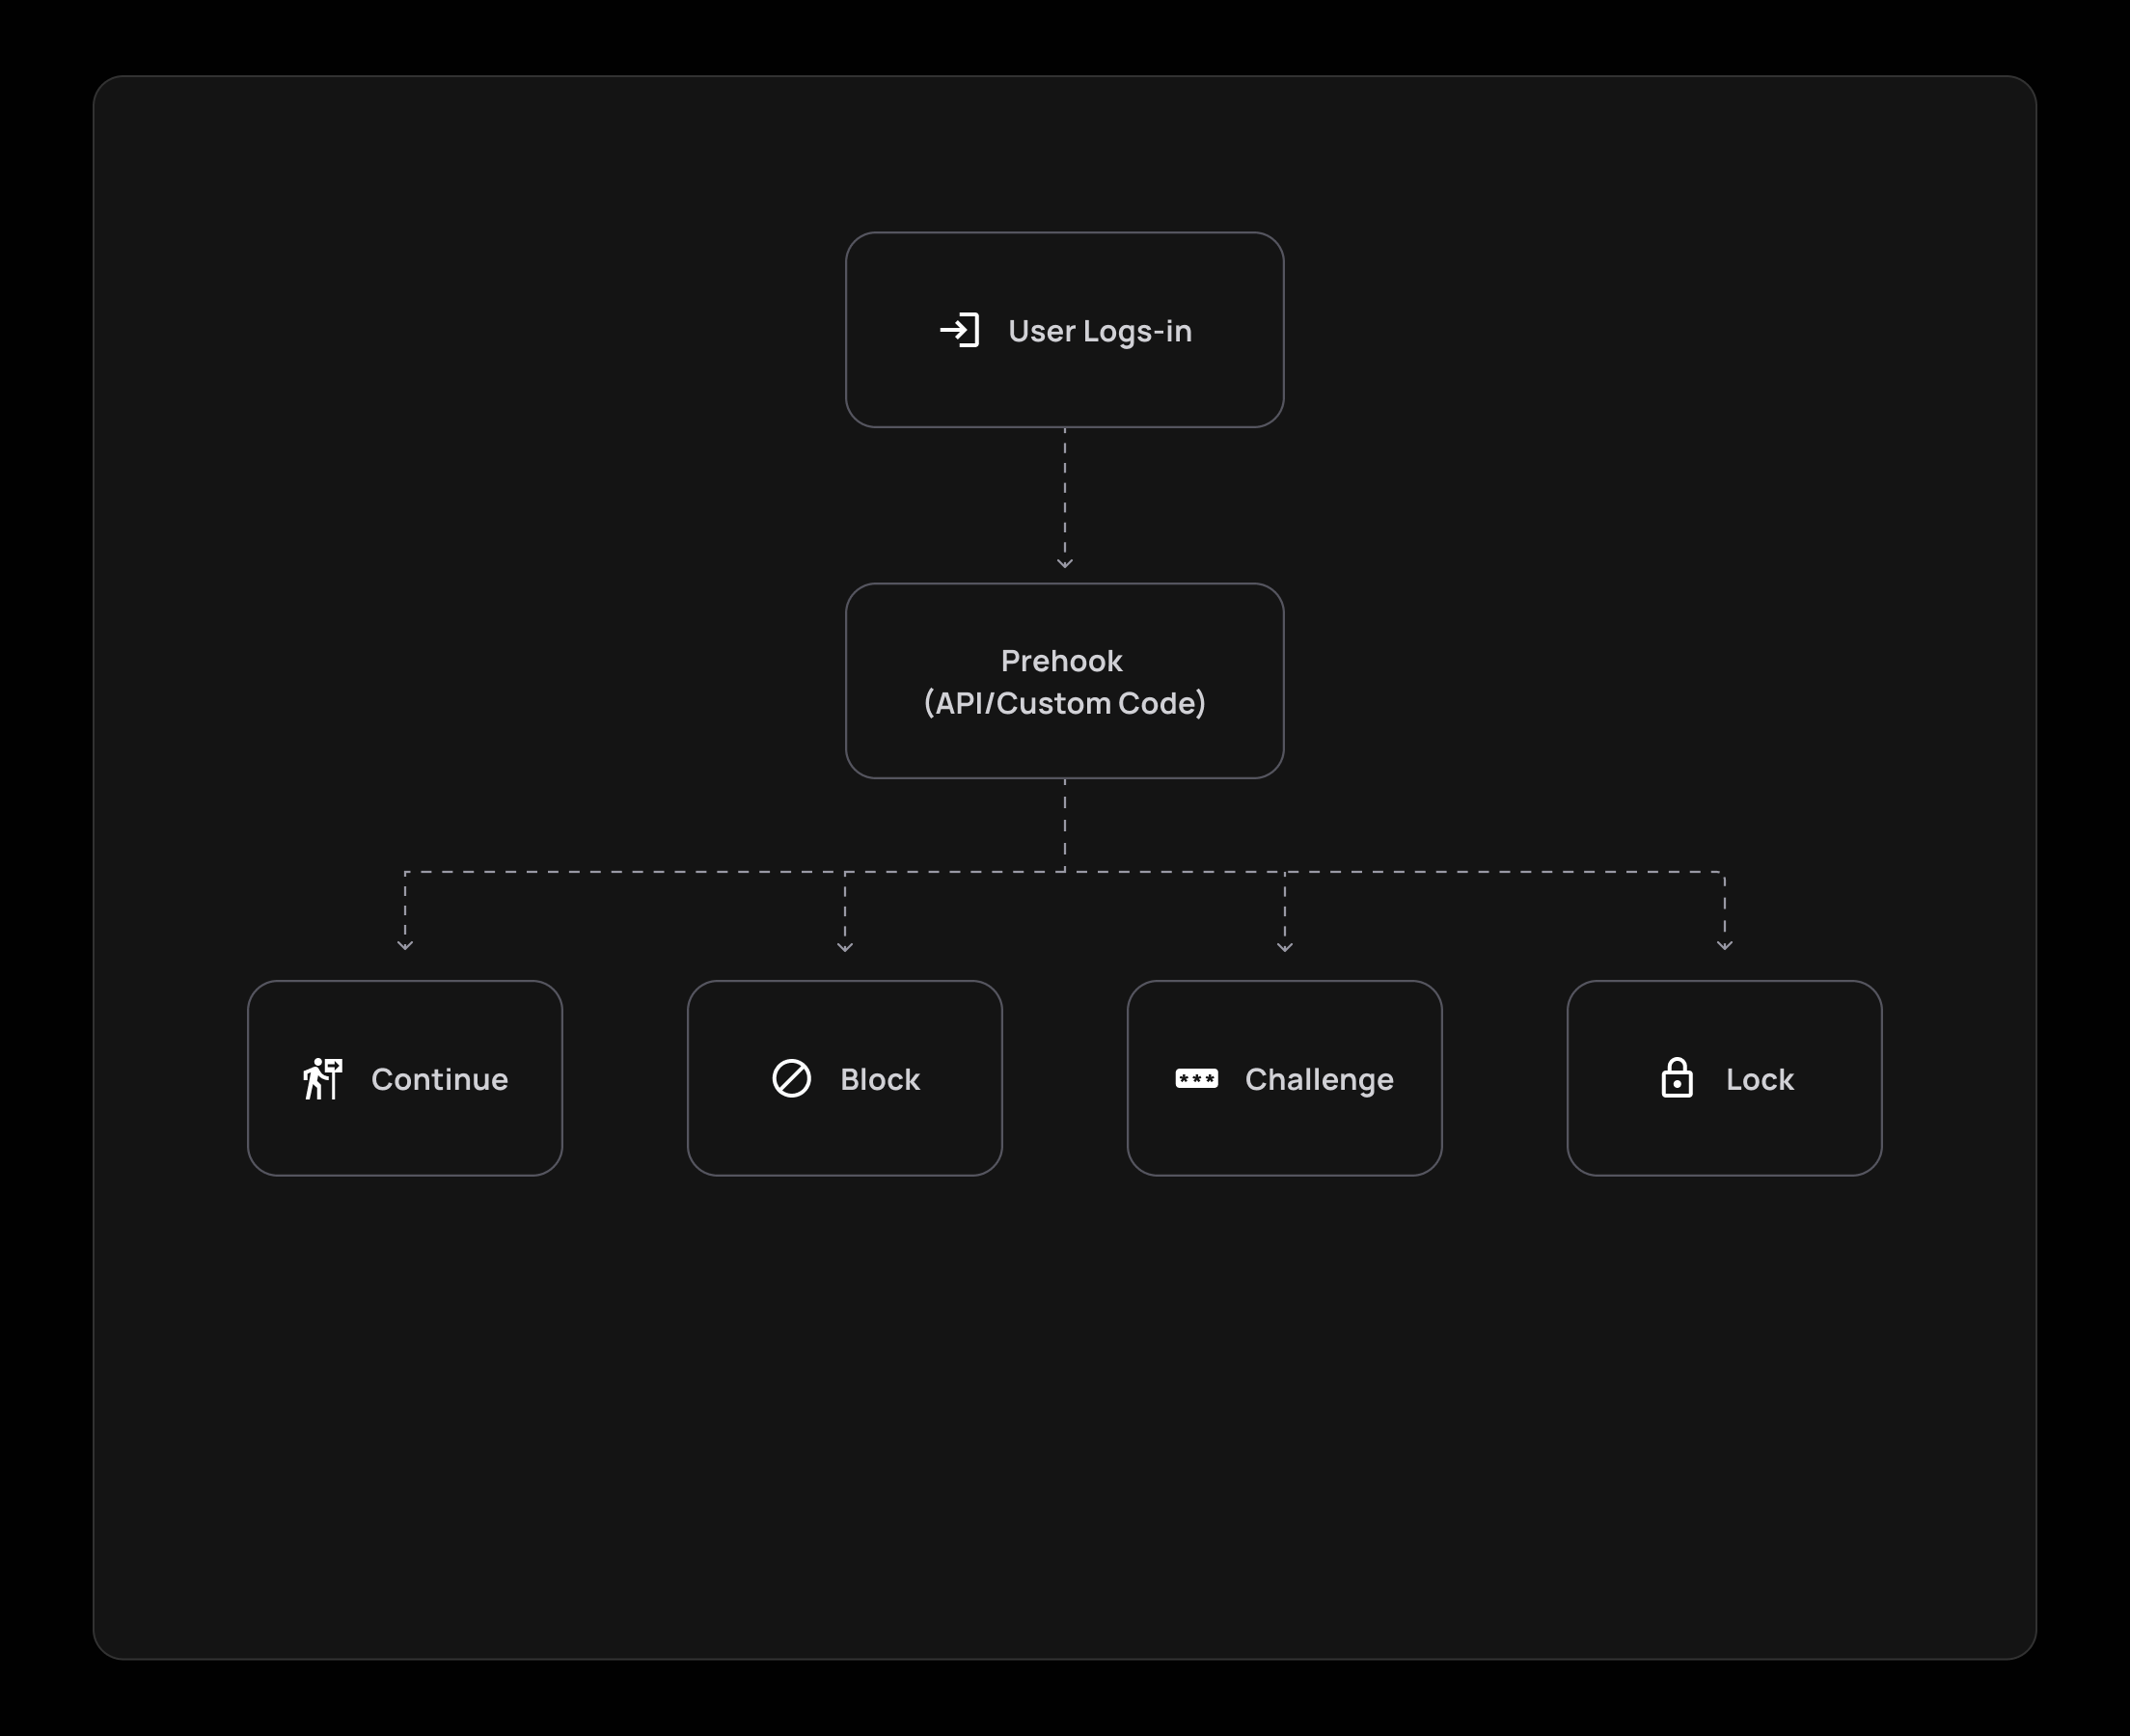
Prehook Verdicts
When a user is enrolled in a prehook, you can choose which of the four possible verdicts for a prehook will be enabled:
- Continue: The user is allowed to proceed with the flow if he complies with the prehook's requirements.
- Block: The user is not compliant with the flow requirements and is thus not allowed to continue with the flow.
- Challenge: The user falls within the rules that require a challenge (usually for enhanced security measures).
- Lock: The user is locked when trying to perform a specific flow/action. This verdict can be used in cases such as locking users after a long period of inactivity or if a user entered the wrong password multiple times in a row.
The verdict field can include the following enums: challenge, allow, block, lock, depending on the logic you wish to enact for your prehooks, like so:
- JWT generation prehook example:
{ "continue": "boolean", // deprecated (refer to documentation) "verdict": "allow | block", "error": { "status": "number", "message": "string[]" }, "response": { "claims": { "tenantId": "string", "customClaims": "Record<string, unknown> | null" } } } - User Open ID Connect authentication prehook example:
{
  "continue": "boolean", // deprecated (refer to documentation)
  "verdict": "challenge | allow | block | lock",
  "error": {
    "status": "number",
    "message": "string[]"
  },
  "response": {
    "user": {
      "firstName": "string | null",
      "lastName": "string | null",
      "email": "string | null",
      "roleIds": "string[] | null",
      "metadata": "JSON | null",
      "profilePictureUrl": "string | null"
    }
  }
}
Check out the videos below to see how prehooks help limit sign-ups for a limited number of users and user invites:
Using Lambdas in Prehooks
We strongly advise to refrain from using Lambdas in Prehooks (unless your Lambdas are pre-warmed), Since cold Lambdas usually have a latency time that surpasses the 5 seconds prehook timeout. If your business case requires the use of Lambdas, please contact us to find the best solution.
Step-By-Step Prehook Setup
Subscribing to prehook events is done in 3 simple steps:
Step 1: Create a Prehook Event
The full flow can be seen in the following video:
Create a Prehook Event
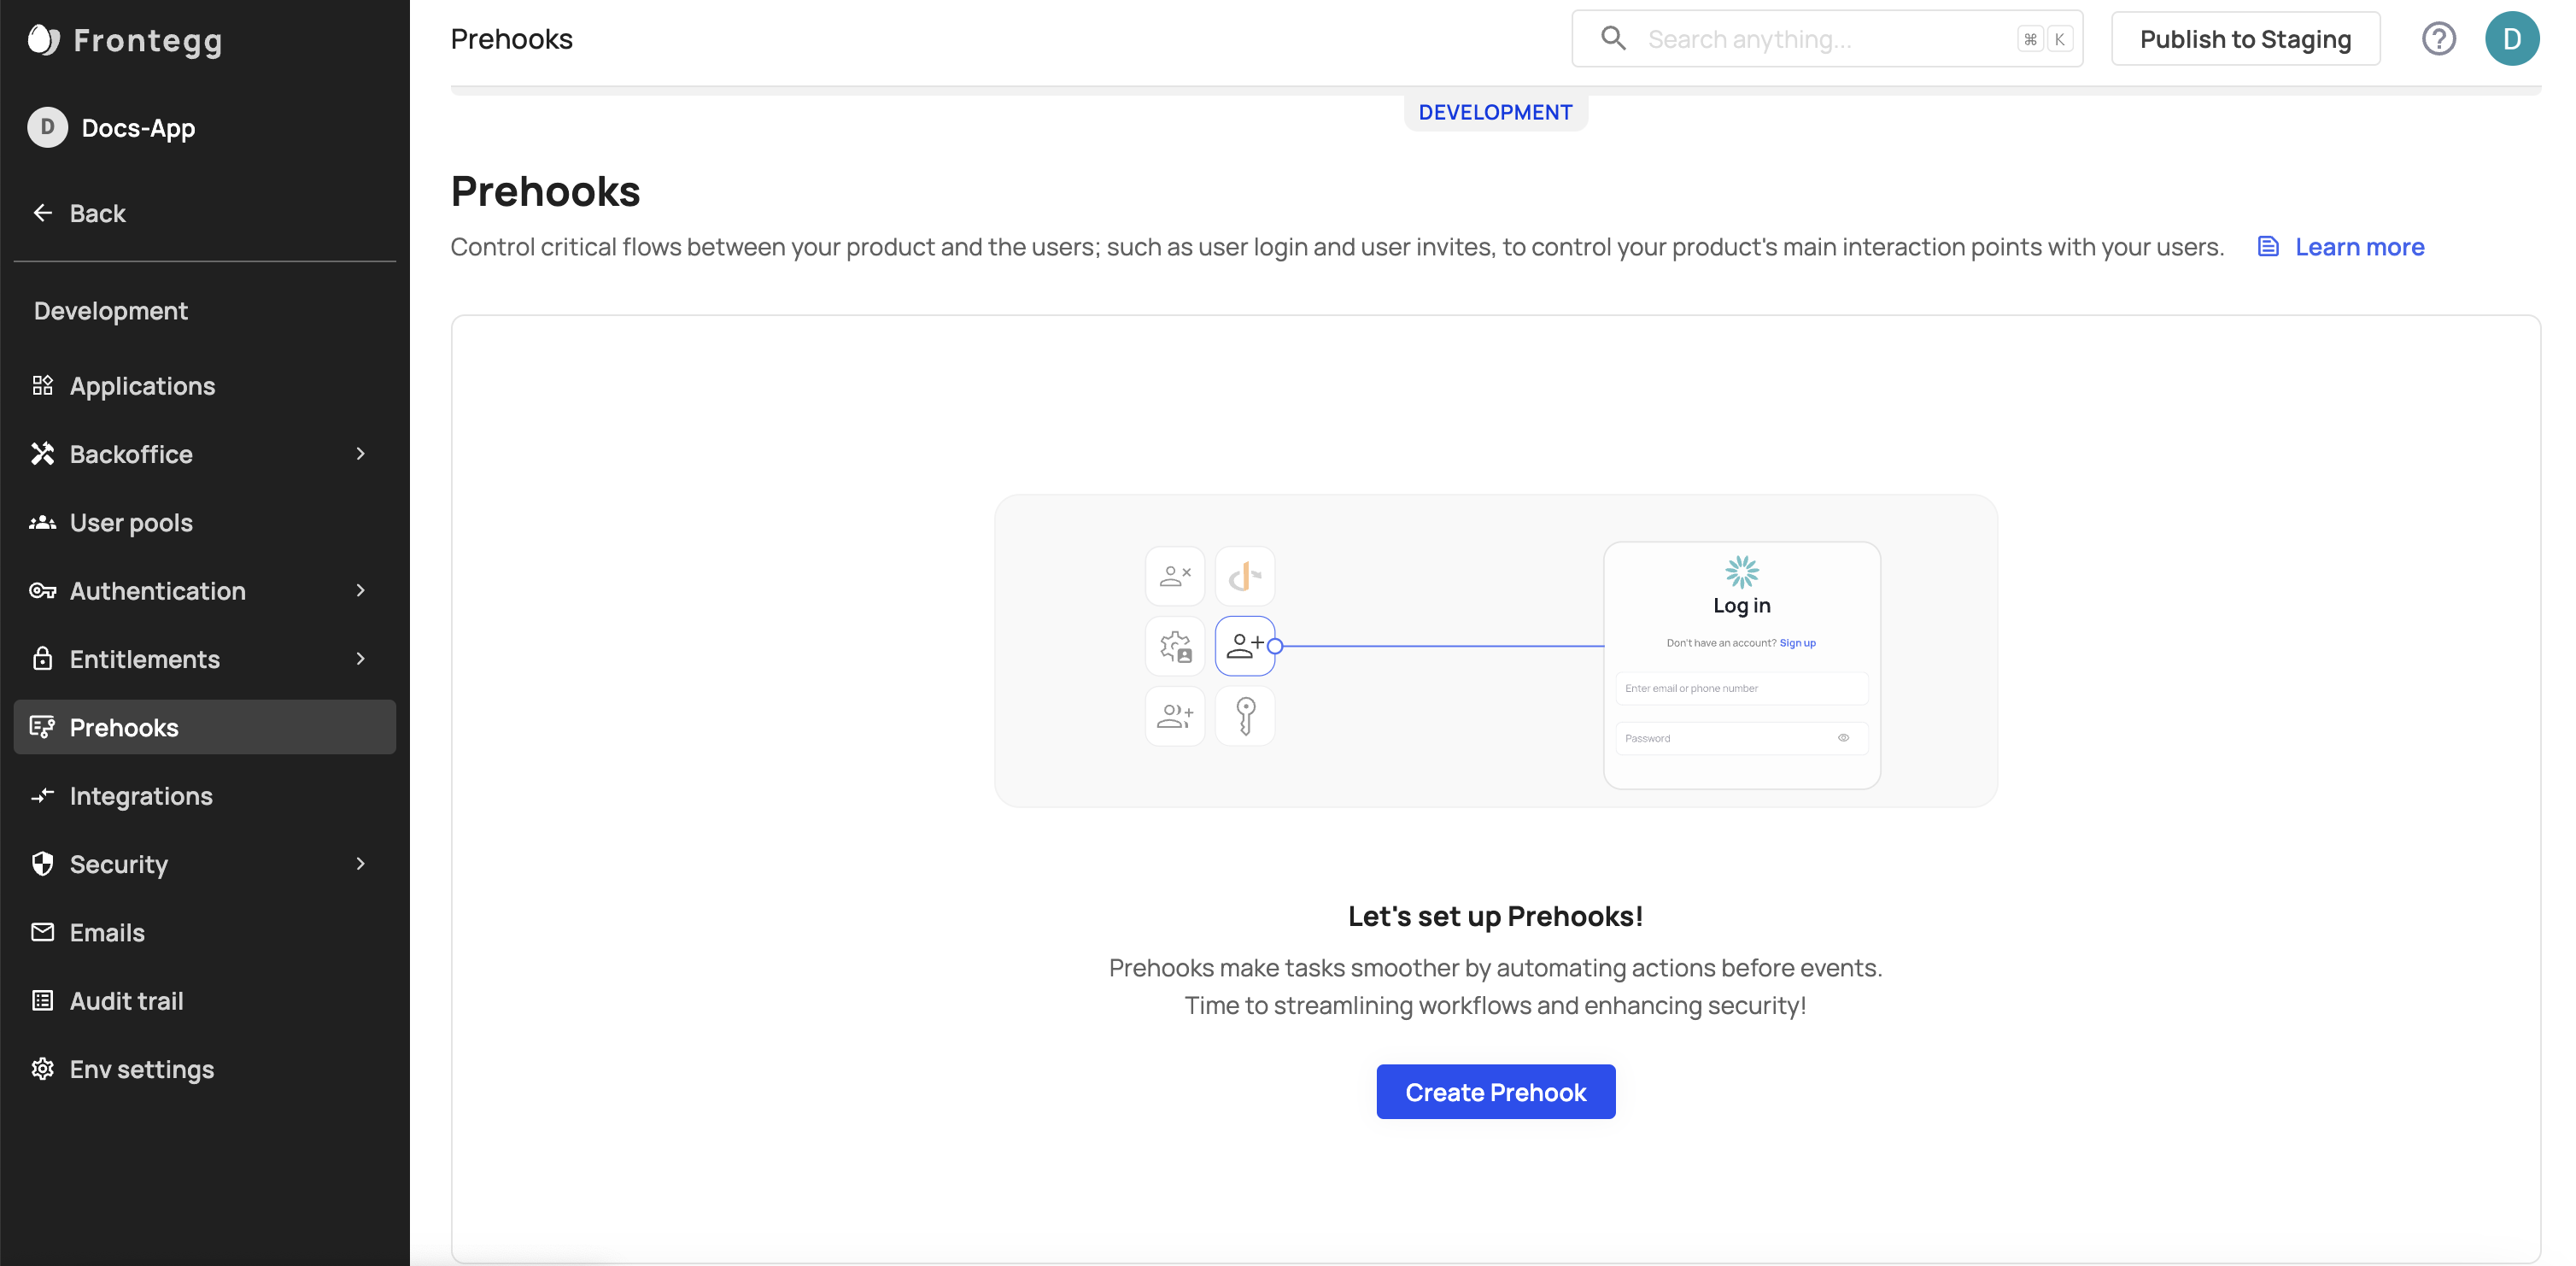
In your Frontegg Portal, go to [Name of Environment] ➜ Prehooks.
- Click on the Create Prehook button.
Prehook Events
A list of all supported prehook events can be viewed here.
Enter Prehook Details

Set your prehook information, and choose your prehook type. The Code type is either an API or a Custom prehook.
- Select a triggering event for your prehook.
- Insert your preferred display name and description.
- The URL should be the address where you will receive the prehook data. The URL acts as an address where Frontegg sends a JSON message when the assigned event happens.
- For the secret key, enter a value that is confidential (see note).
Secret Key
Frontegg generates a header called
x-webhook-secretand signs the prehook request using the secret. For enhanced security, Frontegg recommends that you use the prehook secret.
Setting Your Fail Methodology
In case the call for the hook's endpoint fails (response 500+ or request timeout, which is set to 5 seconds), you can set your fail methodology:
- Fail open: if the call failed or timed out, the operation will continue.
- Fail close: if the call failed or timed out, the operation will stop.
You can also customize the timeout setting of your prehook if it needs to serve longer operations.
Test Prehook
To create the hook, test your prehook to verify everything was setup correctly.
Click the run test button to verify, then await the response. You should see the prehook data you will receive and the response Frontegg expects from your application. If the response is valid, your prehook is ready to go, and you can toggle the Active button.

Prehook Testing
Before testing your setup, make sure you are familiar with working with prehook events, below.
Error Field
Note that the expected data includes error. The
errorfield is required in your response to Frontegg only if you setcontinueto false. Also, you must set the errorstatusbetween 400 and 499.
Working With Prehook Events
You may want to adjust the configuration of prehooks when subscribing. Read on to learn how to work with prehook events.
JWT Custom Claims
If you want to customize the data encoded by the JWT, you need to subscribe to a prehook event for JWT Generation. This will allow you to intercept the JWT and customize the JWT claims.
For JWT Generation prehooks, Frontegg sends a new prehook event every time the hosting application requests a new JWT.
The prehook event sent to the hosting application contains whatever data Frontegg has stored for each claim in the table below.
| Key | Value |
|---|---|
| sub | string |
| tenantId | string |
| roles | string[] |
| permissions | string[] |
| metadata | Record <string, any> |
| type | userToken | userApiToken | tenantApiToken |
To override the default claims, include the data that you want to change in your prehook response.
You can include the following claims in your prehook response:
| Key | Value |
|---|---|
| tenantId | string |
| permissions | string[] |
| customClaims | Record<string, unknown> | null |
Customizing JWT Claims
The JWT will contain the default data unless you customize the JWT claims.
Test the JWT Generation prehook event like so:

JWT Availability
JWT custom claims are available throughout the JWT's lifespan. To change JWT claims, you need to refresh the token.
Single Prehook View
After testing and creating your prehook, you can view and adjust its settings. Each prehook has a Logs tab where you can see the triggered events associated with that prehook. Note that you can't change the Trigger event for Custom Prehooks after the connection is initiated.
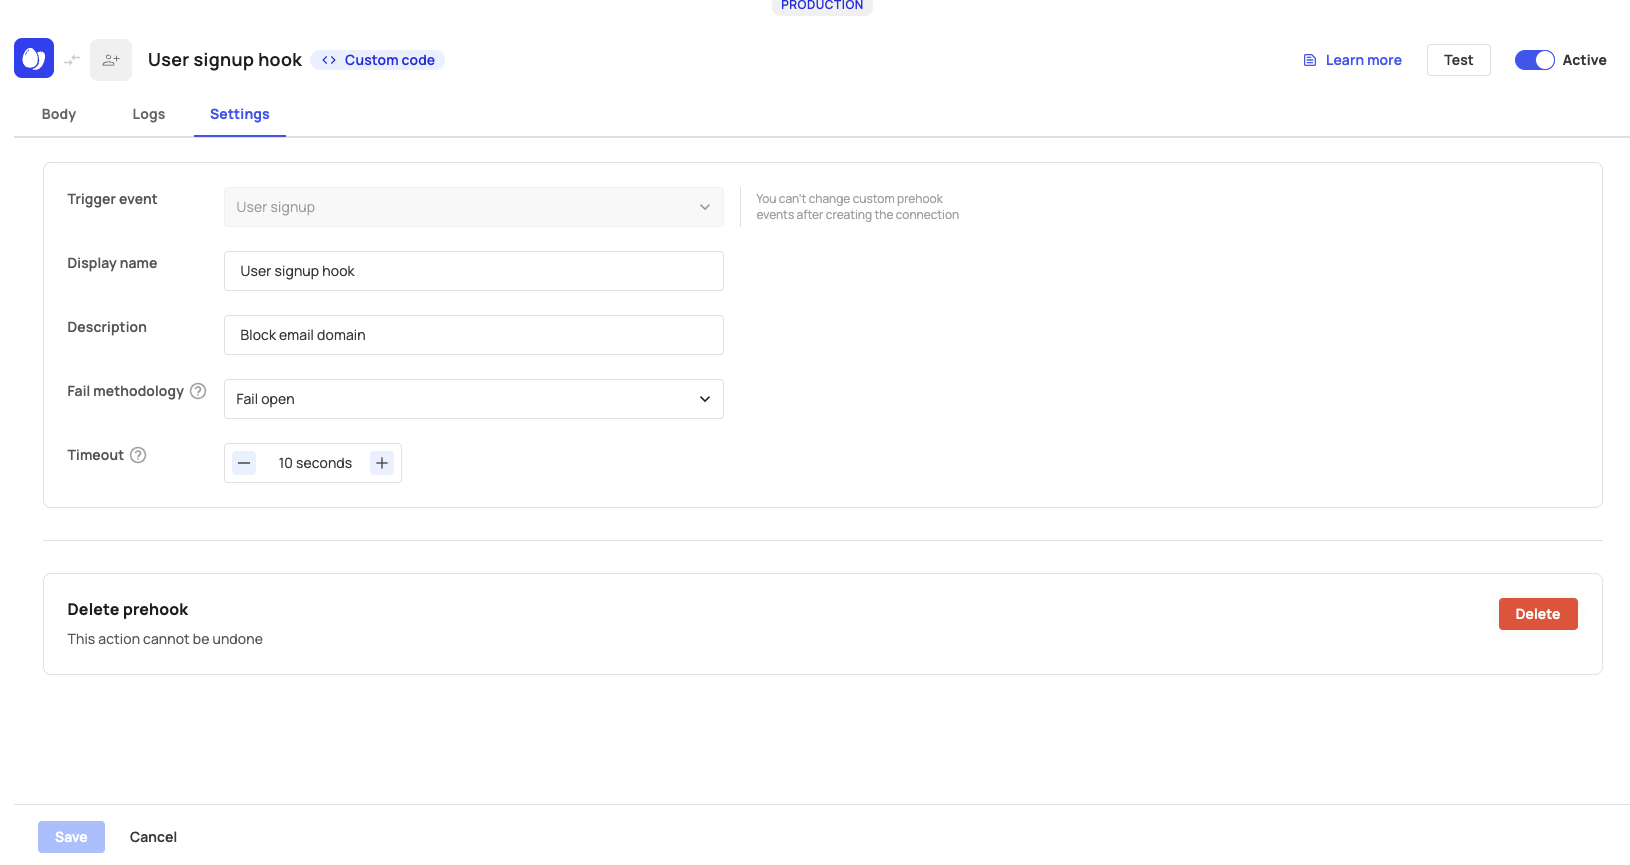
Prehook Settings Tab
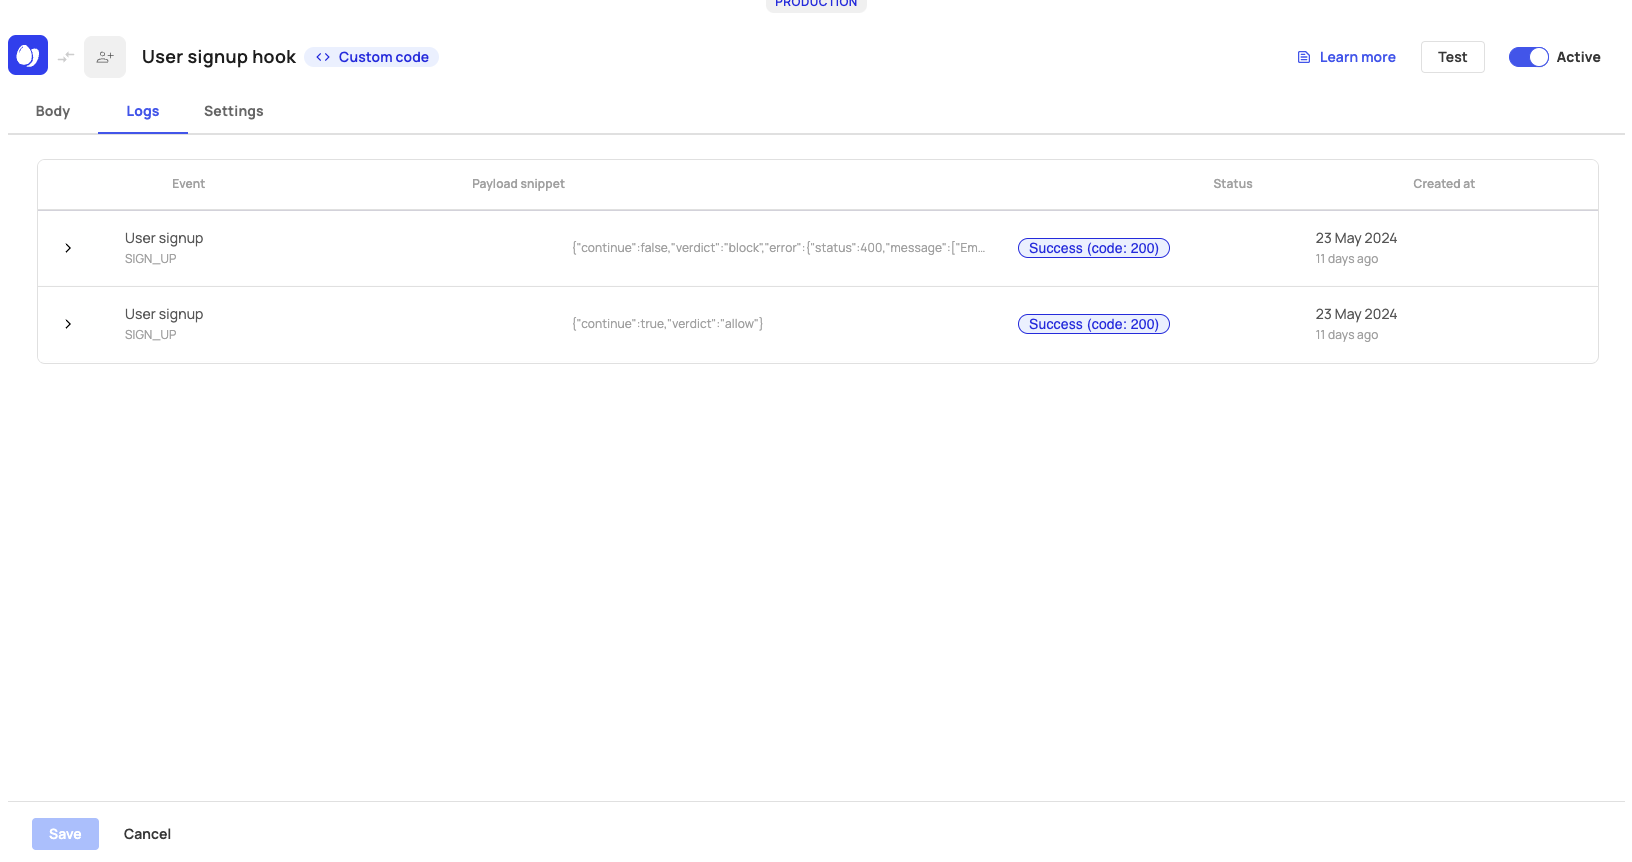
Prehook Logs Tab
Prehook Event List
The following list shows all available events that can be associated with prehooks:
| Event | Event Key | When do we send it? |
|---|---|---|
| User signup | USER_SIGNUP | Local/Social/SSO sign ups |
| User invite | USER_INVITE | On every user invite |
| User update | USER_UPDATE | On every user update |
| User delete | USER_DELETE | When user is removed from tenant/completely deleted |
| JWT Generation | JWT_GENERATION | On every JWT generation |
| Social login exchange | SOCIAL_LOGIN_AUTH | On each social login token exchange |
| Open ID connect authentication | OIDC_AUTH | On each OIDC authentication exchange |
| SAML authentication | SAML_AUTH | On each SAML authentication exchange |
Prehook Use Cases
Prehooks can be linked to multiple events. Check out the following use-cases for a step-by-step implementation.
Limiting sign-ups to a specific number of users:
Limiting user invitations:
Updated about 1 month ago