
What are Roles?
Frontegg's role-based authorization, grounded in Role-Based Access Control (RBAC), simplifies the process of managing user access. In Frontegg, user access to information and user's ability to perform actions within your application are determined by their roles. Users can have one or more roles, and each role can have a subset of permissions associated with it. Each permission grants the ability to perform certain actions within your application.
Designing roles in Frontegg is both intuitive and straightforward. We do offer several unique features, which we will expand on below.
Getting started with roles
Roles in Frontegg exist per environment [ENVIRONMENT] → Entitlements → Roles and are linked to Permissions, thus granting users with specific roles their subset permissions.
By default, we've configured two preset roles in your portal Admin and Read Only. You can choose to use, edit, or delete them.
the roles tab is where you can add, view, edit or delete roles. The tab showcases all roles created by Frontegg (Admin and Read only roles) and by you (custom roles).
- Search bar - gives you the option to search for a specific role
- Filters - you can filter roles by levels
- Delete a role - use the three dots on the right side of each role line to delete a role.
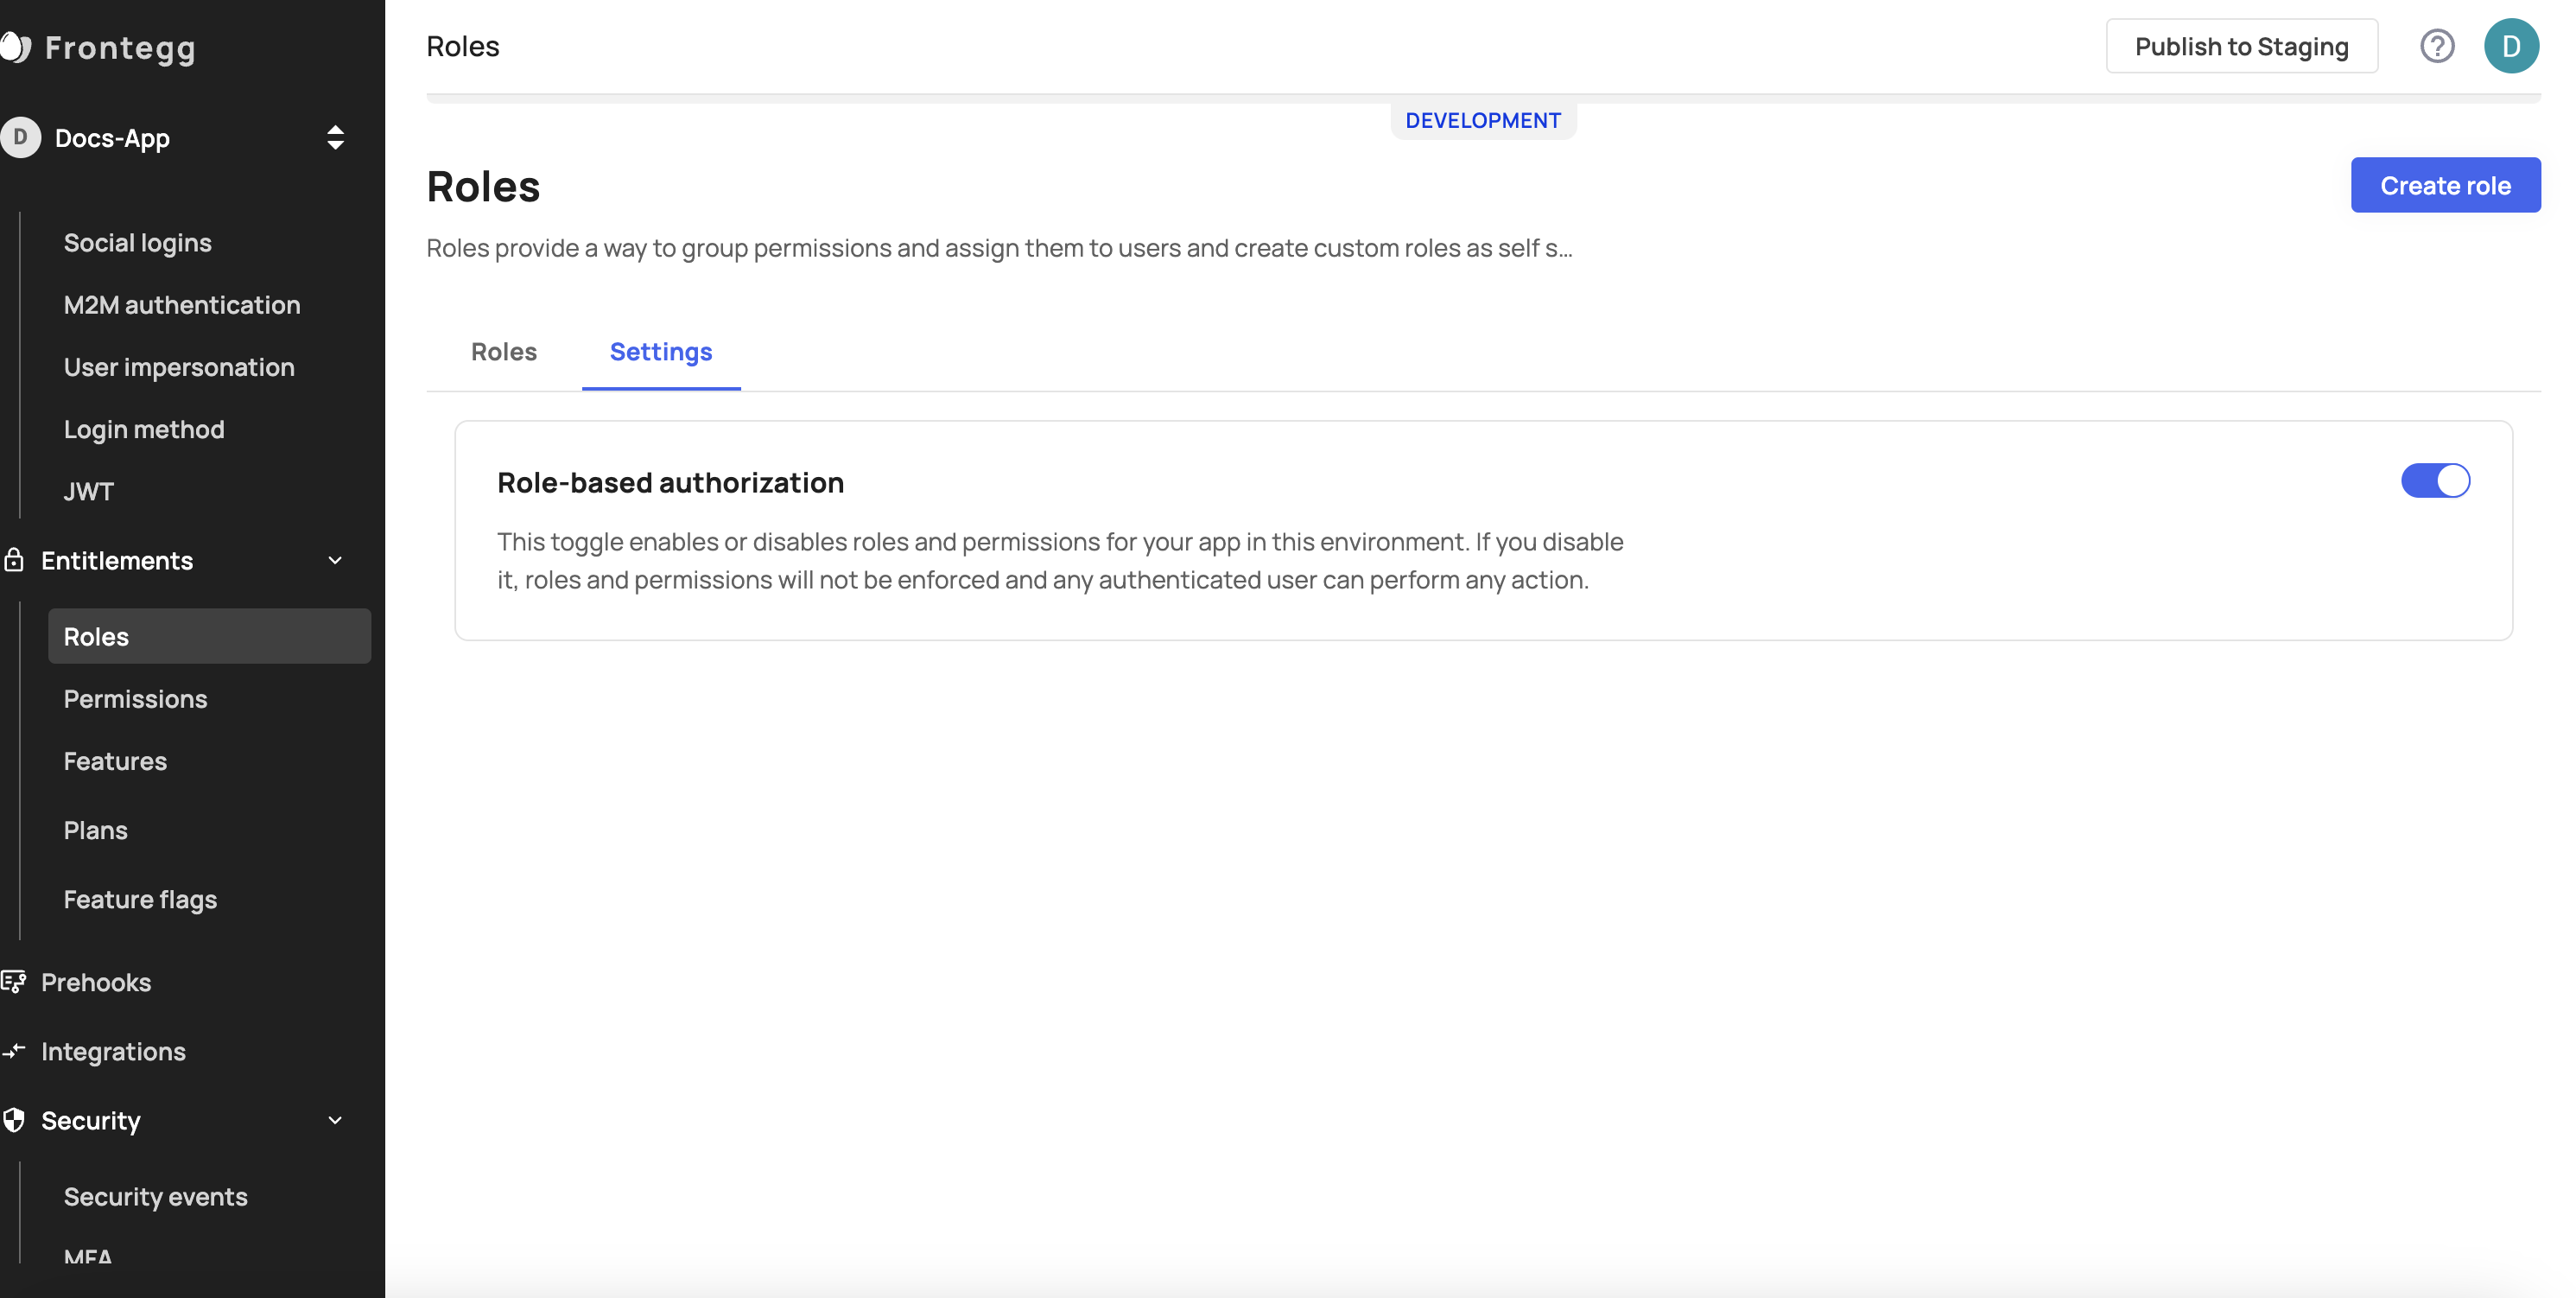
Enabling roles and permissions
Before getting started, ensure you’ve enabled the roles and permission option under the Entitlements → Roles → Settings → Role-based authorization.
Managing roles
You can set roles and assign them to users. This action can happen in two different way— you can set them up as the vendor (management) or your customers can configure and set theirs up by themselves (self-service). Both instances can also be performed via API (see last section).
In the Backoffice - When you will add users to different accounts.

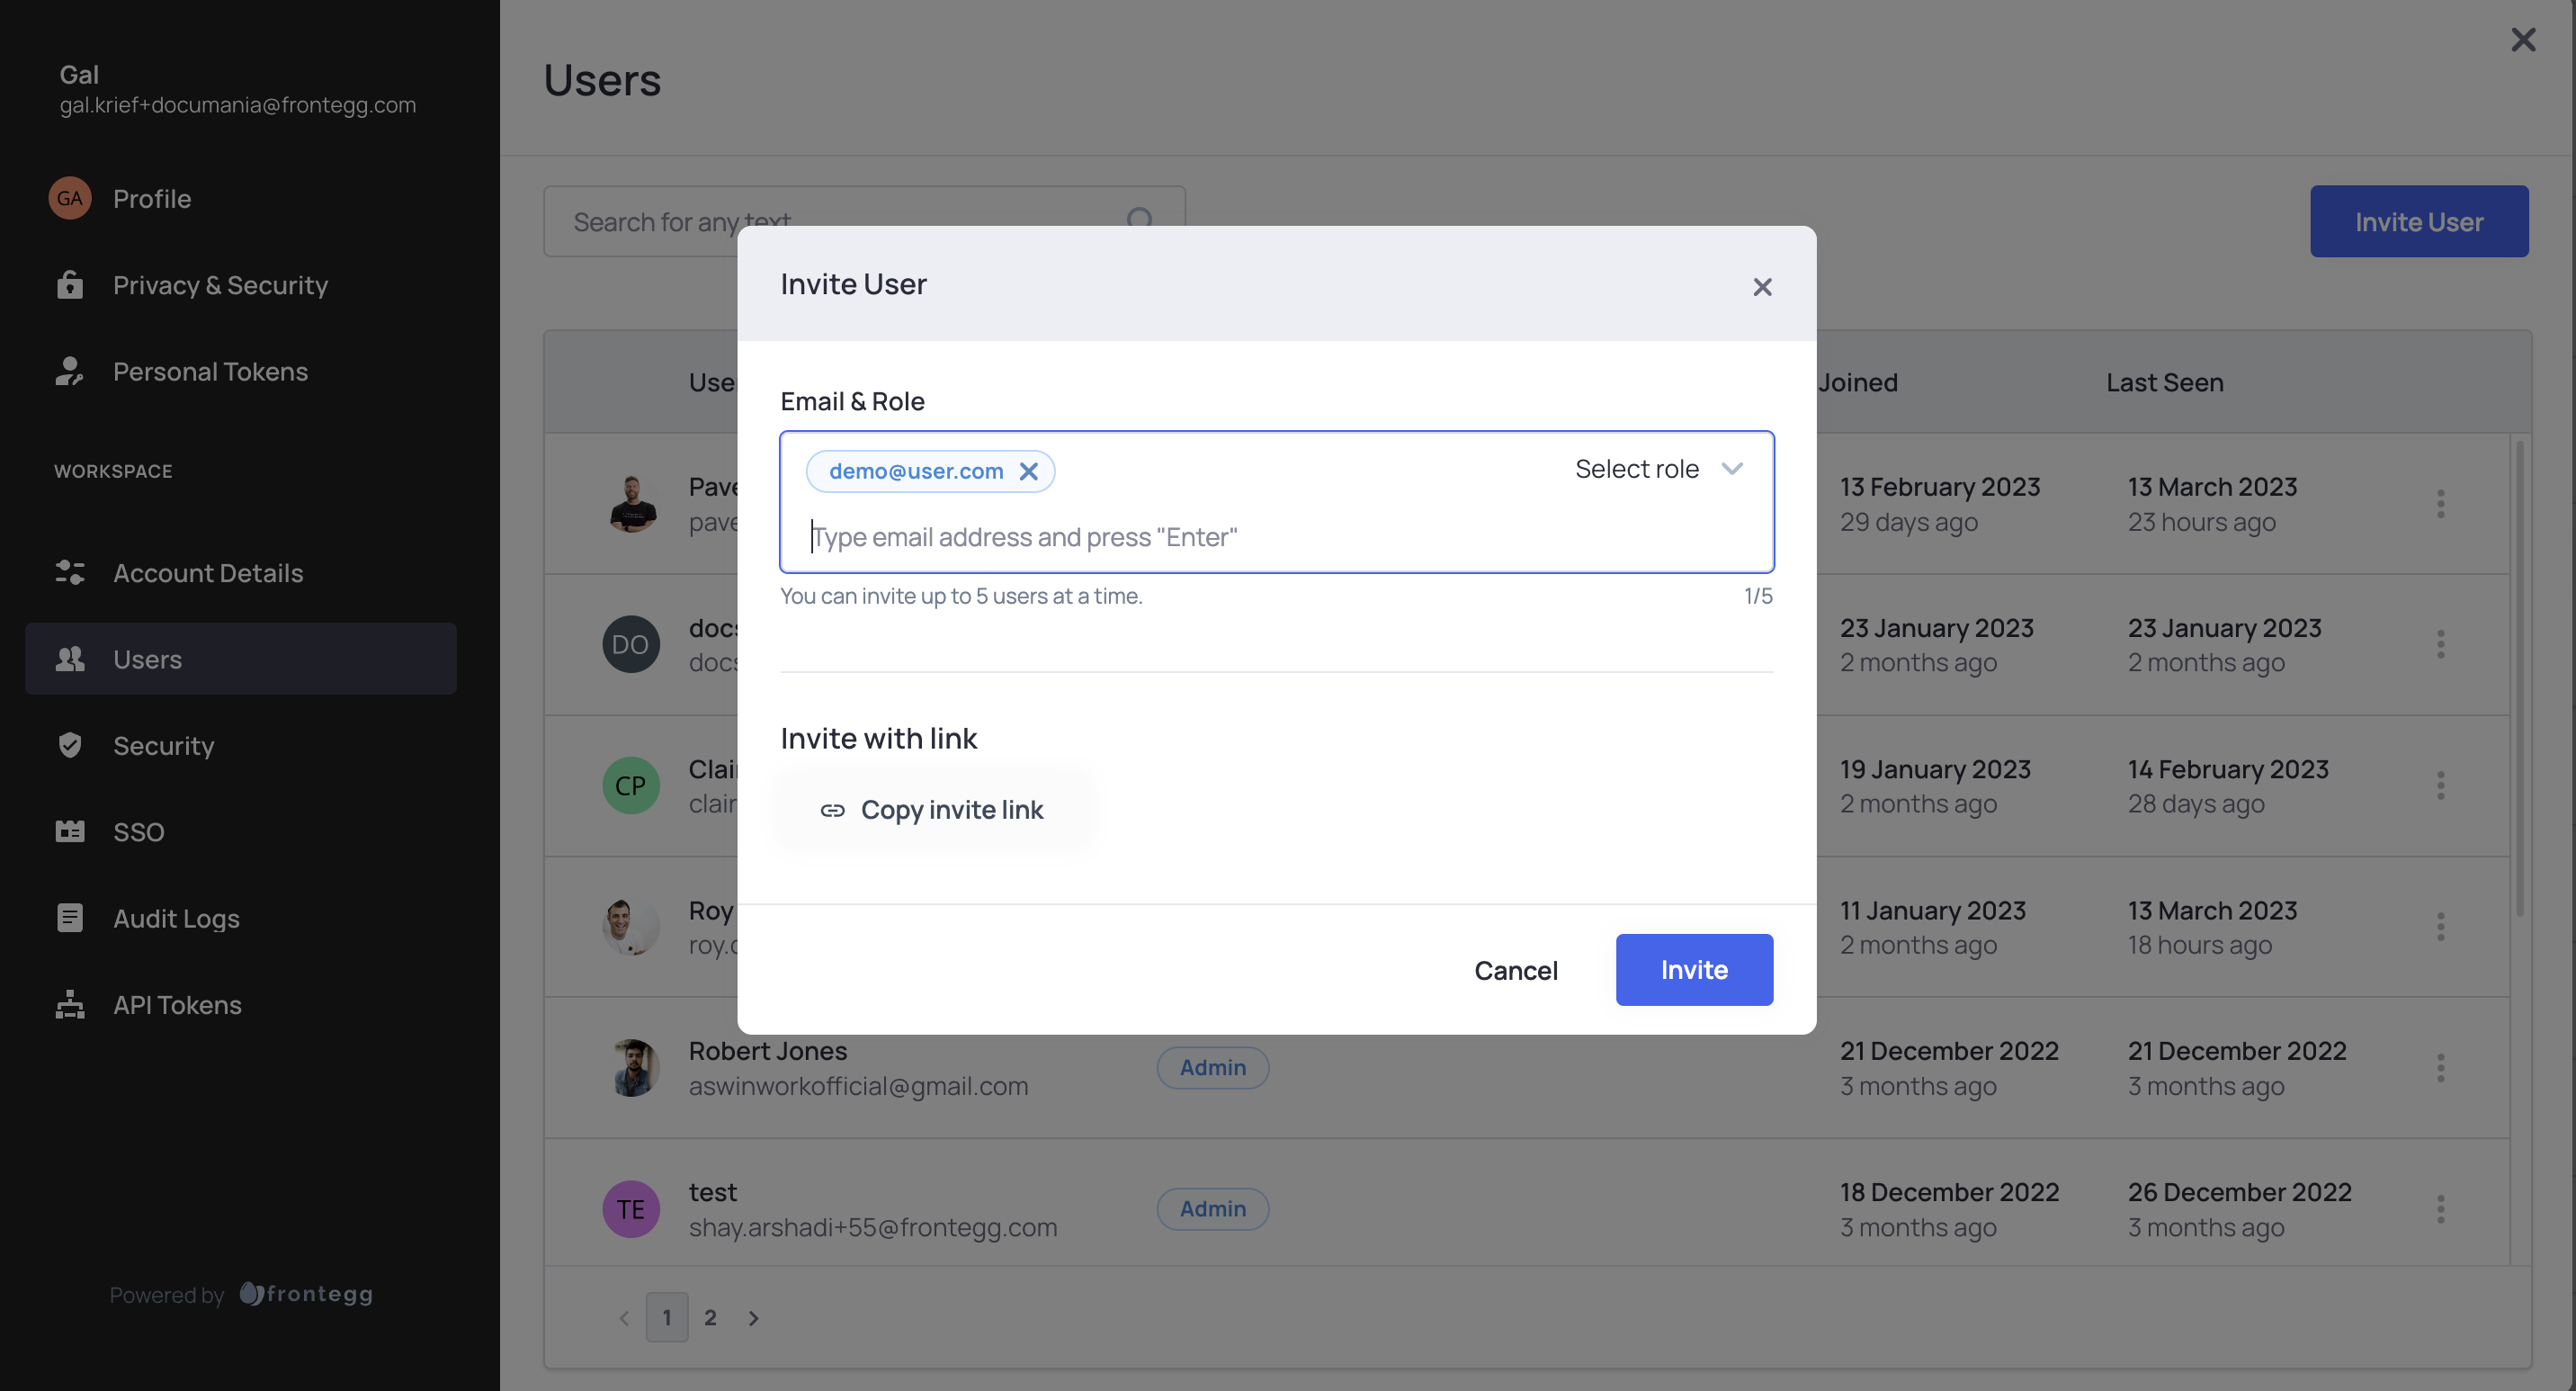
By your customer within the admin portal - when inviting new users. Users must assign the invited user a role.
Creating a new role
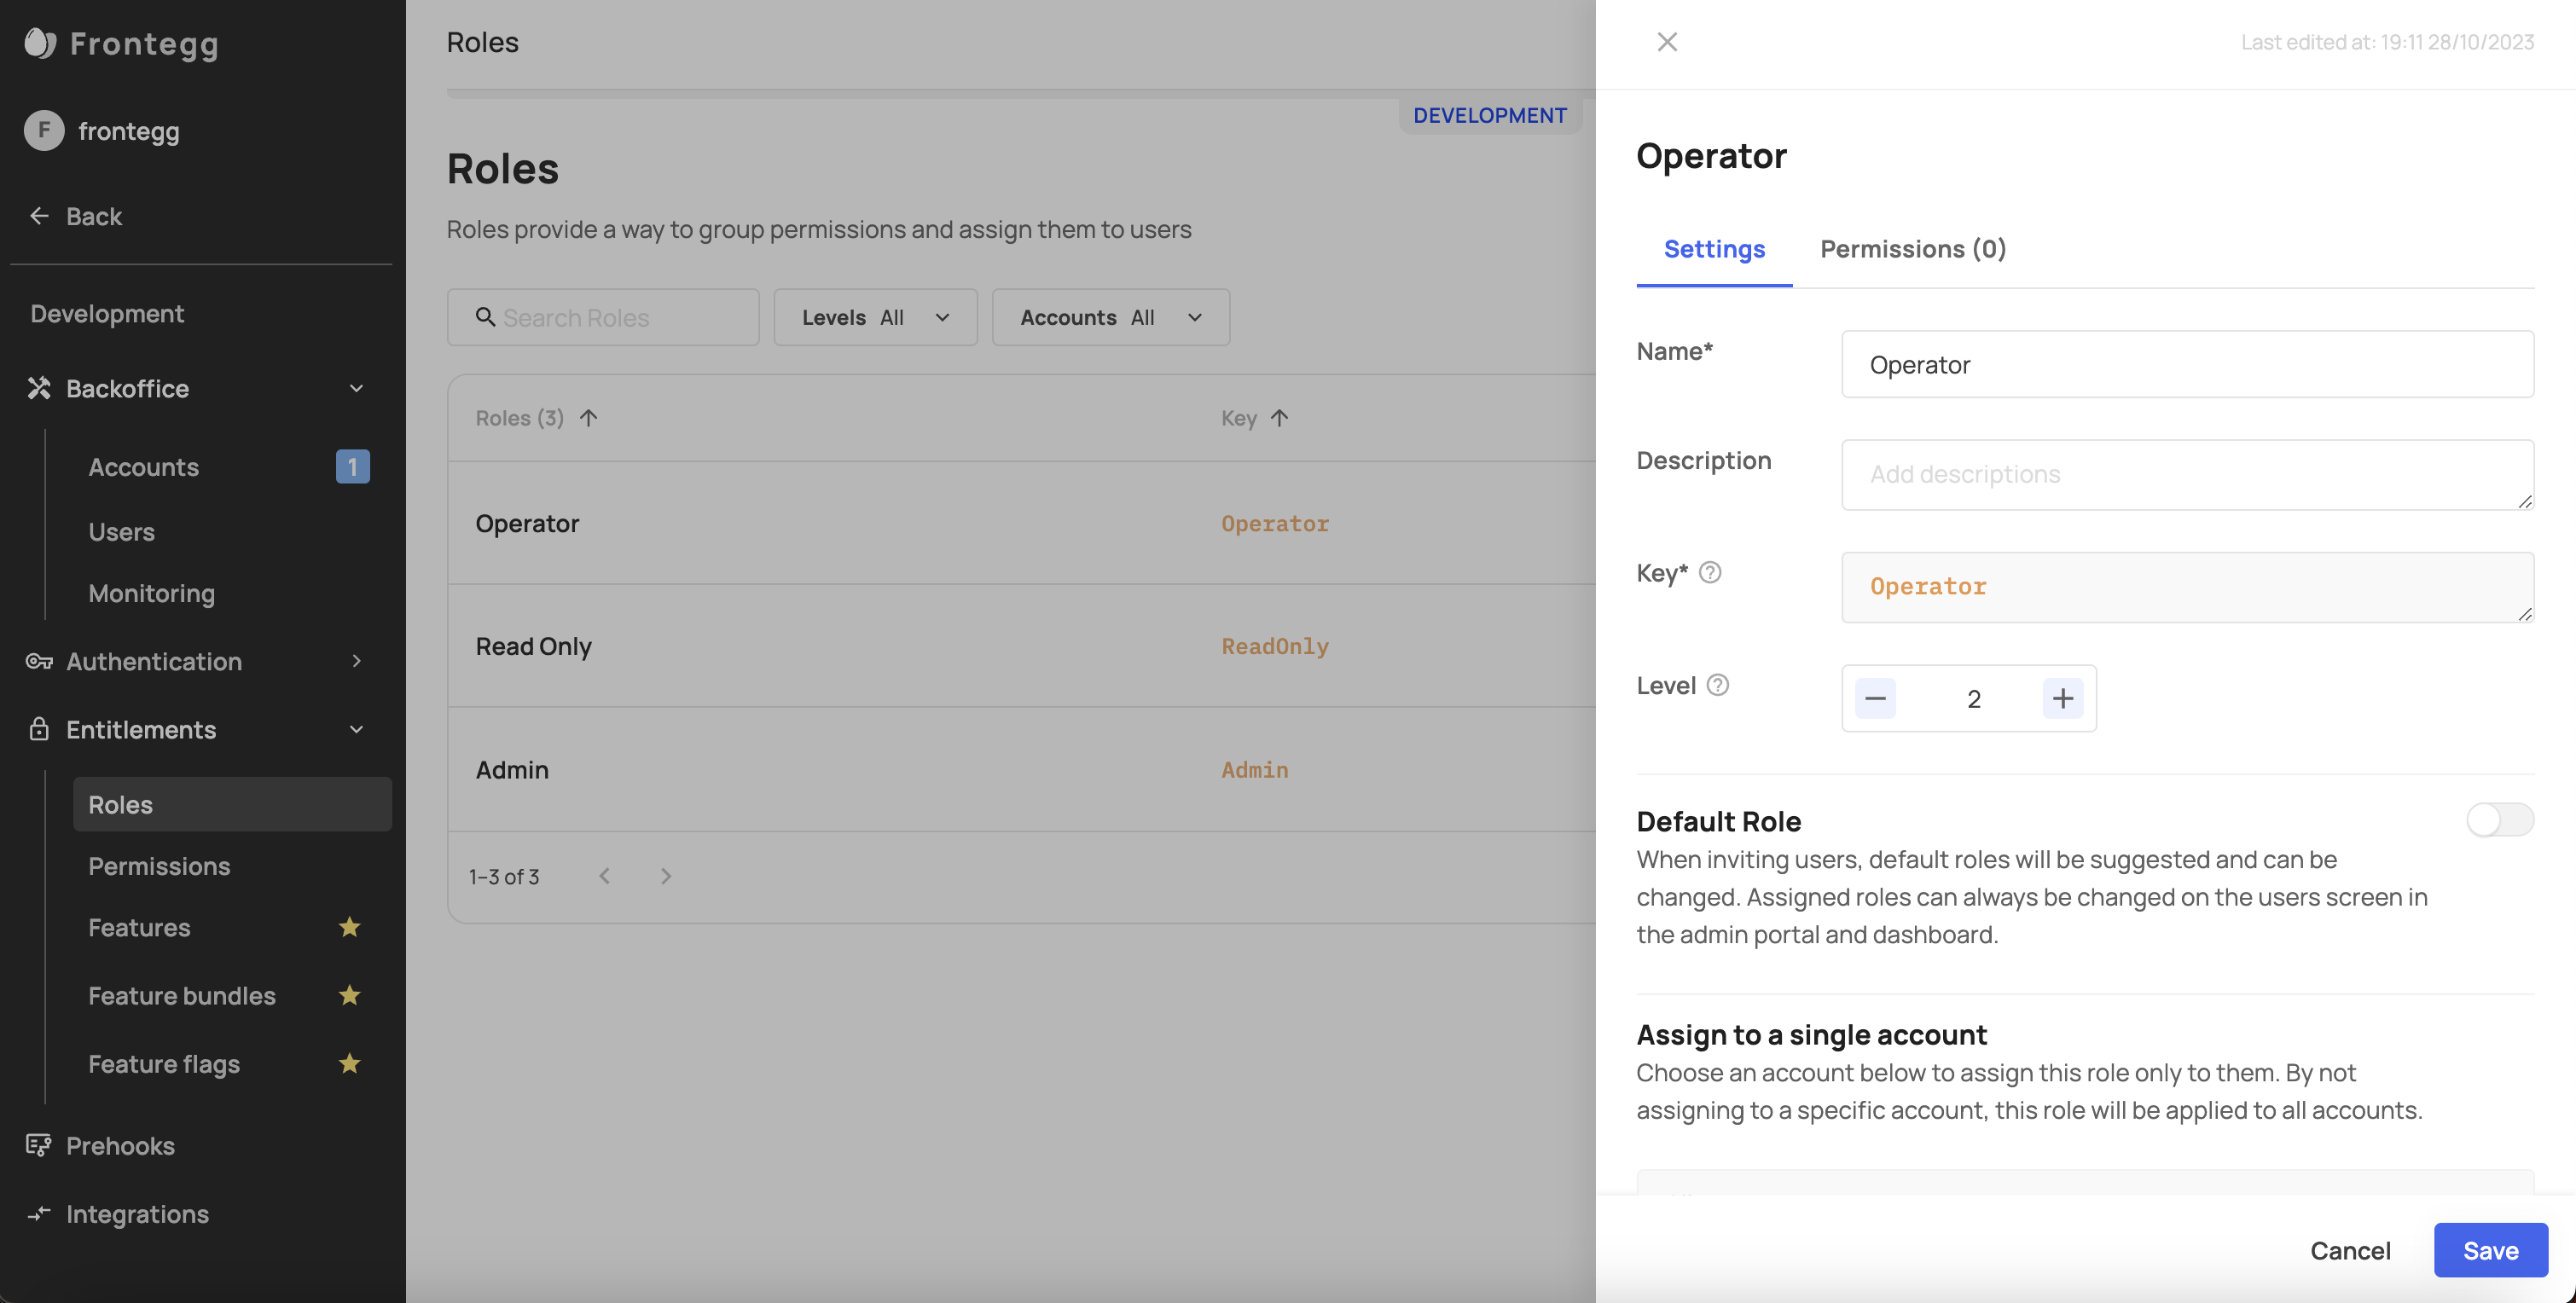
Let's breakdown the process of creating a new role. To create a new role, click the "Add new role" button.

When creating a new role, note that you have a Key and Level fields. The Key field represents the identifying key that will be stored in the user's JWT and will be associated with the role if you wish to use it as an attribute, possibly for Feature Flagging. The Level field will indicate the level of this role and will allow the person holding it to invite or assign roles only to users with an equal or greater level than theirs.
Create a new role
Default role
Make sure you have at least one role you include as "Default". This role will be added to a user when signing up.

Role Properties
| Property | Description |
|---|---|
| Name | This property will be presented to all users when inviting others on the Frontegg portal within the Backoffice or when adding users to accounts in your app. Try to make it descriptive. |
| Description | The description is intended to help you and your teammates understand the role internally. |
| Key | An internal identifier that must be unique. As mentioned above, the JWT includes a ‘roles’ array, that contains the role keys associated with that user. |
| Level | A role level can refer to the level of authority or privilege associated with a specific role for a user. Usually, higher role levels have more permissions and access than lower role levels. Users can only apply roles (to other users) with levels lower than theirs. |
| Permissions list | An individual permission allows someone to perform a specific task, such as uploading a video or editing a profile. Essentially, each role contains a set of permissions assigned to it. |
| Assigned accounts | The role can be assigned to a specific account or all accounts in the environment. |
| ID | Each role has a unique ID that is generated automatically upon role creation (see note*) |
Assigning permissions to roles
As we've mentions, roles are defined by the scope of permissions that the users holding them can perform. To assign permissions to roles, follow these steps:
- Go to [ENVIRONMENT] → Entitlements → Roles, pick a role, and go to the permissions tab adjacent to the role's settings (see screenshot).
- Click “Assign permissions” and choose the permissions you would like to add to this role
- Click ‘Save’ to add the role to the role table
When do I need to add permissions to roles?
A role can be initially saved without associated permissions. You can assign permissions to a role at a later stage.


Edit existing roles
To go back and edit an existing role, click on the role line in the table and edit its settings.
Custom roles
You can let your account create their own custom roles. Go to custom roles to learn more.
Roles behind the scenes
When Frontegg generates a user/API M2M access token (JWT), it includes a ‘roles’ array containing the role keys associated with this user and a ‘permissions’ array with all the permission keys contained in those roles.
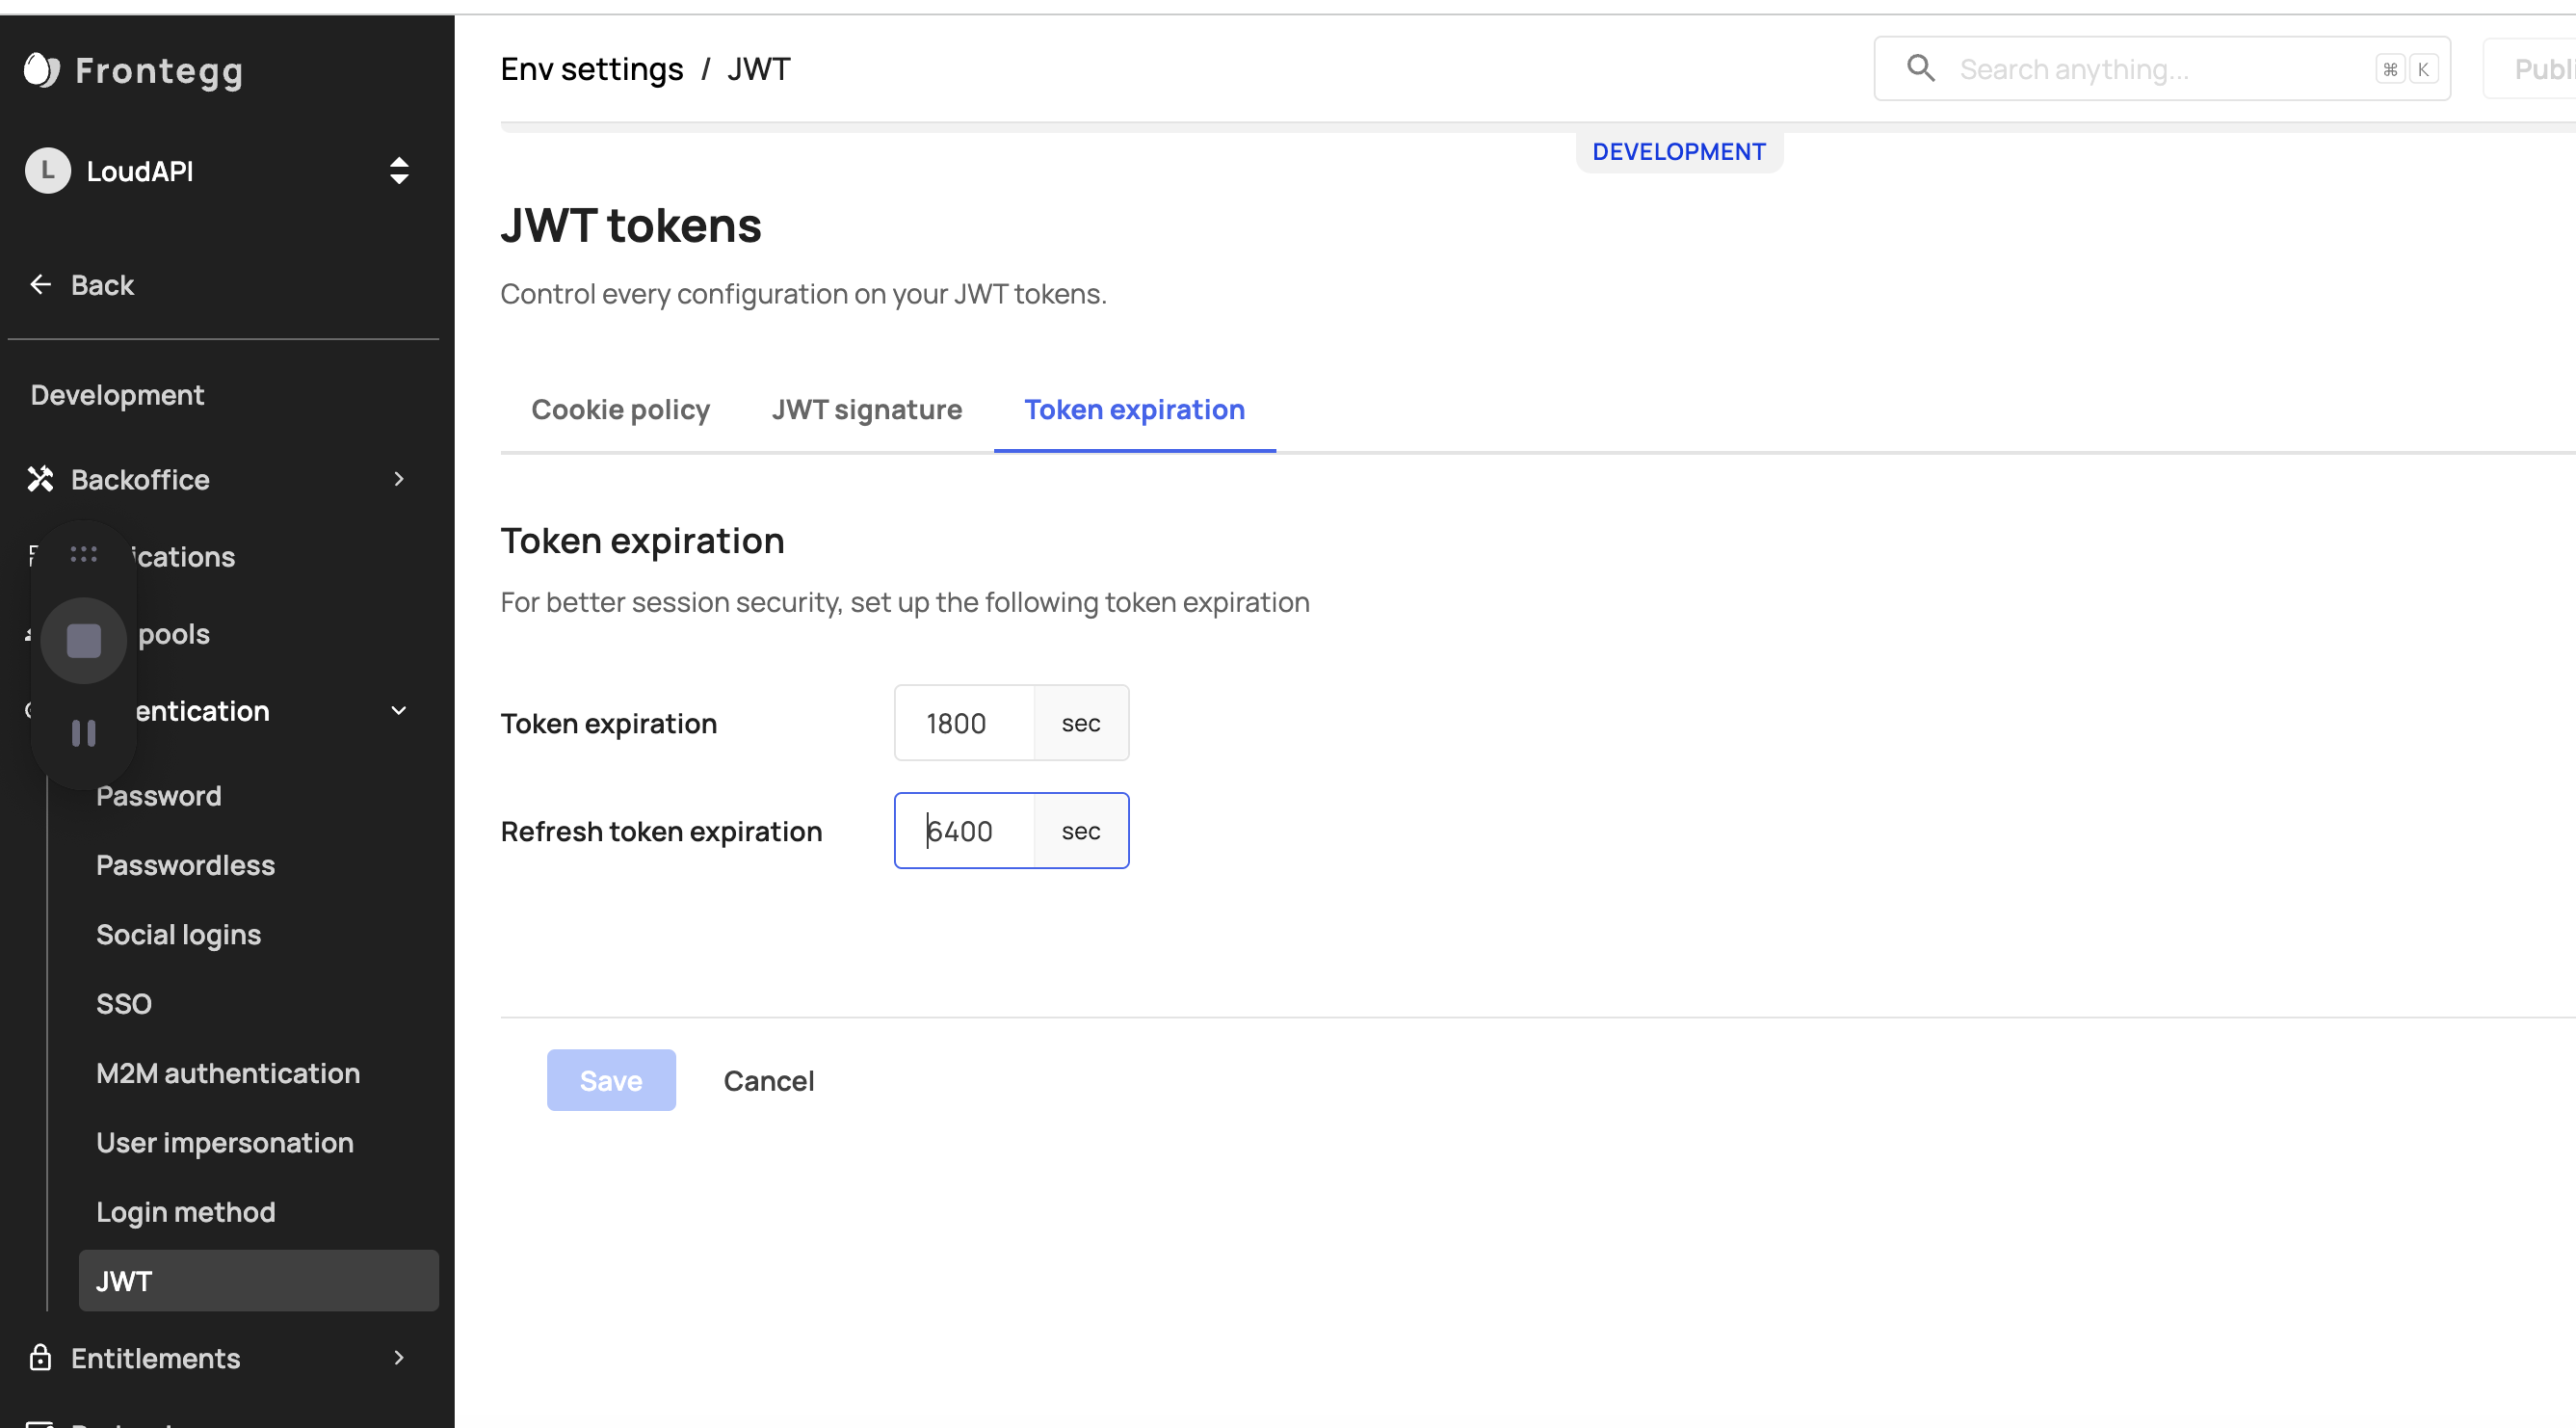
Roles and Token Expiration
User roles are embedded within the user's JWT. When a role is modified, the new permissions will only take effect once the current token expires and a new one is issued. To prevent potential security risks and ensure that user permissions remain up-to-date, consider shortening the JWT's lifespan. You can adjust this setting by going to [Environment] -> Authentication -> JWT -> Token Expiration.
Good to know
The Frontegg backend SDKs can verify the JWT and enforce roles and permissions for you. You can specify the ‘permissions’ and/or ‘roles’ required for a certain operation. Learn more.
Wrapping it all up - Who uses roles and where?
Roles via APIs
You and your customers can perform multiple actions relating to roles via API:
Updated 4 days ago