Your first FGA application
Prerequisites
You will need your OPA docker to be V0.51.0. Use the following command to fetch the correct version:
docker pull openpolicyagent/opa:0.51.0
To get started with creating your very first Fine Grained Authorization (FGA) application, you will need to complete the following steps:
- Configure OPA (read on).
- Creating your first policy
- Adding FGA to your application
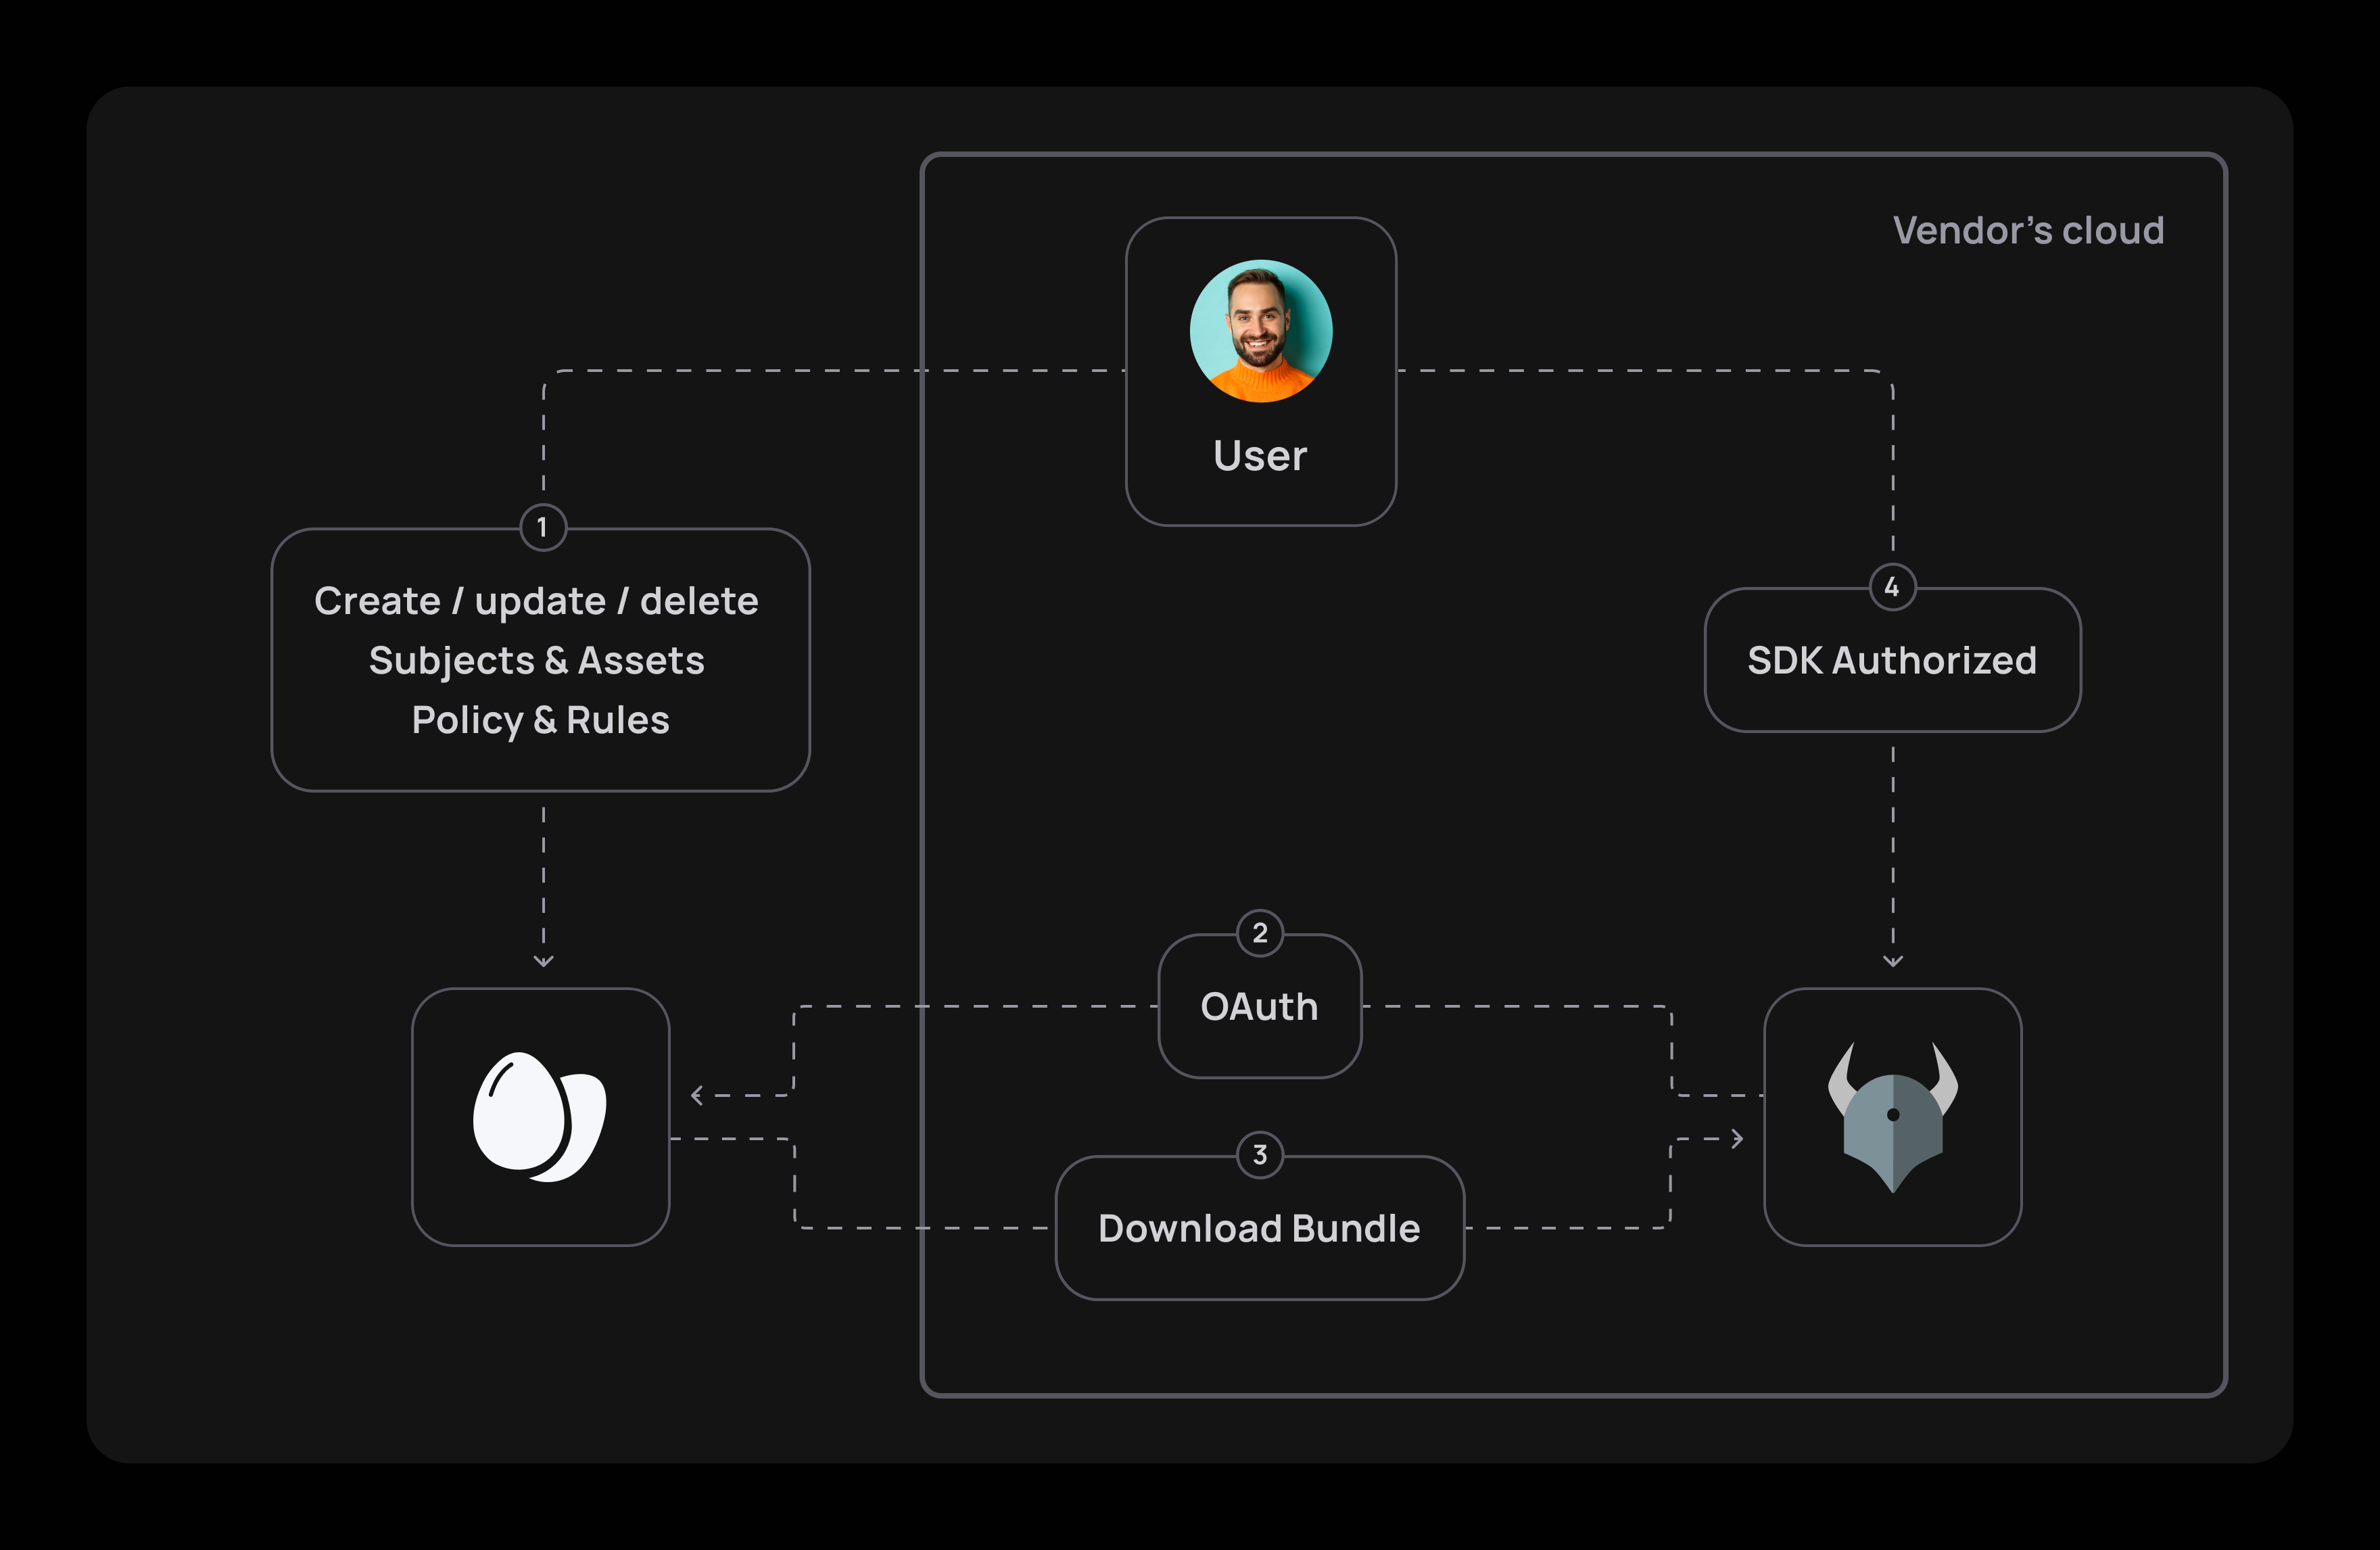
To set up your Finely Grained Application (FGA) app, your initial step would be to install a local OPA agent on your cloud. An OPA agent is there to ensure authorization runs at top speed by minimizing the need to go back and forth to Frontegg's cloud.
A small configuration file is all you need to ensure OPA knows how to authenticate with Frontegg's OAuth mechanism and sync its policy to your cloud.
Once the policy is fetched, you only need to use the SDK to authorize your requests.

What's OPA?
Open Policy Agent (OPA) is a versatile policy enforcement engine that can be used for fine-grained authorization in various applications and systems. OPA allows you to define and enforce policies that control access to specific resources or actions with a high level of granularity. Thanks to OPA, You can define policies that take into account various attributes and conditions, allowing you to specify exactly who or what can perform a certain action on a particular resource in your app.
OPA generates policy decisions by evaluating the query input against policies and data. OPA and Rego (OPA's language) are domain-agnostic so you can describe almost every kind of invariant in your policies.
What's Rego?
OPA formulates its policies using Rego, a sophisticated declarative language tailored for articulating policies over intricate hierarchical data structures. For an in-depth understanding of Rego, refer to the Policy Language documentation for comprehensive details.
Getting started
Clone the sample project
To create your first FGA-powered application, clone the following sample project:
git clone [email protected]:frontegg-samples/fine-grained-authorization.git
Create Tenant API Token
In the frontegg portal, create your Tenant API Tokens. You can name them OPA or choose any other identifier that suits your preference. Ensure you keep the values of your clientId and SecretKey. Ensure the confidentiality of these keys by securely copying and pasting them into your OPA configuration.
Let's name it [OPA] FGA sample token. Copy clientId and clientSecret and copy it to OPA configuration file (located in ci/opa-configuration.yaml)
Configure OPA
Let's get OPA up and running. To do so, we need to configure OPA with the previously created API token.
OPA configuration
For complex scenarios, please refer to the OPA configuration guide. For simplicity reasons, we're going to show only the minimal required configuration to get you up and running with frontegg.
services:
  - name: frontegg-bundle-endpoint
    url: https://api.frontegg.com/policy
    credentials:
      oauth2:
        token_url: "https://frontegg-prod.frontegg.com/oauth/token"
        client_id: "<client id>"
        client_secret: "<api key>"
# To use with a specific environment use the `additional_headers` and set frontegg-environment-id

decision_logs:
  console: true

bundles:
  frontegg:
    service: frontegg-bundle-endpoint
    resource: resources/bundles/v1
    persist: false
    polling:
      min_delay_seconds: 60
      max_delay_seconds: 60
Rate limits
Rate limits may apply on the bundle sync.
Start your (OPA) engine
To start your OPA engine, run the following file— It will be added on top of the configuration file you created earlier:
version: "3"
services:
	opa:
  	container_name: opa
    image: openpolicyagent/opa
    restart: always
    ports:
    	- "8181:8181"
    volumes:
      - ./opa-configuration.yaml:/etc/opa-configuration.yaml
    command:
      - "run"
      - "-s"
      - "--log-level"
      - "debug" # This is used for local debuggability
      - "-c"
      - "/etc/opa-configuration.yaml"
Create Seed data
Seed data
The seed data will create the initial data required for you to run the sample. It is best to run it in your Developement environment so it won't affect your Production environment.
npm run seed:local
yarn seed:local
To create your seed data, you will first need to fetch your environmentclientId and API Key from the Frontegg portal and copy them into the following prompt:
? Enter your Frontegg environment Client ID <Your client Id>
? Enter your Frontegg environment API Key [hidden] <Your API key>
Once done, the seeding job will create all the required data you need. Save the data as you will need it later.
// Example
{
  tenantId: 'new tenant id',
  supermanSubjectId: 'super man id',
  batmanSubjectId: 'batman id',
  topLevelAssetId: 'top level asset id',
  batcaveAssetId: 'batcave asset id',
  fortressOfSolitudeAssetId: 'fortress of solitude id',
  generalHQAssetId: 'general hq id',
  policyId: 'policy id'
}
Run the docker-compose
Note for arm64 Users
Make sure to add
platform: linux/amd64before running the docker-compose.
docker compose -f ./ci/docker-compose.yaml up
Run your app!
Server is up and running on port 3000 an frontegg-FGA enabled logic
You're all set!
The next stage would be to create your first policy.
Updated 2 months ago