Security Settings
Security is of utmost important to any app. Frontegg gives you control of all sorts of aspects of security.
But your customers also want to make sure security in their account is configured correctly. Frontegg offers this in the Admin Portal, allowing customers to self-serve features like MFA, sessions, and login/signup restrictions.
This guide explains each self-serve security feature that can be found in the Admin Portal.
Configuring Security in the Admin Portal
Go to Builder ➜ Experience ➜ Engagement.
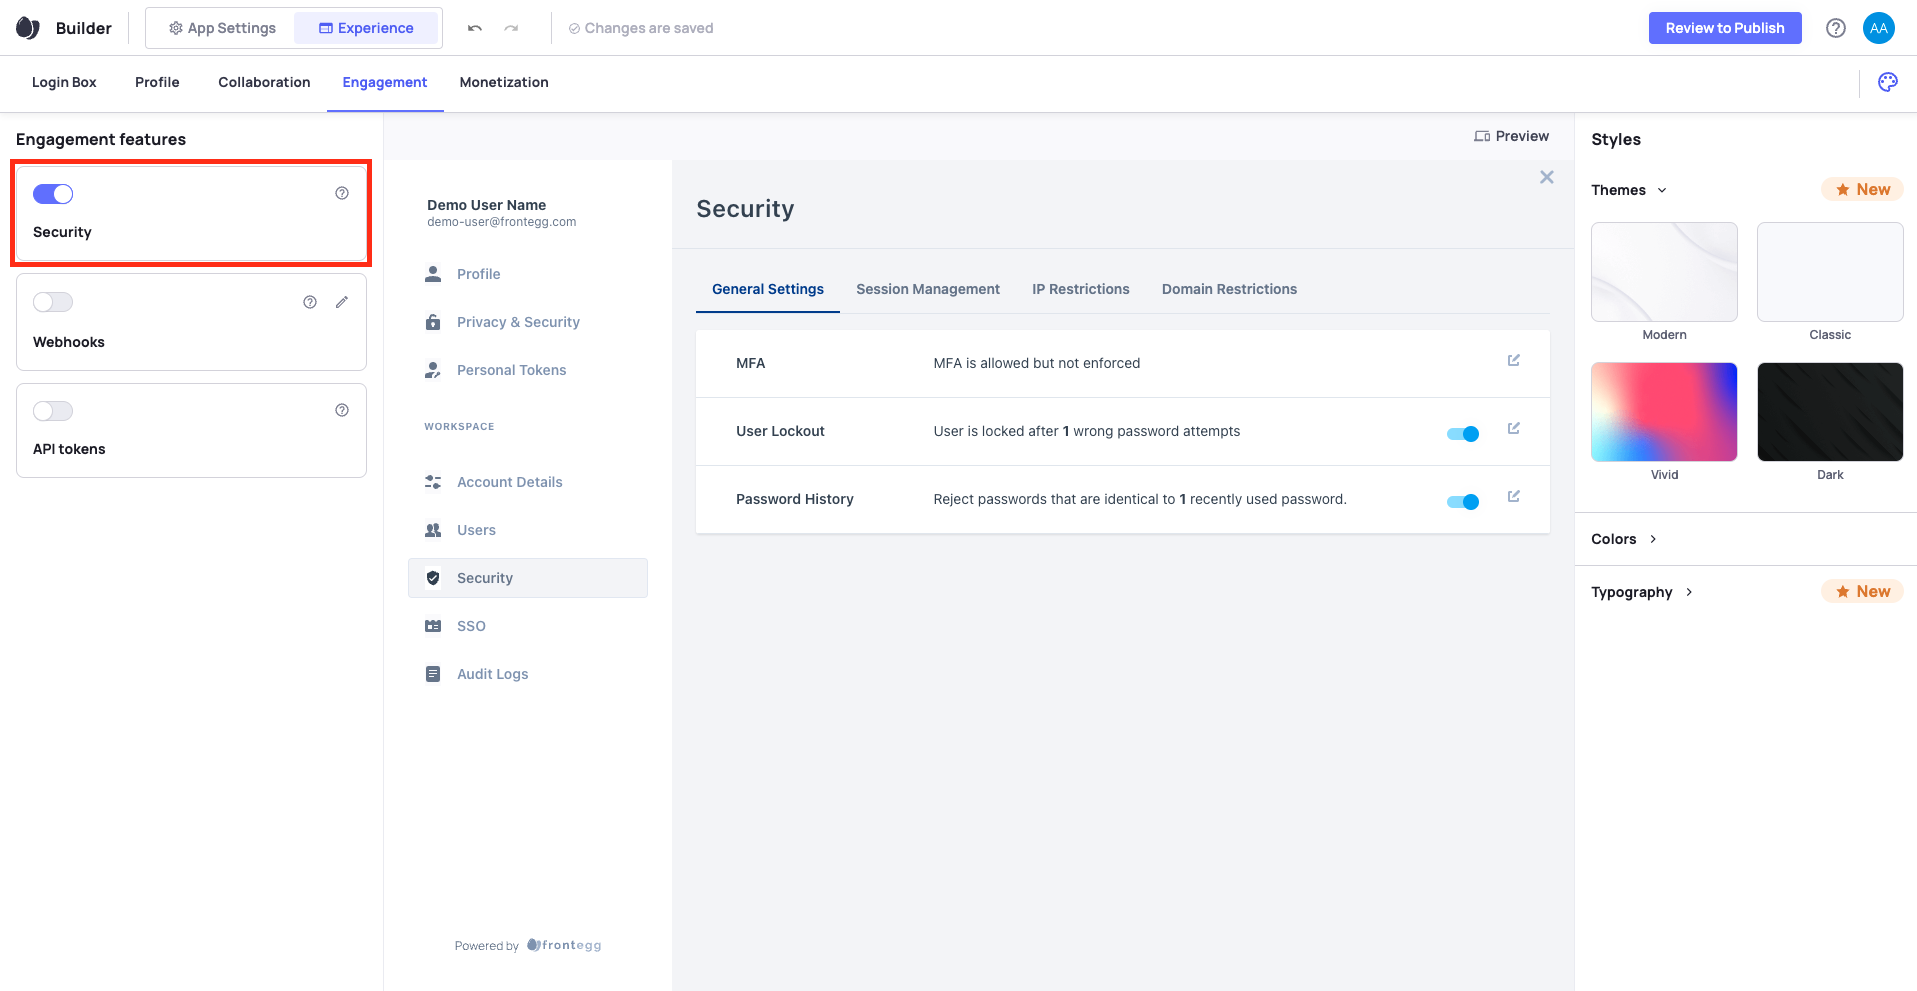
Find Security and toggle its switch on. You should now see a new tab in your Admin Portal called Security.
General Settings
Your customers can control three general security settings for users in their accounts: MFA, User Lockout, and Password History.
MFA
Customers can choose a stricter MFA policy to what you, the vendor, chose. For example, if the vendor MFA policy (configured in App Settings) is Don't Force, your customers can choose Force or Force except Enterprise SSO for their users.
User Lockout
For apps that use a password, customers can define how many incorrect password a user can try before they get locked out. For this feature, customer settings override vendor settings.
Password History
For apps that use a password, customers can define how many unique passwords a user can set before setting one that was already used. For this feature, customer settings override vendor settings.
Session Management
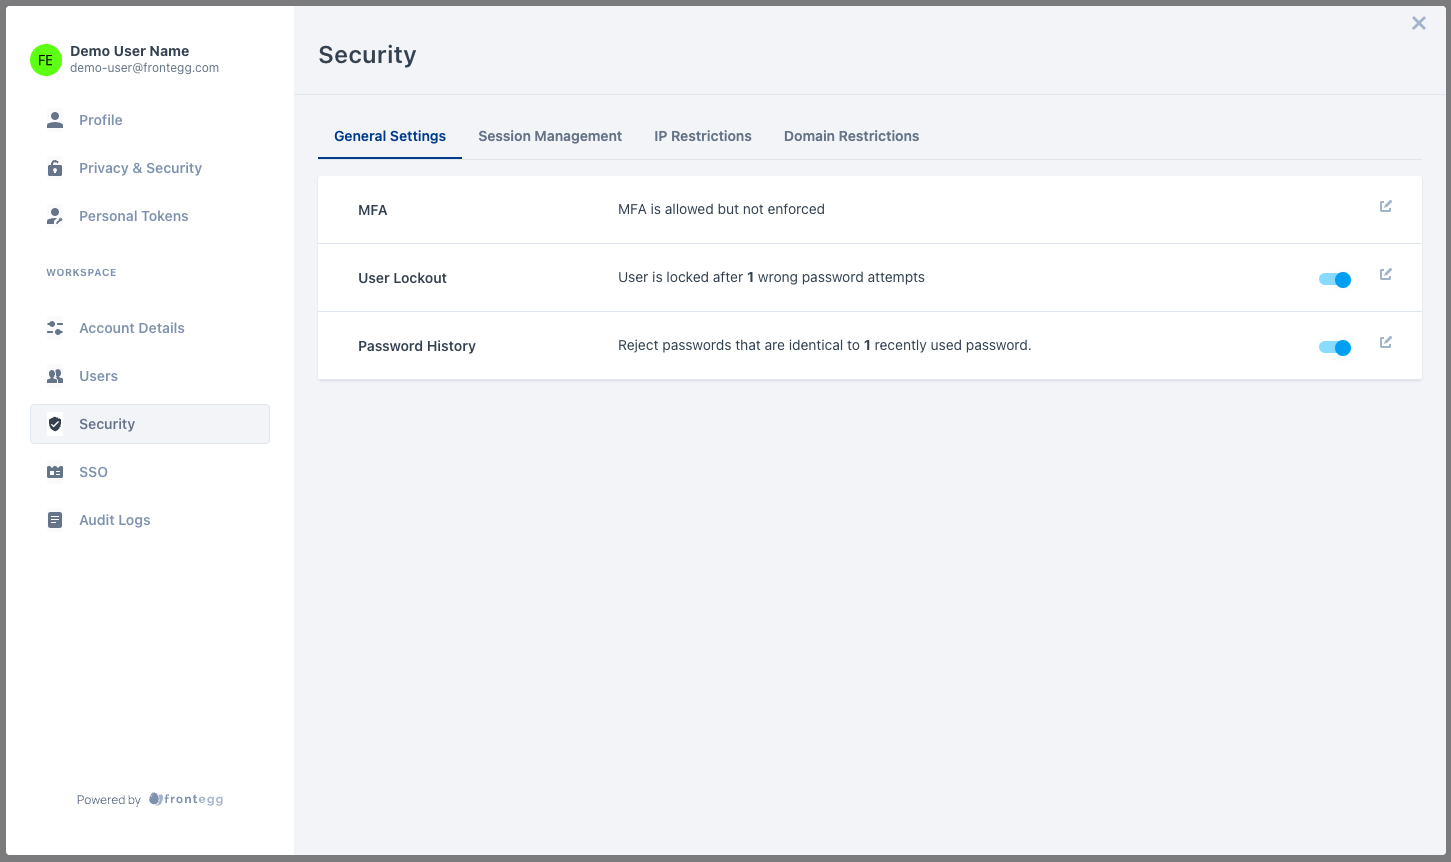
In addition to the session management configurations you've made in App Settings, you can also allow your customers to configure their own session management settings.
Idle Session Timeout
Your customers can define how long their users can have idle sessions before they are terminated.
Force Re-login
Your customers can force users to log in again periodically, whether sessions are active or inactive.
Maximum Concurrent Sessions
Your customers can decide how many sessions users can have open at the same time. If users reach their limit, new sessions replace older sessions automatically.
The settings your customers choose in the admin portal will override the settings you set in App Settings.
IP Restrictions
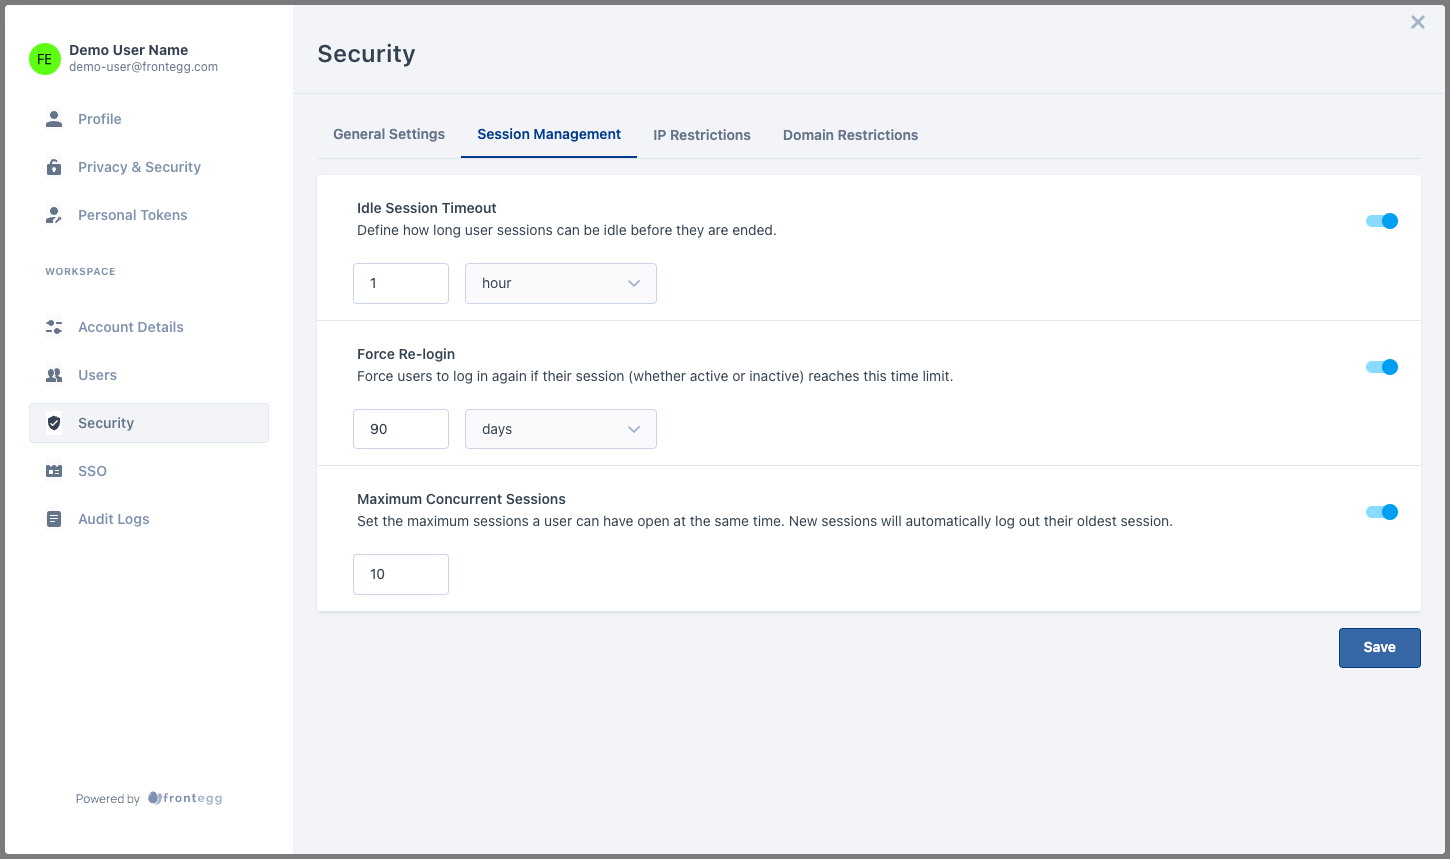
IP Restrictions give your customers the ability to restrict login or signup to certain IP addresses. The rules can contain IPv4 (e.g 255.255.255.255), IPv6 (e.g. 2345:0425:2CA1:0000:0000:0567:5673:23b5), and masks in CIDR notation (e.g. 192.0.2.0/24 or 2002:🔢abcd:ffff:c0a8:101/64).
Frontegg offers allowlists as well as denylists.
Allowlist: Only allow the following IPs and deny all others
Allowlists must contain the IP address of the user (otherwise the user configuring it could get locked out of their account).
Denylist: Only block the following IPs and allow all others
Denylists can't contain the IP address of the user (otherwise the user configuring it could get locked out of their account).
Enabling IP Restrictions
In order for IP restriction rules to be enforced, the toggle in the top-right corner of the feature must be enabled.
Domain Restrictions
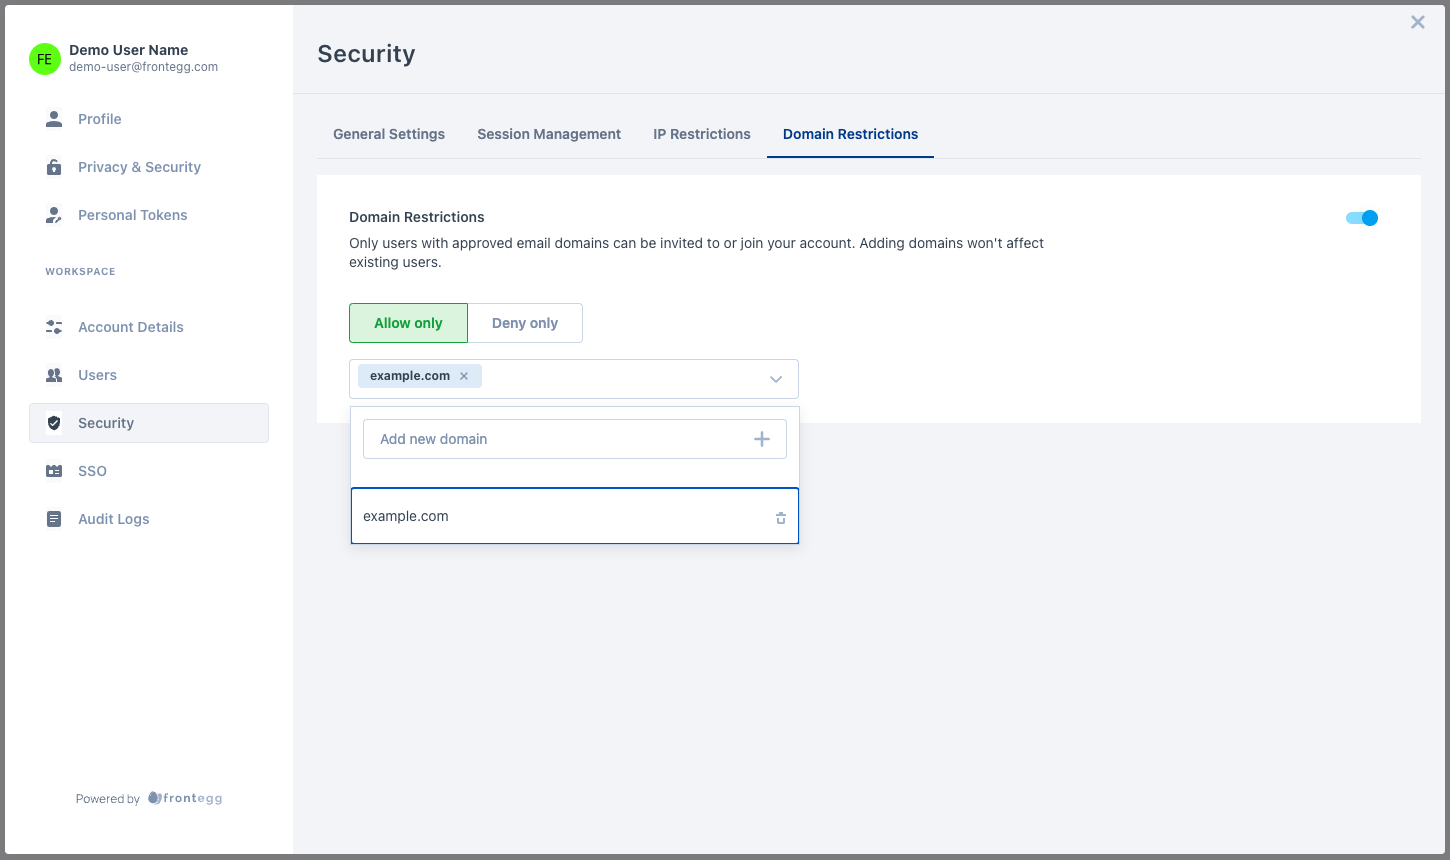
Your customers want to let users invite other users to their account, but they may not want to let them invite anyone. By configuring email domain restrictions, they can restrict signup to specific email domains.
Frontegg offers allowlists as well as denylists.
Allowlist: Only allow the following domains and deny all others
Denylist: Only block the following domains and allow all others
Both methods apply in 2 places:
- On user invitation by email
If a user tries to invite a user with a domain that isn't allowed, they won't be able to invite them.
- On user signup after clicking an invite link
If a user tries to join your account with a domain that isn't allowed, they won't be able to join.
Note: Configuring domain restrictions doesn't affect existing users.
Permissions
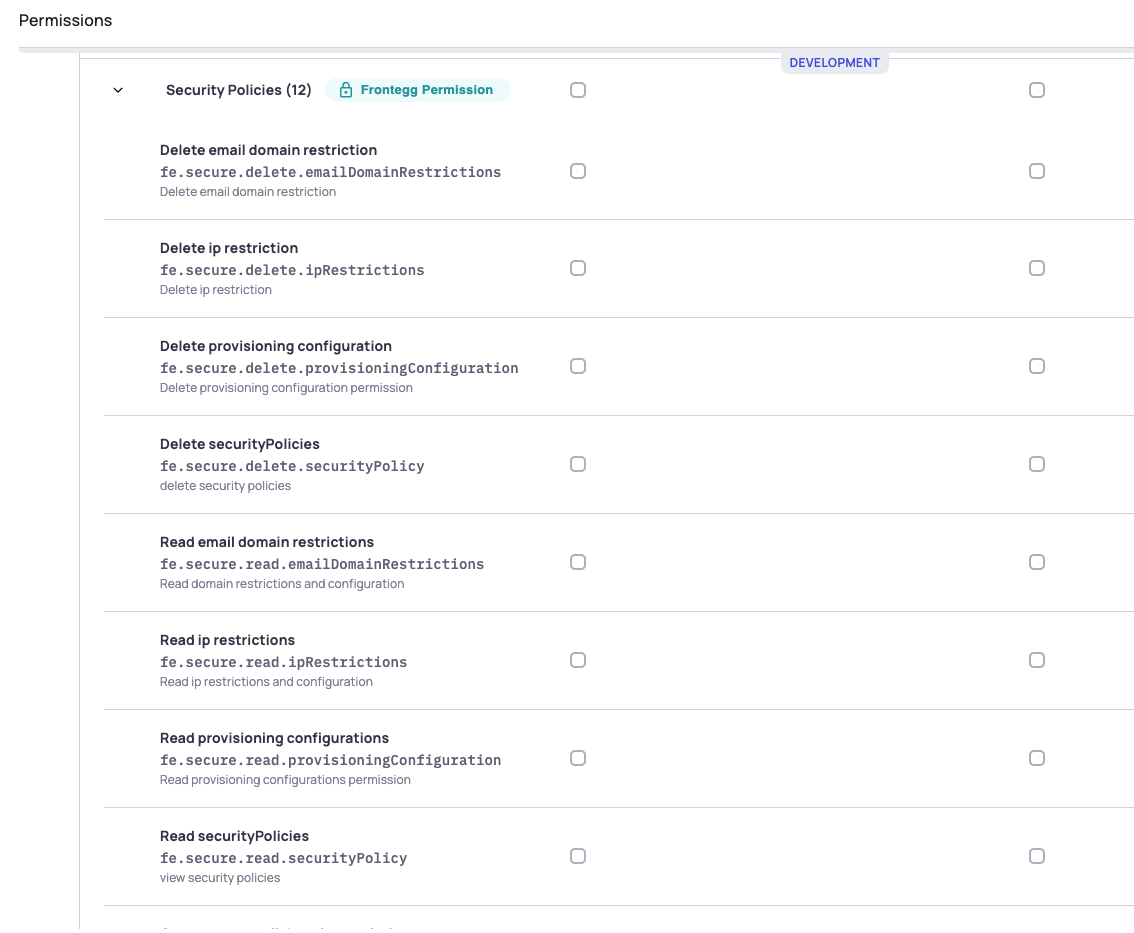
In order for your users to have permission to view and edit security features, you'll have to give permissions to certain roles. You can grant these permissions in any environment by going to Environments ➜ [NAME OF ENVIRONMENT] ➜ Permissions
Look for the Security Policies category and check the checkboxes where you want roles to have security permissions.
For example, checking "Delete IP Restriction" for an admin role will allow them to delete IP restriction rules.
Showing or Hiding Each Feature
Each of the features above can be hidden and/or made view-only in the Admin Portal. Instructions on how to achieve that can be found here: Customizing Admin Portal Modules.
Updated 8 months ago