Frontegg webhooks enable you to trigger automation workflows upon actions occuring in Frontegg's servers.
Examples of use cases may include:
- Registering a user on an internal database when they are invited to your app.
- Sending a marketing email to users upon first login.
- Generating transactional flows based on login-related actions.
Frontegg webhooks are sent from the following IPs
EU IPs:
99.81.198.187
54.216.181.43
52.209.54.22US IPs:
23.21.59.58
54.152.159.125
3.220.173.9
Configuring and Subscribing to Webhooks
Subscribing to webhook events is done in 3 simple steps:
Step 1: Create a Webhook Connection
Create a webhook connection
In your Frontegg Portal, go to Environments ➜ [NAME OF ENVIRONMENT] ➜ Integrations.
The page lists all your webhooks and has a button for adding a new webhook.
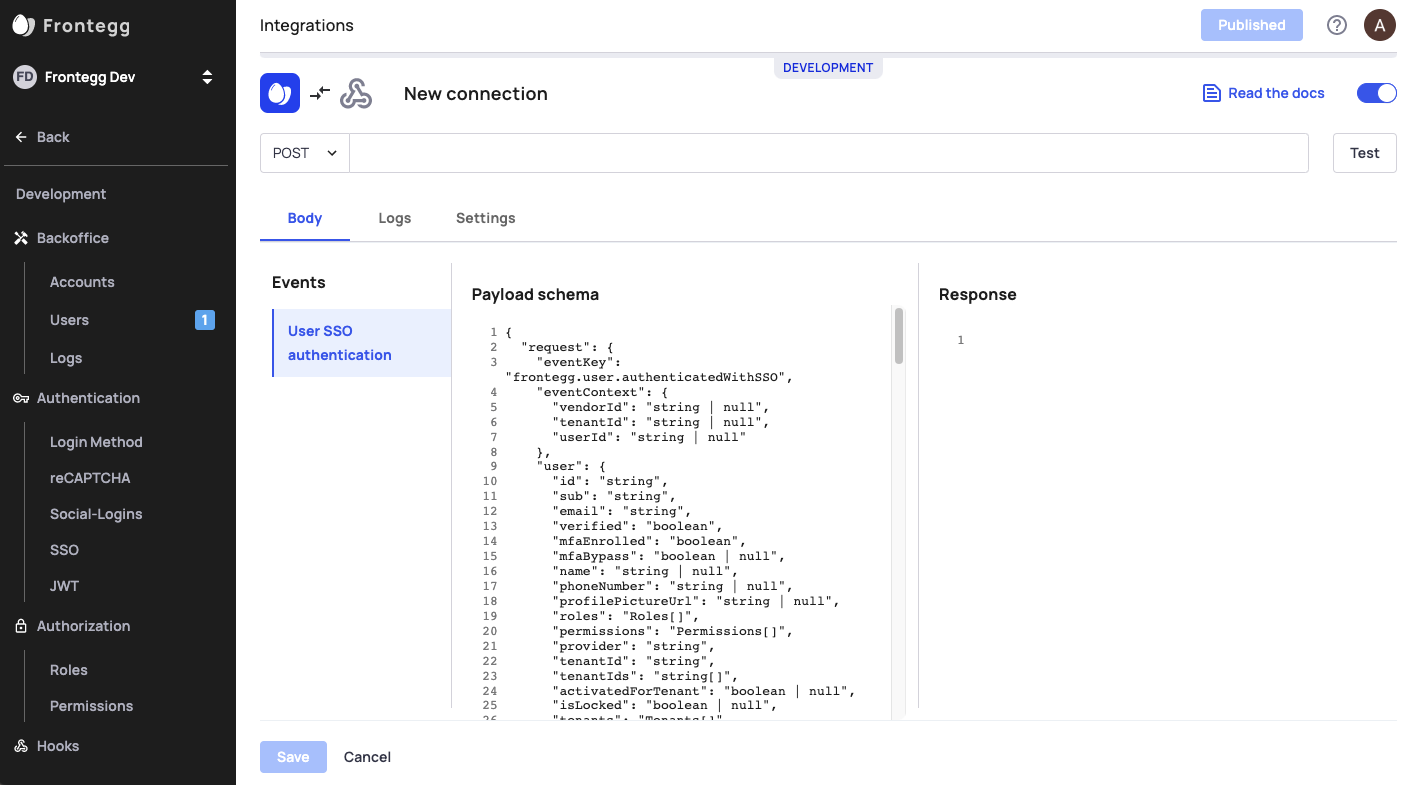
Click the Connect button next to Webhooks. Fill in the webhook details for display name choose the events you want to subscribe to.
Enter URL Address
Enter the URL at which you will receive the webhook data. The URL acts like an address that where Frontegg sends a JSON message to when the assigned event occurs.

Here is an example of the structure and content of the JSON.
{
  "user": {
    "id": "35639902-a53d-44c3-9aea-066b06569f78",
    "email": "[email protected]",
    "verified": null,
    "name": "cheli",
    "phoneNumber": null,
    "profilePictureUrl": "https://www.gravatar.com/avatar/7827edbdf8ec0d52e57a736448e873c3?d=https://ui-avatars.com/api/eldad/128/random",
    "provider": "local",
    "mfaEnrolled": false,
    "metadata": "{}",
    "tenantIds": [
      "adf4c0a5-9a5e-4c51-a228-d008050c0e15"
    ],
    "tenantId": "adf4c0a5-9a5e-4c51-a228-d008050c0e15",
    "roles": [],
    "permissions": [],
    "createdAt": "2021-05-02T11:25:22.000Z",
    "lastLogin": null,
    "isLocked": false,
    "activatedForTenant": true
  },
  "eventContext": {
    "tenantId": "adf4c0a5-9a5e-4c51-a228-d008050c0e15"
    "userId": "35639902-a53d-44c3-9aea-066b06569f78" //note: userID is optional

  },
  "eventKey": "frontegg.user.created"
}
Test Webhook Request
For the test to succeed, ensure your URL endpoint is up and running and returns a 200 response to the webhook request.
Webhook response
Any 2XX code will be registered as success
Any 4XX code will be registered as failure
The response body can remain empty.
Security
Protecting your requests with a Secret Key:
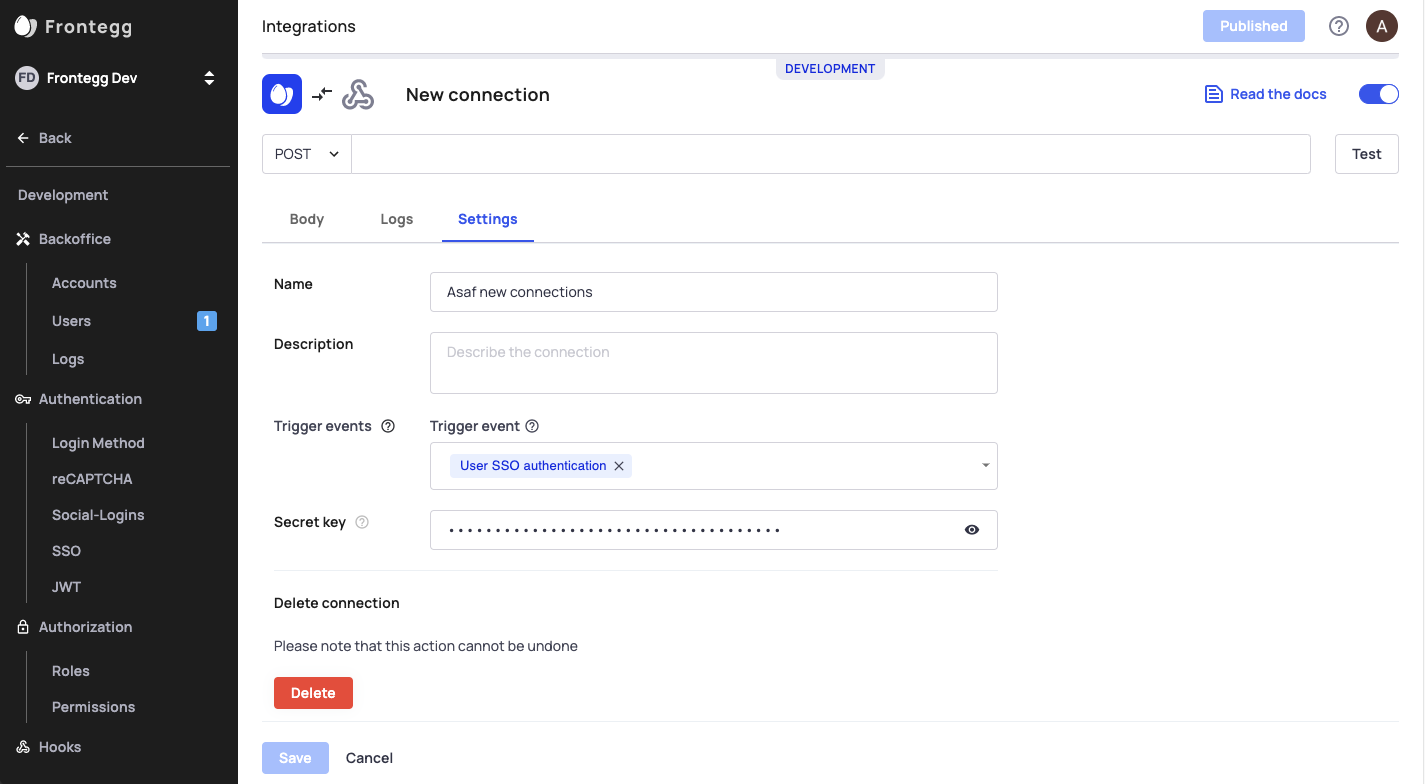
We strongly recommend to set a Secret Key for each webhook connection your create.
Go to your Settings Tab, and under the Secret key field, enter a value that is confidential. Frontegg will generate a header called x-webhook-secret and will sign the webhook request using the secret.
To verify the hook's signature using thex-webhook-secret header, you should use a method from your backend library.
For example, for Node.js you could use the below function:
jwt.verify(<x-webhook-secret-value>, <the secret in the dashboard on bhook settings>)

Webhook events
Read below to learn more about the available events in Frontegg.
Authentication Events
| Event | Event Key | When do we send it? |
|---|---|---|
| User authenticated | frontegg.user.authenticated | a user is authenticated |
| User SAML authentication | frontegg.user.authenticatedWithSAML | a user is authenticated using SAML |
| User SSO authentication | frontegg.user.authenticatedWithSSO | a user is authenticated using SSO |
| User failed to authenticate | frontegg.user.failedAuthentication | a user tries to sign in and inputs incorrect credentials |
MFA Events
| Event | Event Key | When do we send it? |
|---|---|---|
| User MFA enroll | frontegg.user.enrolledMFA | a user enrolls with MFA |
| User disabled MFA | frontegg.user.disabledMFA | a user disables MFA |
User Management Events
| Event | Event Key | When do we send it? |
|---|---|---|
| User created | frontegg.user.created | a user is created |
| User signed up | frontegg.user.signedUp | a user signs up |
| User deleted | frontegg.user.deleted | a user is deleted |
| User invited to tenant | frontegg.user.invitedToTenant | a user is invited to tenant |
| User changed password | frontegg.user.changedPassword | a user changes their password |
| User forgot password | frontegg.user.forgotPassword | a user forgets their password |
| User removed from tenant | frontegg.user.removedFromTenant | a user is removed from tenant |
| User API token created | frontegg.userApiToken.created | a user API token is created |
| User API token deleted | frontegg.userApiToken.deleted | a user API token is deleted |
| User activated | frontegg.user.activated | a user activates their account |
Tenant Events
| Event | Event Key | When do we send it? |
|---|---|---|
| Tenant created | frontegg.tenant.created | a tenant is created |
| Tenant deleted | frontegg.tenant.deleted | a tenant is deleted |
| Tenant updated | frontegg.tenant.updated | a tenant is updated |
| Tenant API token created | frontegg.tenantApiToken.created | a tenant API token is created |
| Tenant APi token deleted | frontegg.tenantApiToken.deleted | a tenant API token is deleted |
Custom Webhooks
Frontegg allows you to customize your webhooks, providing a more flexible and powerful way to create integrations with third-party tools. With custom webhooks, you can send data in real-time to external applications, allowing you to create customized workflows that cater to your specific needs and automate repetitive tasks. Learn more about creating Custom Webhooks
Configuring Webhooks in Your Admin Portal
You need to toggle on that option to enable webhook management for your users in the admin portal. Learn more about Webhook Settings and Configuration
Updated 2 months ago