What are plans?
The Entitlements Engine is built on four core components: Users, Permissions, Features, and Plans. This topic will focus on the Plans component. Plans can include a stack of features or a single feature and can be assigned to specific users or accounts. This allows vendors to create subscription plans that cater to different user needs and business models.
Benefits of incorporating plans in your business model
There are multiple ways in which you can (and should) use plans in your account. Creating plans under which you bundle multiple features, assigning plans to accounts, and managing trial periods offers several benefits. You can use them to create a tiered pricing model, making it easier for your customers to choose a plan that fits their needs and budget and for you to easily manage it from your side.
Additionally, managing trial periods effectively can help in acquiring new customers by allowing them to experience the value of your product before committing to a purchase. This can be particularly effective in converting trial users into paying customers, especially if the trial period is strategically aligned with the customer's needs and expectations.
Creating a new feature plan
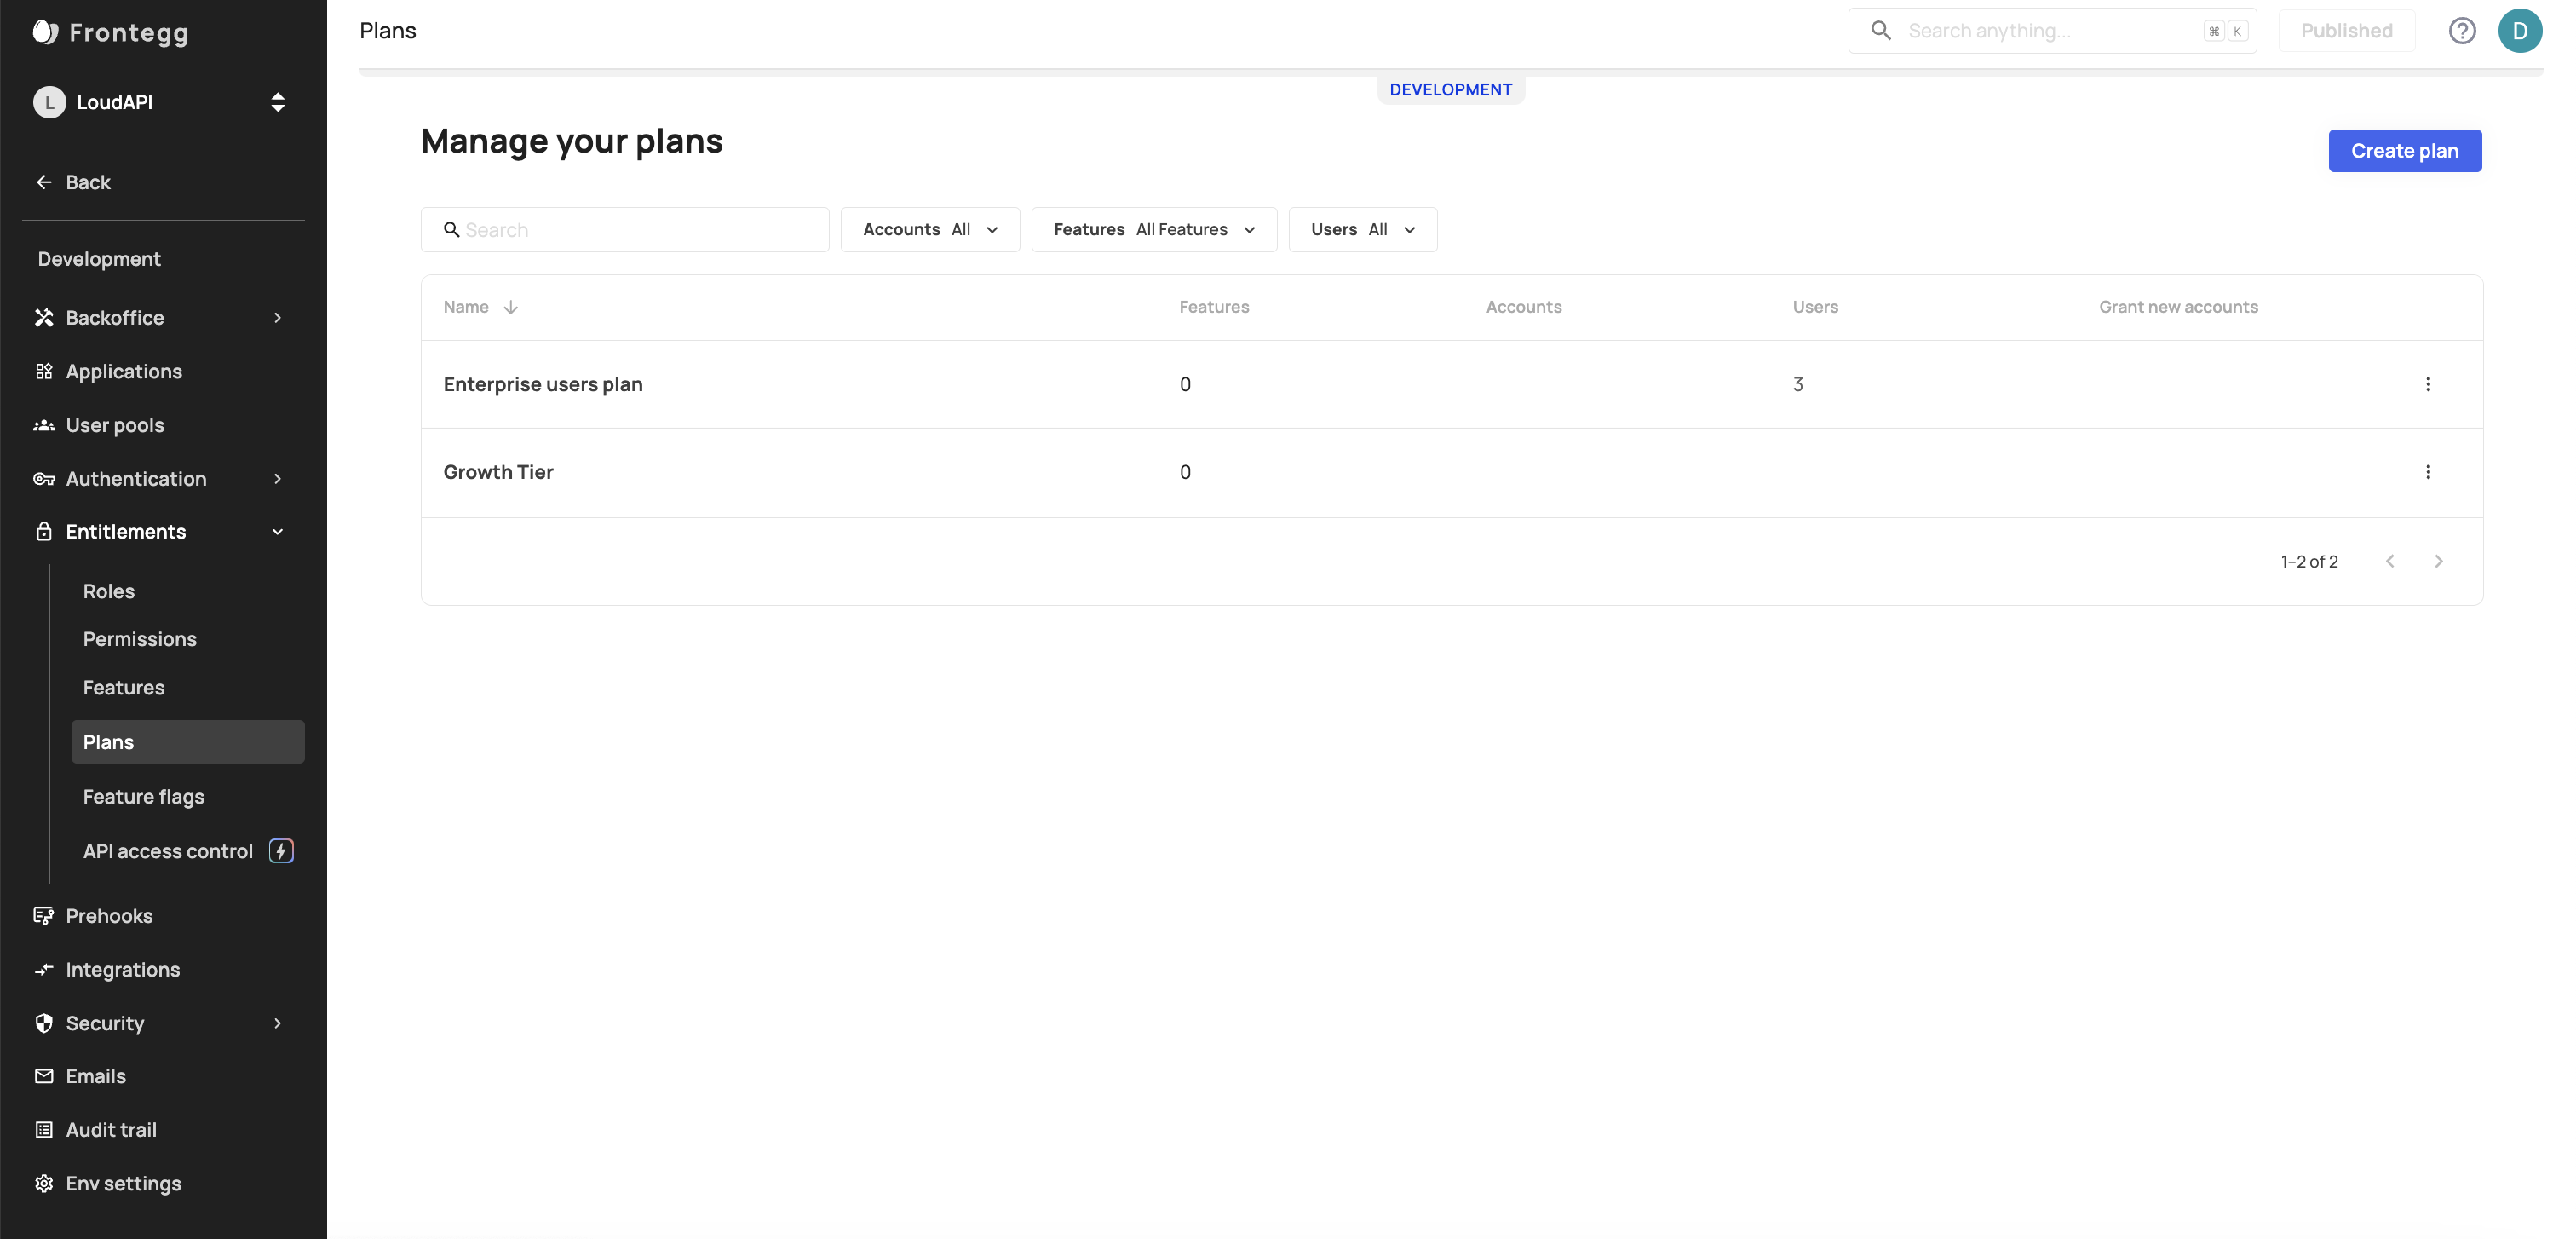
To get started with your first plan, go to [ENVIRONMENT] -> Entitlements -> Plans and do the following steps:
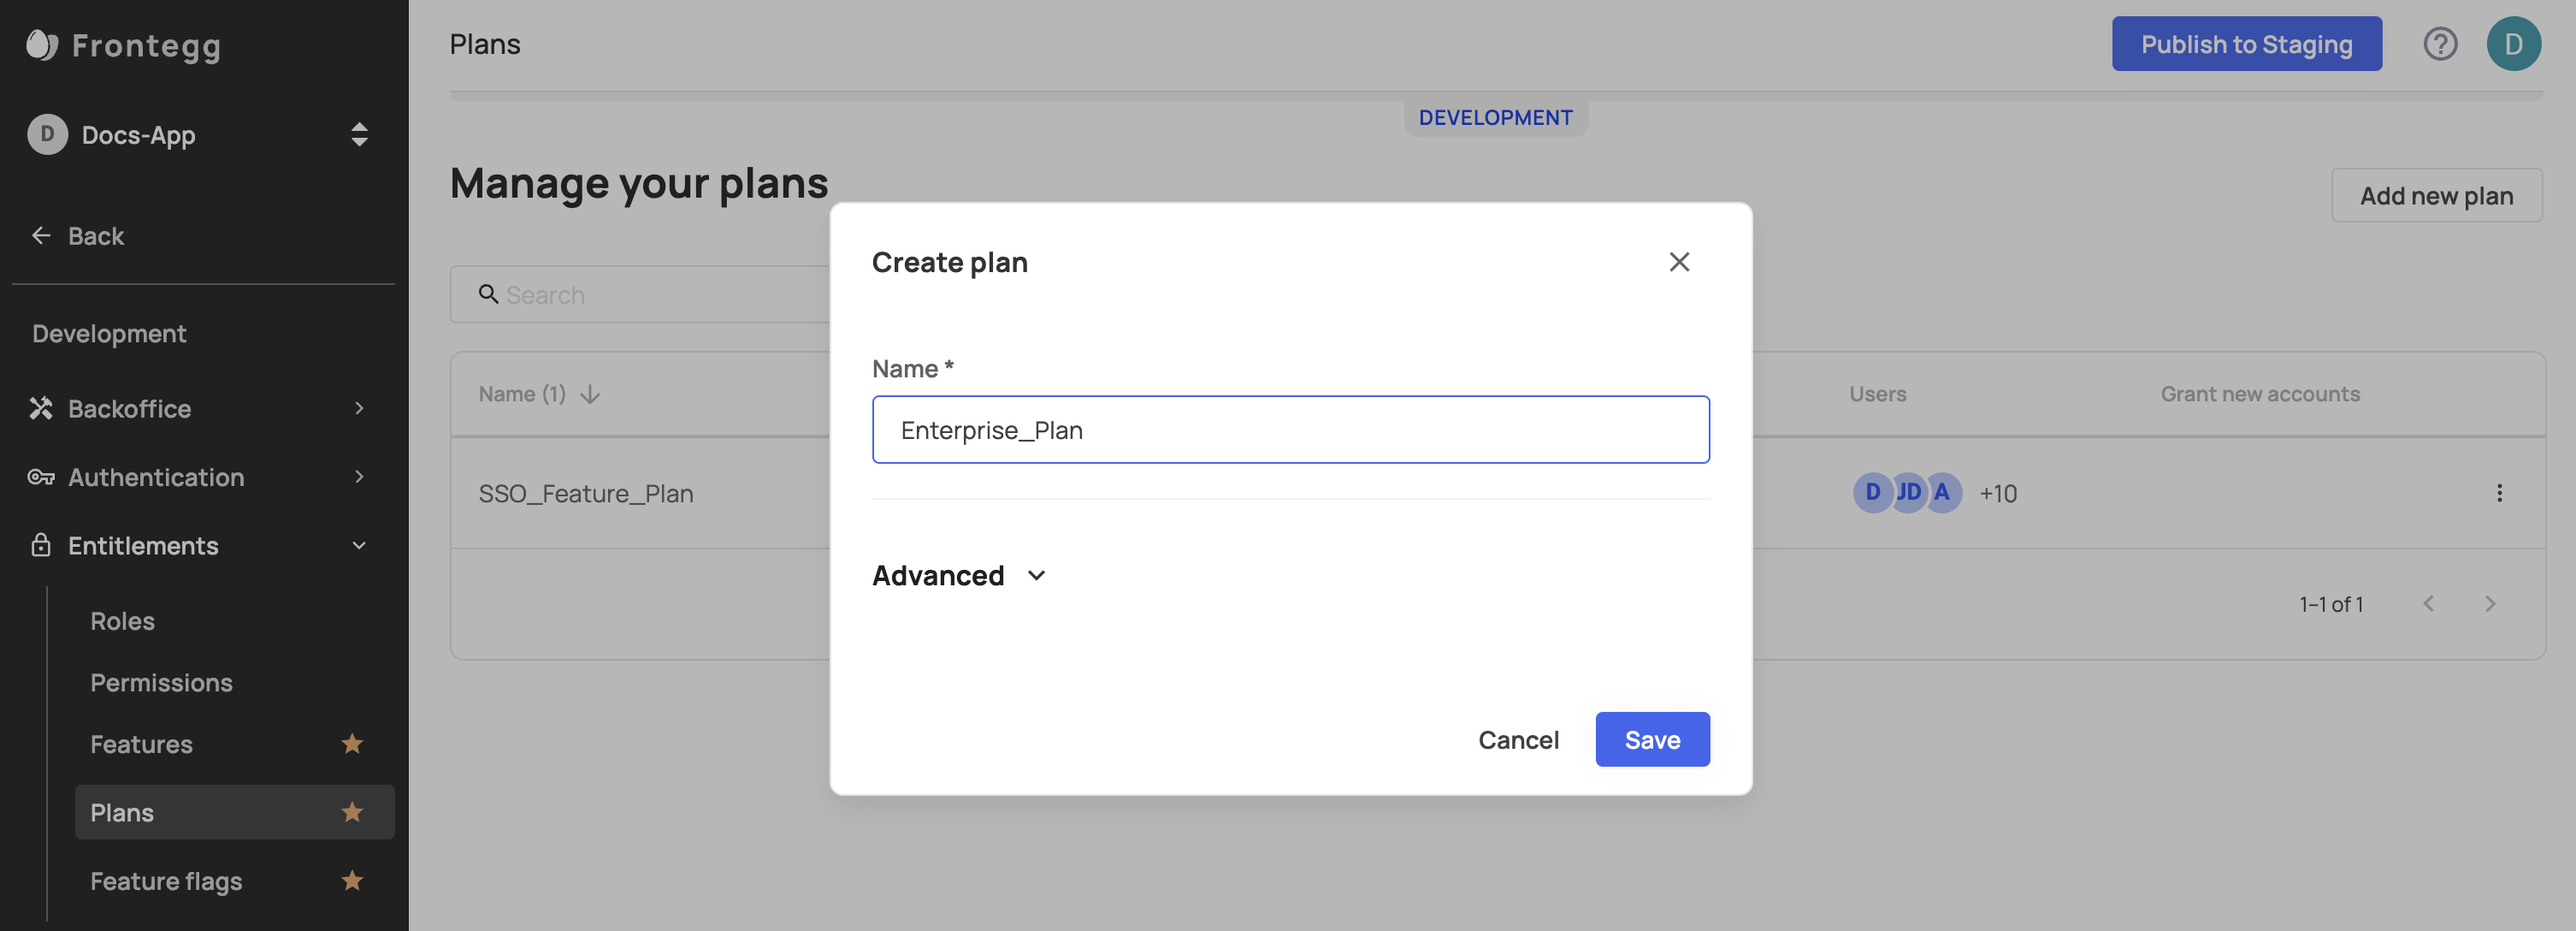
- Click the Create plan button located at the top right side of the page.
- Name - add the relevant name to the plan
- Advanced -
- Grant to all new accounts - This ability allows you to create an automatic trial— Upon account creation, the account will be granted the plan automatically.
- Indefinite or time-bound - Allowing you to limit the time the plan is assigned to the account/users. If you wish to enroll users in a trial period, you can set the trial time limitation in advance.
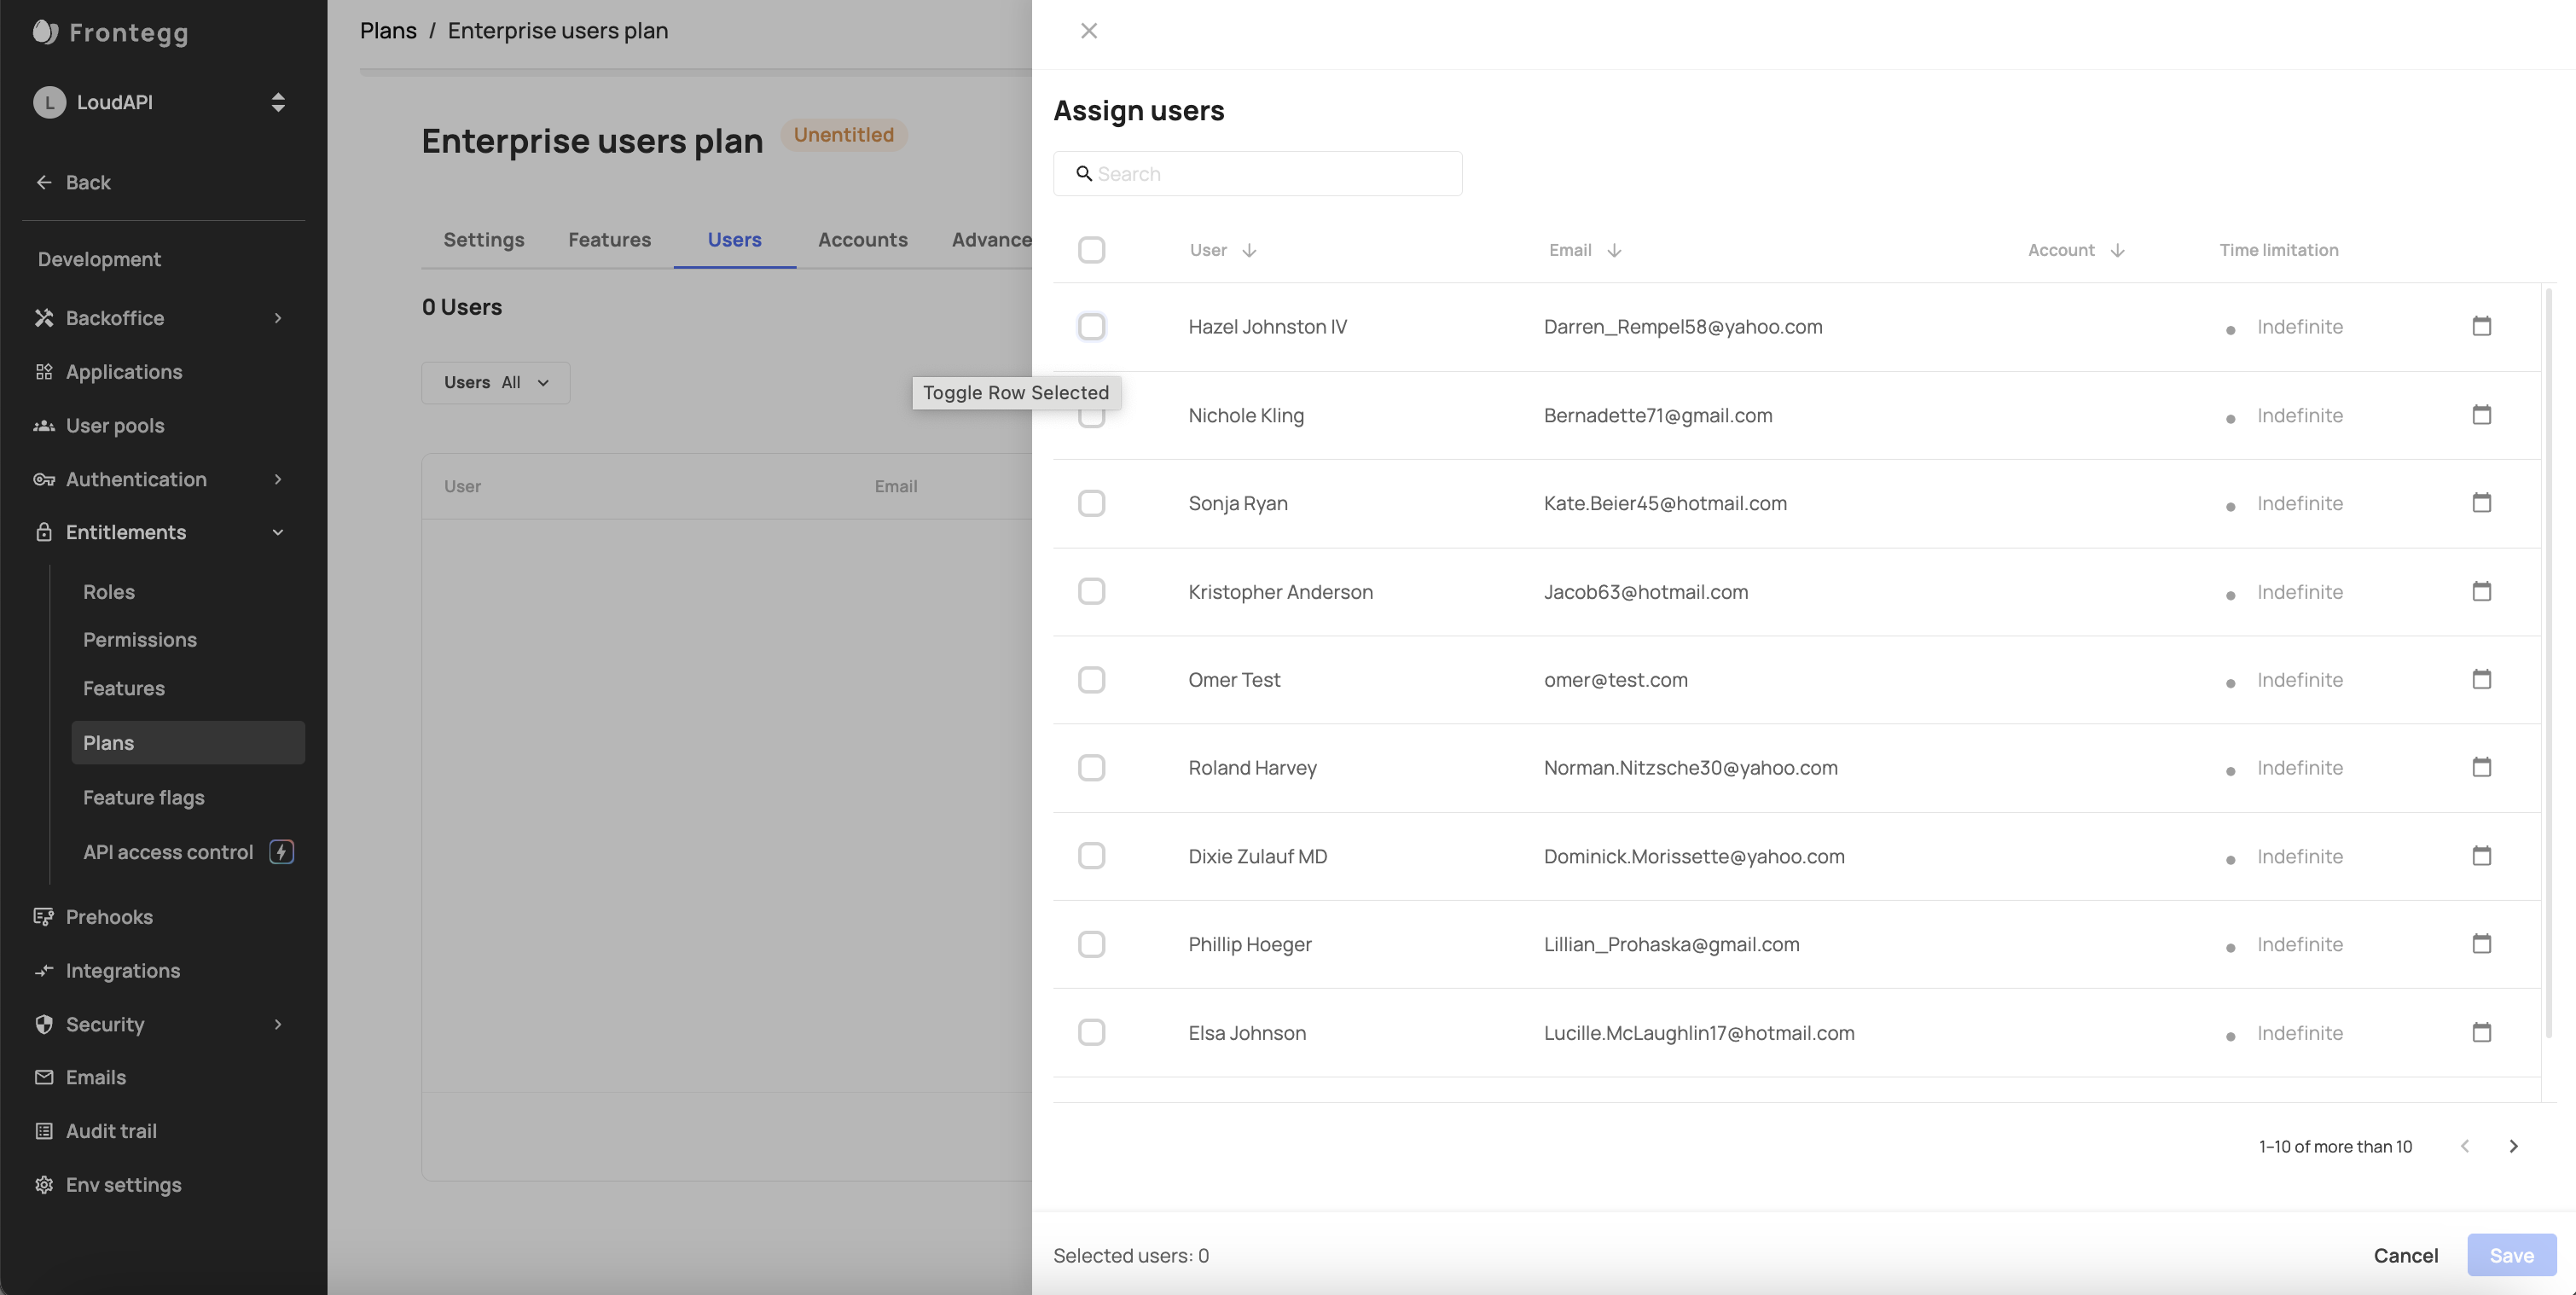
Once you create a plan, it's time to assign and edit features, accounts, and users.
- Assign features - add features to the Plan.
- Assign accounts - add accounts to your Plan. All users within an account are granted the associated Plan when their account is assigned.
- Assign users - add specific users to a Plan.
Creating a time-limited plan
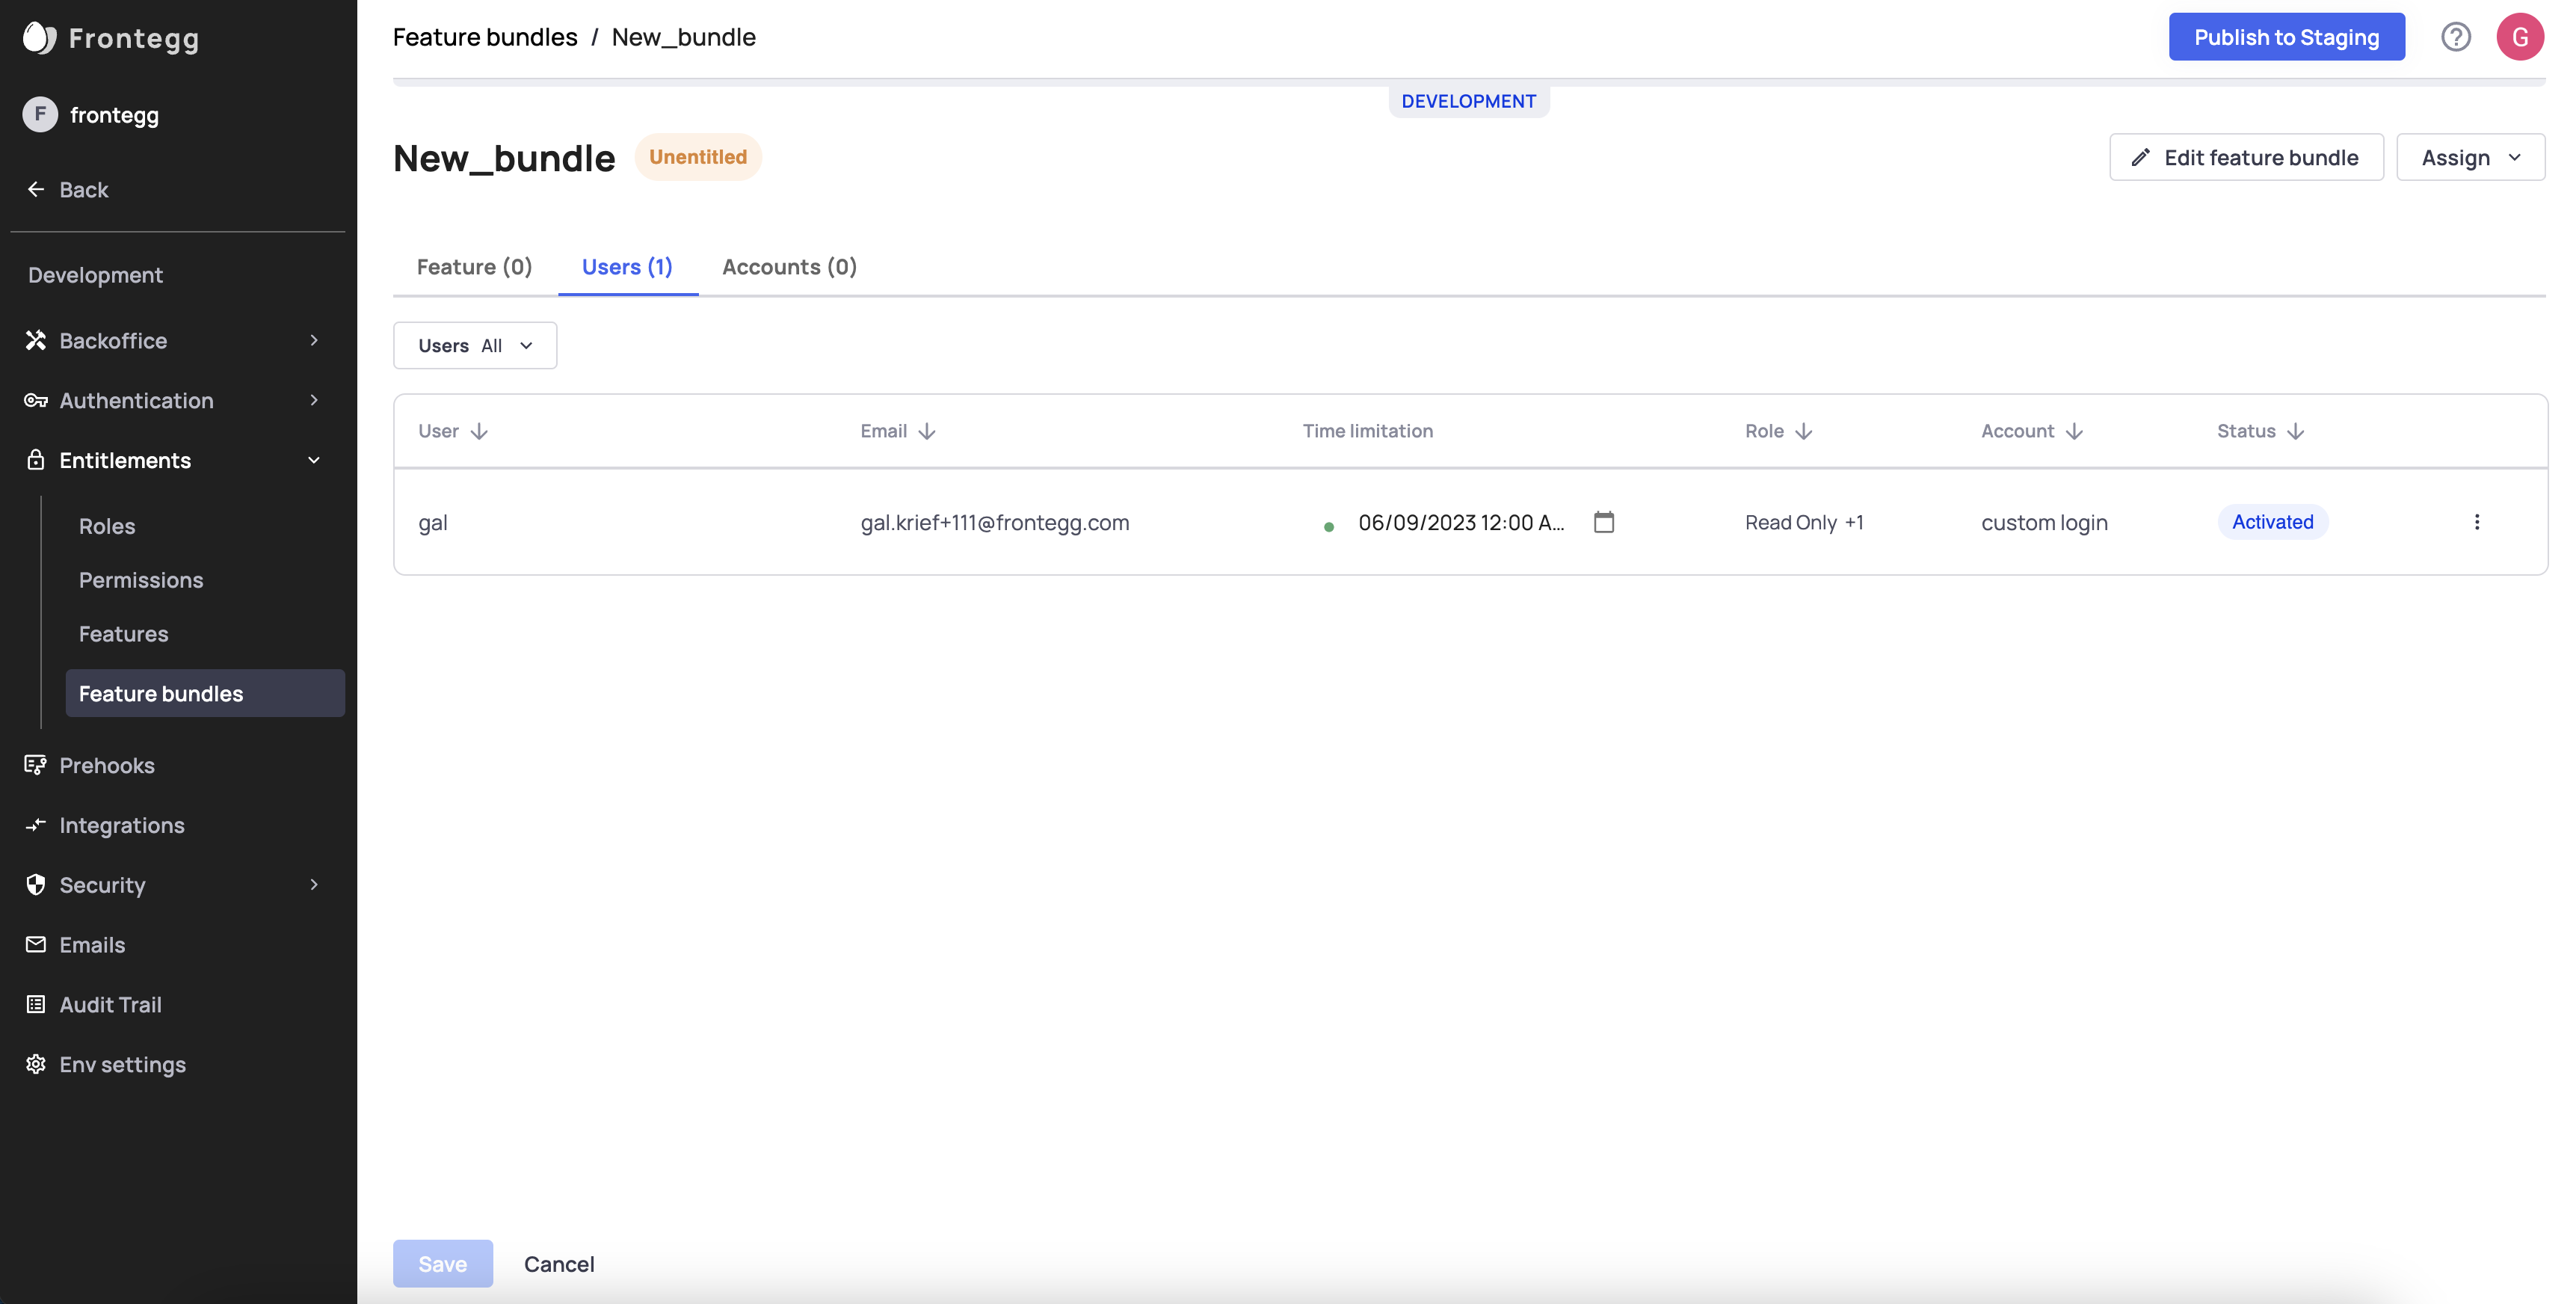
You can manually limit the expiration of the entitled Plan for accounts and users. This capability allows you to control users' access and grant time-bound access for different use cases.
Time expiration precedance
If a user is being granted the same plan with different time expirations, they will be entitled to the longest time period between the two.
Advanced user targeting
Advanced targeting allows you to enroll users in a plan according to specific attributes (either Frontegg attributes, Custom attributes, or JWT attributes).
To create designated user access to plans, go to [ENVIRONMENT] -> Plans -> Advanced Targeting -> Add rule and select the attributes you wish to apply for the plan. You can add multiple rules for each plan (limitations are specified in the Plan Rule Limitations) below.
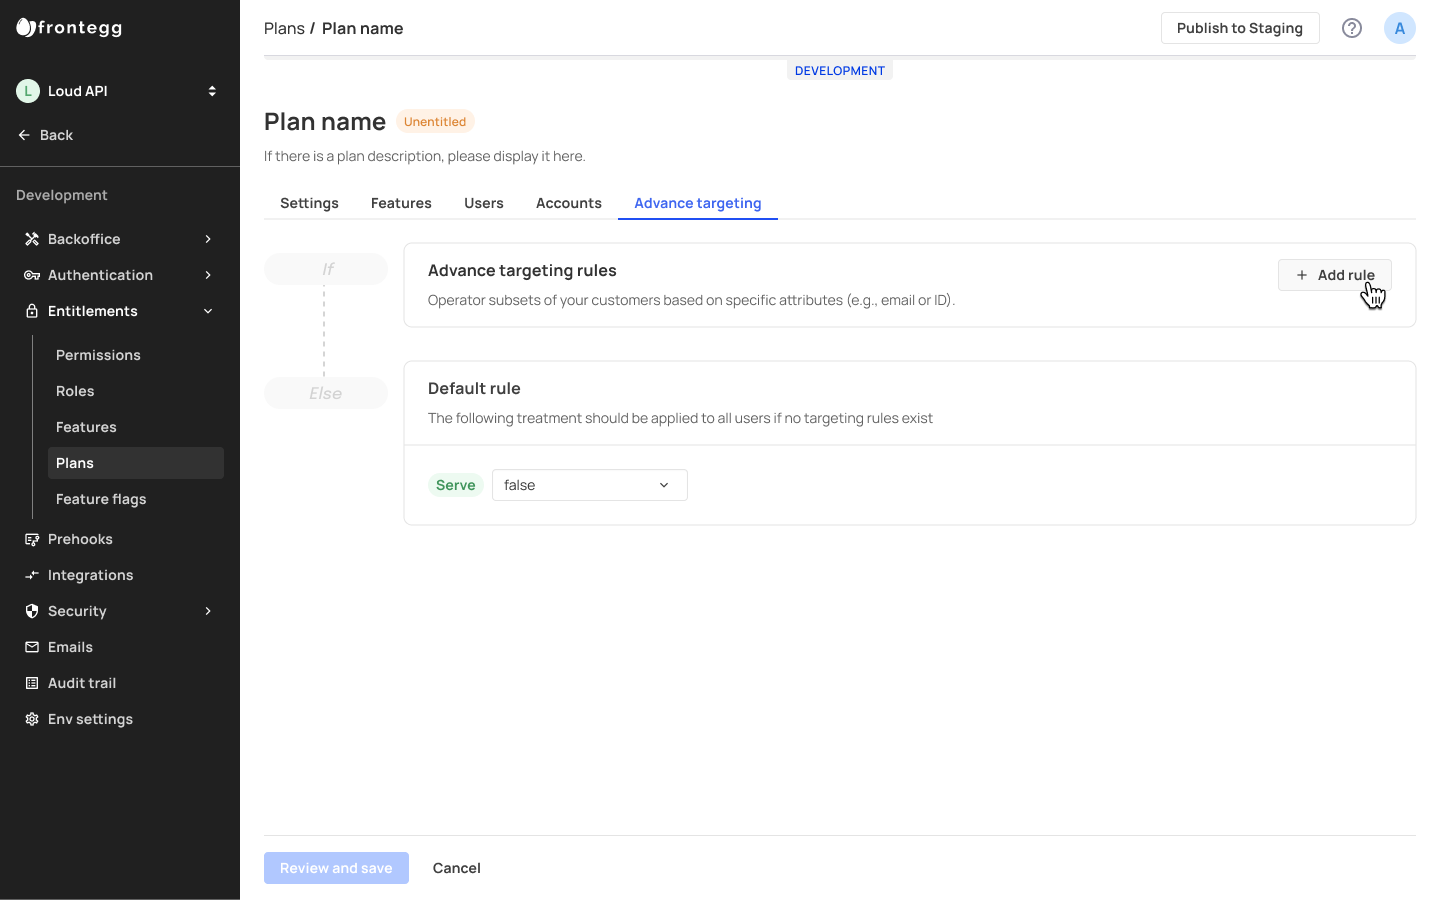
Adding a rule for Advanced Targeting
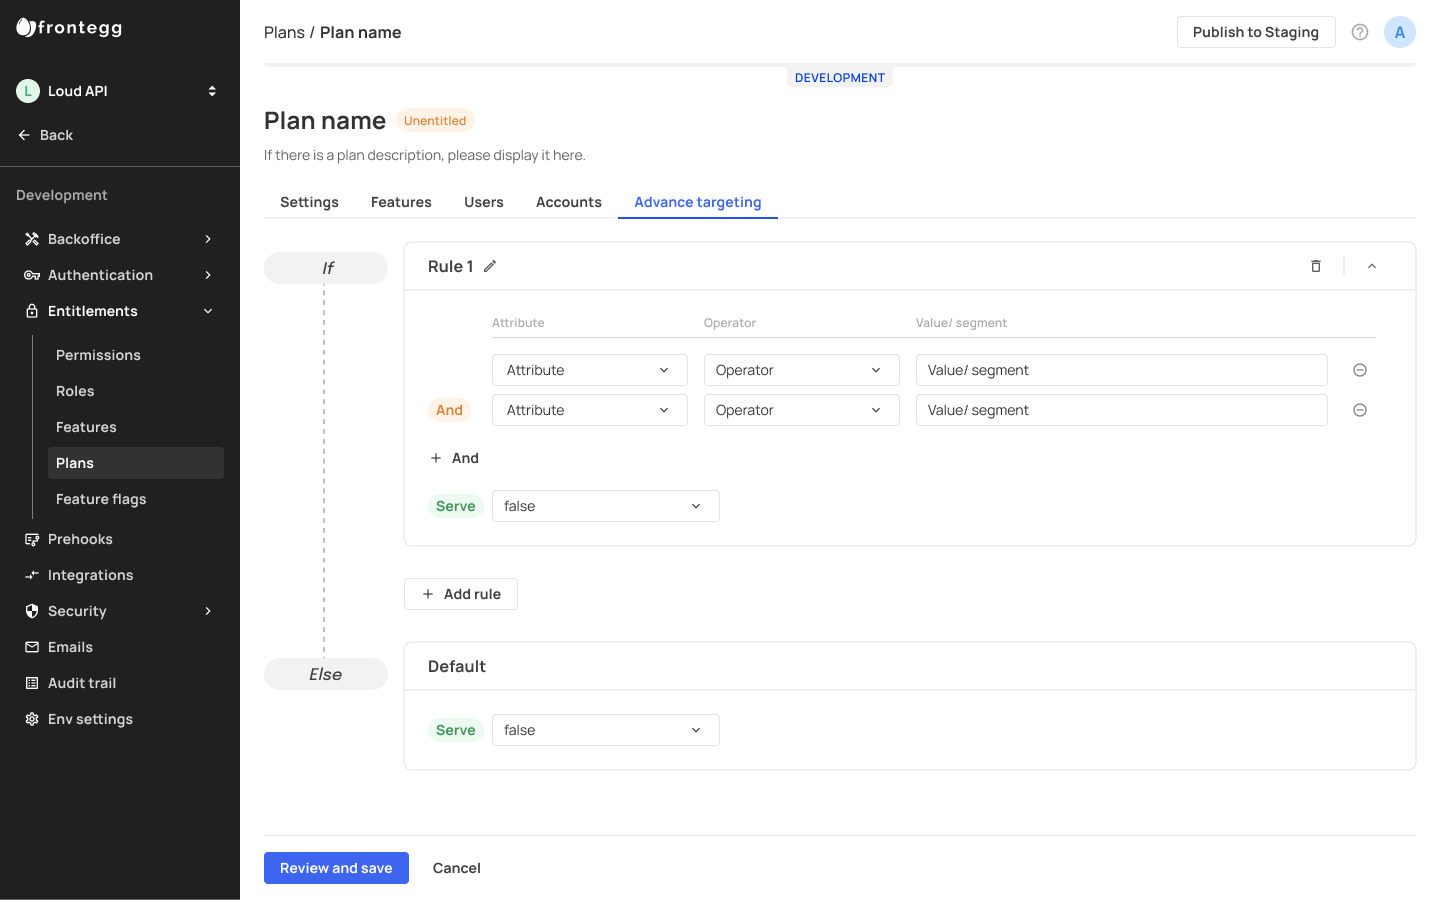
Setting desired attributes to enroll only specific users in a plan
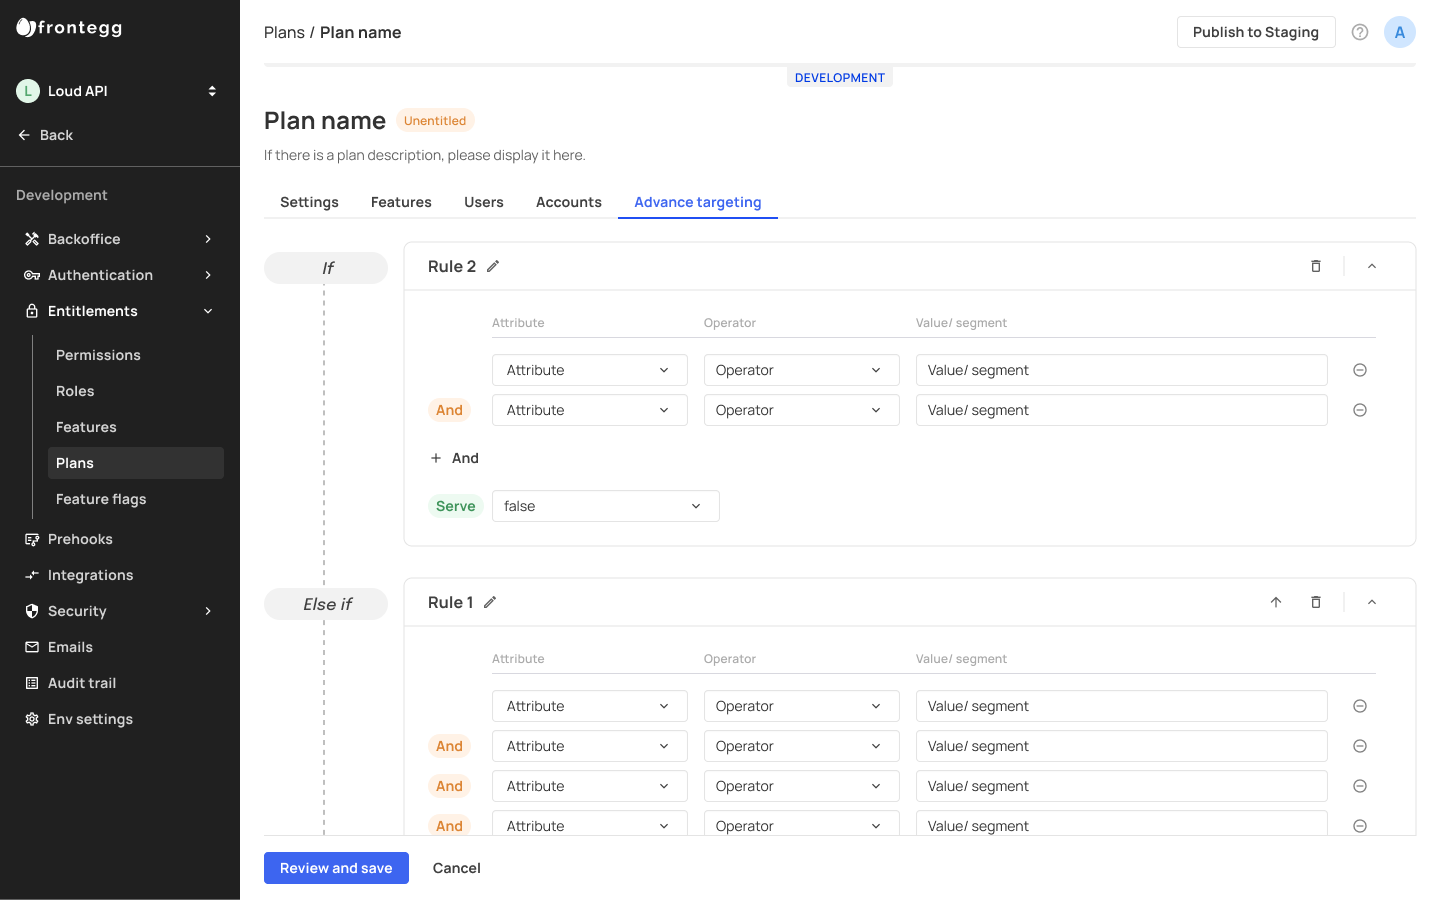
Adding multiple rules per plan
Users and Advanced Rules
Note that when you set targeting rules via the Advanced targeting option in plans, the rules will be check for compatibility with all users, and will target those that apply to the rule. A different option is to assign plans to specific users via the users' tab, but that is not to say that advanced targeting is applicable only to the users you add to the users' tab.
Attributes for Plan Targeting
The default Frontegg attributes we offer are: email (frontegg.email), email verified (frontegg.emailVerified), user Id (frontegg.userId), and tenant Id (frontegg.tenantId). These attributes are included in your drop-down attributes menu. In addition to frontegg attributes, Custom attributes can also be used. Learn more about custom attributes in the following section.
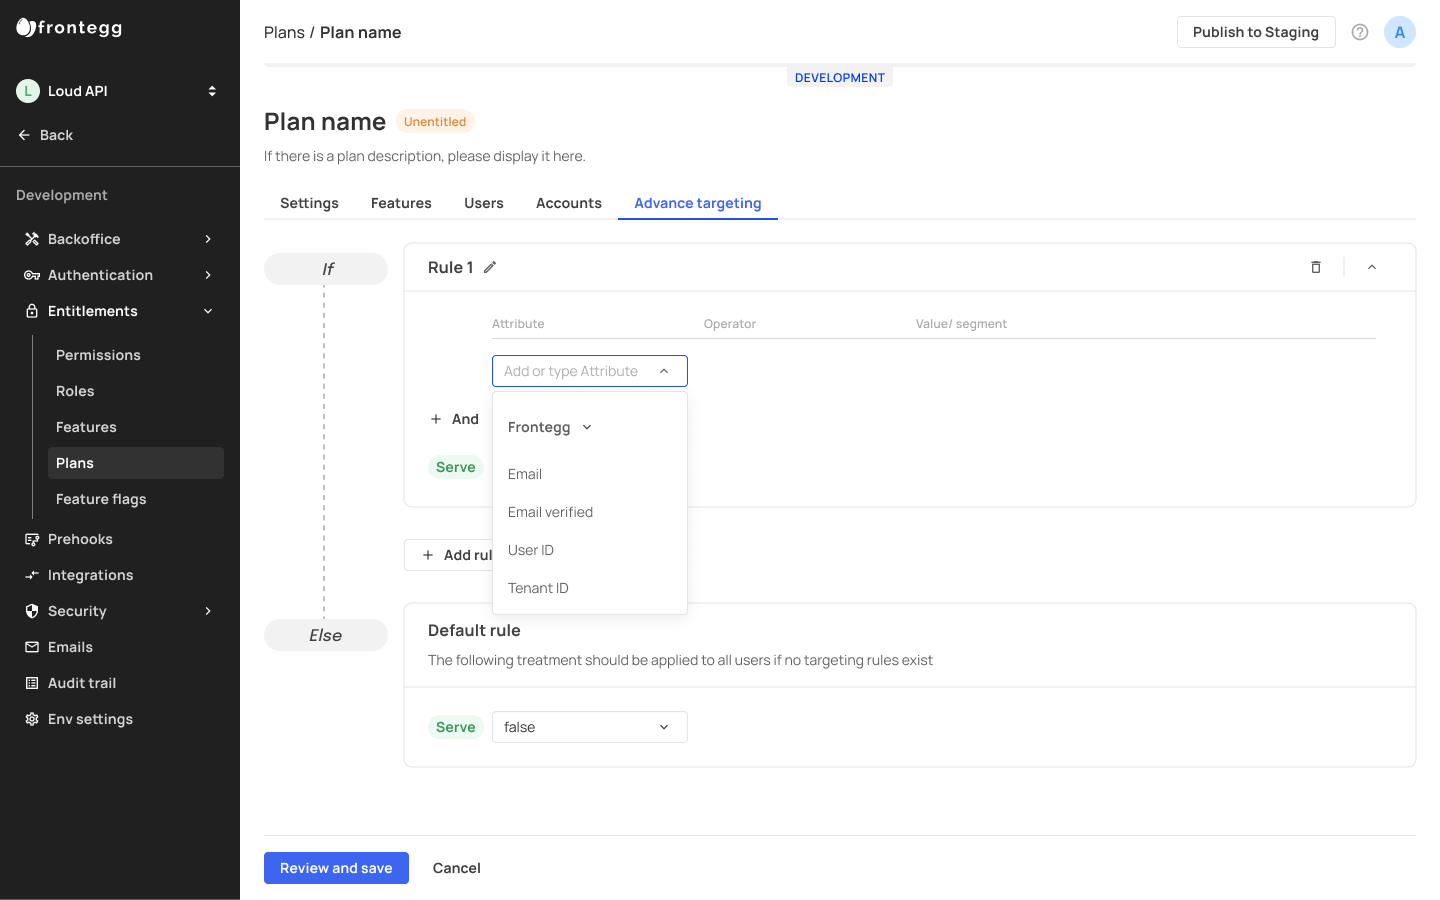
Custom Attributes
You can create custom attributes to fine-grain your users' enrollment in a plan. When creating custom attributes, the attribute Key and Value you set in your code must correlate with the text you input in the Attribute and Value/Segment fields.
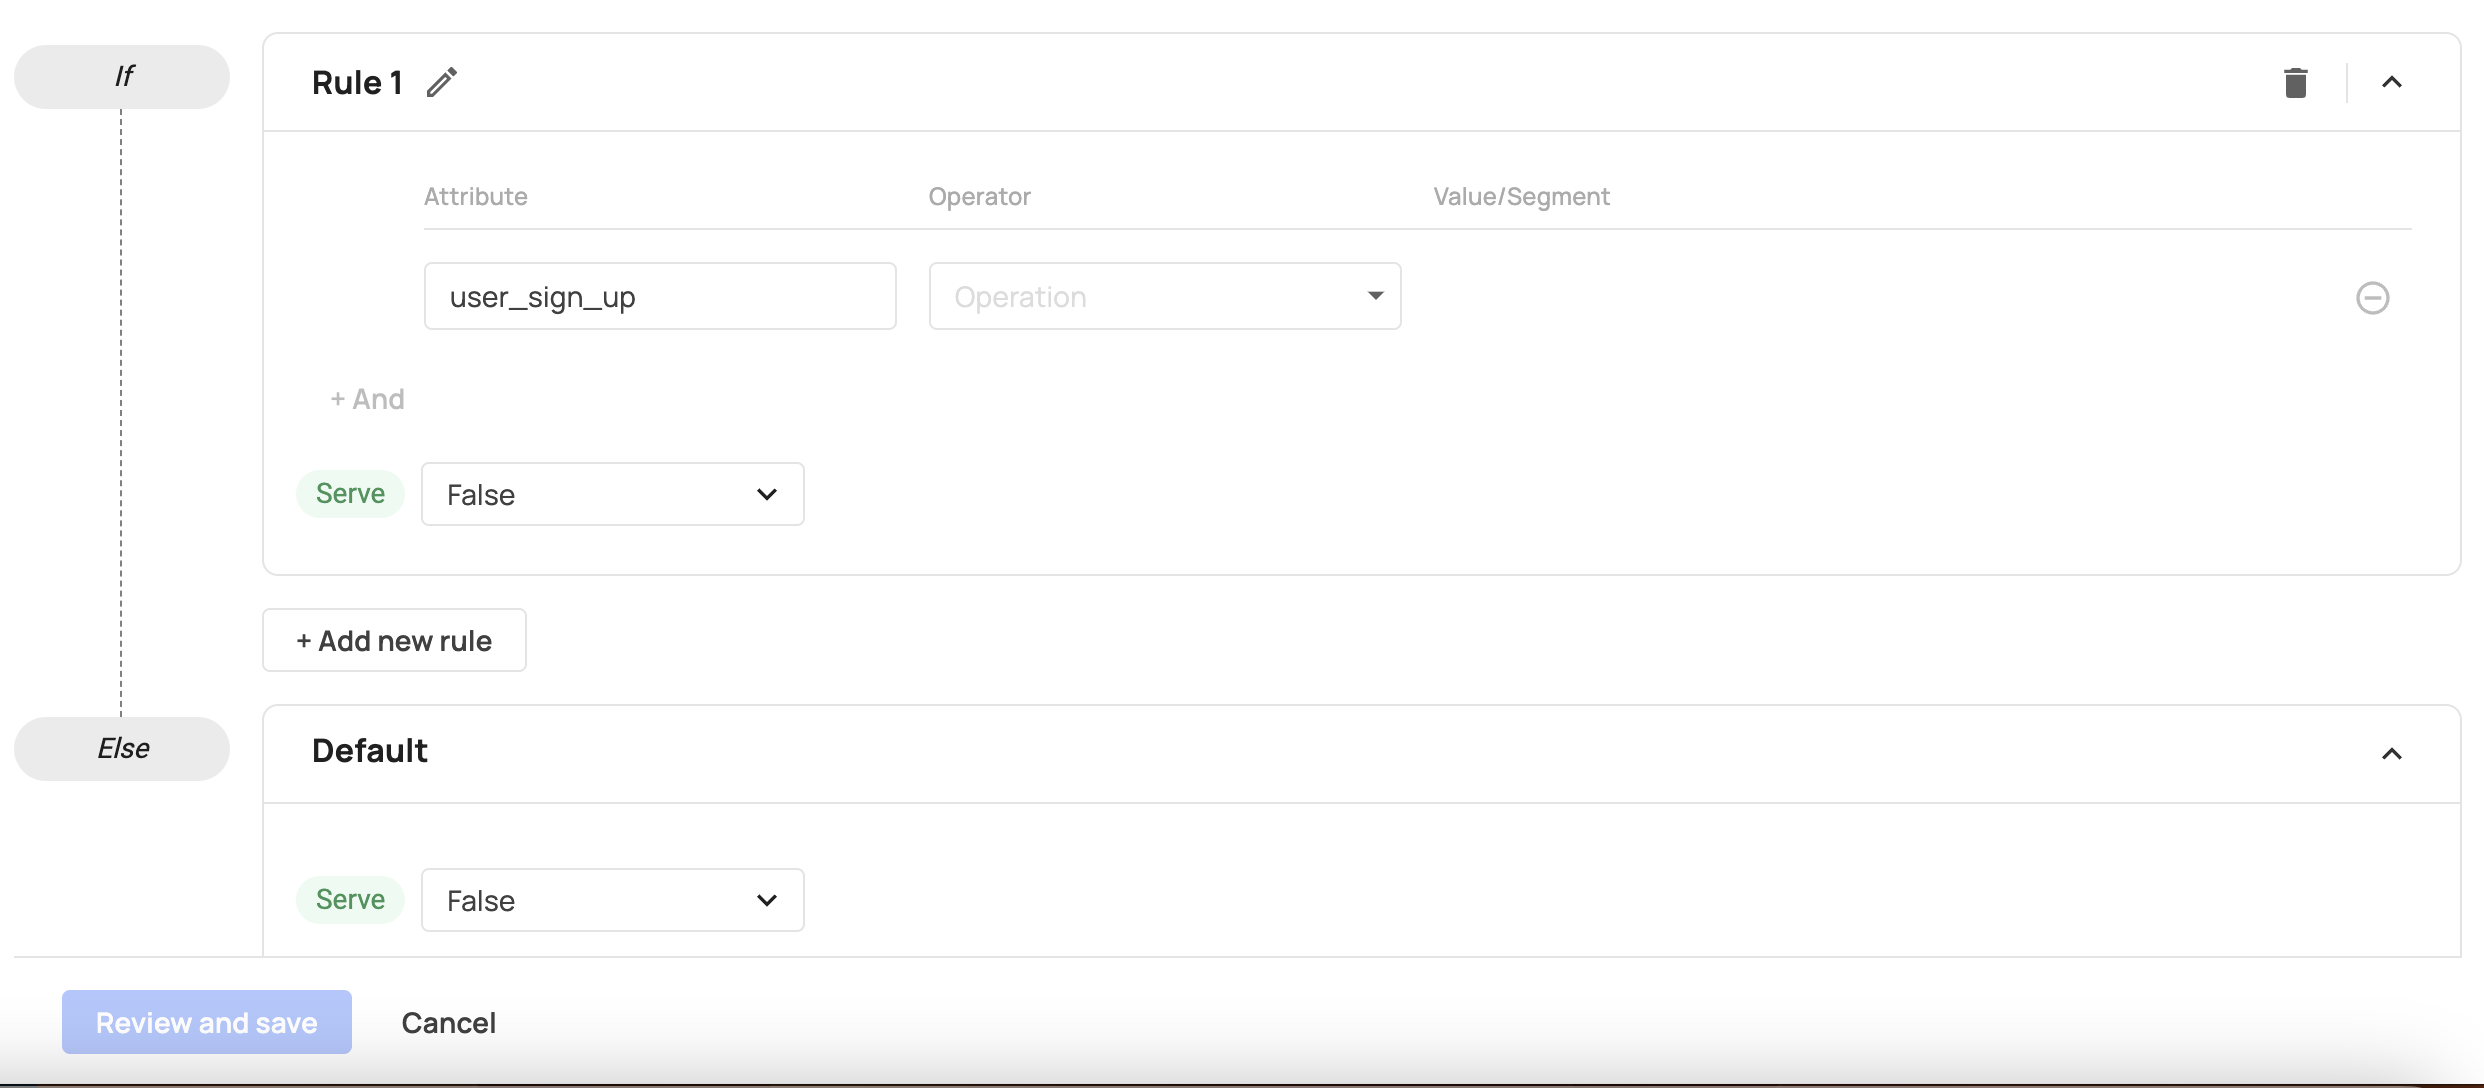
JWT Attributes
In addition to Custom attributes and default Frontegg attributes, you can target attributes from the user's JWT. Since we flat the jwt object, you can access its nestled properties, including arrays. For example, if you store information such as the user's date of birth as dateOfBirth, then you can target this attribute by inputing a jwt.dateOfBirth in the attribute field. For JWT attributes, you need to use the jwt prefix.
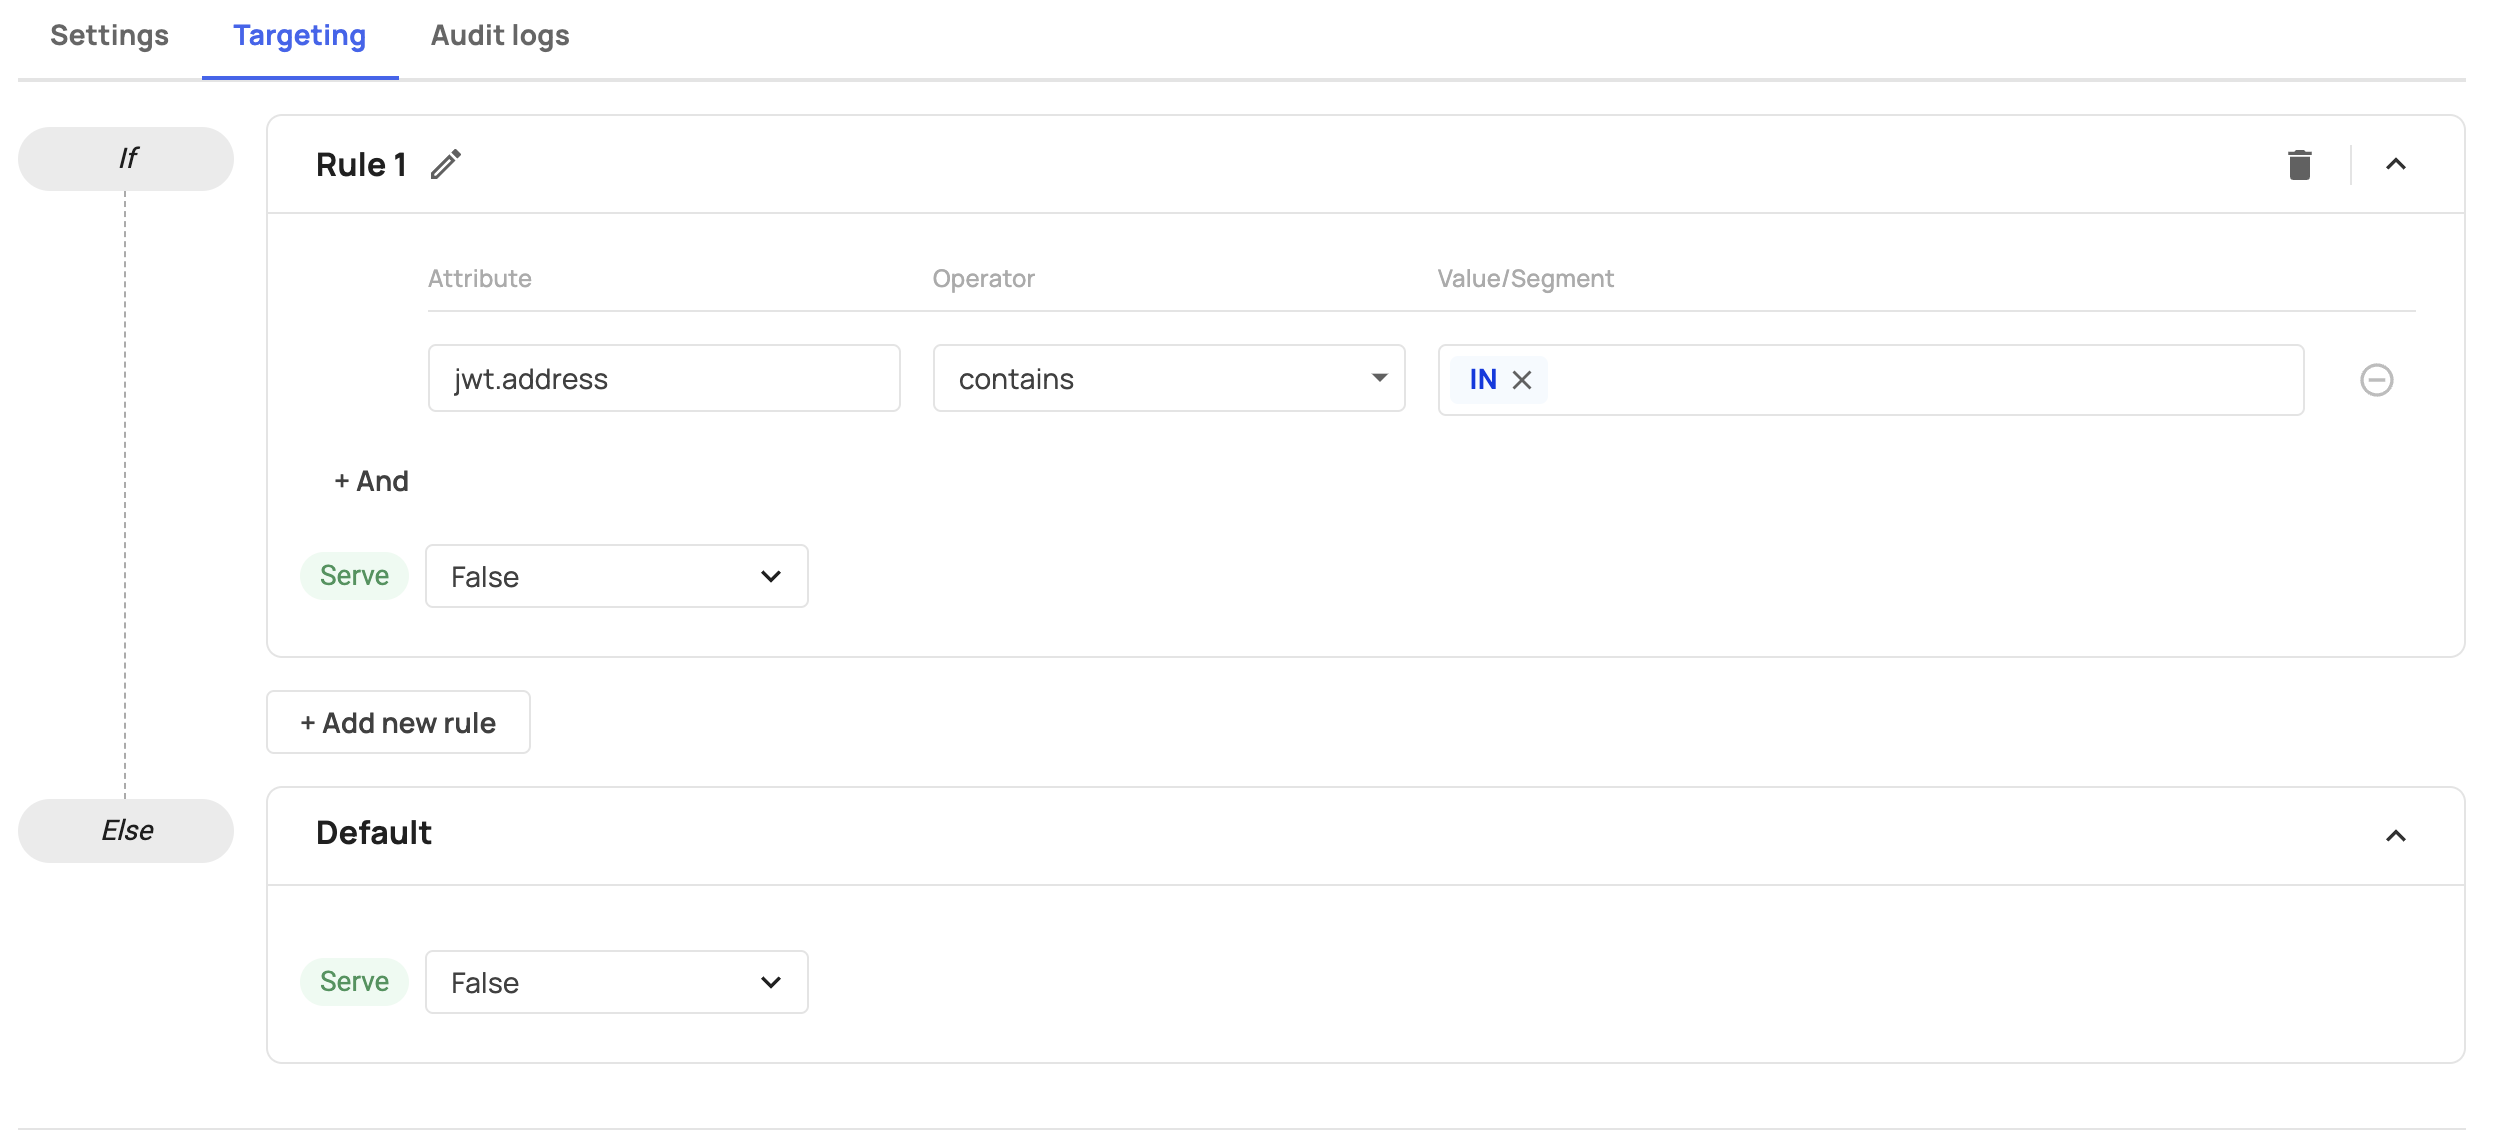
Entitlement SDKs
Check our Entitlements SDKs Collection
Plan Rule Limitations
When creating an advanced targeting rule for a plan, note the following limitations:
- Each environment (developing/staging/production) is limited to 100 plans (Contact us if you need to exceed this limitation).
- Each plan can have up to 10 rules
- Each Rule is limited to 10 conditions
- The Attribute field is limited to 100 characters
- The Value/Segment field can contain up to 25 items
- Each Value/Segment is limited to 50 characters
Updated about 10 hours ago