Login Integration (React)
This guide will seamlessly walk you through integrating Frontegg's login box into your React application, with robust functionalities including Sign In, Sign Up, and Single Sign-On (SSO). Streamline your authentication process with just a few lines of code, leveraging the power of redirects, OpenID Connect, and OAuth2.
⚡ Before you start: ⚡
Getting your Frontegg subdomain and clientId
Frontegg creates a unique
subdomainandclient idfor every environment created on the account. In order to retrieve theclientIdsubdomainthat will act as thebaseUrlin the integration, navigate to your workspace 'Settings' menu, 'Domains' and copy theFrontegg domainandclientId.You will need them for this guide.
STEP 1: Create a New React application
Note
If you have an existing app, skip this step.
To create a new app, use the following script.
npm create vite@latest app-with-frontegg --template react

cd app-with-frontegg
STEP 2: Install Frontegg library
Run the following command to install the Frontegg React.JS library.
npm install @frontegg/react react-router-dom
yarn add @frontegg/react [email protected]
STEP 3: Configure
Wrap your root component with FronteggProvider.
import React from 'react'
import ReactDOM from 'react-dom/client'
import App from './App.jsx'
import './index.css'
import { FronteggProvider } from '@frontegg/react';


const contextOptions = {
  baseUrl: 'https://[YOUR_SUBDOMAIN].frontegg.com',
  clientId: '[YOUR_CLIENT_ID]',
  appId: '[YOUR_APP_ID]'
};


const root = ReactDOM.createRoot(document.getElementById('root'));
root.render(
  <React.StrictMode>
    <FronteggProvider
    contextOptions={contextOptions}
    hostedLoginBox={true}
    >
        <App />
    </FronteggProvider>
  </React.StrictMode>,
  document.getElementById('root')
);
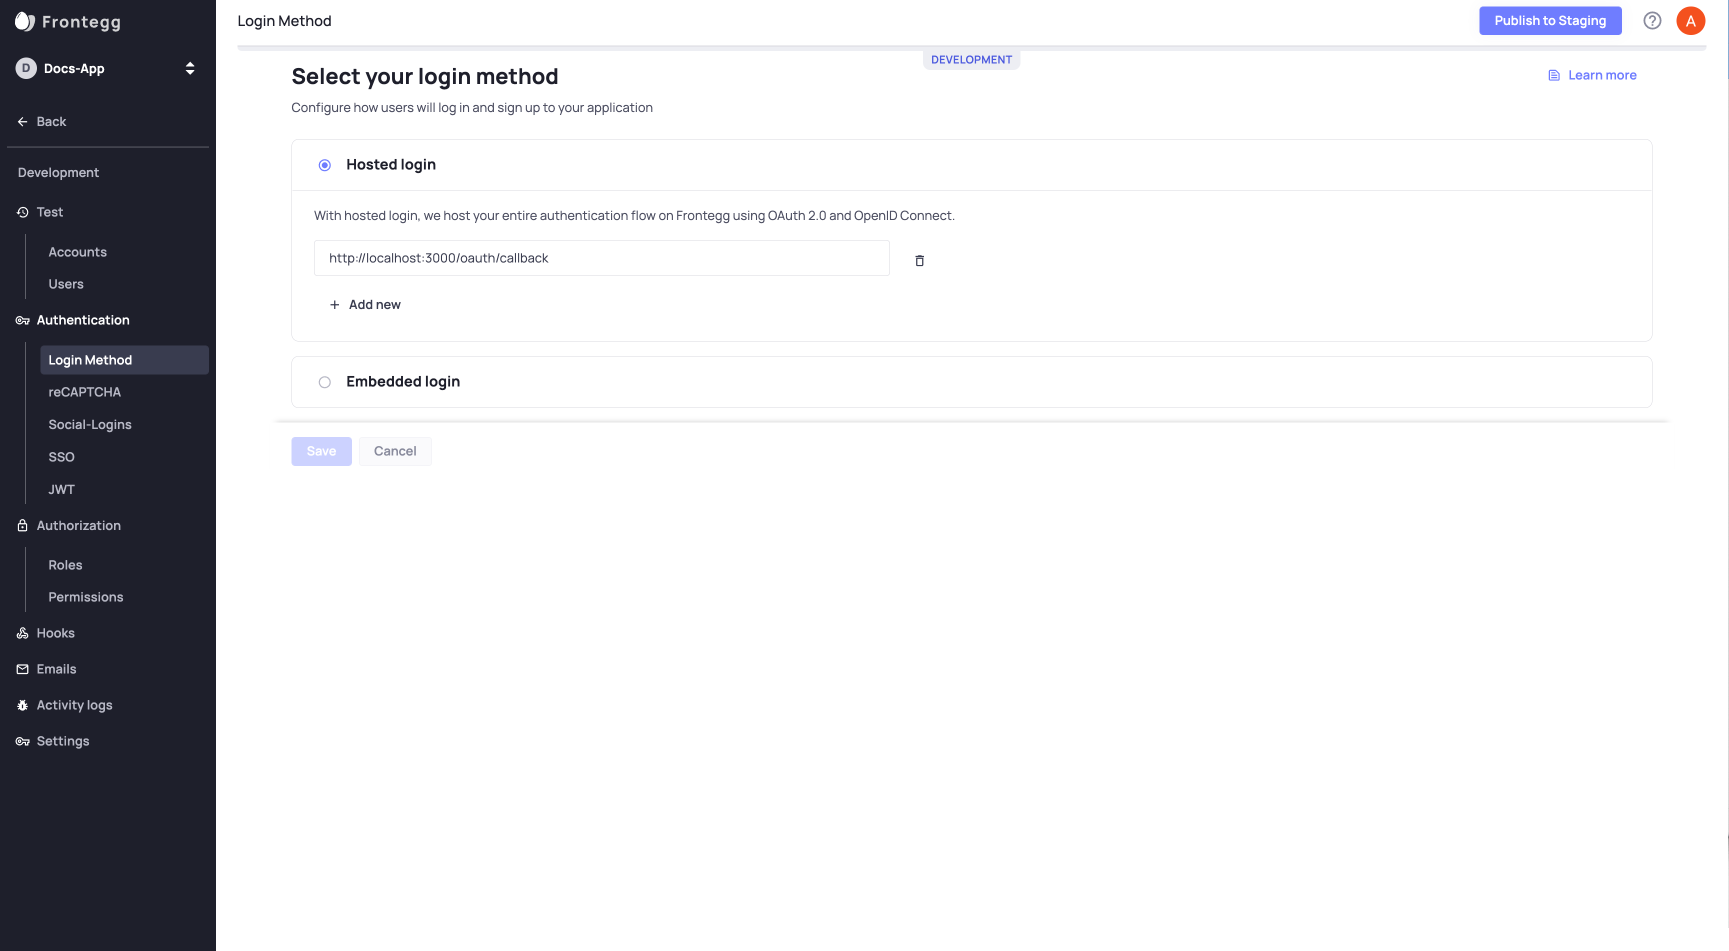
Under the hosted login configuration, add http\://localhost:5137/oauth/callback or http://localhost:3000/oauth/callback as the allowed redirectUrl (should be in accordance with the port your application is running on).

Configure Each Environment
Configure the hosted login for each environment separately.
STEP 4: Redirect to login
Using the Frontegg useAuth hook, you can determine whether a user is authenticated or not.
If the user is not authenticated, you can redirect the user to login via the useLoginWithRedirect hook as shown below.
import './App.css';
// import { useEffect } from 'react';
import { useAuth, useLoginWithRedirect, ContextHolder } from "@frontegg/react";
function App() {
const { user, isAuthenticated } = useAuth();
const loginWithRedirect = useLoginWithRedirect();
// Uncomment this to redirect to login automatically
// useEffect(() => {
// if (!isAuthenticated) {
// loginWithRedirect();
// }
// }, [isAuthenticated, loginWithRedirect]);
const logout = () => {
const baseUrl = ContextHolder.getContext().baseUrl;
window.location.href = `${baseUrl}/oauth/logout?post_logout_redirect_uri=${window.location}`;
};
return (
<div className="App">
{ isAuthenticated ? (
<div>
<div>
<img src={user?.profilePictureUrl || undefined} alt={user?.name}/>
</div>
<div>
<span>Logged in as: {user?.name}</span>
</div>
<div>
<button onClick={() => alert(user?.accessToken)}>What is my access token?</button>
</div>
<div>
<button onClick={() => logout()}>Click to logout</button>
</div>
</div>
) : (
<div>
<button onClick={() => loginWithRedirect()}>Click me to login</button>
</div>
)}
</div>
);
}
export default App;
Great, Frontegg is now integrated with your app!
Try it now!
Run your app and click on the Click me to login button.
Updated about 1 month ago