Configuring Frontegg as SAML IDP for 3rd party services
This capability is fully supported for Frontegg Hosted Login users
Hosted login with SAML (Security Assertion Markup Language) is a secure and efficient authentication mechanism that allows organizations to delegate the authentication process to a trusted identity provider (IdP). Instead of handling user authentication themselves, organizations can rely on a third-party IdP to verify their users' identities and grant them access to their services. If you want to connect third-party application with your Frontegg Hosted login via SAML, follow the steps below to configure your Frontegg Environment as an IDP for a third-party service.
Prerequisites:
This capability is fully supported if you are using Frontegg Hosted Login. If you are using Frontegg Embedded Login, it will not be possible to redirect the end user to the 3rd party application via social and SSO login methods.
Common use cases
You may be wondering about common use cases requiring the configuration of Frontegg as SAML IdP. Some examples may include:
- Add a support tool (such as Zendesk) as your third-party application and enable users to share the same identity with that support tool.
- Adding support for documentation platforms (e.g., readme.io or similar) and allowing your users to use the same identity credentials with that platform.
In such cases, the flow will resemble the following:

Configuring Frontegg as SAML IDP
The configuration of Frontegg as SAML IDP can be implemented either via the Frontegg portal's UI or via API calls.
Follow the guide below and send the requests in the order listed to get your Frontegg IDP working with third-party SAML service providers.
Configure in Frontegg Portal
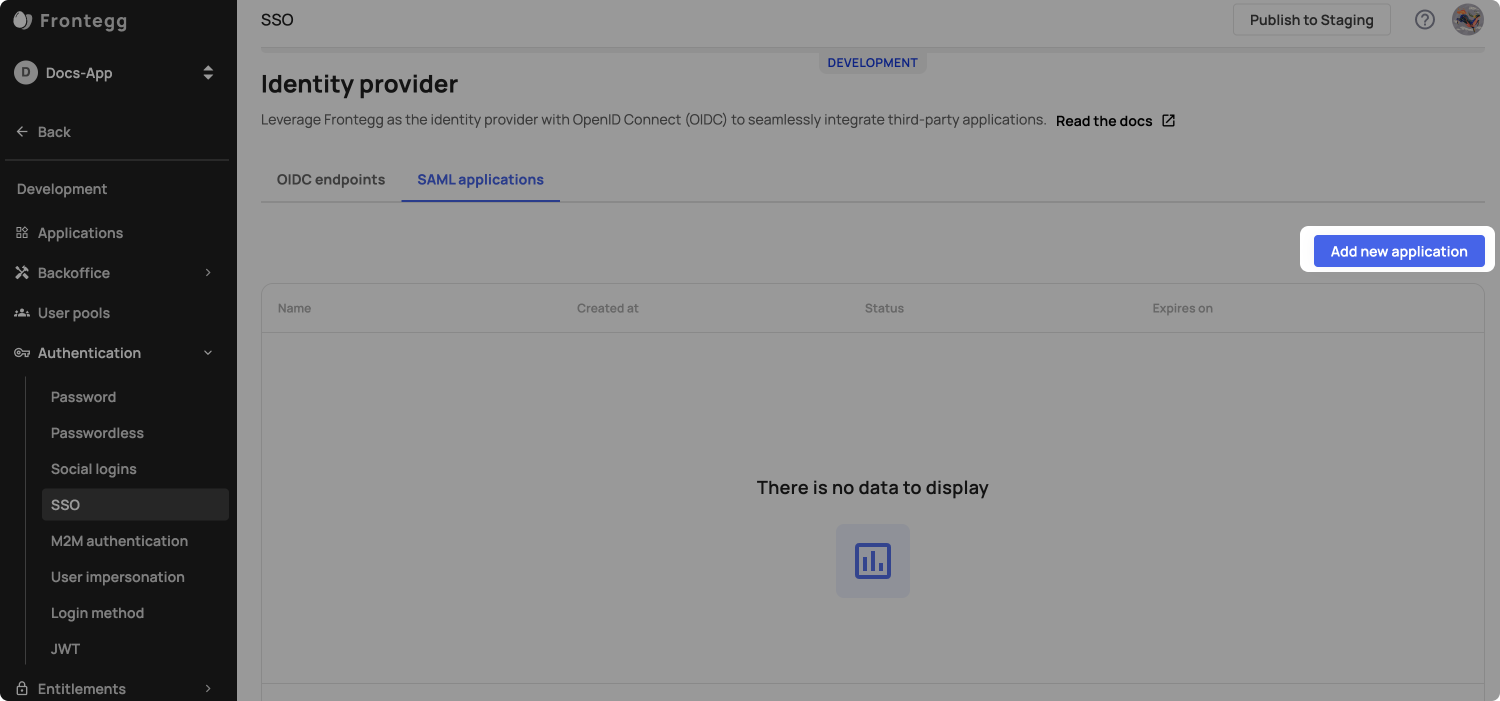
Go to the Identity Provider section under [NAME OF ENVIRONMENT] ➜ Authentication ➜ SSO ➜ Identity Provider ➜ Saml applications and click on Add new application:
Register the service provider (in our example, Zendesk) on Frontegg's side and insert the Entity ID and ACS URL in the dedicated fields:
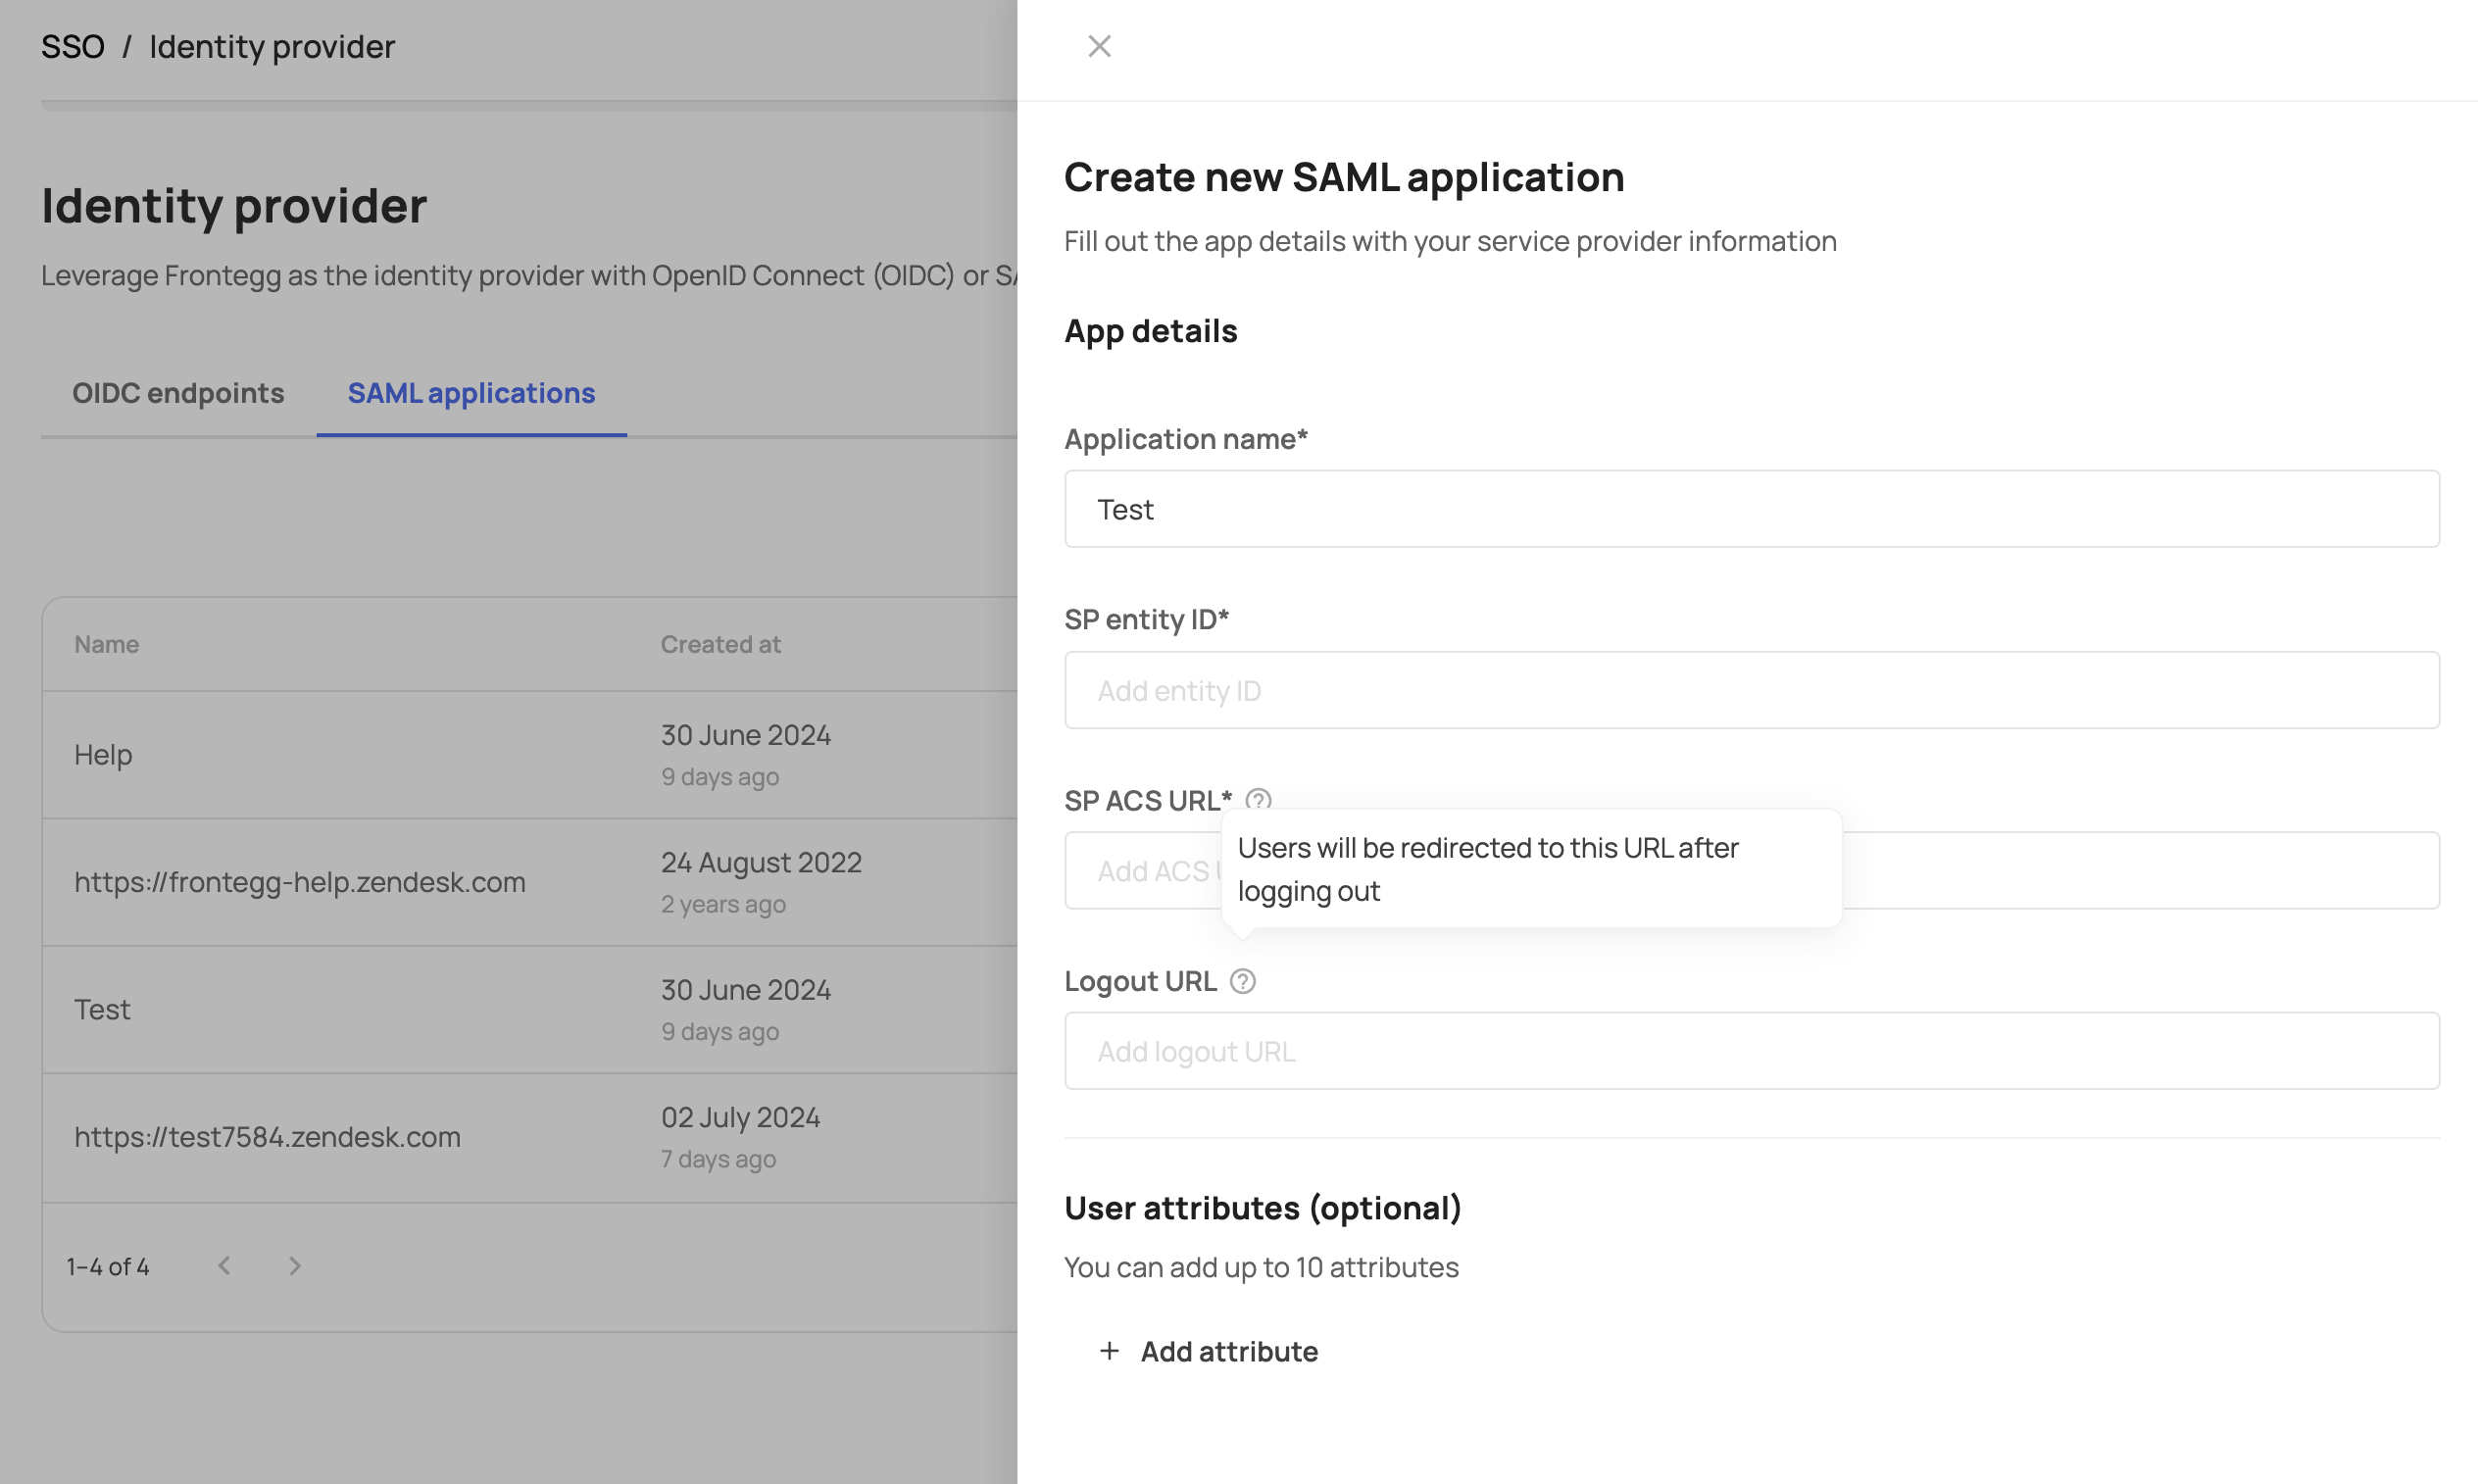
Logout URL
You can optionally add a Logout URL to choose to where the user will be redirected after initiating logout from the 3rd party service.
After clicking Next, you will see the SSO endpoint and the Frontegg (IdP) certificate. Enter these details into the appropriate fields in your Service Provider (Zendesk). Note that some providers might not accept public certificates, in which case you can use the SHA-256 fingerprint as an alternative.
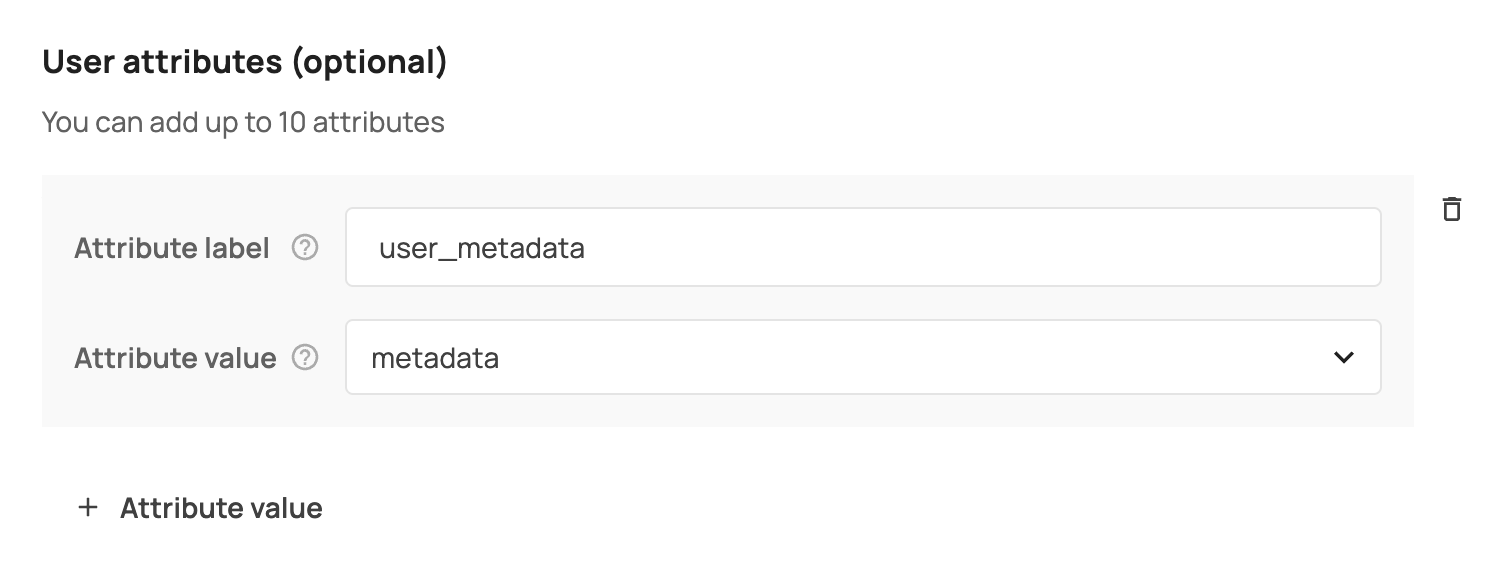
You also have the option to transfer user-related attributes from Frontegg to the Service Provider by choosing from a list of available attributes.
After clicking done, make sure you added the SP ACS URL as an authorized redirect URL as described here
Custom domain
If you have a custom domain set up for an environment, the SSO endpoint will be automatically generated using this domain.
Configure using API
Use your environment's credentials to authenticate with Frontegg's API:
curl --location --request POST 'https://api.frontegg.com/auth/vendor' \
--header 'Content-Type: application/json' \
--data-raw '{
    "clientId": "[YOUR-CLIENT-ID]",
    "secret": "[YOUR-API-KEY]"
}'
The call will return a token you can use for throughout the configuration process:
{
    "token": "[VENDOR-JWT]",
    "expiresIn": [EXPIRES-IN-SECONDS]
}
Creating SAML Configuration
Using the token you generated prior, create the SAML configuration.
Note that the entityId in the URL MUST match the entityId in the POST call.
curl --location --request POST 'https://api.frontegg.com/oauth/resources/configurations/saml/v1/[URL-ENCODED-ENTITY-ID]' \
--header 'Authorization: Bearer [token]' \
--header 'Content-Type: application/json' \
--data-raw '{
    "acsUrl": "[ACS-URL-FROM-SP]",
    "entityId": "[ENTITY-ID-FROM-SP]",
    "attributes": [
      {"name":"name","value":"name"},
      {"name":"email","value":"email"}
    ]
}'
The API will return XML metadata to use for the SAML configuration on the service provider configuration.
<EntityDescriptor
    xmlns="urn:oasis:names:tc:SAML:2.0:metadata"
    xmlns:assertion="urn:oasis:names:tc:SAML:2.0:assertion"
    xmlns:ds="http://www.w3.org/2000/09/xmldsig#" entityID="http://frontegg.com/saml">
    <IDPSSODescriptor WantAuthnRequestsSigned="false" protocolSupportEnumeration="urn:oasis:names:tc:SAML:2.0:protocol">
        <KeyDescriptor use="signing">
            <ds:KeyInfo
                xmlns:ds="http://www.w3.org/2000/09/xmldsig#">
                <ds:X509Data>
                    <ds:X509Certificate>[THE-PUBLIC-CERTIFICATE]</ds:X509Certificate>
                </ds:X509Data>
            </ds:KeyInfo>
        </KeyDescriptor>
        <KeyDescriptor use="encryption">
            <ds:KeyInfo
                xmlns:ds="http://www.w3.org/2000/09/xmldsig#">
                <ds:X509Data>
                    <ds:X509Certificate>[THE-PUBLIC-CERTIFICATE]</ds:X509Certificate>
                </ds:X509Data>
            </ds:KeyInfo>
        </KeyDescriptor>
        <NameIDFormat>urn:oasis:names:tc:SAML:1.1:nameid-format:emailAddress</NameIDFormat>
        <SingleSignOnService Binding="urn:oasis:names:tc:SAML:2.0:bindings:HTTP-POST" Location="[YOUR-VENDOR-HOST]/oauth/sso/SingleSignOnService"></SingleSignOnService>
        <SingleSignOnService Binding="urn:oasis:names:tc:SAML:2.0:bindings:HTTP-Redirect" Location="[YOUR-VENDOR-HOST]/oauth/sso/SingleSignOnService"></SingleSignOnService>
        <SingleLogoutService Binding="urn:oasis:names:tc:SAML:2.0:bindings:HTTP-POST" Location="[YOUR-VENDOR-HOST]/oauth/sso/SingleLogoutService"></SingleLogoutService>
        <SingleLogoutService Binding="urn:oasis:names:tc:SAML:2.0:bindings:HTTP-Redirect" Location="[YOUR-VENDOR-HOST]/oauth/sso/SingleLogoutService"></SingleLogoutService>
    </IDPSSODescriptor>
</EntityDescriptor>
Adding Redirect URLs
To enable Frontegg to authorize the redirect back to the third-party application, you must add your Service Provider's ACS URL to the list of authorized redirect URLs for Hosted Login.
In your application [NAME OF ENVIRONMENT] ➜ Login Method ➜ Hosted Login

That's it! Now, when users try to log into the third-party application, they will be redirected to your hosted login page and can use the same authentication method and credentials they use for your application.
Updated 4 months ago