Frontegg allows you to easily migrate users with a CSV file. The migration process imports users and their passwords, so once the migration process is finalized, you can immediately switch from your legacy system to Frontegg, without needing to keep both platforms operating simultaneously.
You can now perform the migration process efficiently from your Users page located in your Backoffice menu, where you must upload a JSON file describing the correlation between the column name of the legacy system and Frontegg.
Attribute Mapping
To ensure a seamless transition between your legacy system and Frontegg, you must upload a JSON file formatted in key-value pairs where the key value will correlate with the values of your legacy system and the value field will correlate with those of Frontegg's. Note that the only mandatory fields for migrations are email and tenantId.
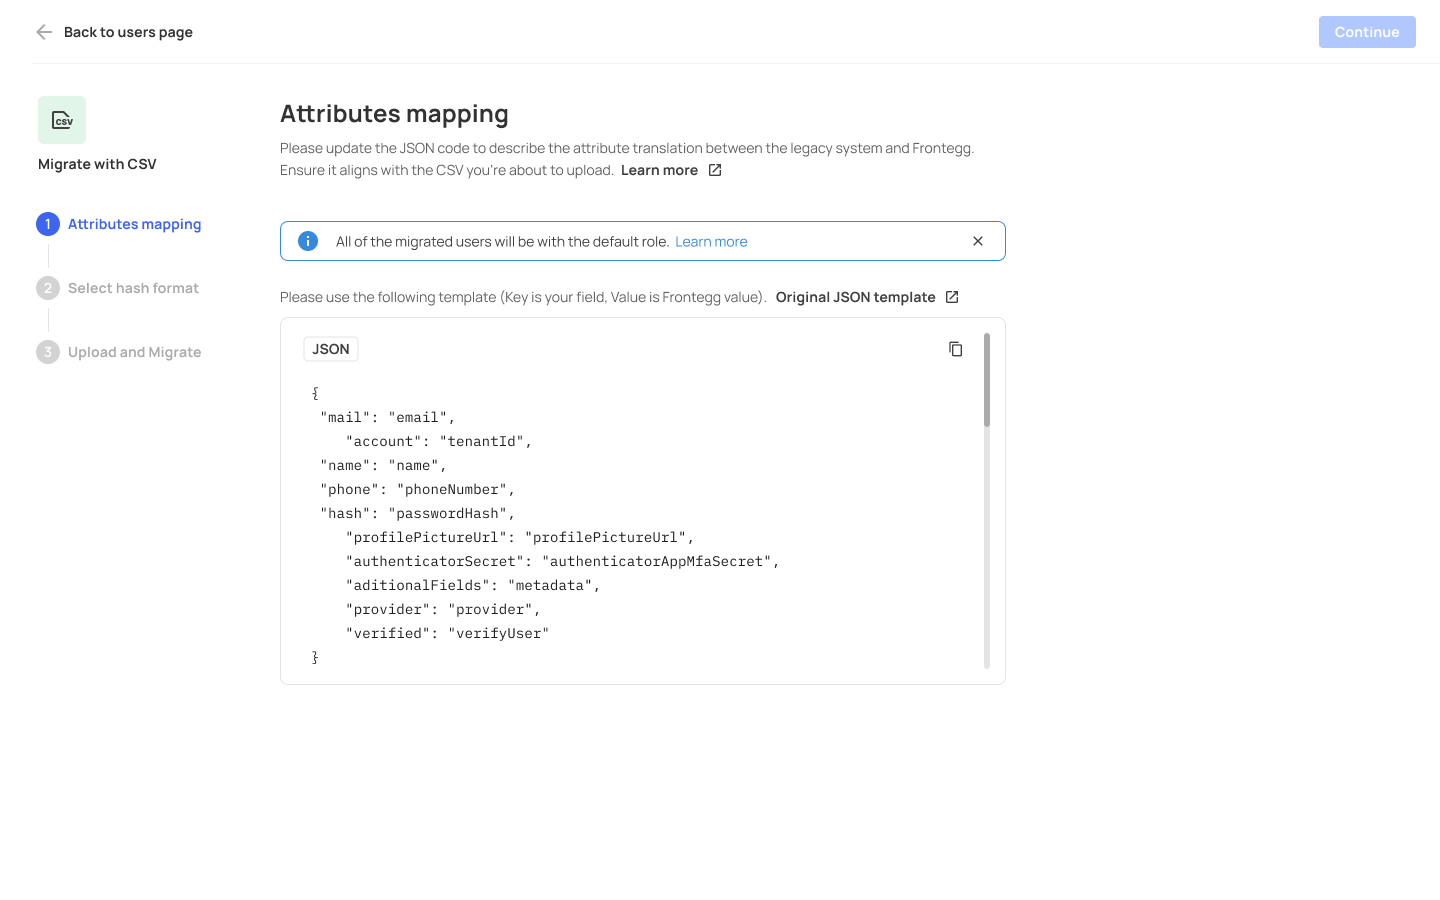
The following table lists all of the available Frontegg fields that can be included within your JSON file:
| Frontegg Field | Format | Mandatory/Optional |
|---|---|---|
email | string | Mandatory |
tenantId | string | Mandatory |
name | string | Optional |
profilePictureUrl | string | Optional |
PasswordHash | string | Optional |
authenticatorAppMfaSecret | string | Optional |
phoneNumber | string | Optional |
provider | typeof providersArray [number] | Optional |
metadata | string | Optional |
verifyUser | boolean | Optional |
roleIds | {string}|{string} | Optional* |
Migration with a
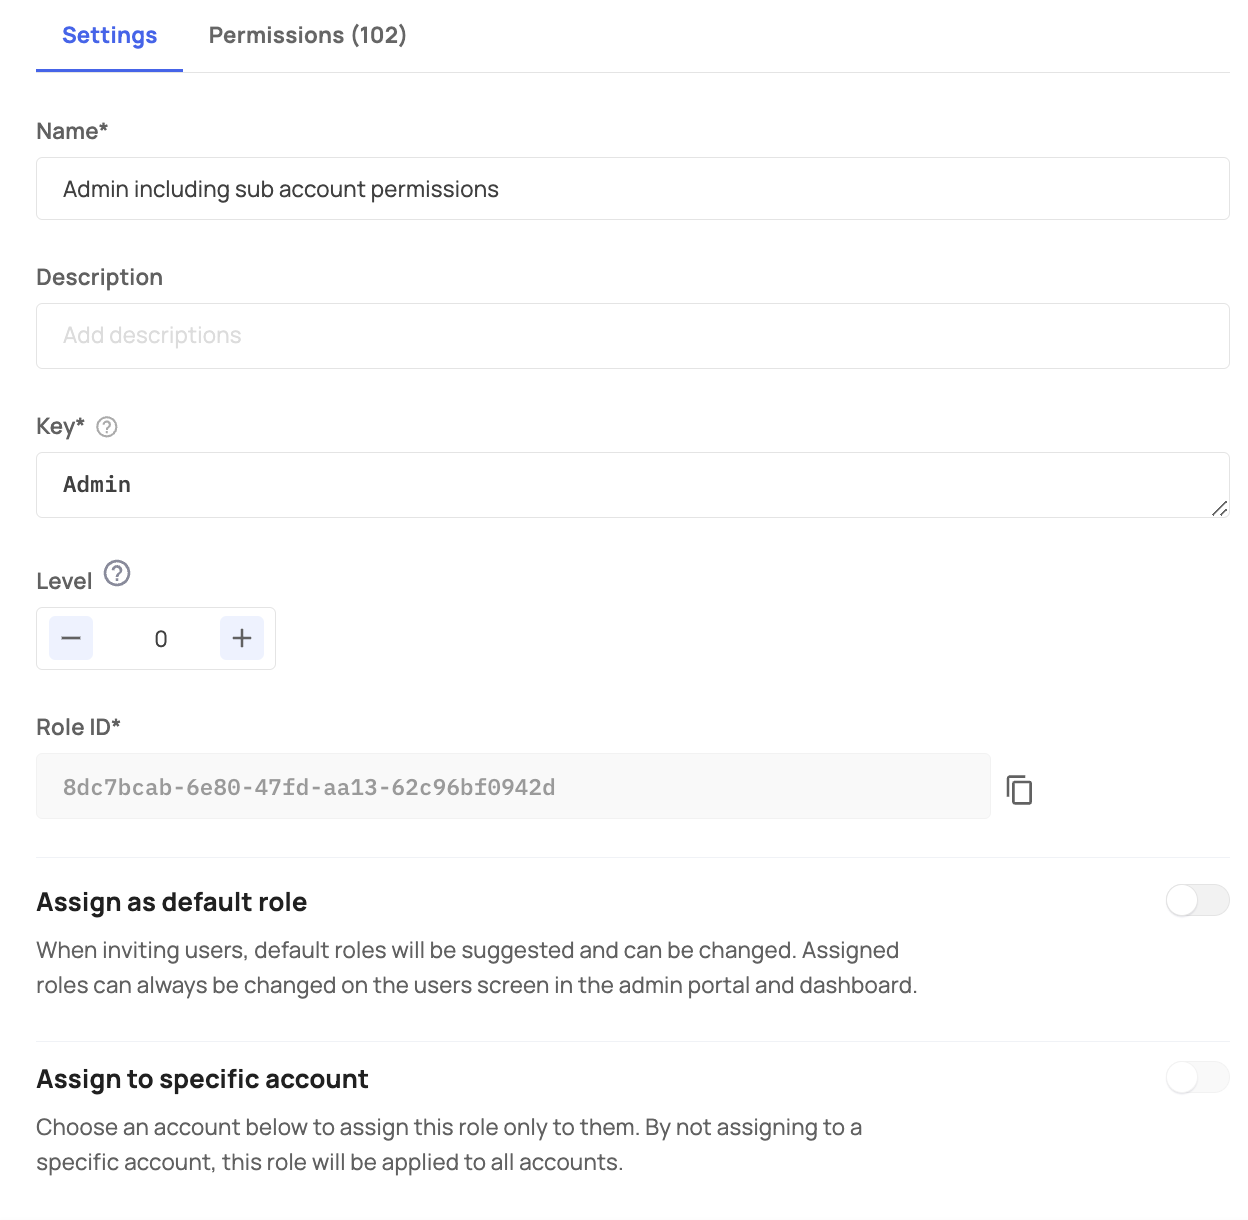
roleIdsTo find an ID of a role, go to [Environment]->Entitlements->Roles, and press the More actions (three dots) icon next to the role. The 'Role ID' will be located under the Settings tab.
- Roles must be created prior to migration.
- If no
roleIdsfield is specified during migration, the default role of the account will be applied.- You can state multiple IDs under the
roleIdsfield in the following format (strings):{roleId}|{roleId}.
Exporting Hash Passwords
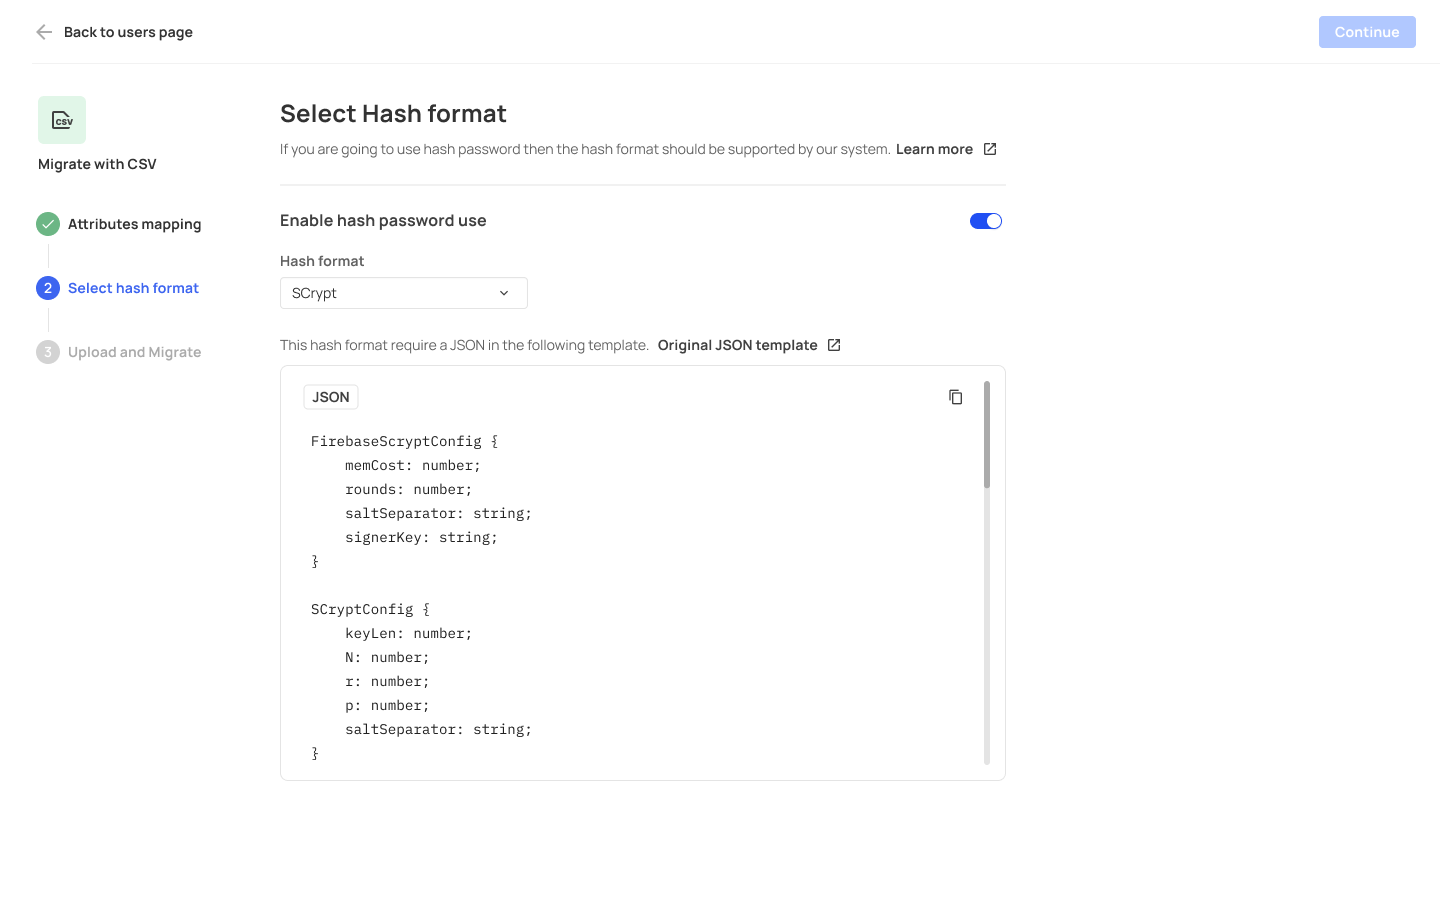
While not mandatory, if you opt to import users with their hash passwords, the format used should be supported by Frontegg. Choose the hash format from the dropdown menu in the second step of CSV migration (Select hash format) and follow the instructions to ensure proper migration.
Hashing Config
Note that if you use SCrypt or FirbaseScrypt as your hash passwords, you must also provide a hashing config.
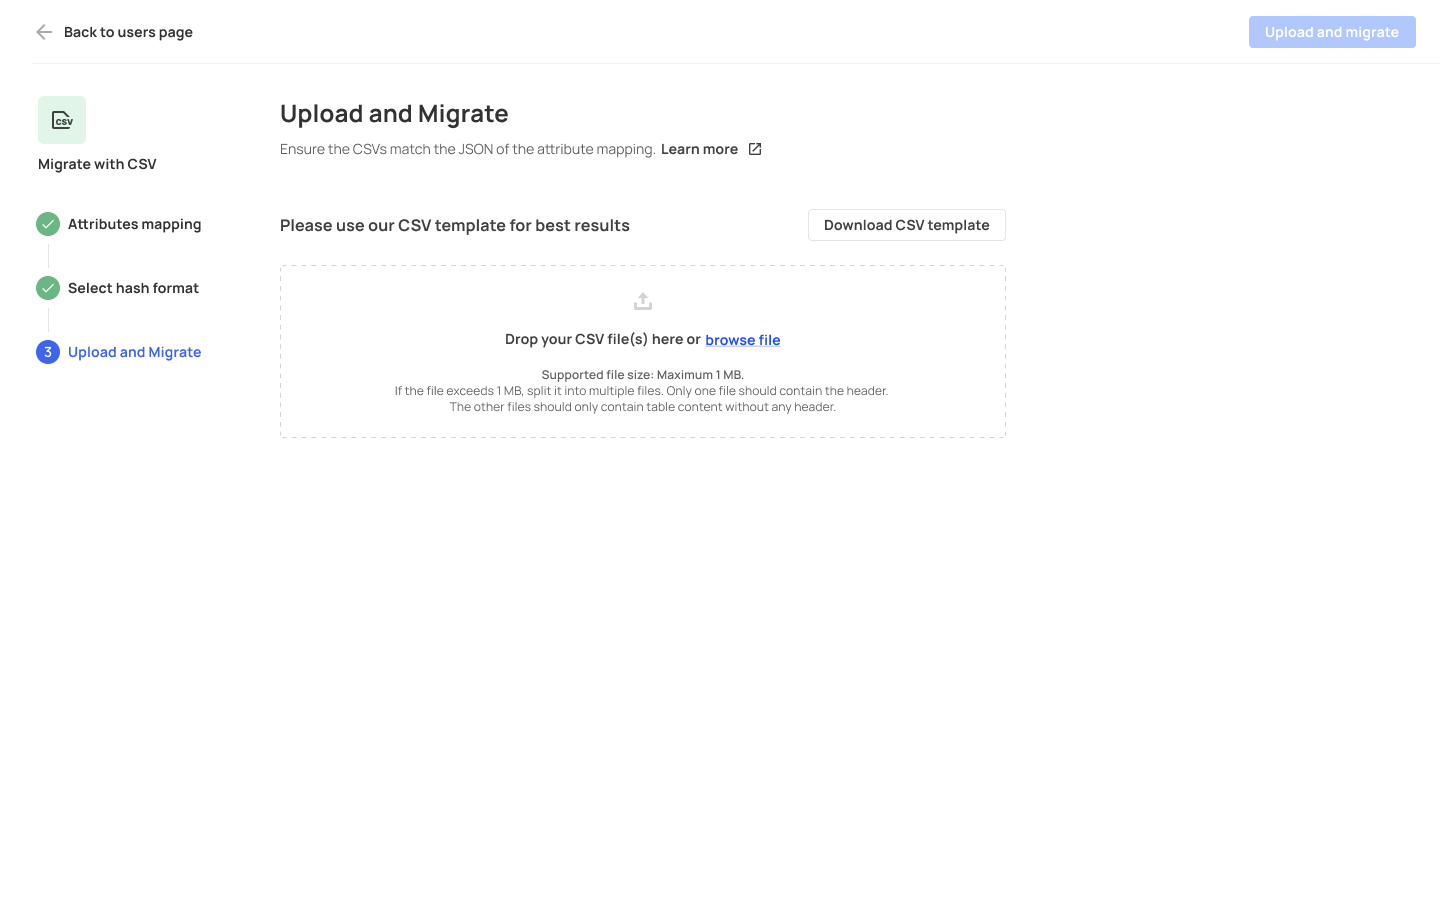
Uploading Your CSV File
After completing your attribute mapping and hash format selection, it's time to upload your CSV file and migrate your users to Frontegg.
CSV format
All CSV files should not have
\n\rin their name format, otherwise the system will count the file as invalid.
Make sure to runtr -d '\r' < filename.csv > filenameFixed.csvto ensure proper formatting.
CSV Parameters and Limitation
To ensure your CSV file is uploaded seamlessly, it must include the fields you uploaded previously in the attribute mapping file.
If a single file upload doesn’t suffice, you can upload multiple CSV files to support your user migration. into multiple files. You can upload up to 10 files of 1MB each. Each upload must contain a 'csv' suffix in its name.
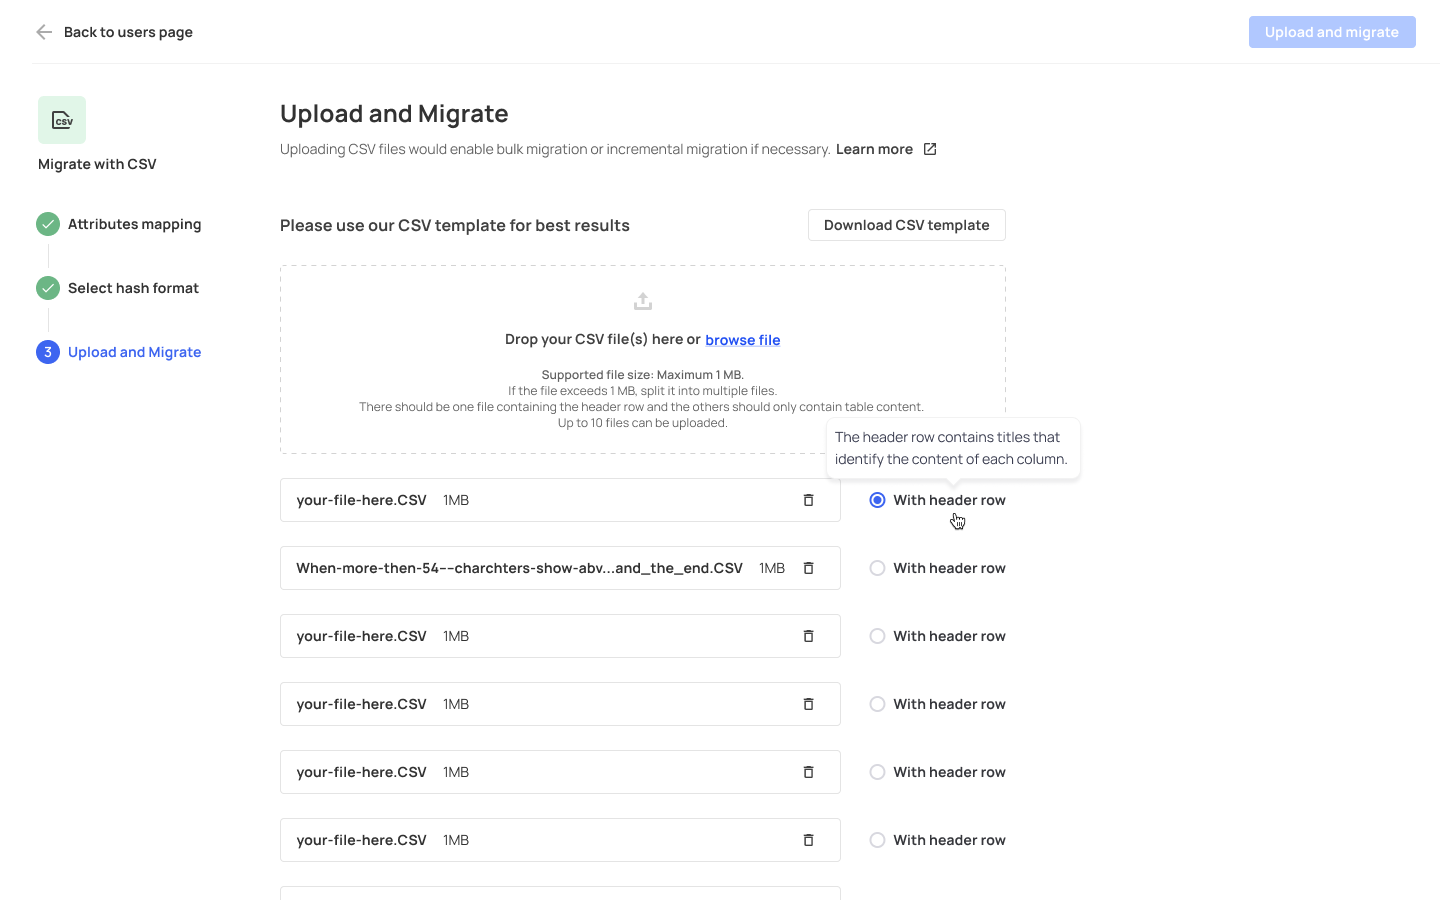
Header Row Import
Whether you upload a single or multiple CSV files, the first file should include a header row specifying the attributes that must be imported. You must therefore specify from where Frontgg should extract the header to enact it on all subsequent files, like so:
User Status After Migration
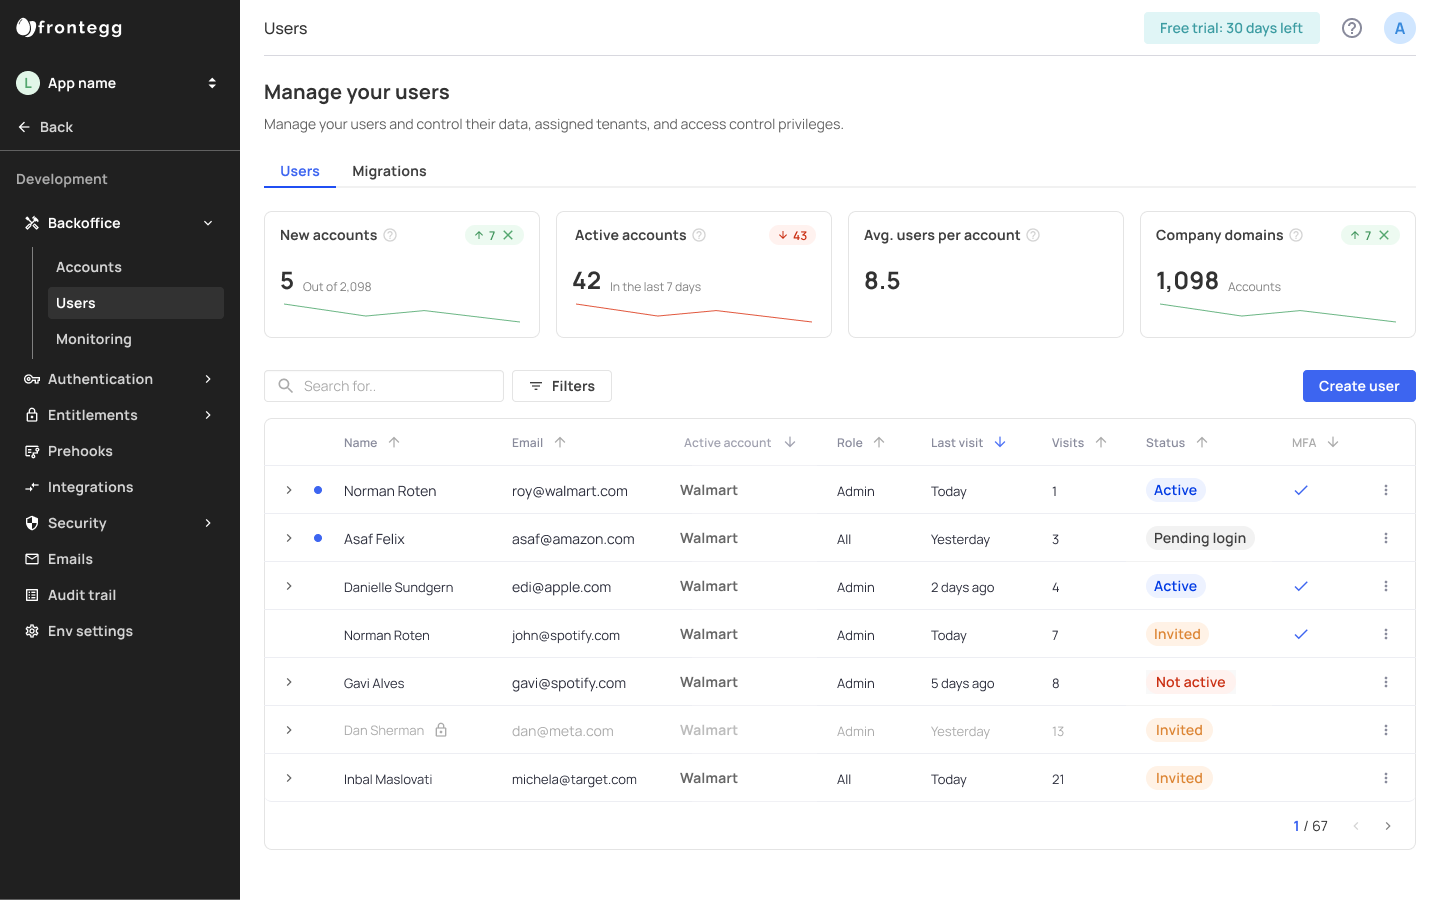
Upon uploading your CSV file, the migration process will ensue. The users will be uploaded to your dashboard with the fields you indicated beforehand. Their status can be one of the following:
- Active - user completed login after migration
- Pending Login - user status after migration, before first login
- Invited - user received an invite mail
- Data error - fields were imported incorrectly
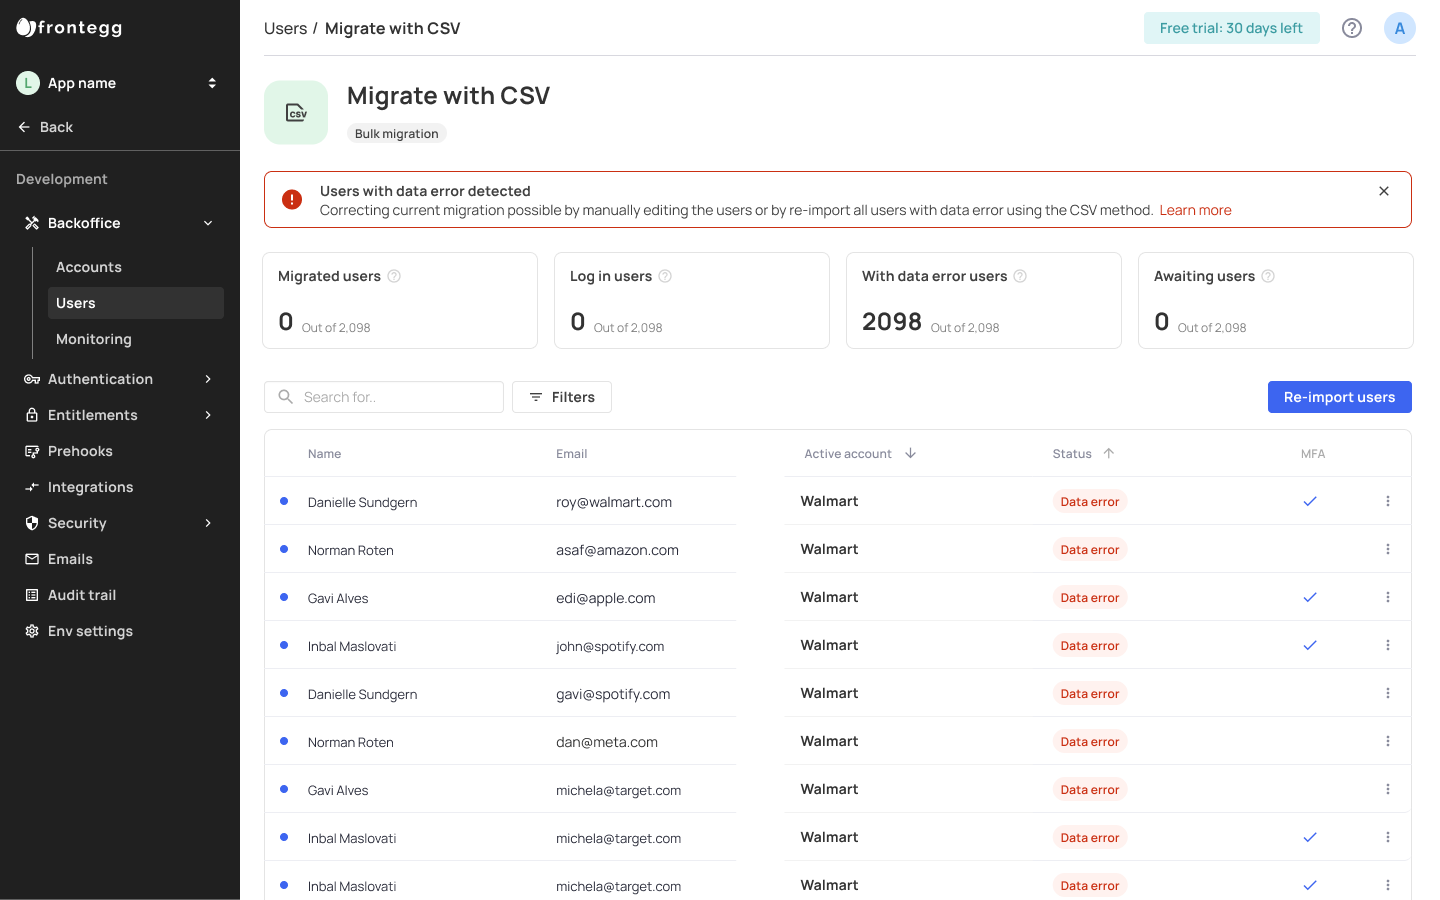
Possible Errors in Migration
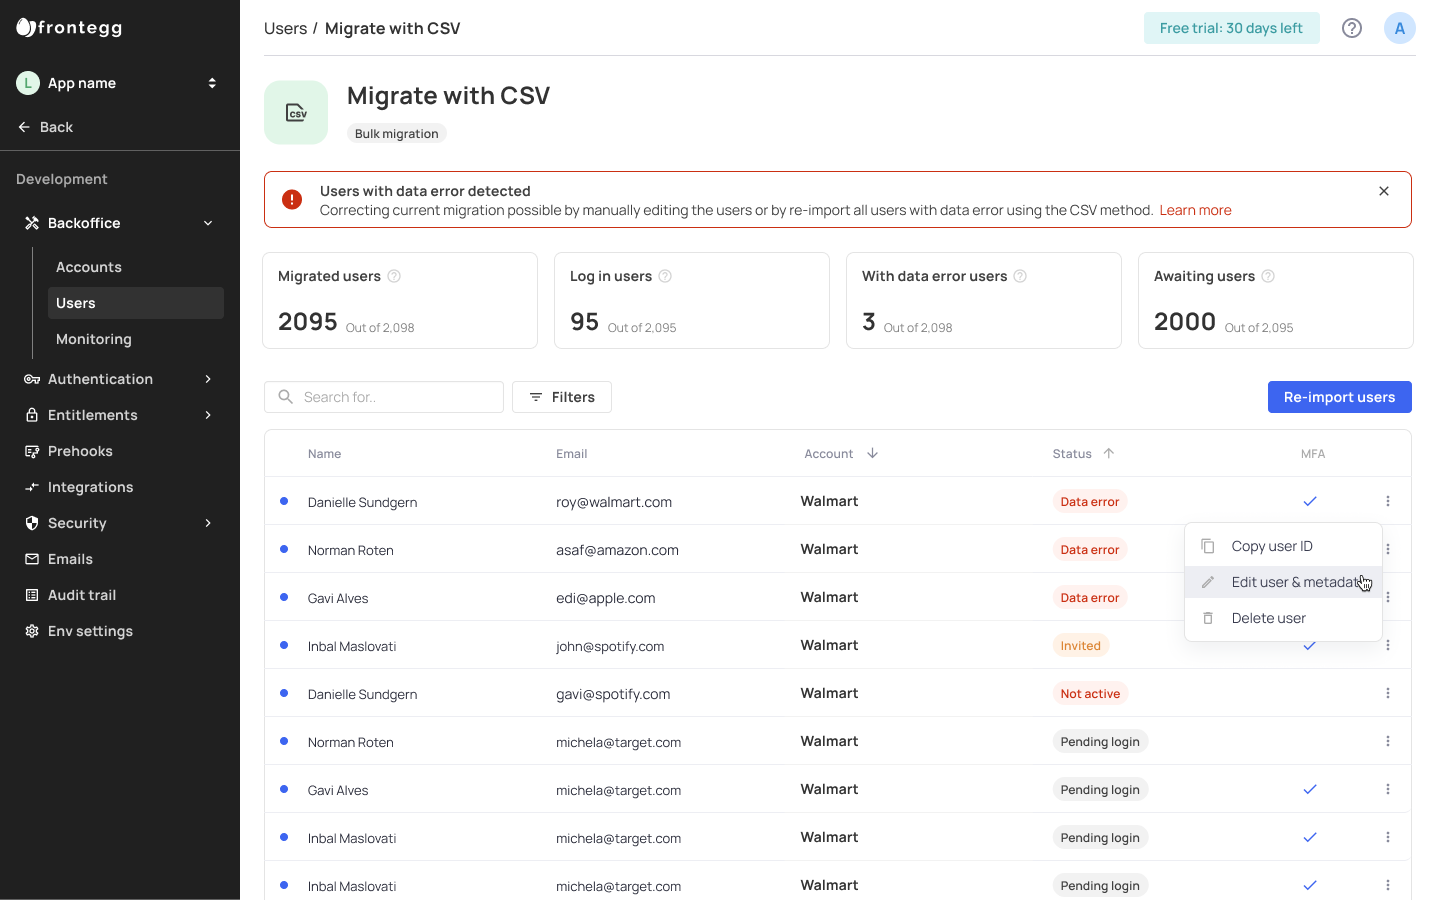
A Data error status may occur if the CSV file columns do not correspond with the migrated fields correctly. If the Data error is for several users, you can manually adjust those users' metadata by choosing the Edit user & metadata option. If the Data error inflicts all users, you should check your attribute settings and re-import the file.
Error in migration due to problem in attribute mapping
Updated 2 months ago