Facebook Login
To enable your users to login with Facebook, you must enable Facebook login in the builder and then create an application with Facebook to serve as the OAuth provider.
Read below to learn how.
Enable In Builder
Go to Home and click on the Login Box builder.
In the left panel, toggle the switch to on for Facebook.

Moving Environments
When moving a project from one environment to another, Frontegg moves the social login environment configurations for you. For instance, if moving from development to production, Frontegg moves the development social login configurations to production.
Step 1: Register Your App
To create your OAuth application, go to Facebook for Developers.
Next, select My Apps .

Then, click on Create App.

Select an app type. Learn more about Facebook's app types, set your app name, and set your app contact email.

Step 2: Add Facebook Login
On your Facebook application's dashboard, click the Facebook Login Set Up button.

Then, enable Client OAuth Login, enable Web OAuth Login, and set your Redirect URI (for example, http://localhost:3000/account/social/success).

Step 3: Enable public_profile advanced permission
Depending upon which Facebook application type you registered, you may need to enable public_profile advanced permission.
In App Review, select Permissions and Features, look for public_profile and click Get Advanced Access.

Advanced Permission
If you do not see the option to Get Advanced Access, either the app type you selected already has it by default or else it is not available with the app type you selected.
Step 4: Enter Credentials In Frontegg
Test Environment
If you are still developing your app, create a Facebook test app and enter those credentials into the Frontegg Portal. See the guide. When ready for production, switch your credentials to your Facebook production app.
Copy the App ID and App Secret from Facebook Login.

Go to Environments ➜ [NAME OF ENVIRONMENT] ➜ Authentication ➜ Social Logins.
Click on the Facebook manage button.

Enter your Facebook information. Then save and publish.

Step 5: Test Facebook Button
In your login screen, you should see a Facebook button that redirects to the Facebook OAuth Consent screen for login. Test it to make sure it works.

Set Who Can Login With Facebook
By default, only invited users can login with Facebook. If you want to allow new users to signup with Facebook, go to the Login Box builder and enable Allow Signups in the left panel.
Create Test Environment
To test your app in a development environment, create a Facebook test app.
Step 1: Create Test App
To create a test app, click on your app name on the top left corner. Select Create Test App .

Give it a name and select Create Test App.

Step 2: Add Facebook Login
To add Facebook login, it is the same process as for the setup you did for the production app:
- On your app's dashboard, click Set Up for Facebook Login.

Step 3: Enter Credential In Frontegg
From your Facebook test app, copy your App ID and App Secret and enter them into the Facebook Login configuration section of your Frontegg Portal.

Go to Environments ➜ [NAME OF ENVIRONMENT] ➜ Authentication ➜ Social Logins, click on the Facebook Login manage button and enter your Facebook information.
Customizing Authentication Scopes for Facebook
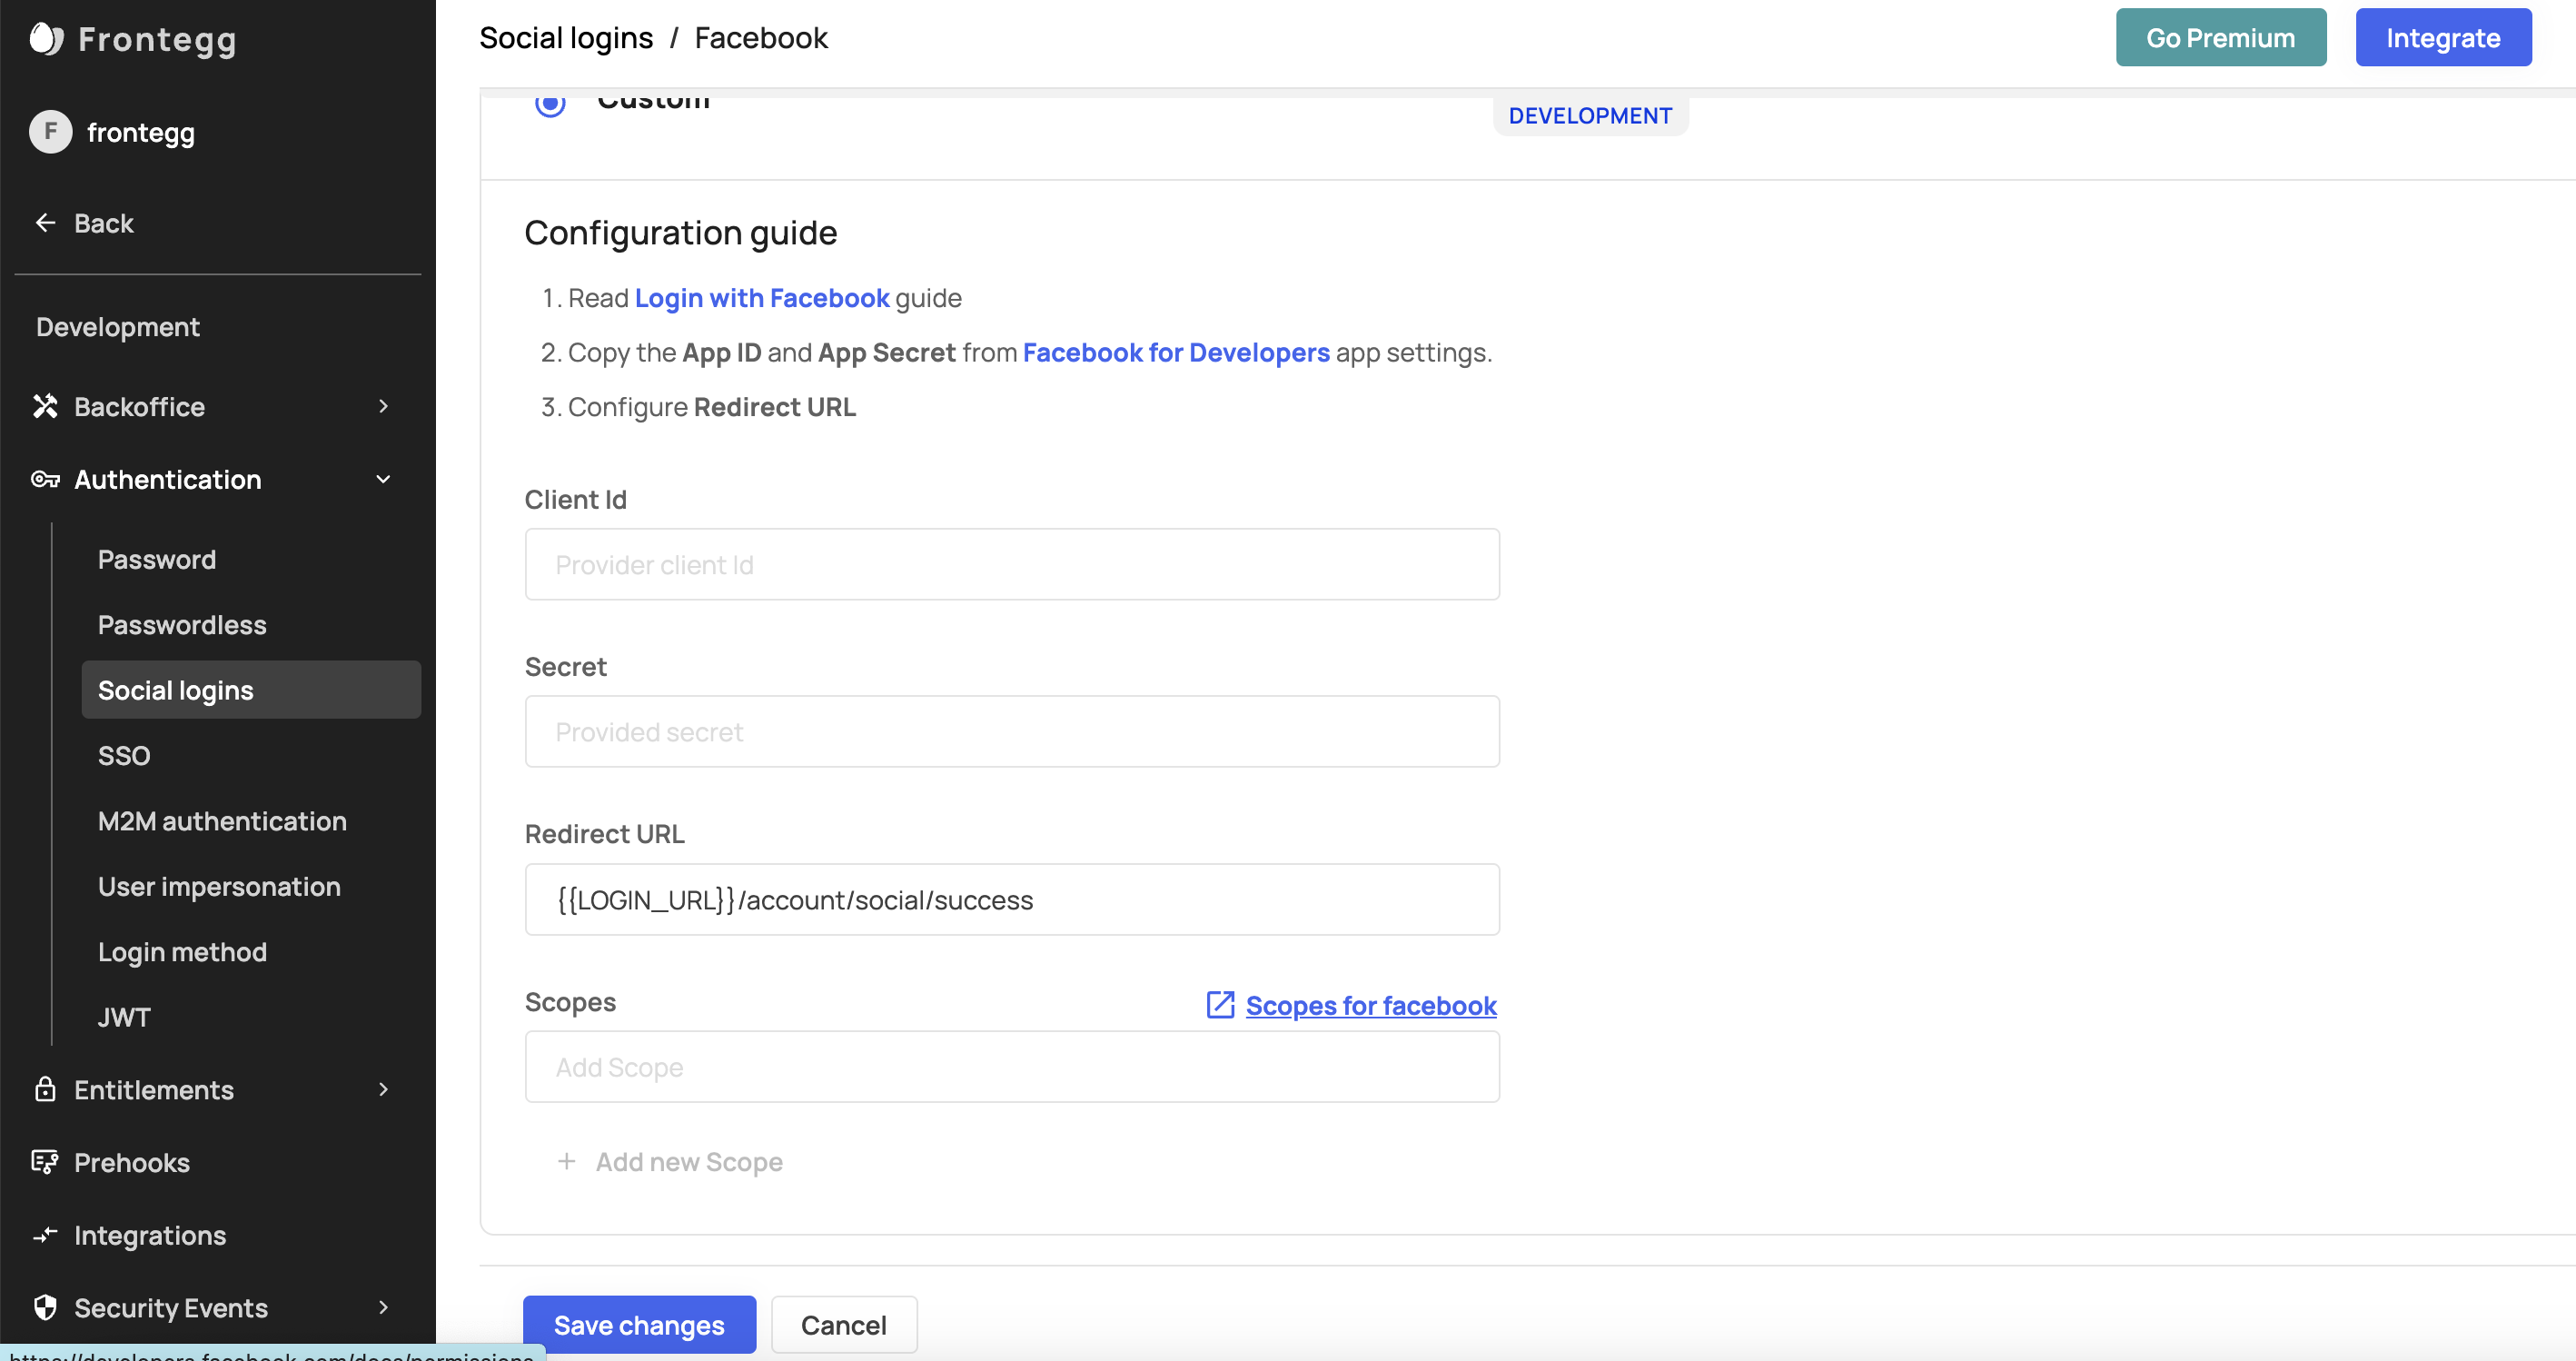
Customizing Scopes for Facebook Social Login
Scopes let you specify exactly what type of information your application can fetch from your users after they grant it access— and the generated access token includes these approved scopes. Frontegg currently fetches a user profile and user email as default scopes when users authenticate with their Facebook account. You can add additional, custom scopes to your social login via your Frontegg portal. To do so, go to [Environment name] > Authentication > Social login > Custom > Scopes.
Updated 9 months ago