User management
The Users tab in your back office allows you to manage various aspects of your users and control their activity and metadata.
Backoffice and Your Environments
Note that Each capability is available in all the environments you are using (Development, Staging, QA, and Production). Each environment will reflect it’s own accounts and users, so the accounts and users in Development, Stating, and QA environments are probably testing accounts/users, while those in Production will be your customers, as well as possibly testing accounts/users.
You can filter your testing users by filtering your domain in the _Excluded domains _filter in the users section.
Managing users for your customer's accounts.
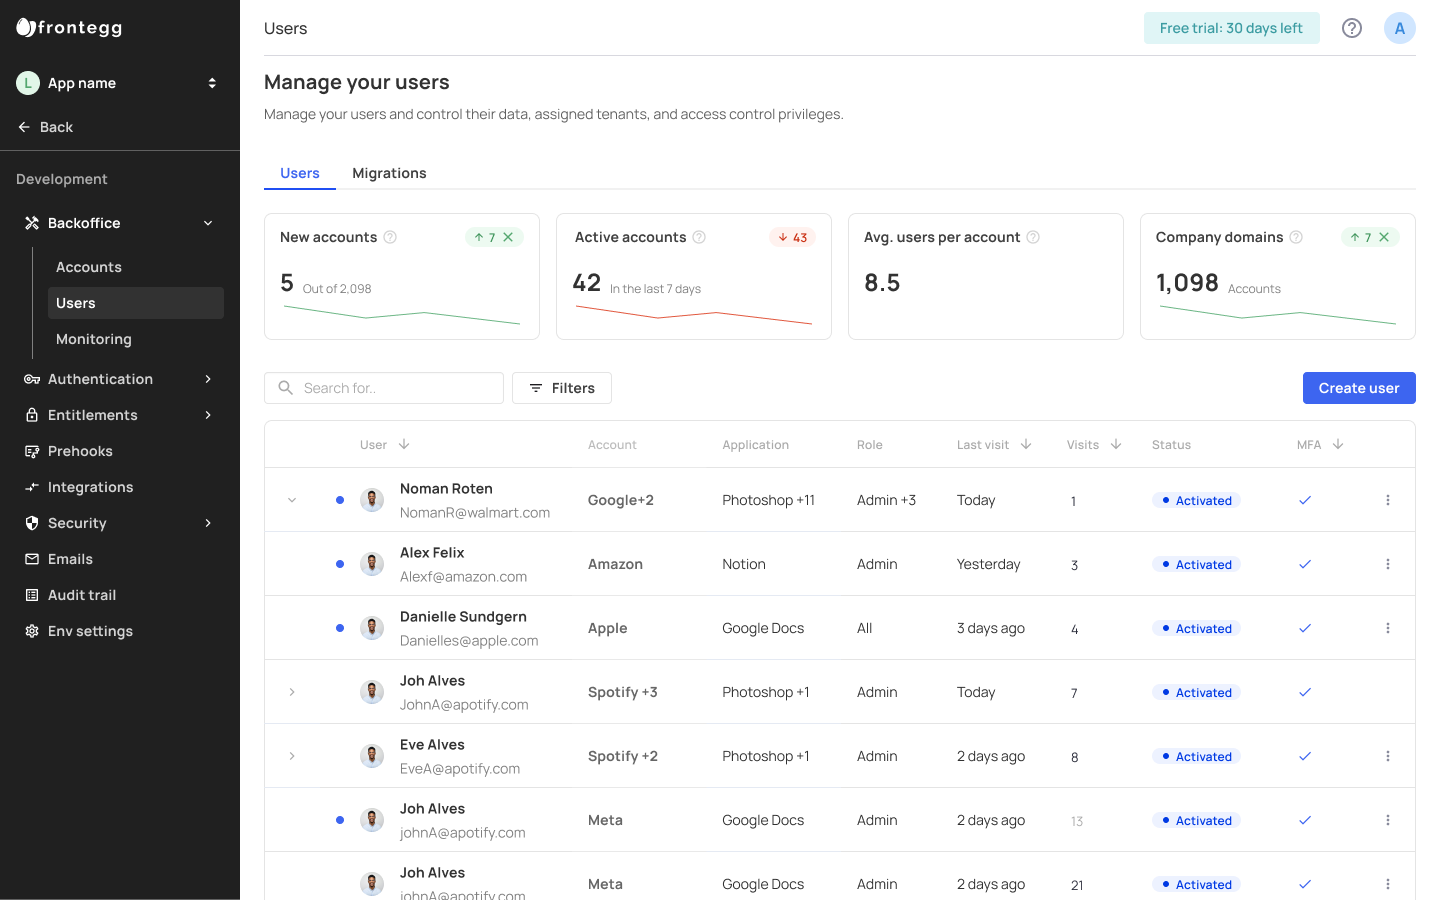
Your Backoffice -> Users space is your high-level user dashboard, where you can view and filter users across all of your accounts. The dashboard shows information such as New and Active accounts, Company domains, and additional KPIs. You can also migrate users in bulk via the migrations tab and create new users easily.
Every user in the table has a breakdown of their account(s), applications, roles, status (whether the user has verified their invitation to join the customer account by email), and if they have MFA enabled.
Creating Users
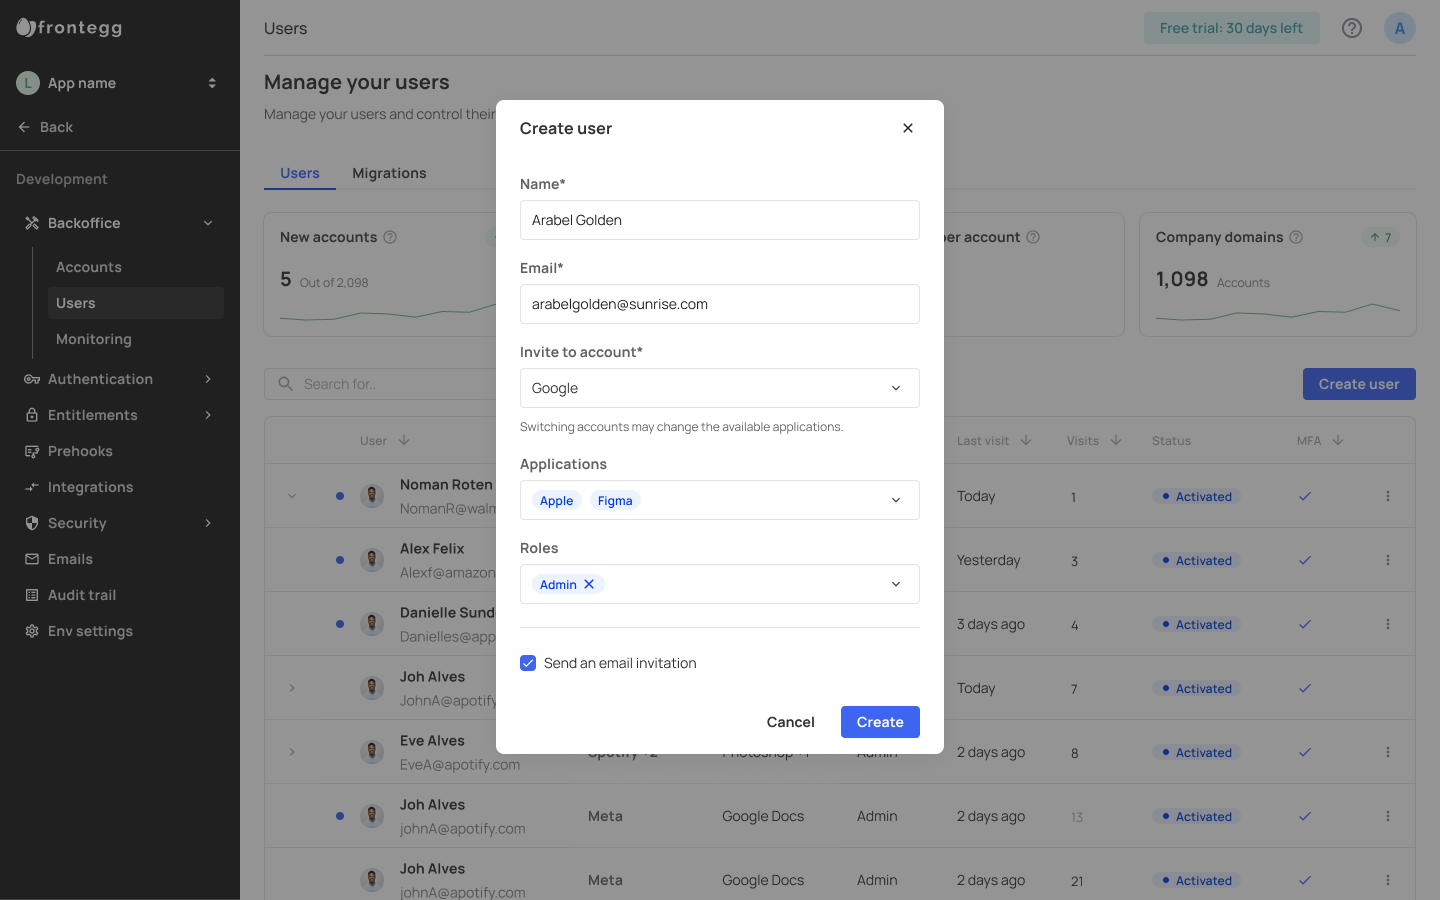
To create a new user, press the Create user button and fill in the relevant user information. Note that via this modal, you can invite users to a specific account, assign them applications (head over to the Multi Application Accounts for further reading), and define their roles.
Extended user search
We are excited to announce a new API endpoint that extends your user search capabilities, allowing you to perform both exact and fuzzy searches of user fields like name, email, metadata, ID, and more. Whether you’re looking for partial matches or precise results, this new functionality empowers you to implement custom user searches tailored to your application’s needs.
User impersonation
User Impersonation refers to the ability of a system to temporarily grant access to specific user account, typically an administrator or support staff. This feature can be extremely useful for troubleshooting, testing, or resolving user issues without the need for the original user's login credentials. And with Frontegg, you can impersonate your users easily and securely.
Go to User Impersonation to learn more.
Associating plans with users
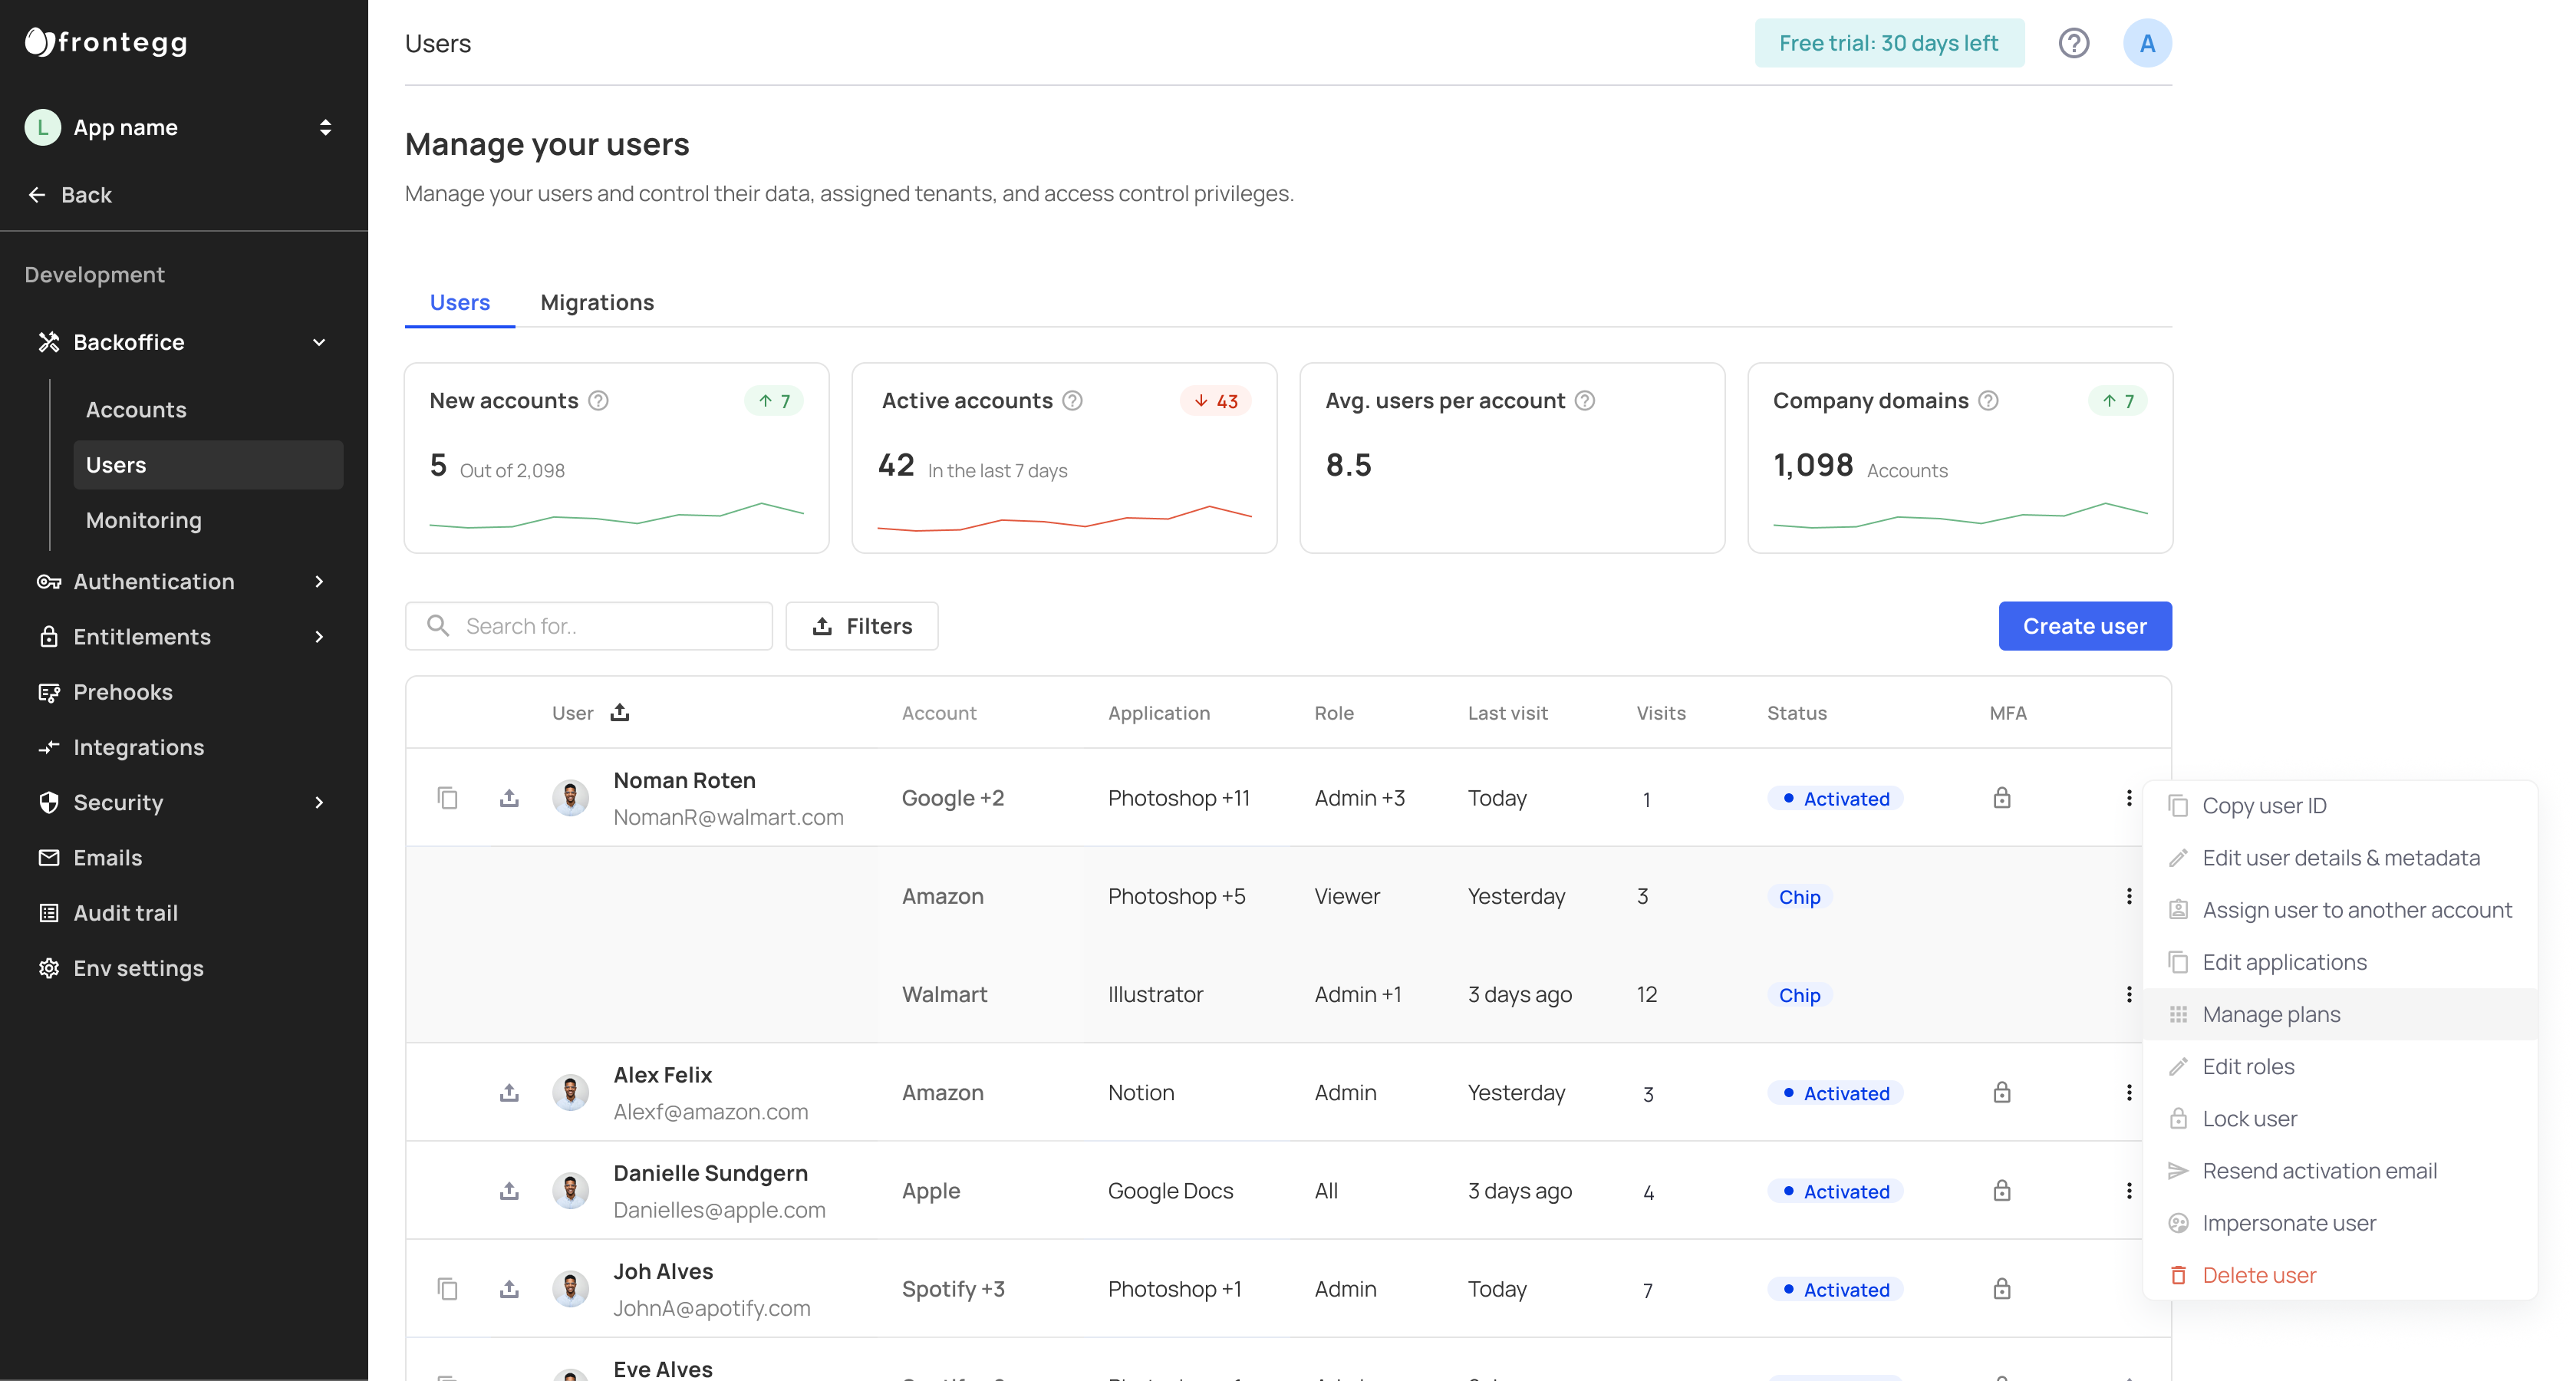
You can associate users with a specific plan by going to the User tab and pressing the three dot menu -> Manage plans.
You can choose the relevant plan from the drawer menu and assign it to your user. Check the Plans topic to learn how to create a new plan.
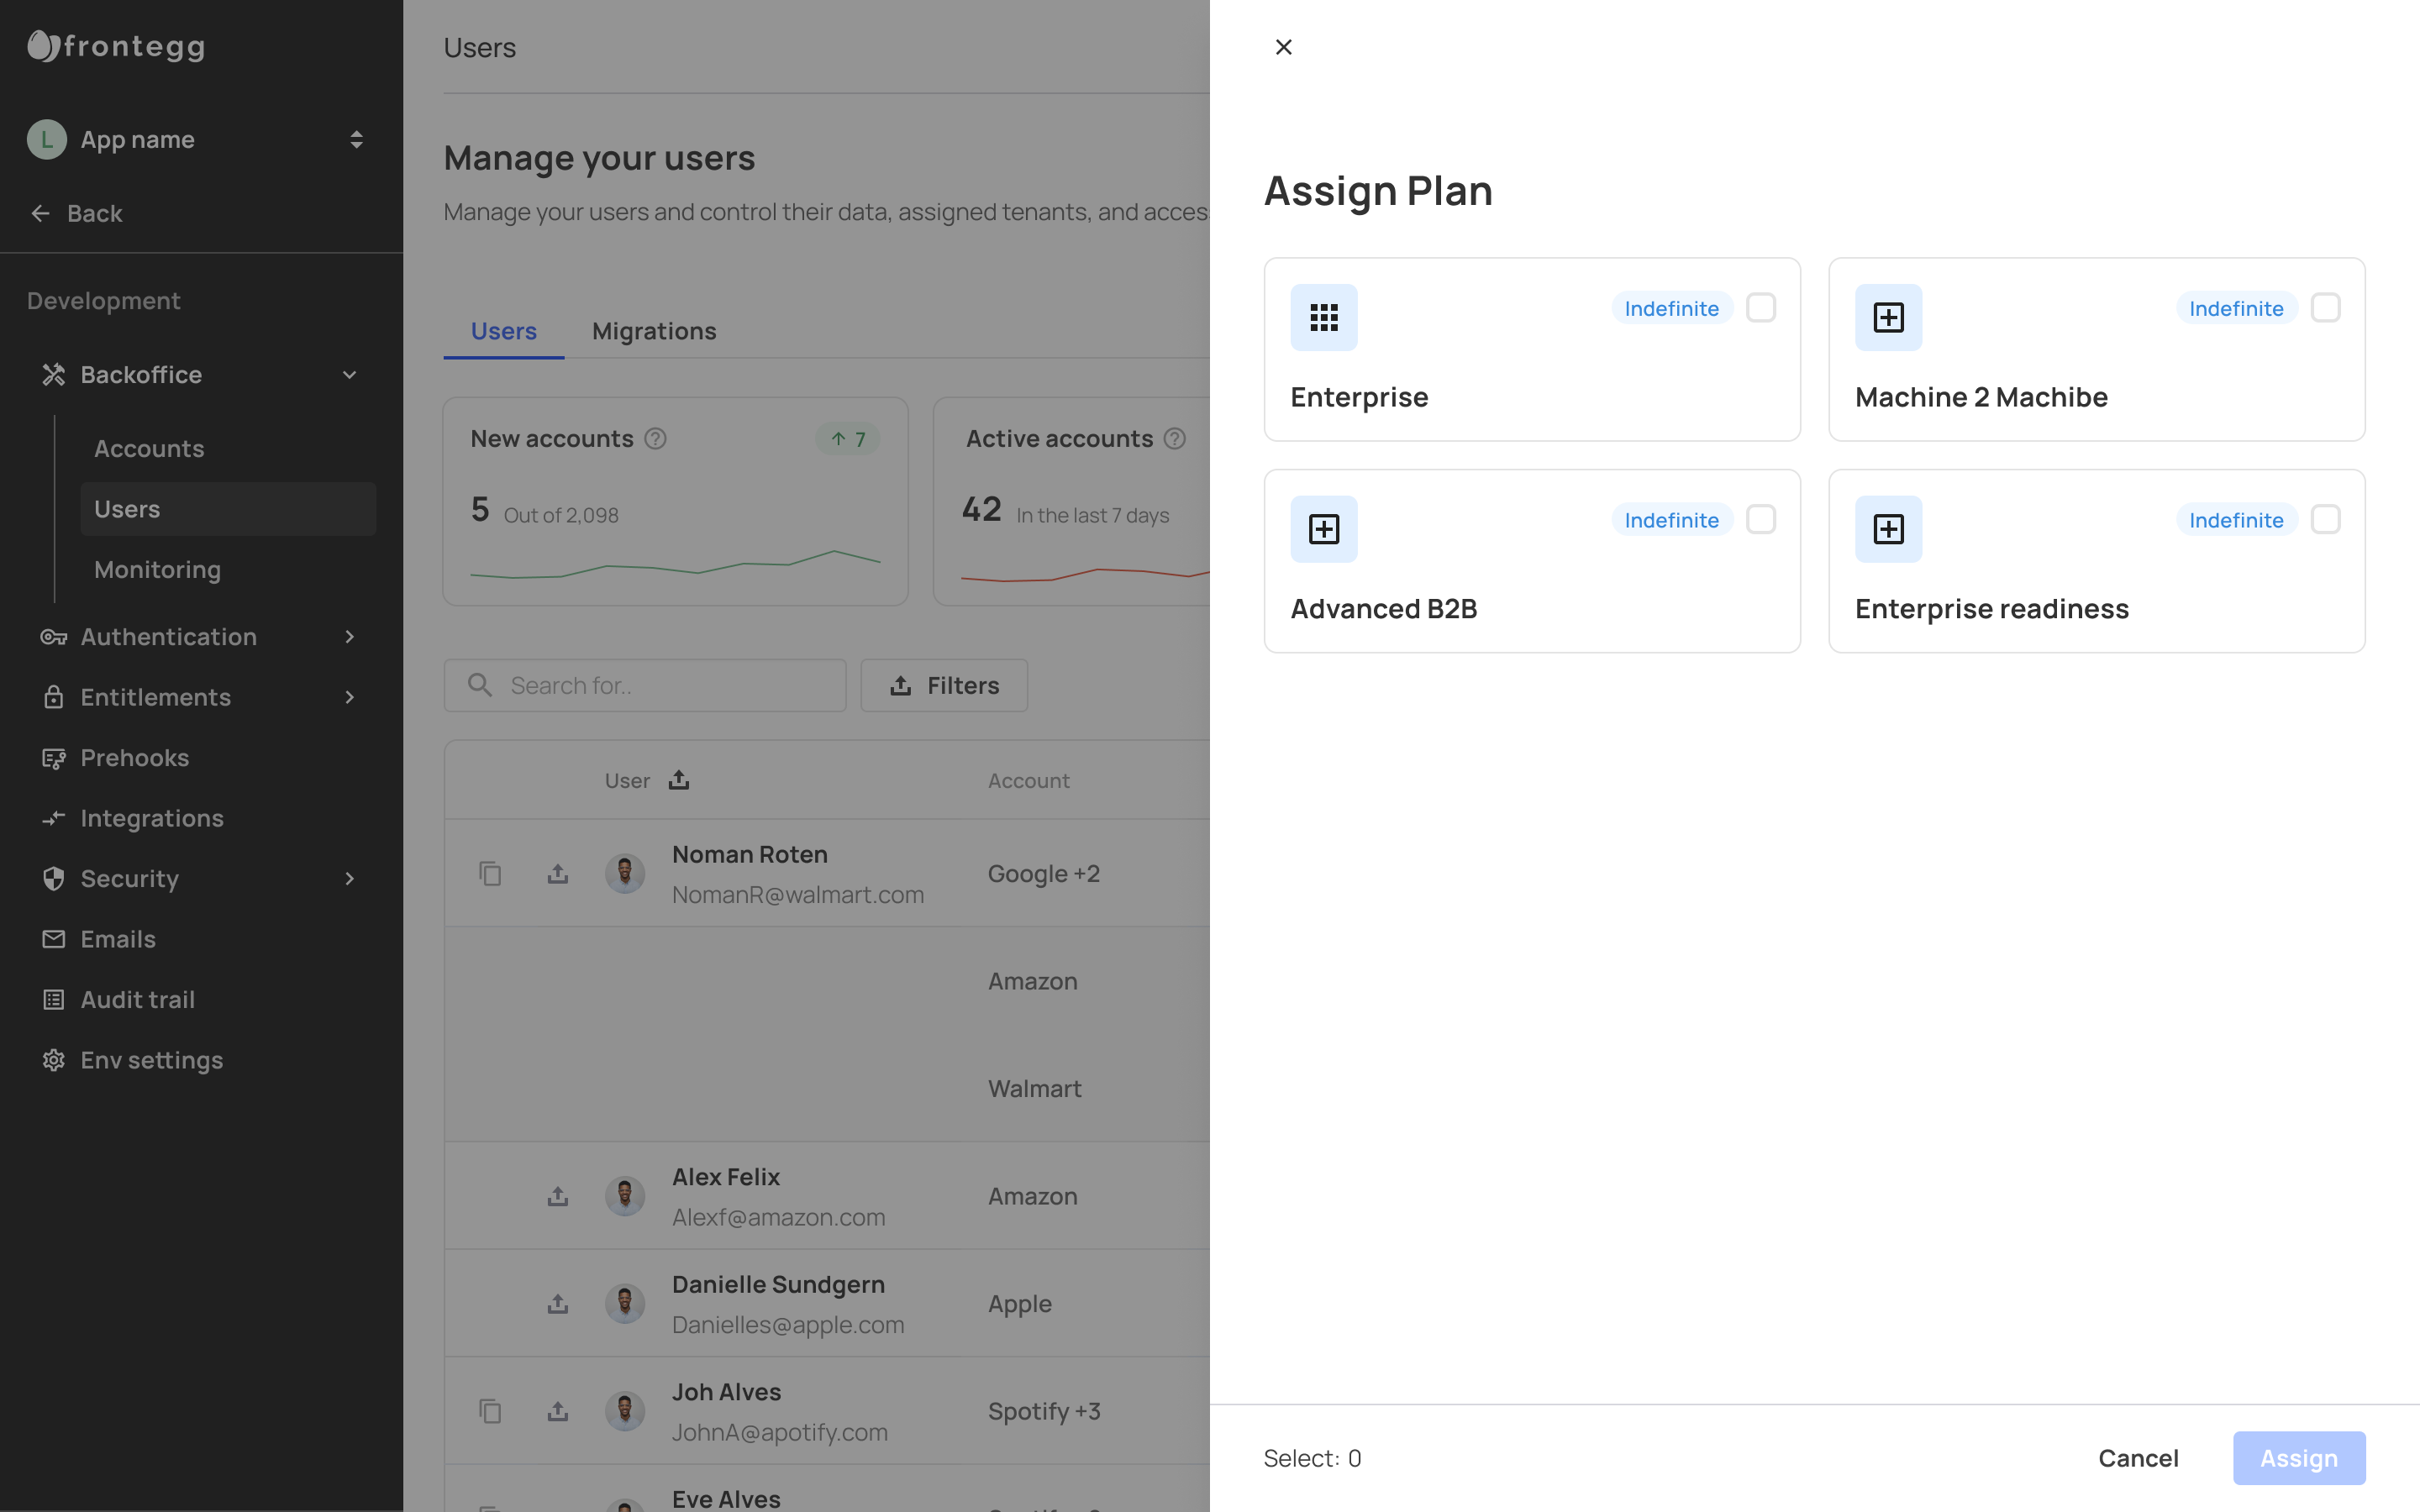
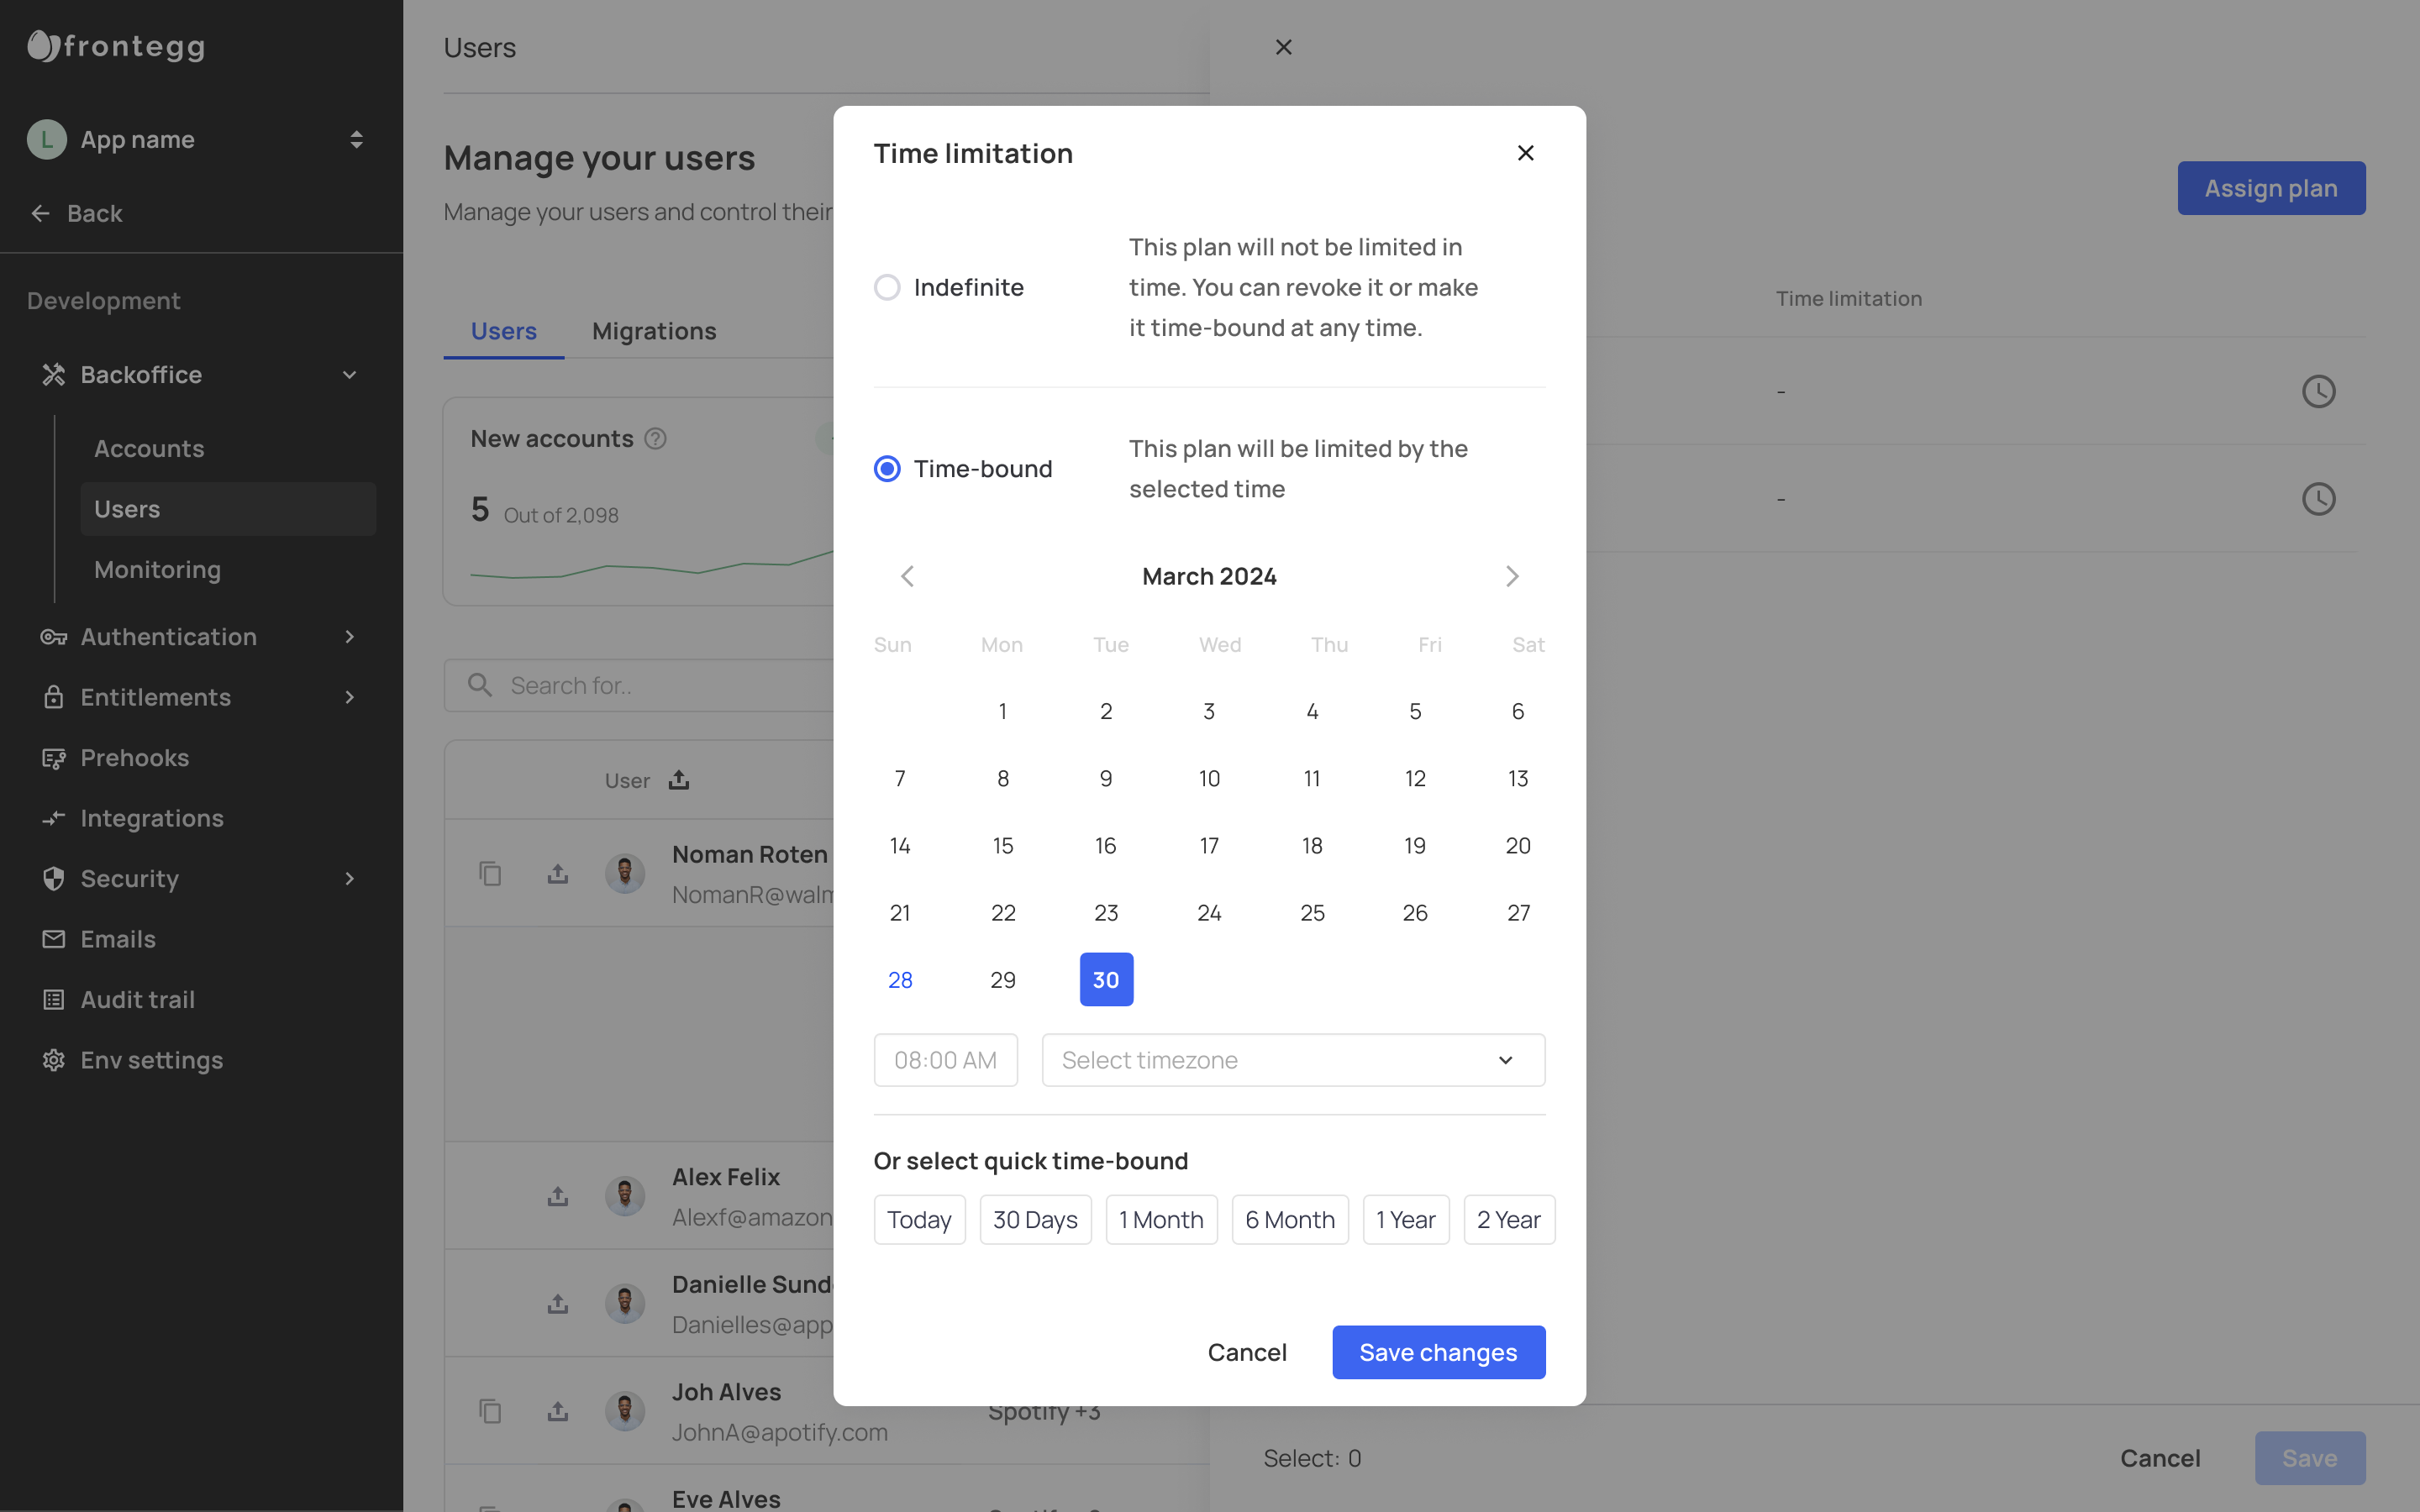
Note that plans can be set to be time-bound or indefinite. If you opt for the time-bound option, you can choose your desired time frame, like so:
Via API
You can perform multiple actions related to users e.g., create, delete, update, and search for users with our extensive API Collection. Note that to perform actions on users under specific tenants, you need to pass the tenant's ID in the frontegg-tenant-id header when sending the request.
Exact and fuzzy user searches
Note that you can perform extensive search capabilities via API, allowing you to perform both exact and fuzzy searches of user fields such as name, email, metadata, ID, and more. Whether you’re looking for partial matches or precise results, this functionality allowas you to implement custom user searches tailored to your application’s needs.
Updated 2 months ago