Machine-to-machine Authentication
To enable authentication via multiple sources (such as CLI tools) and allow your customers to log in via those CLI tools and manage their API tokens via the Admin Portal. We support User (Personal) Tokens and Tenant (API) Tokens. Read on to learn more.
Types of API tokens
Frontegg supports token generation for two types of tokens for Tenants and Users — Access Tokens and Client Credential token types.
Client credentials are used for Passwordless authentication methods where the user receives a magic code/link. These tokens are time-sensitive.
Access tokens are more flexible in the sense that they don't have to be time-limited (although you can set time-limitation for them; see next section). Learn more about Machine-to-Machine Tokens.
As mentioned, these token types can be generated for tenants and users. Read on to learn how.
Client Credentials
Client Credentials' Token Authentication
Note that authenticating with a client credentials token enforces a rotation mechanism for refresh tokens associated with client credentials. It limits each token to a maximum of 100 refresh tokens simultaneously. When a client authenticates using the same API token for the 101th time, the earliest refresh token is automatically invalidated.
Access Tokens and Client Credentials
IMPORTANT- When using Access tokens you need to pass the access token in the X-API-KEY header. When using Client Credentials M2M token type, you should pass the generated bearer in the Authorization header.
User (personal) tokens
User tokens are tied to the user and will always contain the user context and the roles/permissions of the user on the active tenant.
User token will be deleted once the user is deleted from the system.
Creating personal tokens
Creating personal tokens is possible using 2 methods:
- Via the admin portal (for the end-user)
- Via API call
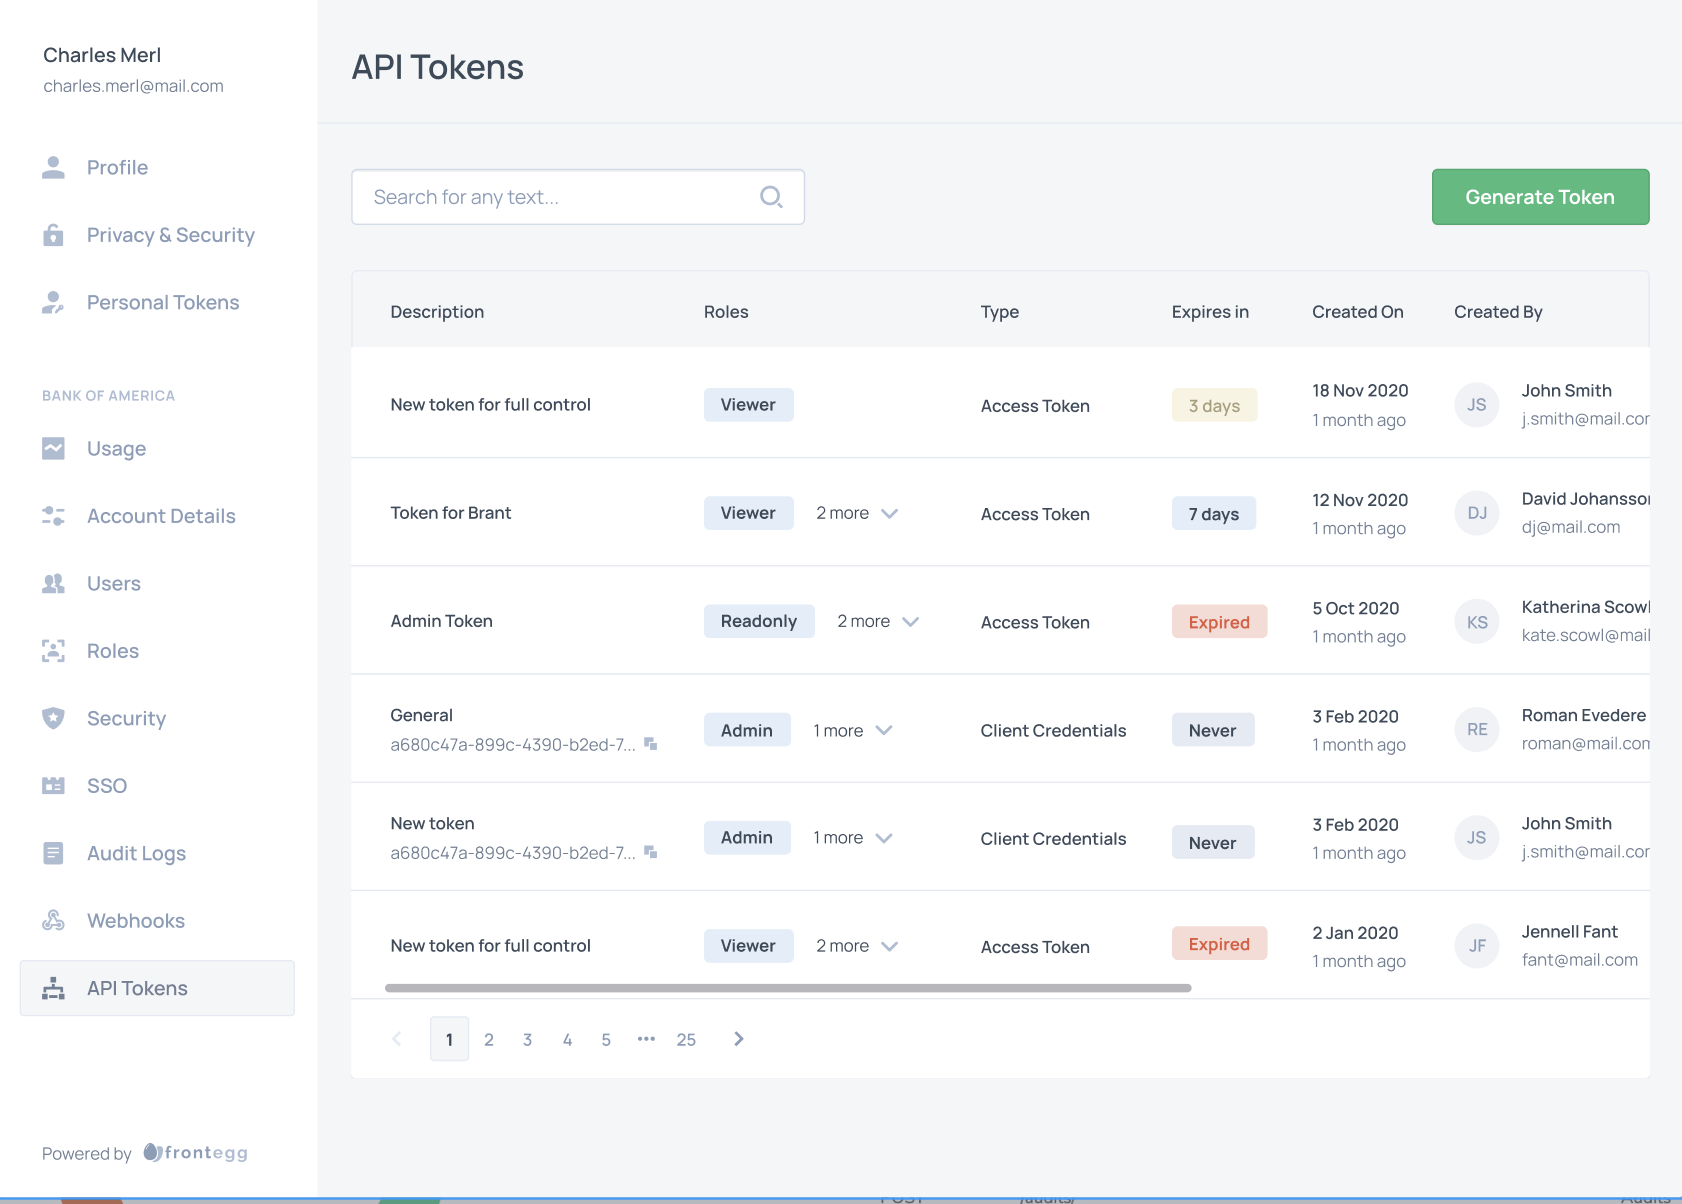
Creating personal tokens via the Admin Portal
After embedding the Admin Portal Integration, allow your users to generate tokens for themselves by following API Tokens guide. The type of the token that will be created is defined, by what is chosen under M2M Tokens.
Creating personal tokens via API
Want to experiment API tokens before allowing your users with the self-service experience they deserve? No worries - we got you covered!
Generating API token via API is easy as 1,2,3:
Authenticate your environment
Environments ➜ [NAME OF ENVIRONMENT] ➜ Settings ➜ General Settings
curl --location --request POST 'https://api.frontegg.com/auth/vendor' \
--header 'Content-Type: application/json' \
--data-raw '{
    "clientId": "[your-workspace-client-id]",
    "secret": "[your-workspace-secret]"
}'
Create user token
Using the access token from the /auth/vendor create the user API token. You will need to pass:
frontegg-user-idheader - To represent the user ID which the token will be created forfrontegg-tenant-idheader - To represent the tenant ID which for the context of the userdescription- to represent logical description which will help you and the user remember what this token is for
// Client credentials
curl --location --request POST 'https://api.frontegg.com/identity/resources/users/api-tokens/v1' \
--header 'frontegg-user-id: acme-user-id' \
--header 'frontegg-tenant-id: acme-id' \
--header 'Authorization: Bearer [token-from-vendor-authentication]' \
--header 'Content-Type: application/json' \
--data-raw '{
    "description": "Token for CLI calls"
}'

// Access Token

curl --location --request POST 'https://api.frontegg.com/identity/resources/users/access-tokens/v1' \
--header 'frontegg-user-id: acme-user-id' \
--header 'frontegg-tenant-id: acme-id' \
--header 'Authorization: Bearer [token-from-vendor-authentication]' \
--header 'Content-Type: application/json' \
--data-raw '{
    "description": "Token for CLI calls",
    "expiresInMinutes": 60
}'
This API will return clientId and secret which will be used for the actual JWT exchange or the Access token, depending on the type of the token.
Shhhhh... It's a secret...
Secrets are shown clear only once on the API tokens creation. You know why? Because they are saved hashed and bcrypted and CANNOT be reversed.
You are good to go to Authenticate your API!
Tenant tokens
Tenant tokens are tied to the tenant and don't have any notion of user on them. The roles/permissions on the API tokens match the scopes given to the token when it was created.
Creating tenant tokens
Creating tenant tokens is possible using 2 methods:
- Via the admin portal (for users with required permissions)
- Via API call
Creating tenant tokens via the Admin Portal
After embedding the Admin Portal, allow your account admins to generate tokens by themselves as specified in the API Tokens guide. The type of the token created is defined by the Access Token type.
Creating tenant tokens via API
Want to experiment API tokens before allowing your users with the self-service experience they deserve? No worries - we've got you covered!
Generating API tokens via API is as easy as 1,2,3:
Authenticate your environment
Environments ➜ [NAME OF ENVIRONMENT] ➜ Settings ➜ General Settings
curl --location --request POST 'https://api.frontegg.com/auth/vendor' \
--header 'Content-Type: application/json' \
--data-raw '{
    "clientId": "[your-environment-client-id]",
    "secret": "[your-environment-secret]"
}'
Create tenant token
Using the access token from the /auth/vendor create the user API token. You will need to pass:
frontegg-tenant-idheader - To represent the tenant ID which the token is created fordescription- to represent logical description which will help you and the user remember what this token is forroleIds- ids to represent the roles which the token will be created formetadata(optional) - JSON which can include additional metadata for the token
// Client Credentials
curl --location --request POST 'https://api.stg.frontegg.com/identity/resources/tenants/api-tokens/v1' \
--header 'frontegg-tenant-id: acme-id' \
--header 'Authorization: Bearer [token-from-vendor-authentication]' \
--header 'Content-Type: application/json' \
--data-raw '{
    "description": "Acme CLI tool",
    "roleIds": ["role-uuid-1", "role-uuid-2"],
    "metadata": {
        "key1": "value1",
        "key2": "value2"
    }
}'

// Access Token
curl --location --request POST 'https://api.frontegg.com/identity/resources/tenants/access-tokens/v1' \
--header 'frontegg-tenant-id: acme-id' \
--header 'Authorization: Bearer [token-from-vendor-authentication]' \
--header 'Content-Type: application/json' \
--data-raw '{
    "description": "Acme CLI tool",
    "roleIds": ["role-uuid-1", "role-uuid-2"],
    "expiresInMinutes": 60
}'
This API will return clientId and secret which will be used for the actual JWT exchange or the Access token, depending on the type of the token.
Shhhhh... It's a secret...
Secrets are shown clear only once on the API tokens creation. You know why? Because they are saved hashed and bcrypted and CANNOT be reversed.
Get roles for access tokens
Extracting Roles from Access Tokens
Access Tokens are permanent and therefore, do not contain roles.
If you use Frontegg Backend SDKs, please check the required versions that already support this functionality on the API tokens guide,
If you use Frontegg Roles & Permissions but do not use our backend SDKs you should access the roles of that token by following the steps below:
- Get the access token from Frontegg.
- Verify it with your environment public key.
- Use the
subfrom the token - this is the {:id} and send a request to
https://api.frontegg.com/identity/resources/vendor-only/users/access-tokens/v1/:idorhttps://api.frontegg.com/identity/resources/vendor-only/tenants/access-tokens/v1/:idWe recommend caching these responses on your end.
If you don’t use Frontegg Roles & Permissions you should make a request to either
https://api.frontegg.com/identity/resources/vendor-only/users/access-tokens/v1/activeorhttps://api.frontegg.com/identity/resources/vendor-only/tenants/access-tokens/v1/activeto verify that that token is still valid.
// Get all Access Tokens for a tenant with Roles IDs:

curl --location 'https://api.frontegg.com/frontegg/identity/resources/tenants/access-tokens/v1' \
--header 'frontegg-tenant-id: acme-id' \
--header 'Authorization: Bearer [token-from-vendor-authentication]'

// Get all roles and permissions for an access token by id:

curl --location 'https://api.frontegg.com/identity/resources/vendor-only/tenants/access-tokens/v1/:id]' \
--header 'Authorization: Bearer [token-from-vendor-authentication]'
Authenticate your API token
Using the clientId and secret from the token creation step, you can now exchange your token for a perfectly signed JWT.
curl --location --request POST 'https://[your-frontegg-workspace-url]/identity/resources/auth/v1/api-token' \
--header 'Content-Type: application/json' \
--data-raw '{
    "clientId": "[the-api-token-client-id]",
    "secret": "[the-api-token-secret]"
}'
Updated 9 months ago