Session Management
Frontegg provides multiple session management features out-of-the-box, and can give you and your customers more control regarding the way users interact with your applications.
Frontegg's session management tools let you and your customers view and configure various session factors such as their duration or how many active sessions a user can have. You can even revoke all sessions of a specific user.
Enable those features in the Profile, Users, and Security sections of the Builder so that users with the permission have the ability to configure and manage user sessions from the Admin Portal.
What is Considered a Session?
A session is a period of time wherein a user interacts with an app. Usually triggered by the opening of an app, a session records the length and frequency of app use to show developers, marketers, and product managers how much time users spend within an app.
Session data can be very useful and informative. For instance, it can be used to determine the average length of time users spend on an app, as well as the time of day users are most likely to engage with a particular app, thus providing users important information on which they can act upon later.
As explained above, every time you visit an app, a session starts. The same goes for sessions in your own app. Without proper protection, sessions can become unsafe, like if a user leaves a session open for too long without being active.
Using Sessions in Frontegg SDKs
In order to gain session management features on our frontend SDKs, make sure to use the correct versions:
- @frontegg/react >= v4.0.27
- @frontegg/angular >= v4.19.0
- @frontegg/vue >= v1.0.19
- @frontegg/next >= v5.8.0
Add an extra layer of control over user security by giving customer accounts the ability to manage the duration of user sessions.
Give certain users permission to manage the duration of user sessions by assigning the permission of revoke all user sessions.
Then, enable features in the Profile, Users, and Security sections of the Builder so that users with the permission have the ability to configure and manage user sessions from the Admin Portal.
The features in the Admin Portal that the permission unlocks include the following.
- Configure session management settings
- View user sessions
- End specific user sessions
Required Versions
@frontegg/react v4.0.27
@frontegg/angular v4.19.0
@frontegg/vue v1.0.19
@frontegg/nextjs v5.8.0
Assign Permission
Give certain users the ability to manage user sessions by assigning the permission of revoke all user sessions to any role that you want to have that authority.
Go to Environments ➜ [NAME OF ENVIRONMENT] ➜ Authorization ➜ Permissions.
Check the box for each role that should have this permission.

Click save and publish to assign that permission to users who have a role with the permission.
Read below to learn how to enable the session management features in the Admin Portal for the users with the permission.
Enabling the Admin Portal
Enable session management in the Admin portal so that customer accounts can manage user sessions.
Personal
Enable customer accounts to view and manage sessions in Profile.
Go to Builder ➜ Experience ➜ Admin Portal ➜ Personal and toggle privacy and security on.
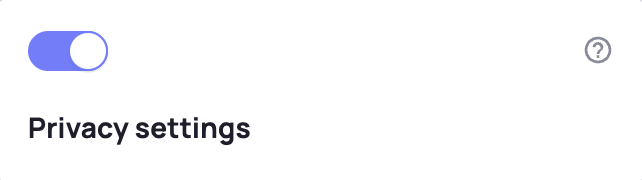
In the Admin Portal, users with permission should now see sessions listed.
Users can log out of sessions by clicking the log out button for a particular session.
Workspace
- Enable customer accounts to view and manage sessions in Collaboration.
Go to Builder ➜ Experience ➜ Admin Portal ➜ Workspace and toggle Users on.
In the Admin Portal, users with permission should now see a list of users.
Click on a user's menu to sign out the user from all sessions.
- Enable customer accounts to configure session management settings in Admin Portal ➜ Workspace.
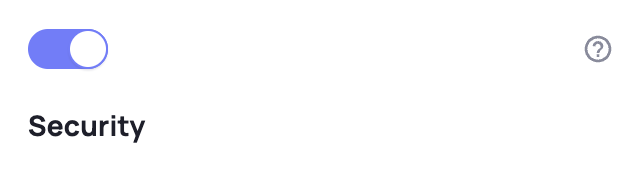
Go to Builder ➜ Experience ➜ Admin Portal ➜ Workspace and toggle Security on.
In the Admin Portal, users with permission should now see configuration options for session management.

Default Session Duration
The default session duration is 24 hours.
Configure Session Management Defaults for your App
Frontegg offers three session management features for which you can set defaults.
Idle Session Timeout
The idle session timeout settings defines how long a session can be open while there is no activity detected. Once the session reaches this time, it will be ended.
Force Re-login
Whether or not a session is active or not, the user will be logged out when it reaches this time limit.
Maximum Concurrent Sessions
This setting determines how many sessions a user can have open at the same time. If a user has reached their maximum and tries to open a new session, the oldest session will terminate and the new one will be opened.
Each of these settings can be changed, however tenants can decide for themselves what the values should be.

Enable Session Management
In this section you will learn how to enable various session management features provided by Frontegg right in the admin portal so that customer accounts can manage all aspects of user sessions.
Assign Permissions
First, we need to give certain users the ability to manage user sessions by assigning the permission of revoke all user sessions to any role that should have that authority.
- Go to Environments ➜ [NAME OF ENVIRONMENT] ➜ Authorization ➜ Permissions.
- Check the box for each role that should have this permission.
- Click "Save changes" to assign that permission to users who have the roles you chose.
As said, users who have the role you chose will have the following features enabled for them in the Admin Portal once they are enabled in the builder (we will enable them in the next sections):
- Configure session management settings
- End other user's sessions
User sessions
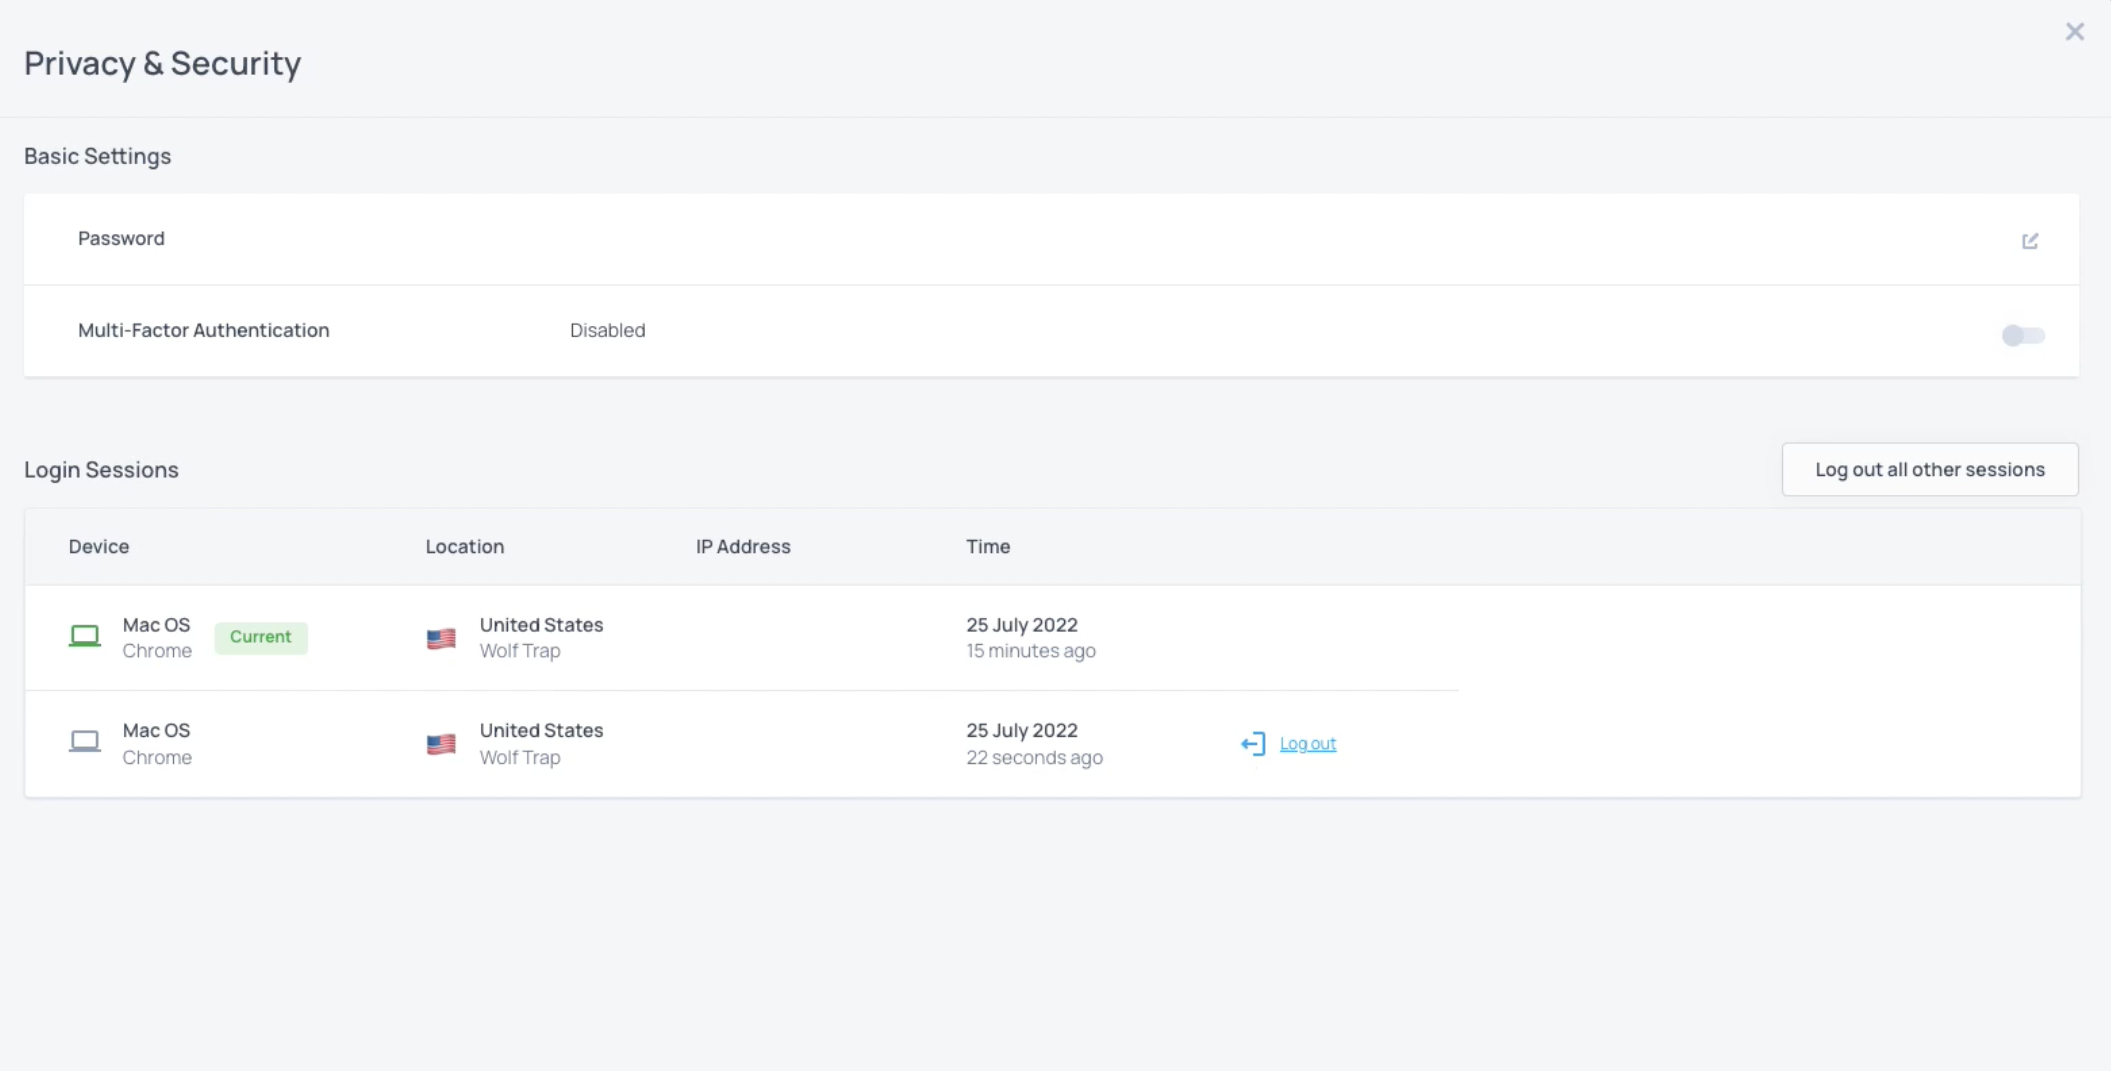
In the admin portal, you can show your customer's users a list of their own sessions. It shows them details on each sessions like session start time, IP Address, location and device. If your users see that one of their sessions are compromised or they left a device somewhere, they can log out individual (or all) sessions from here.
To turn it on, go to Builder ➜ Profile and toggle privacy settings on.
In the Admin Portal, all users should now see their live sessions.
Users can log out of individual sessions or all of them at once.

Other user sessions
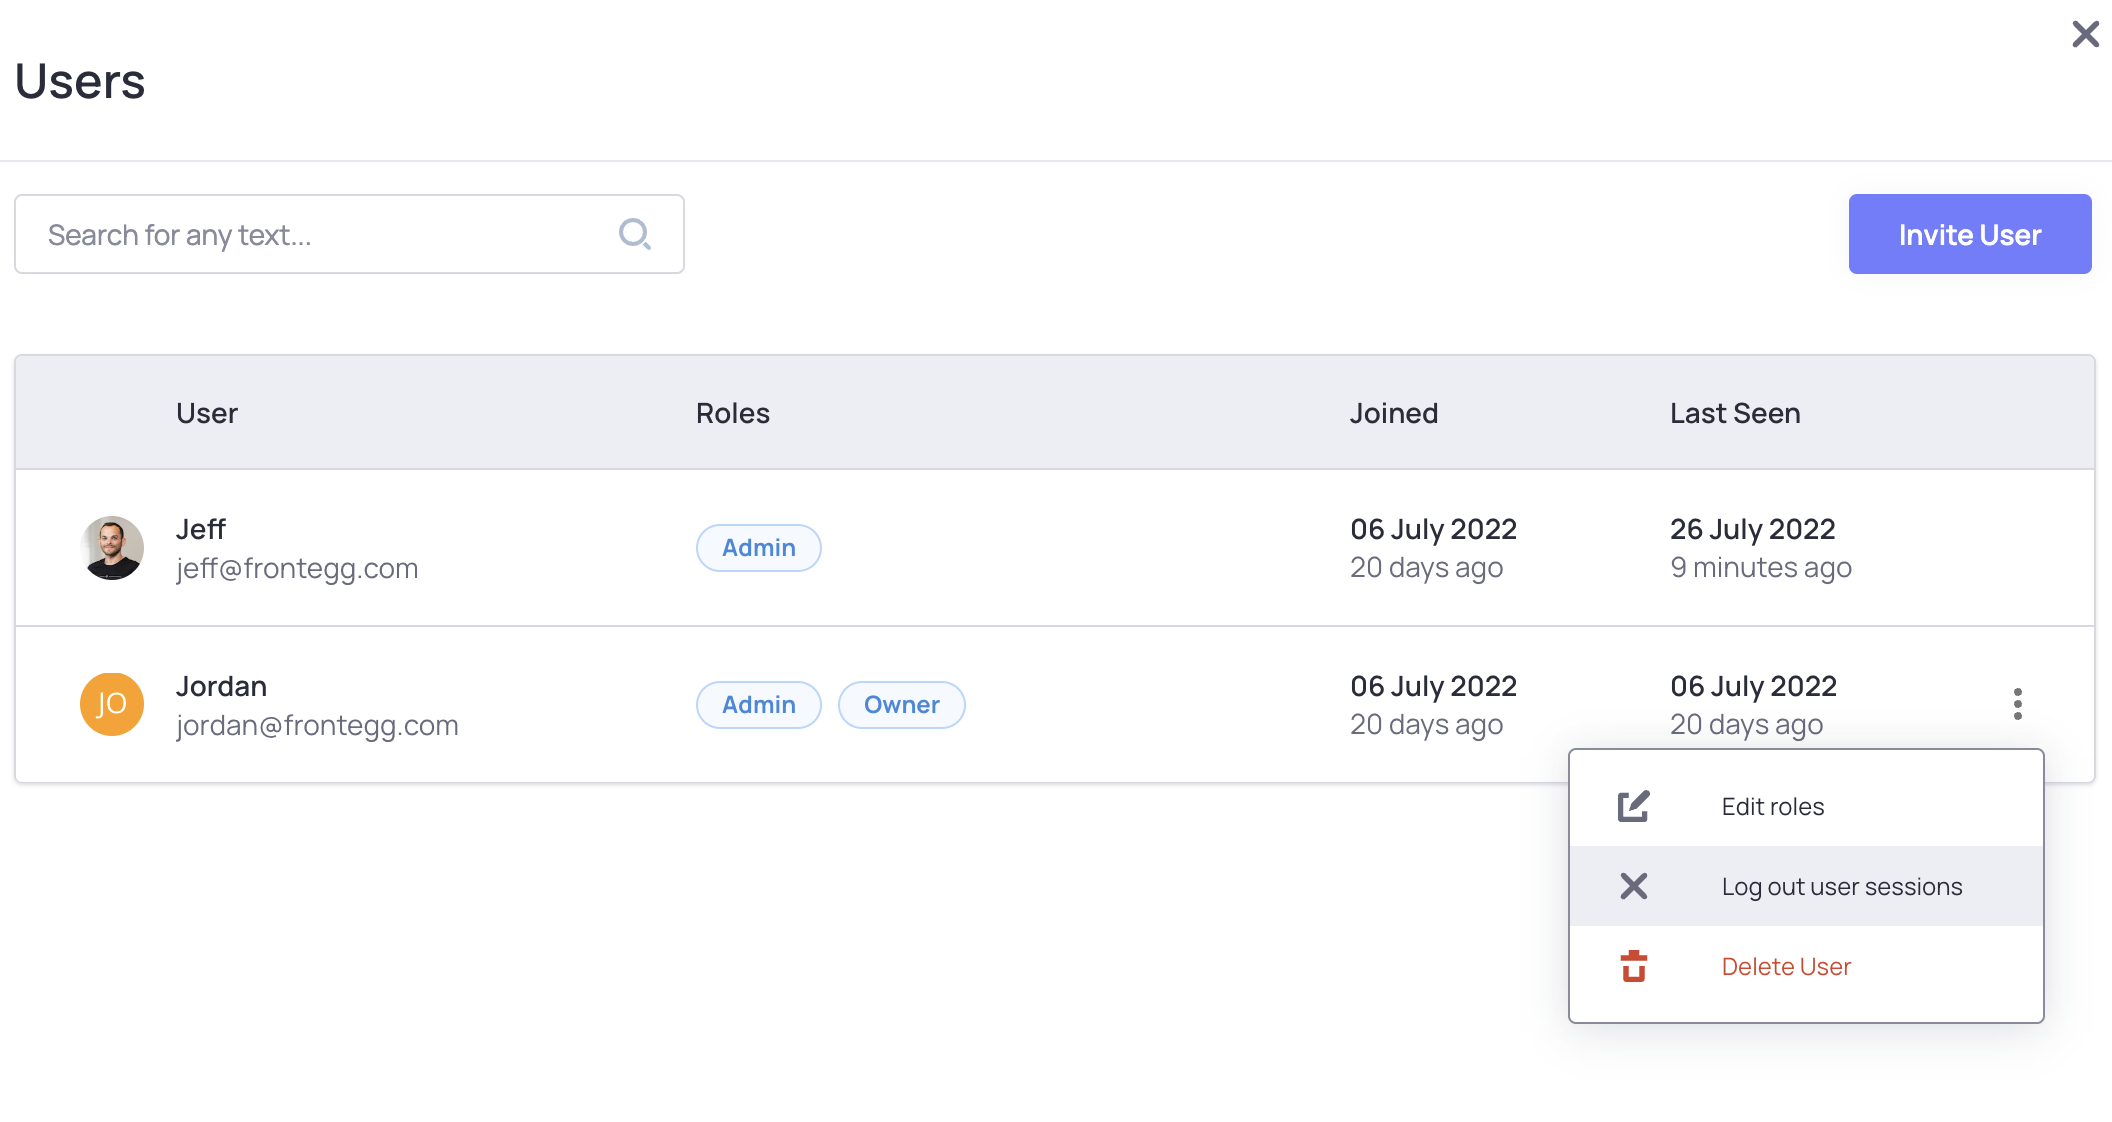
Given the right permissions, admins have control over other user's sessions. For example, if a user in a tenant loses access to their devices, an admin can log that user out of all their sessions.
This feature is included in the Users tab of the admin portal.
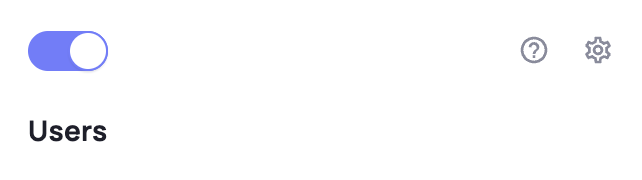
Go to Builder ➜ Collaboration and toggle Users on.
In the Admin Portal, users with permission should now see a list of users.

Each row in the table has an action menu on the right corner. By clicking on a row's menu you can log out that specific user from all his or her sessions in your app.

Session Settings
Enable customer accounts to configure session management settings in Engagement.
Go to Builder ➜ Engagement and toggle security on.
In the Admin Portal, users with permission should now see configuration options for session management under "Session Management" tab.
This section provides various settings that give customer accounts greater control over the way users can interact with the application.
Some of the settings have a default behaviour:
Idle Session Timeout - If not enabled, the default session duration is 24 hours
Force Re-login - Users stay "Logged in" indefinitely
Maximum Concurrent Sessions - A user can login into your application as many times as they want

Updated 12 months ago