Use case : Tenant level custom roles
Note that to use Custom Roles, your app must have Role-based Authorization enabled in your back office, like so:
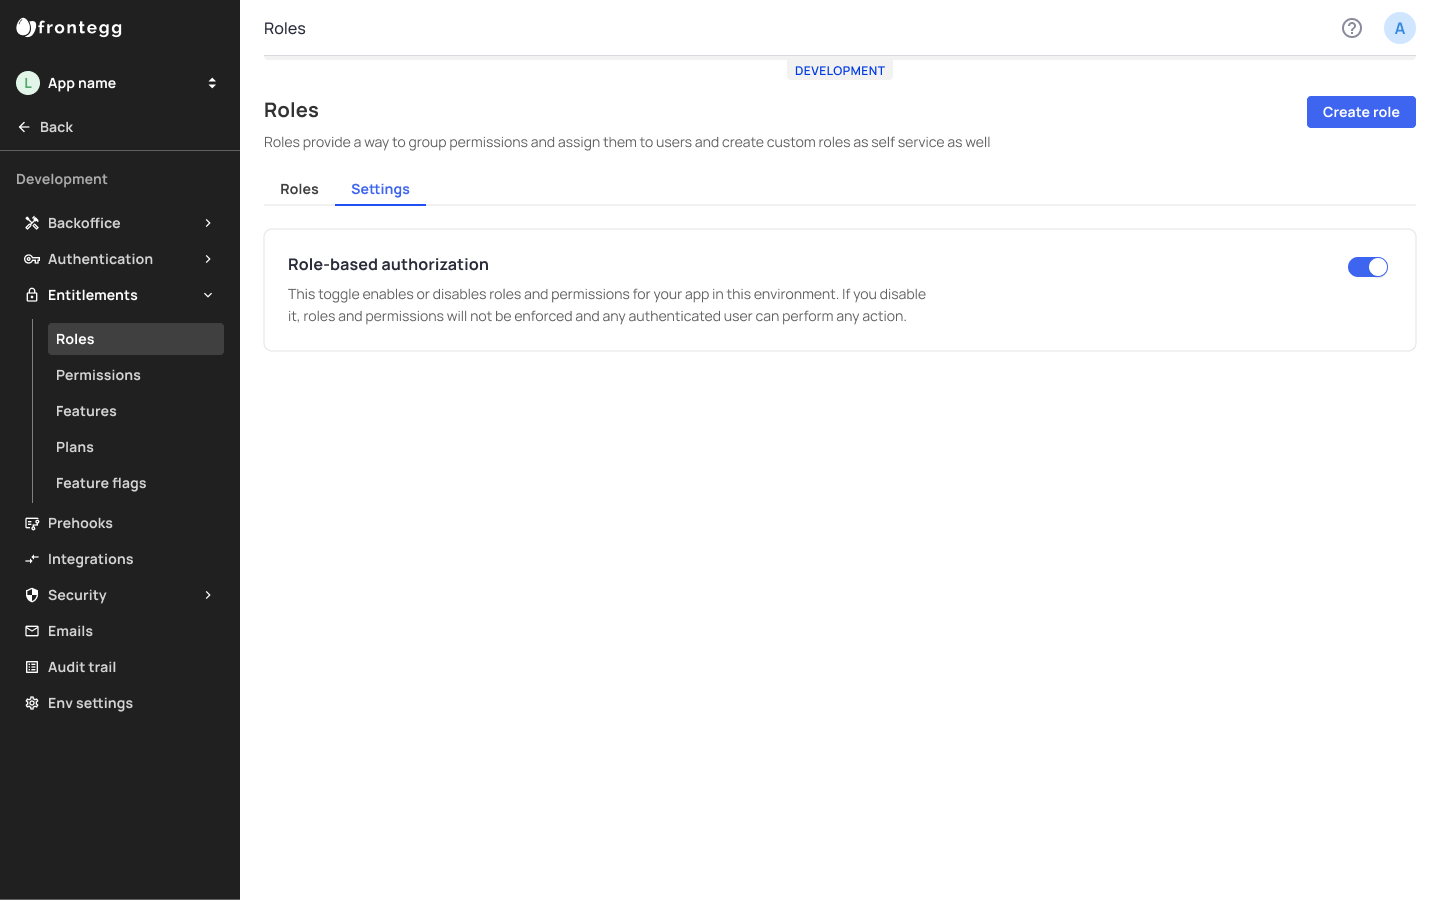
Enabling Role-based Authorization in your environment settings
The need for Custom roles arises when your account's business scales beyond system roles and requires fine-tuning. You may wish to free yourself from devising specific roles for each of your accounts and allow them to configure custom roles by themselves.
Roles in Frontegg are classified into two distinct categories - System Roles, and Custom Roles:
System roles: System roles apply to all accounts. They are visible both in your dashboard and admin portal.
Custom roles: Custom roles can be devised and customized by your accounts via their Admin Portal and are subject to the permissions you allow your accounts to assign.
Enabling Your Tenants to Create Custom Roles
To allow your account to create custom roles, you must complete the following steps:
Step 1: Classifying permissions
step 2: Assign Relevant Permissions
Step 3: Enabling Role Tab
Step 1: Classifying Permissions
Permissions comprise the roles given to your accounts' users and define their scope of action within your app. When creating permissions, you must decide which of them can be assigned to Custom roles created by your accounts, which cannot, and which will be added by default.
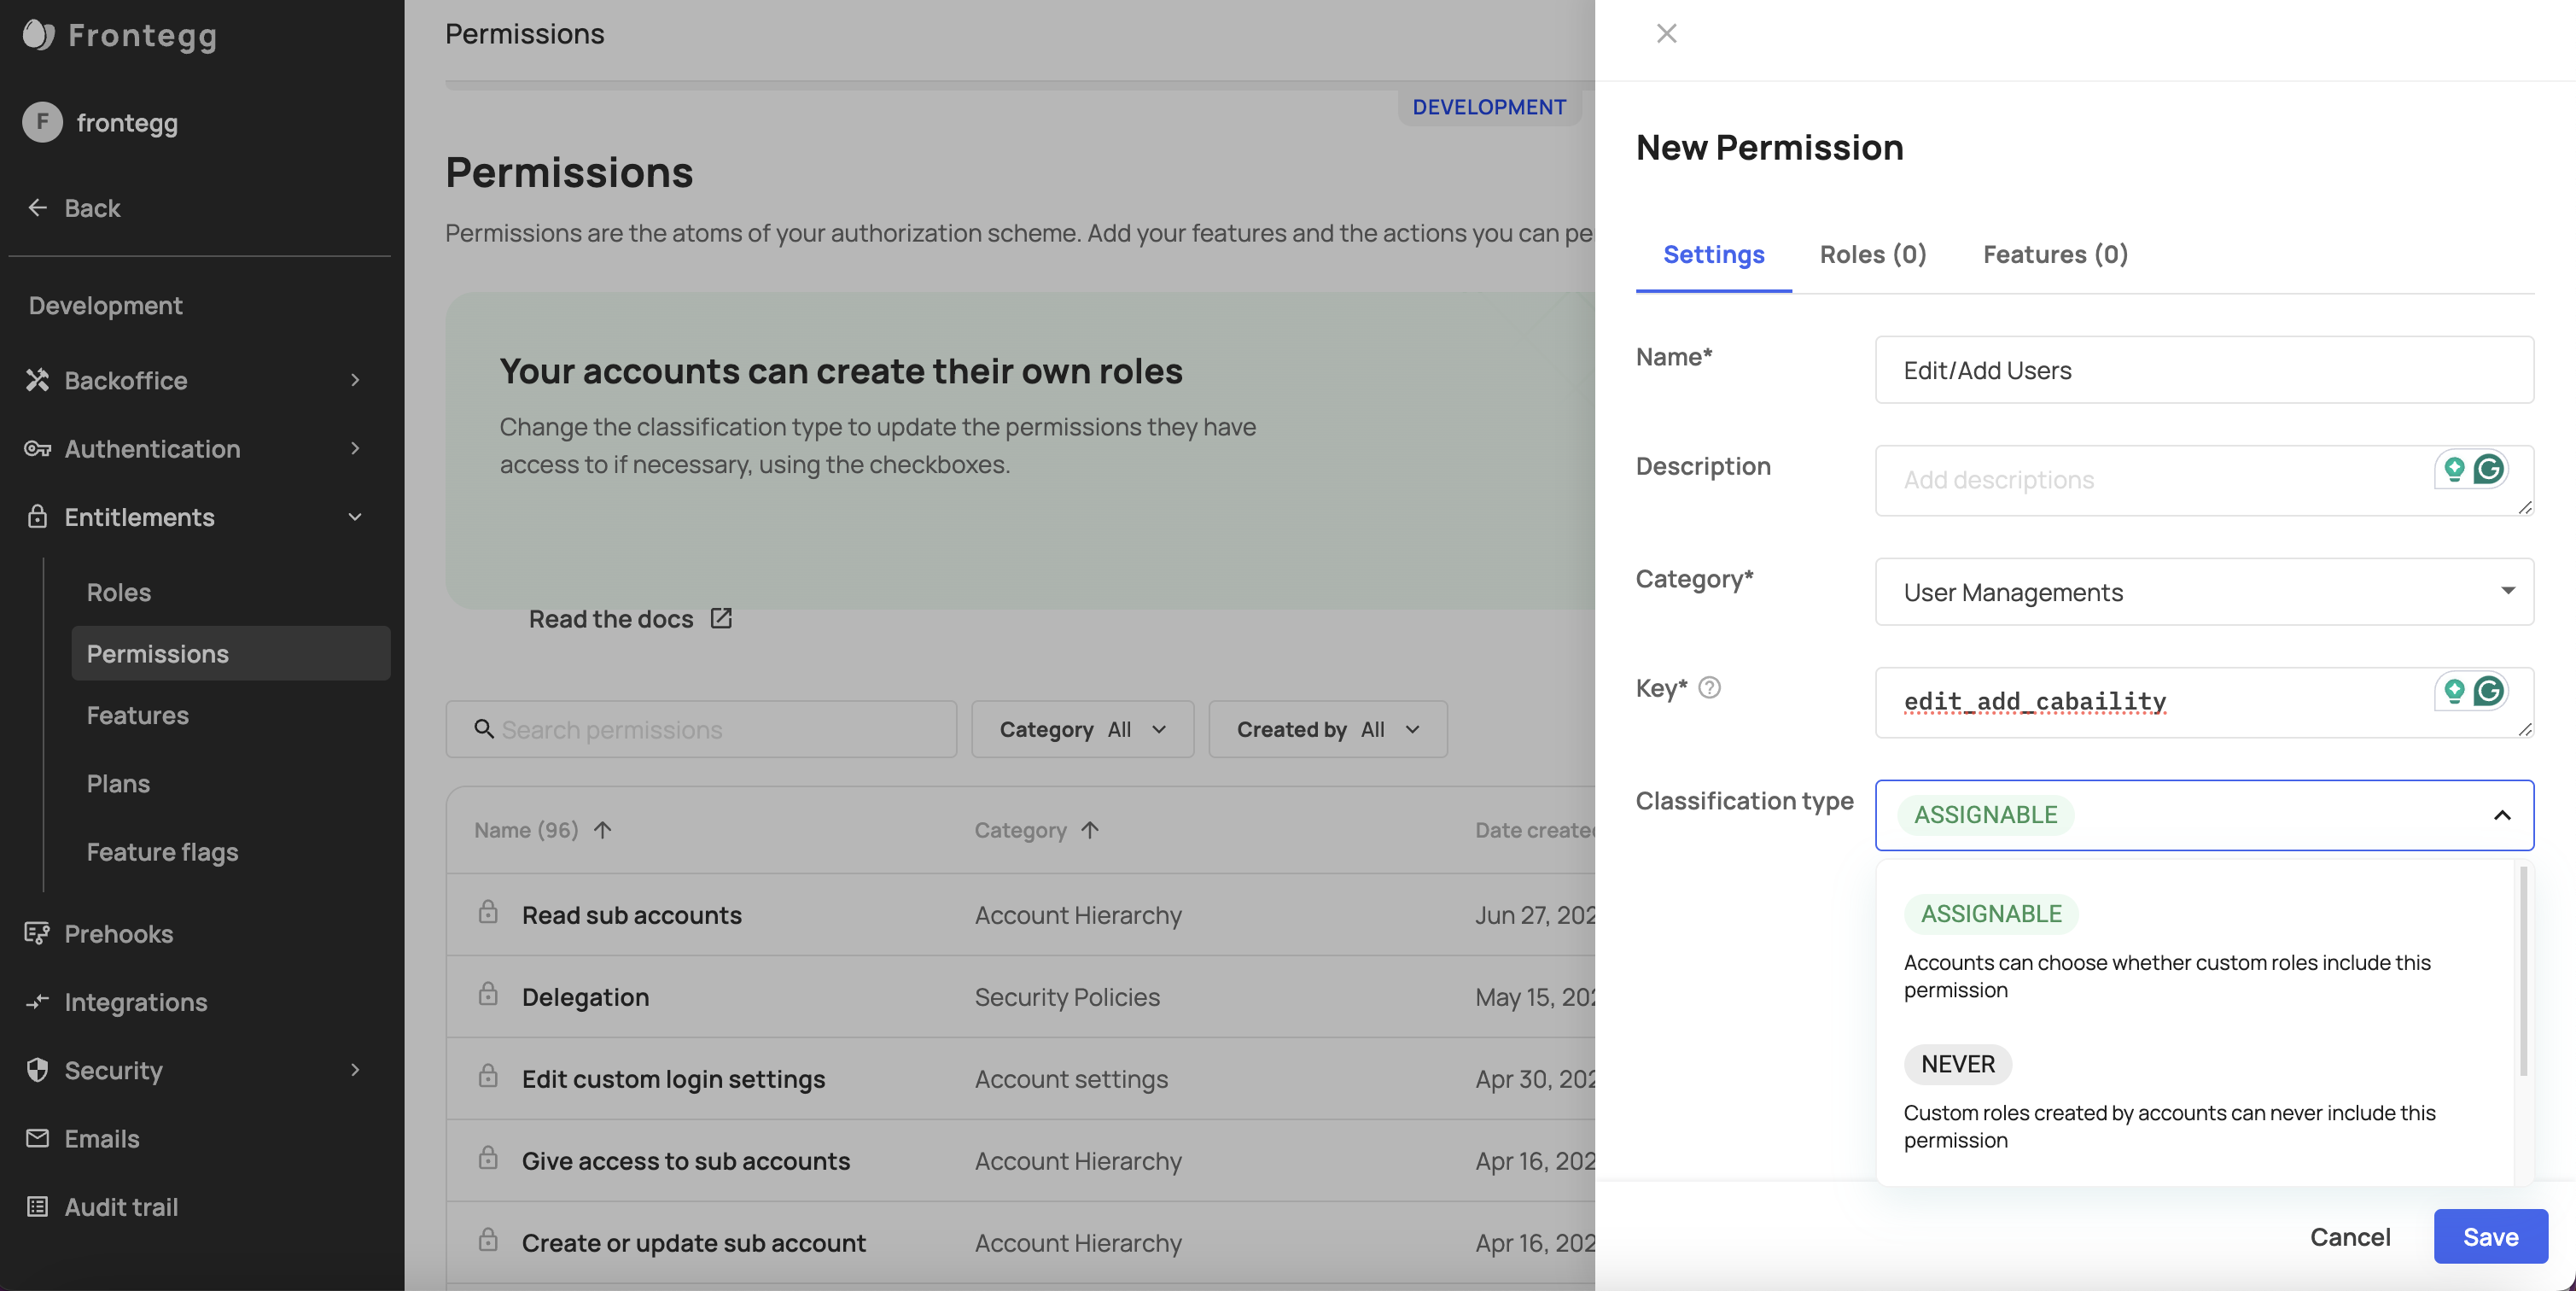
To configure your permissions settings, go to Entitlements -> Permissions. A new (or existing) permission will be comprised of a Name, Description, Category, Key (the indication of the permission in the user's JWT), and a Classification type (Assignable/Never/Always). The Classification type indicates whether that permission can be assigned to a custom role. Permission classification types are:
Never: Custom roles can never use these permissions.
Assignable: Permissions that accounts can assign to their custom role.
Always: Custom roles created by accounts will always include this permission.
Clasification Type Clarifications
- Note that permission's Classification Type is set to Assignable by default. You can always change its classification type via the drop down menu.
- Permissions with a Never classification are typically reserved for administrative, super-users, or system permissions that should not be customizable by accounts
- Permission with an Always classification are essential to the core functionality of the application and ensure that a custom role has a minimum requirment of default permissions.
Step 2: Assign Relevant Permissions
The ability to create, edit, or delete custom roles is defined by specific permissions. The following table lists the possible permission that includes actions relating to Custom Roles.
| Category | Permission | Key | Location in Portal |
|---|---|---|---|
| Security Policies | Read Roles (access Roles section) | fe.secure.read.roles | Roles |
| Security Policies | Write Roles | fe.secure.write.roles | Roles |
| Security Policies | Delete Roles | fe.secure.delete.roles | Roles |
Step 3: Enabling Role Tab
Go to your admin portal and enable the Roles option within your Workspace section to ensure the Roles tab will be visible in your accounts' admin view as well.
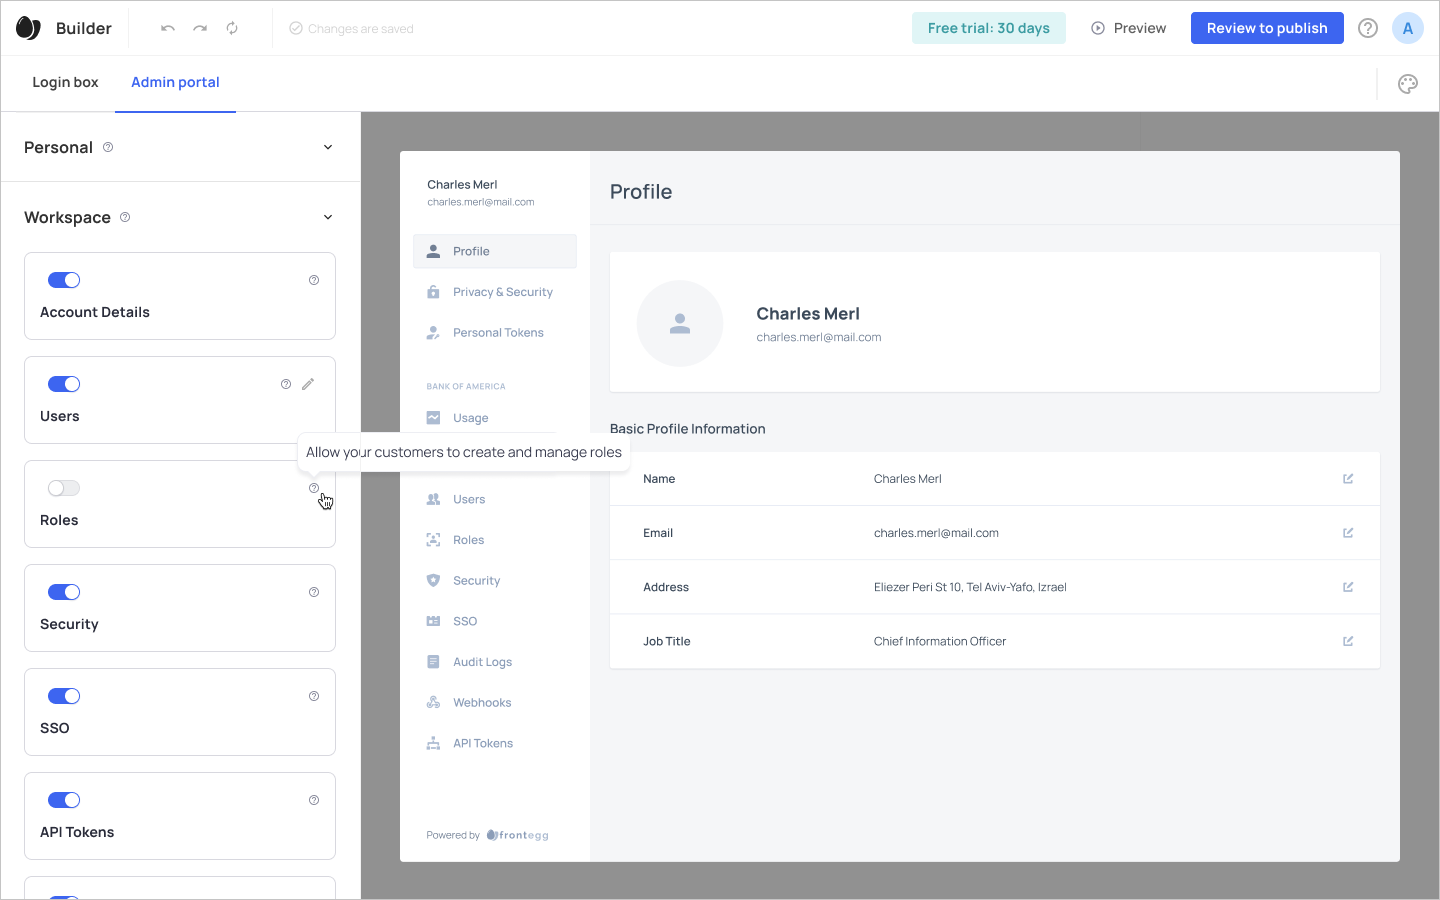
Toggle on Roles in your admin portal (to enable the option for your accounts)
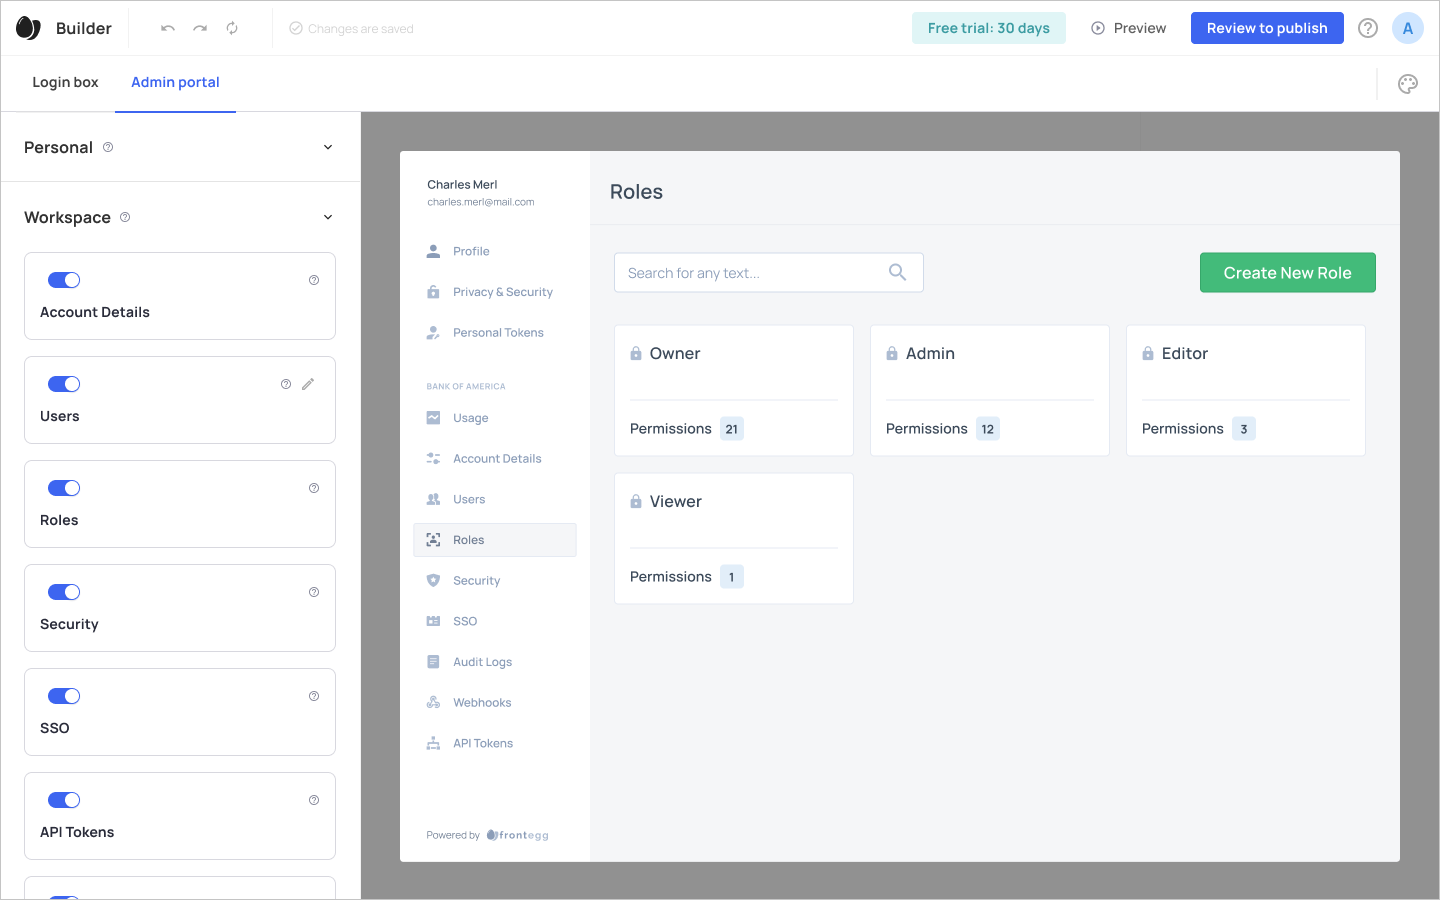
After enabling the Roles option in the dashboard, your accounts will see that section in their portal. Their Roles dashboard will include all the roles available for them to assign (system and custom), and they will be able to create a new custom role by clicking the Create New Role button.
Creating a New Custom Role (Account View)
Once you enable your accounts to create custom roles, they will be able to create a new custom role via their admin portal, where they will fill the role's Name and Description, and then assign the permissions that should be associated with that role.
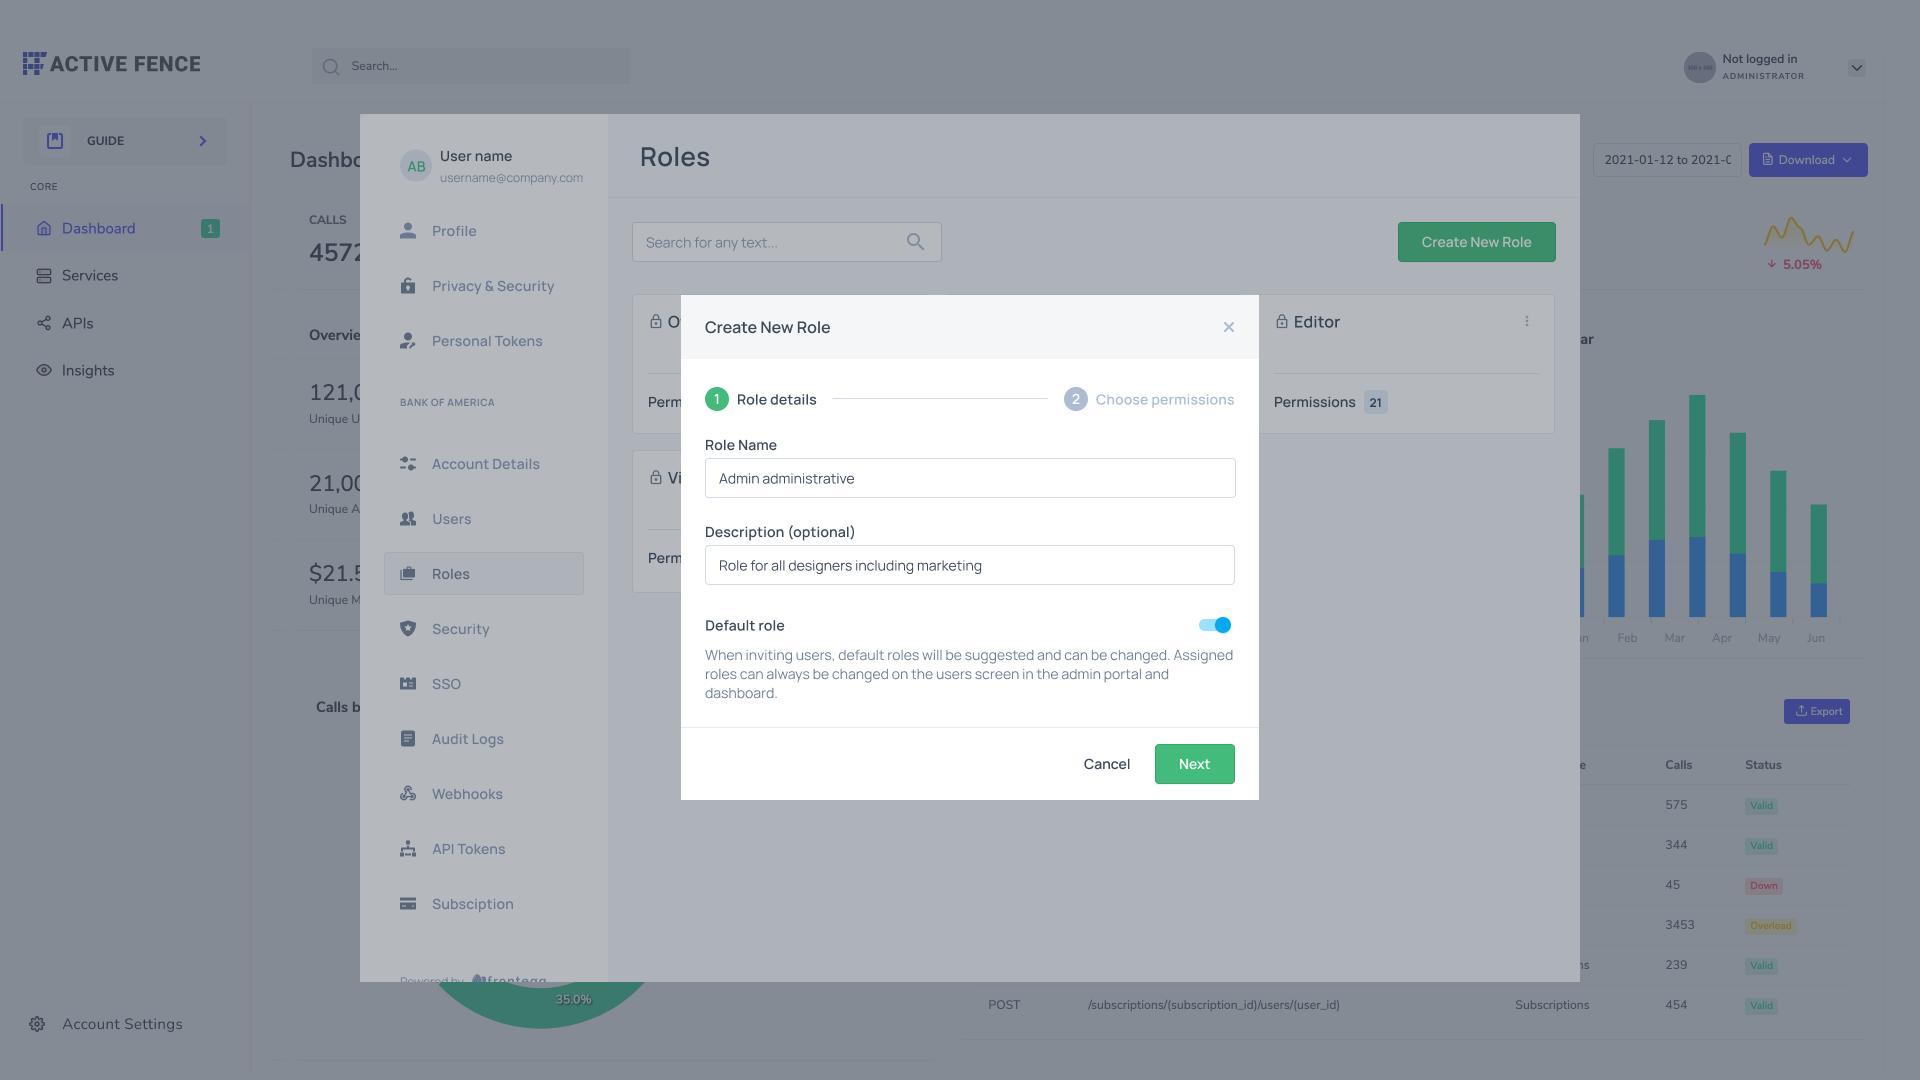
Naming the role and adding a description
Your accounts can choose which role (via the Copy permissions from drop-down menu, see image below) their new custom role will include. The new role will have the same level (created in the roles' settings section) as the role it was created from.
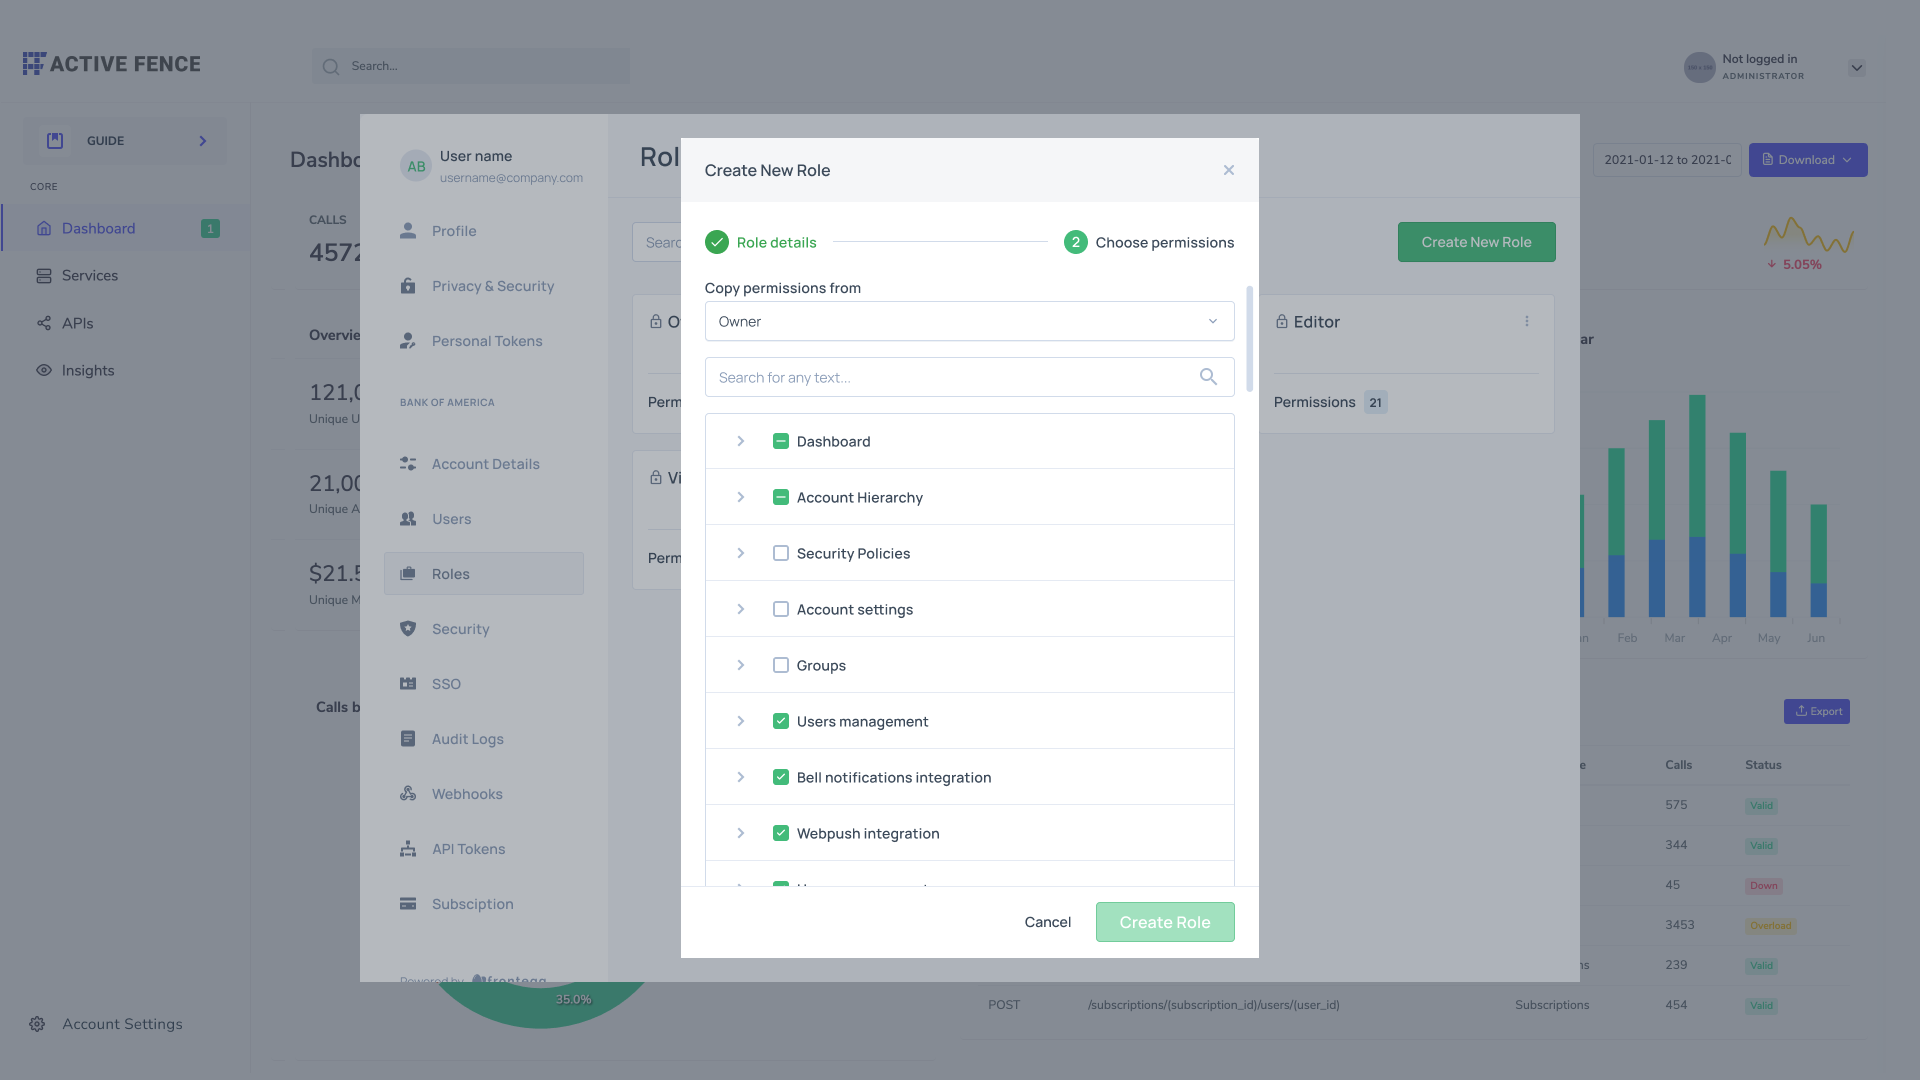
Assigning permissions to a custom role
Custom Roles via API
Custom Roles API Reference
Check out the our Custom Roles API reference here.
Creating a new custom role via API involves sending a POST request to the {url}/identity/resources/roles/v2 endpoint. The request body should include the following parameters:
key (string): The unique identifier for the role.
name (string): The name of the role.
description (string): A brief description of the role.
baseRoleId (string): The ID of the base role from which the custom role is created. The custom role inherits its level from that of the base role.
idDefault (boolean): A boolean value indicating whether the role is set as the default role.
permissionIds (array): An array containing the IDs of the permissions associated with the role.
User token


curl --location --request POST 'https://[sub-domain].frontegg.com/identity/resources/roles/v2' \
--header 'Authorization: Bearer [token-from-user-authentication]' \
--header 'Content-Type: application/json' \
--data-raw '{
    "key": "acme.hierarchy",
    "name": "Manage Hierarchy",
    "description": "This role gives hierarchy management permissions",
    "baseRoleId": "role-id-to-base-on",
    "isDefault": false,
    "permissionIds": ["permissions-id-1", "permission-id-2"]
}'

Vendor token

curl --location --request POST 'https://api.frontegg.com/identity/resources/roles/v2' \
--header 'frontegg-tenant-id: xxxxxxxxx' \
--header 'Authorization: Bearer [token-from-user-authentication]' \
--header 'Content-Type: application/json' \
--data-raw '{
    "key": "acme.hierarchy",
    "name": "Manage Hierarchy",
    "description": "This role gives hierarchy management permissions",
    "baseRoleId": "role-id-to-base-on",
    "isDefault": false,
    "permissionIds": ["permissions-id-1", "permission-id-2"]
}'
Updated about 1 month ago