Passwordless Authentication Strategies
Imagine a world where you do not need to create an impossible-to-remember password just to fulfill some complicated criteria— A world where you do not need to guess your password several times before worrying about being locked out and resetting your account! Welcome to Frontegg's passwordless world!
Passwordless Strategies
Frontegg currently supports two passwordless authentication strategies:
- One-time code (OTC)
- Magic link
One-Time Code
When using OTC to login, a user simply inputs their email address in the login box. In response, Frontegg emails the user a one-time code. After retrieving the code from their email, the user then inputs the code in the login box and is signed in.
In addition to not having to remember a password, one benefit of OTC is added security. The code changes each time the user tries to login and is only valid for a short time. Therefore, it is a very secure way to authenticate.
Magic Link
Similar to OTC, when using magic link to login, a user simply inputs their email address in the login box. In response, Frontegg emails the user a login link. The user then needs to visit their email and click on the link. Clicking the link authenticates the user.
Similar to OTC, the benefits of the magic link are added security and not having to remember a password. The link is valid for only one-time use and expires after a short time.
Step-By-Step Guide
Check out our complete Passwordless API collection here
Complete the following steps to configure your login box to use passwordless authentication:
Step 1: Configure Passwordless in Frontegg Portal
To configure passwordless flow go to your Frontegg Portal and navigate to Home and click the go to builder button for the the Login Box.
Here is the guide for Using Login Box Builder.
Step 2: Set Passwordless Strategy
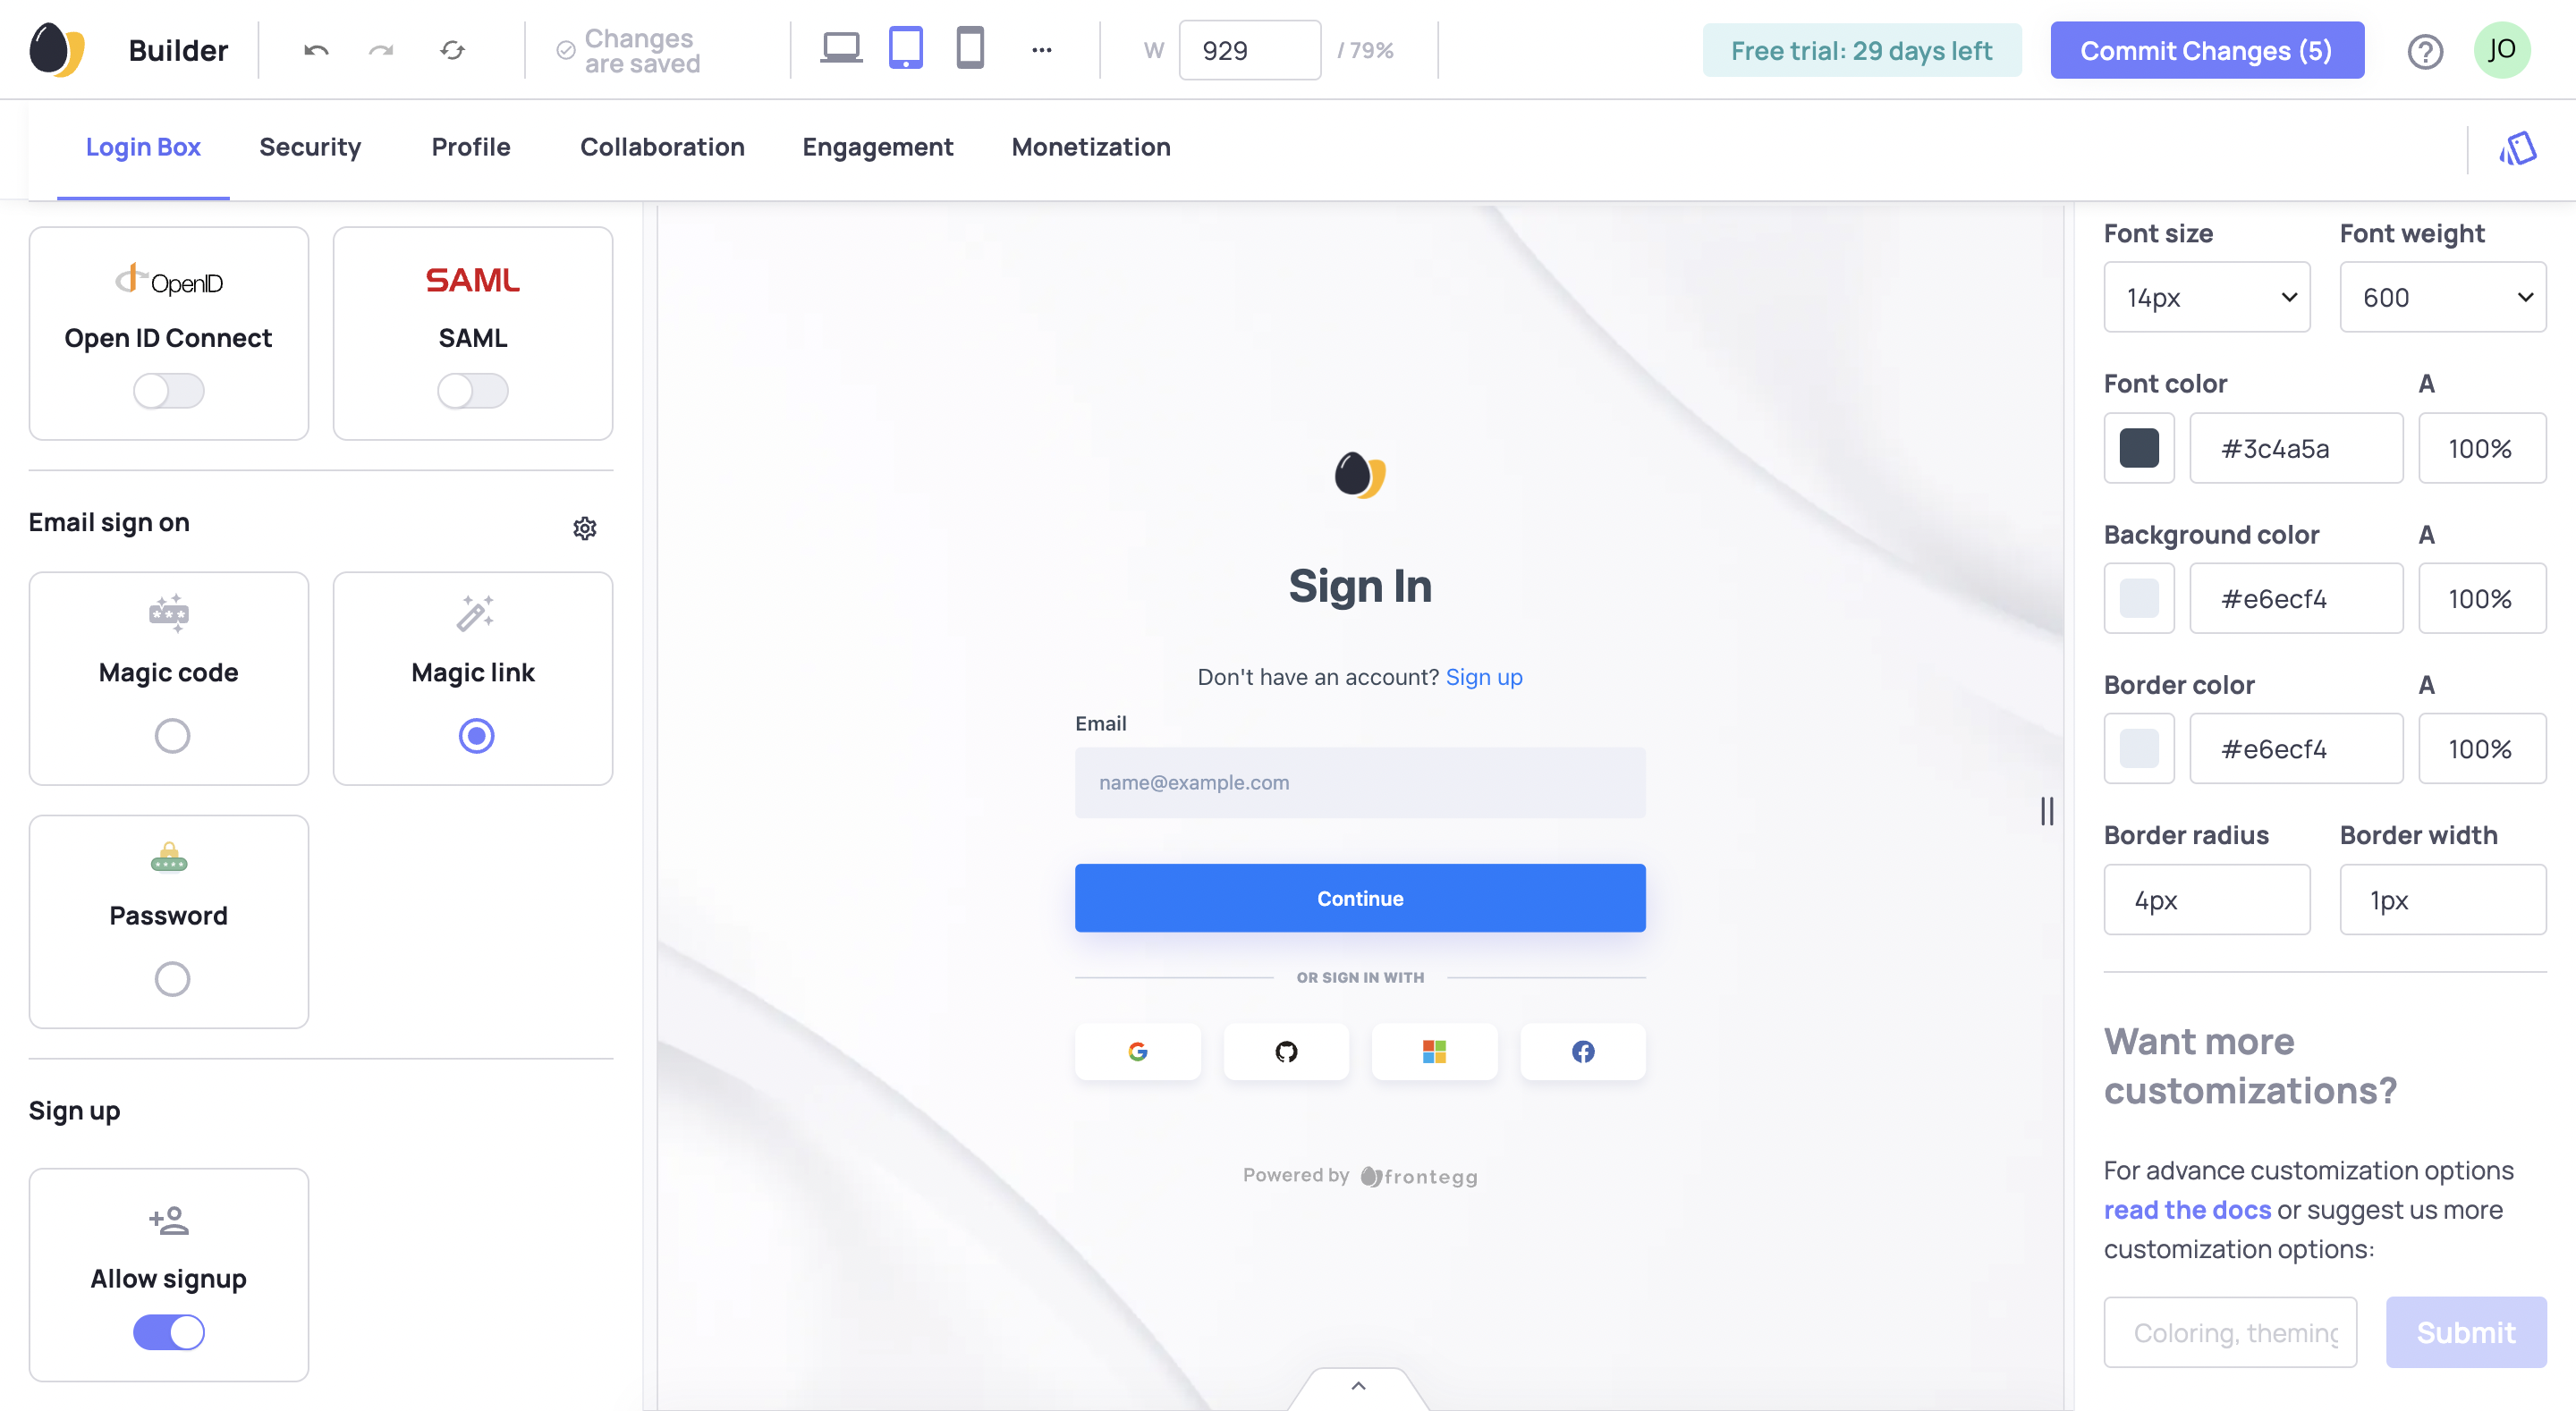
In the left panel under email sign on, decide which passwordless configuration you want to implement.
Choose one of the passwordless options:
- a magic code, where the user receives a one-time code (OTC) by email that they need to enter to login, and
- a magic link, where the user is emailed a unique link that they click to login

Regardless of which option you choose, remember to set the expiration time. The default expiration time is five minutes, but you can choose from pre-defined options between one minute and one hour.
Set expiration time
Whichever option you toggle on, click the ⚙ configure button and fill in the required information.
Step 3: Customize Email Template
After activating passwordless login, you need to customize the email template. The email template is the email the user receives after entering their email address in the login box.
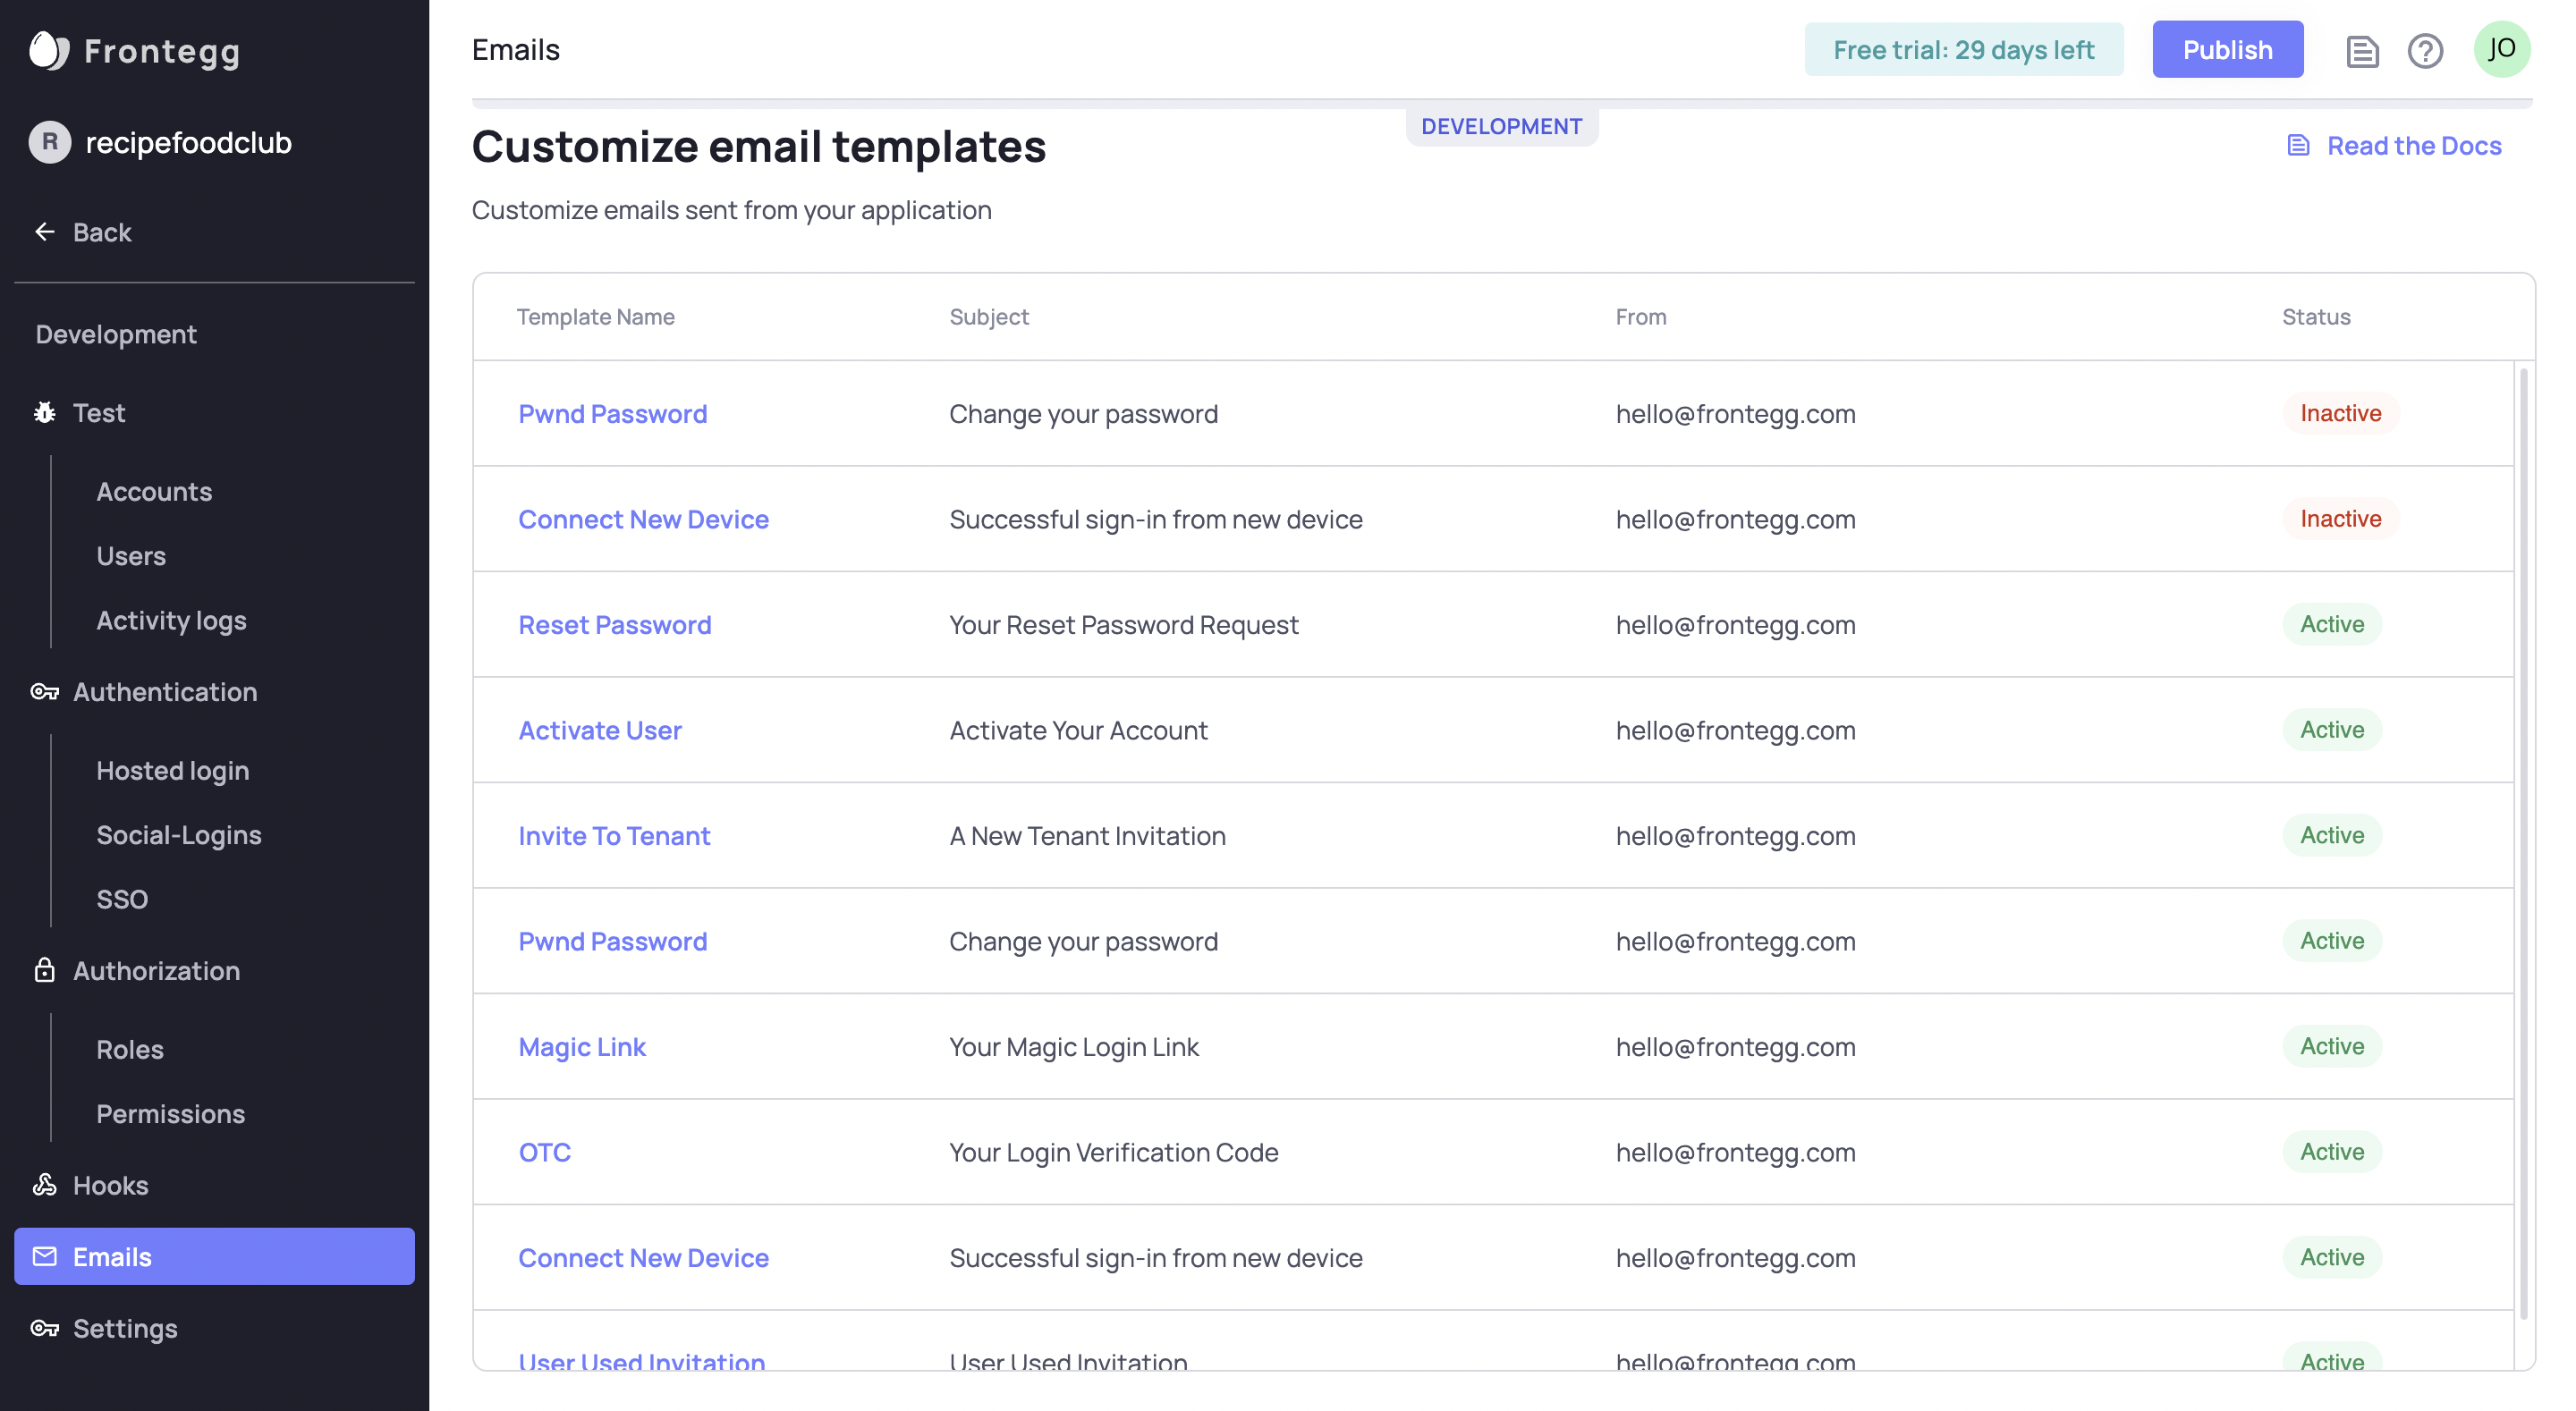
To customize the email template, go to Environments ➜ [NAME OF ENVIRONMENT] ➜ Emails.
For instance, go to the development environment at Environments ➜ Development ➜ Emails.
Be sure to update the email templates in each environment separately.

Depending upon which one you enabled, click on the Magic Link or OTC option. Then, enter your information into the form. You can even customize the HTML and CSS of the message body.
Customize email templates
Read more about how to customize emails templates.
Customizing the email is important because it should be from your email address and consistent with your company's branding.
Plus, the email template might require certain information of yours in order for passwordless login to work properly. For instance, if you choose the magic link strategy, you need to enter a redirect url in the email template.
That is it! Go passwordless.
Required Versions
Note: In order to use passwordless you must use one of the following versions or above:
Updated 8 months ago