Custom prehooks are hooks executed before a specific event occurs, becoming especially useful in authentication flows. They provide a way to insert custom logic or additional checks before the main action is completed, increasing flow security and giving you further personalization over user flows.
Explore all Prehook Options
This topic covers only custom prehooks. You can explore the full prehook topic here.
Frontegg Custom Prehooks allow you to extend the logic of flows within Frontegg without performing any actions on your end. You are granted ultimate control over your users' flows.
This topic will cover the benefits and integration of custom prehooks into your user flows.
Environment Specific Prehooks
Custom Prehooks are devised per environment seperately.
Why use custom prehooks?
The ability to customize prehooks is a game-changer for vendors wanting to customize their users' flows. You can use custom prehooks to perform additional verification for users attempting to access sensitive account features from a new device or from an unusual location, enhancing security measures beyond standard authentication. Additional benefits include:
- Enhanced Security and Compliance: Custom prehooks enable businesses to add extra layers of security before completing the authentication process. You can perform a risk analysis check or assess a device's security posture. This flexibility ensures that businesses can meet stringent security and compliance standards by dynamically adjusting access controls based on real-time assessments.
- Customized User Experiences: By devising custom prehooks, organizations can create a more personalized login experience. Depending on factors like user roles, location, or the time they're accessing the system, the login process can be customized. This could include varying the multi-factor authentication (MFA) requirements or directing users to specific pages after they log in.
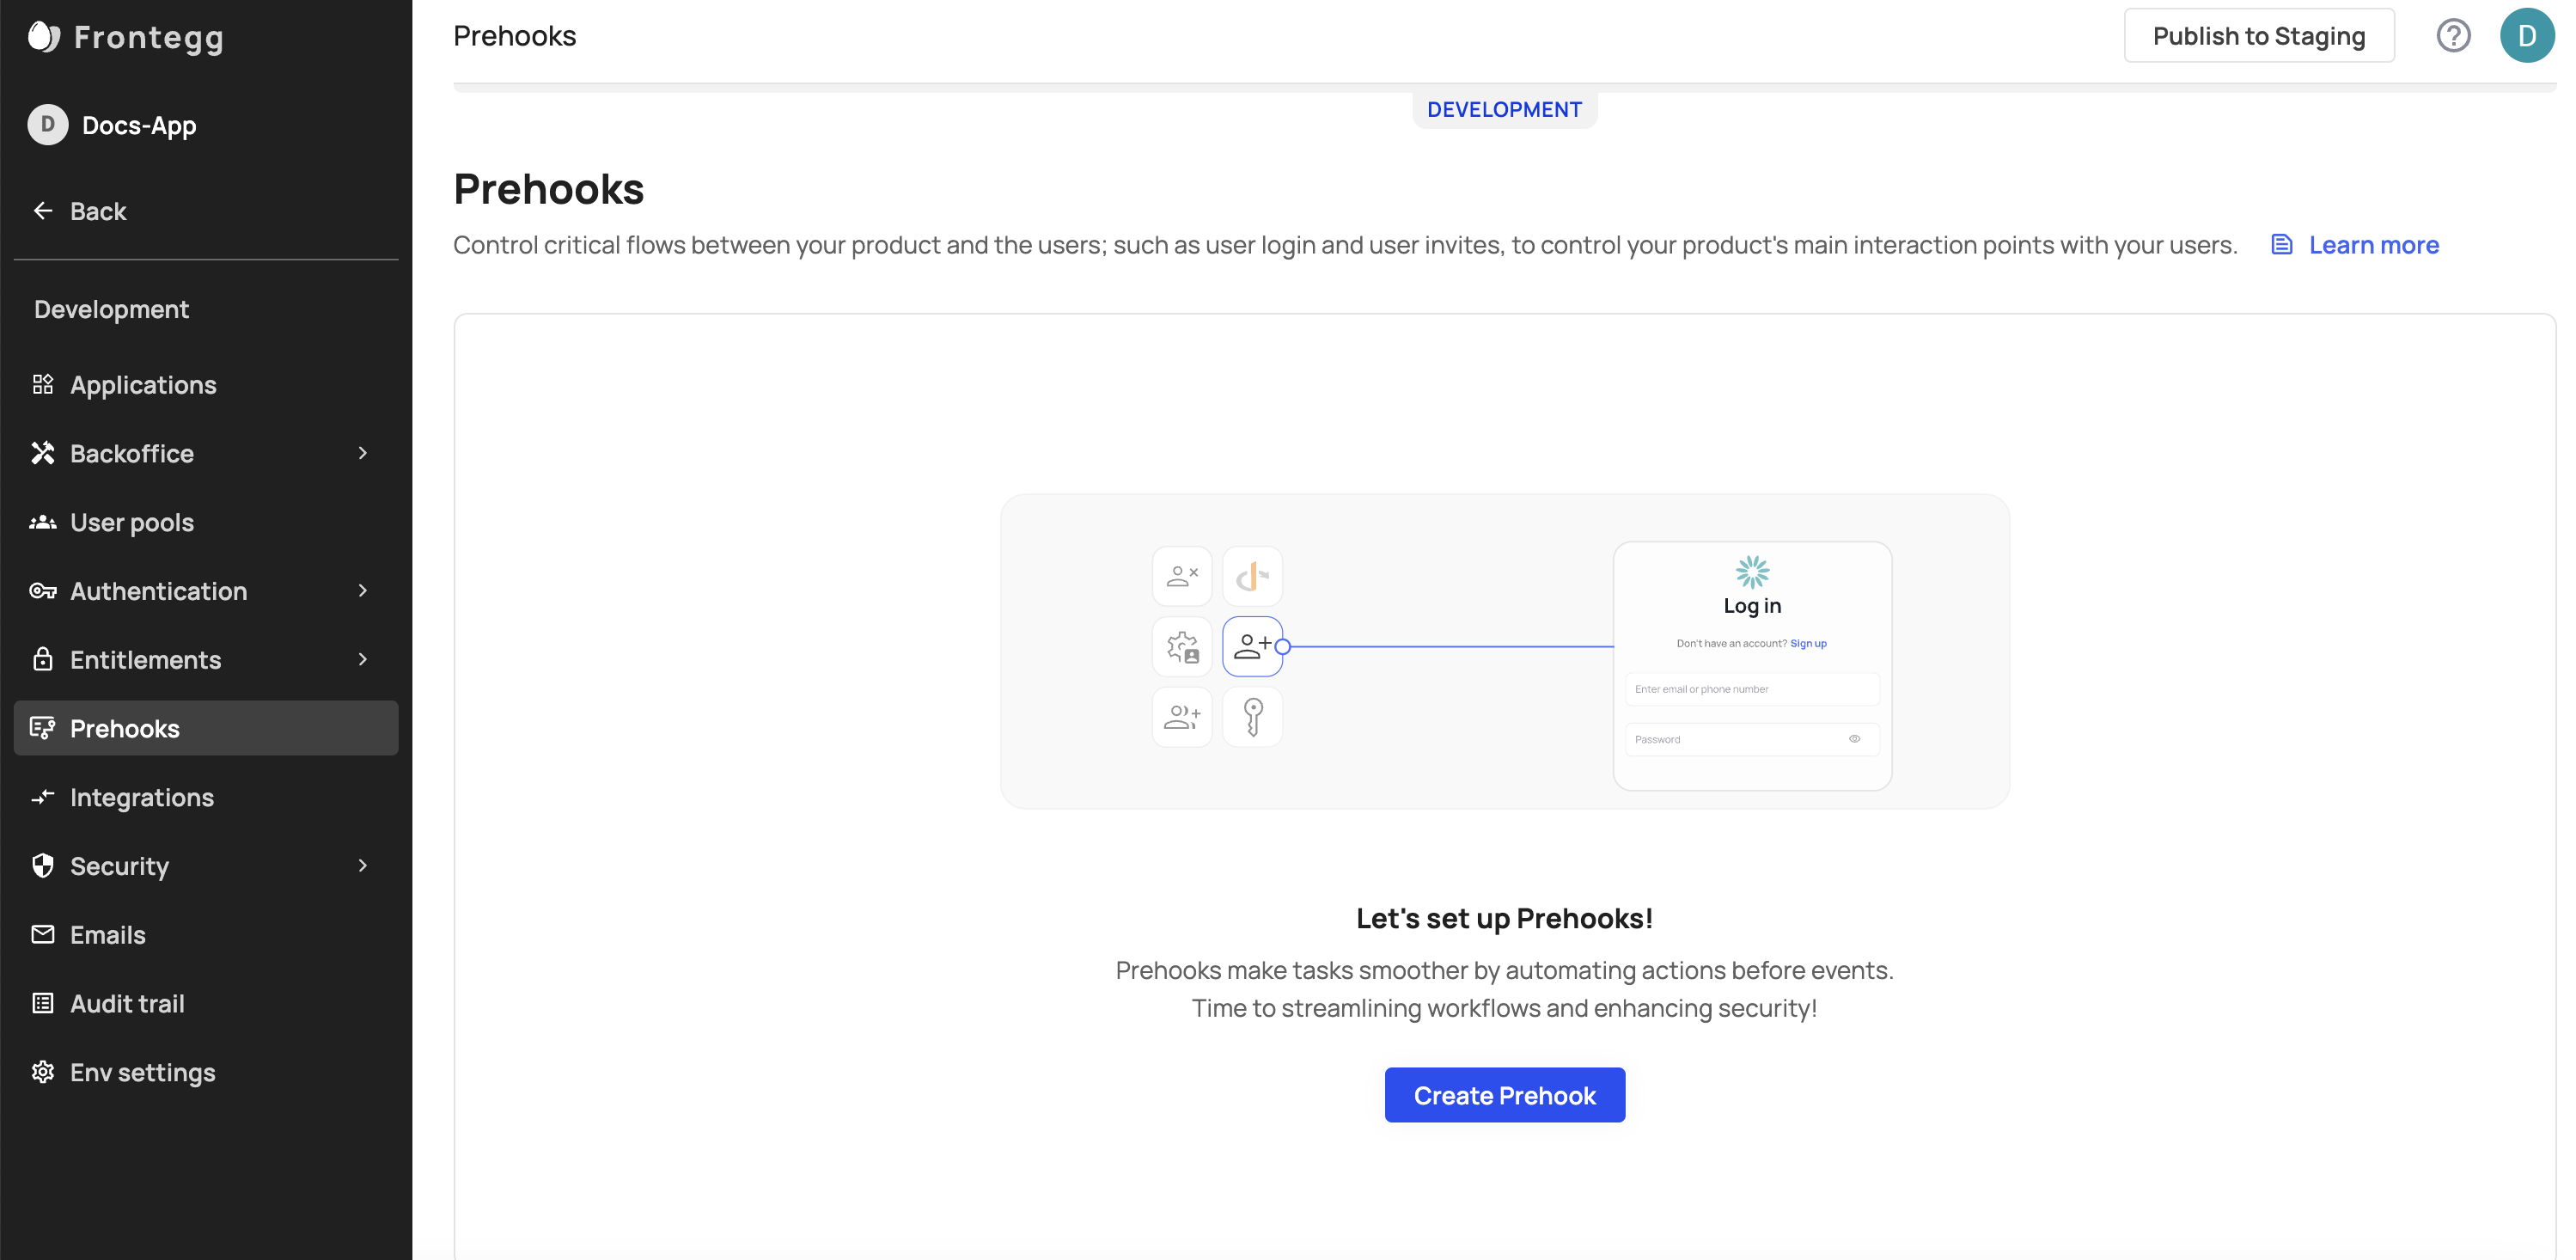
How to Create a Custom Prehook
To create a new custom prehook, head over to your prehooks tab within your environment of choice. Press the Create Prehook button to create a new prehook.
In the side menu, add and define your required settings e.g., Trigger event, Code type (in our case, a Custom code prehook), timeout, etc.
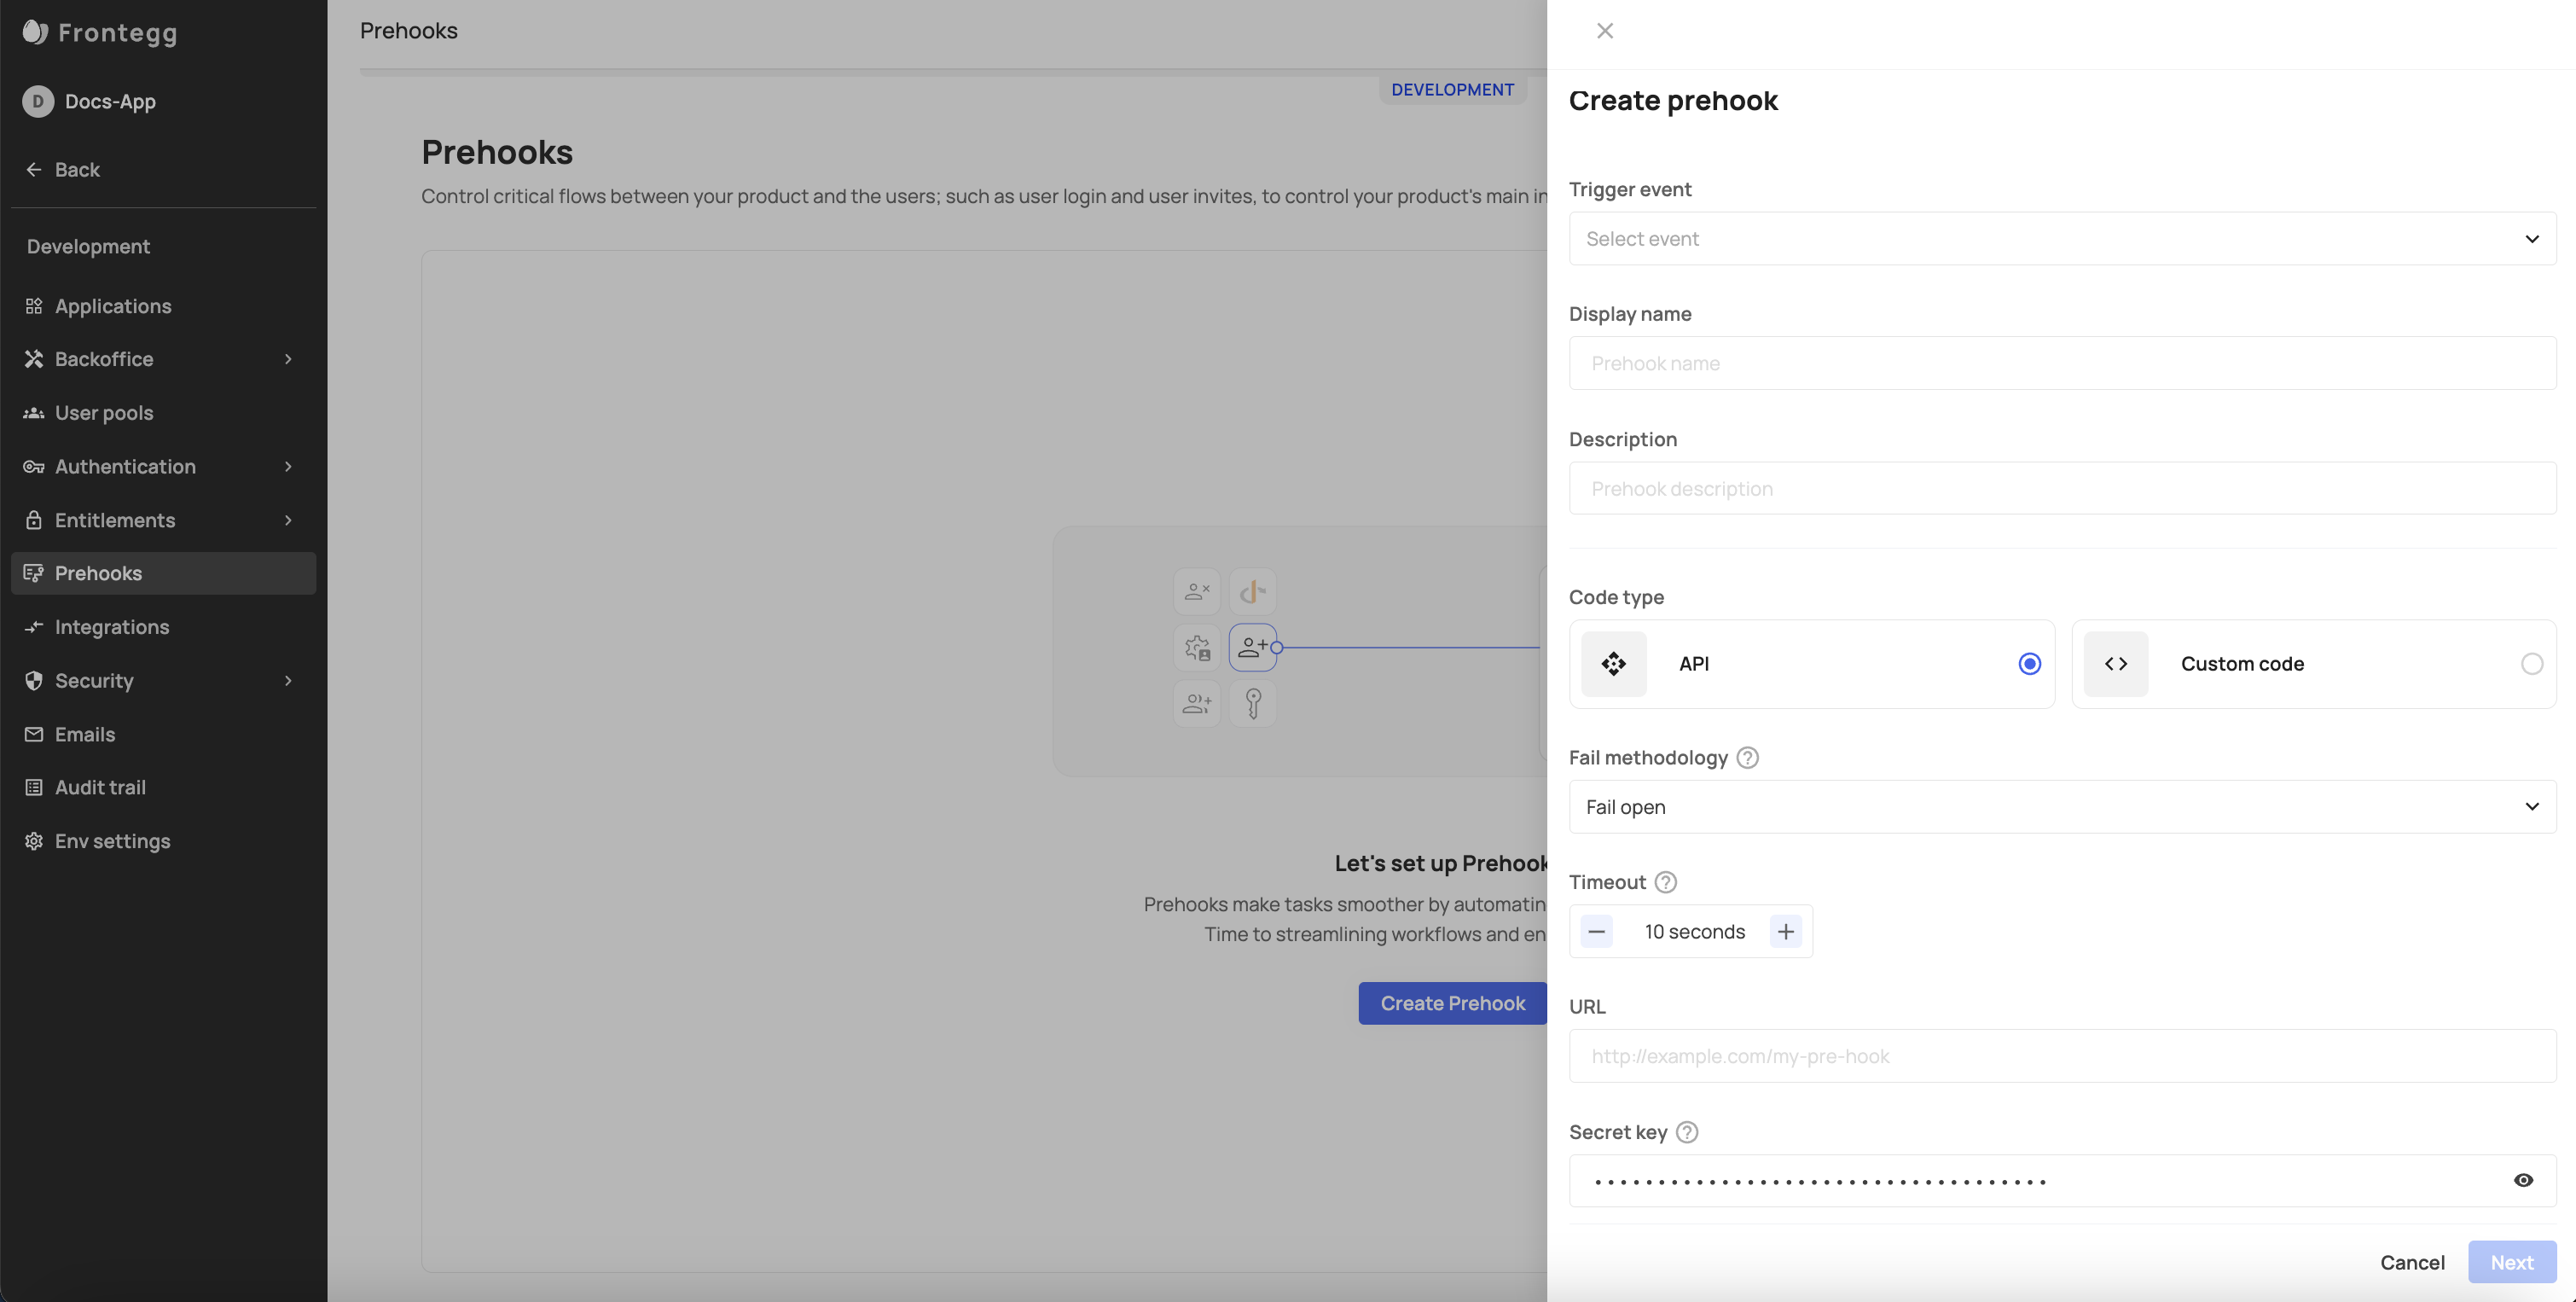
Prehook Fail Methodology
You can choose your prehook's fail methodology to be either open/close. The open option will continue with the flow despite errors while the close will terminate the session.
Custom Prehook Example
Custom prehooks extend your existing Frontegg flows to allow you to further customize your user journey. The following example demonstrates how to customize a prehook for a user authentication flow with the ability to control the verdict (see possible verdicts in the Prehooks topic) of the user after opting to login. Note that this option has a predefined template that you can use.
The following code sample checks if an email address provided during a sign-up event is valid and belongs to an allowed domain. If the email is invalid or not from an allowed domain, it blocks the sign-up process; otherwise, it allows the user to proceed with the flow.
const ALLOWED_DOMAINS = ['gmail.com'];

/**
 * Handle the event
 * @param {SignUpEventData} eventData - the event details
 * @returns {Promise<SignUpHandlerResponse>} event handler response
 */
async function onEvent(eventData) {
      // ensure user email is present
    if (!eventData.data.user.email) {
        // note that userMessage (the second parameter) is displayed in red on the failed sign-up prompt
        return { continue: false, verdict: "block", error: { status: 400, message: ["Email is invalid"] }}
    }

    // ensure a reasonable format for the email
    const splitEMail = eventData.data.user.email.split('@');
    if (splitEMail.length !== 2) {
        // note that userMessage (the second parameter) is displayed in red on the failed sign-up prompt
        return { continue: false, verdict: "block", error: { status: 400, message: ["Email is invalid"] }}
    }

    // if the email domain is not explicitly in our allow list, deny access
    const domain = splitEMail[1].toLowerCase();
    if (ALLOWED_DOMAINS.indexOf(domain) < 0) {
        // note that userMessage (the second parameter) is displayed in red on the failed sign-up prompt
        return { continue: false, verdict: "block", error: { status: 400, message: ["Email is not allowed"] }}
    }

    return { continue: true, verdict: "allow", response: {} }
}

exports.onEvent = onEvent;
Flow Verdict
Check the Prehooks topic for a full breakdown of the possible flows' verdicts (each affecting the continuity of the user's journey).
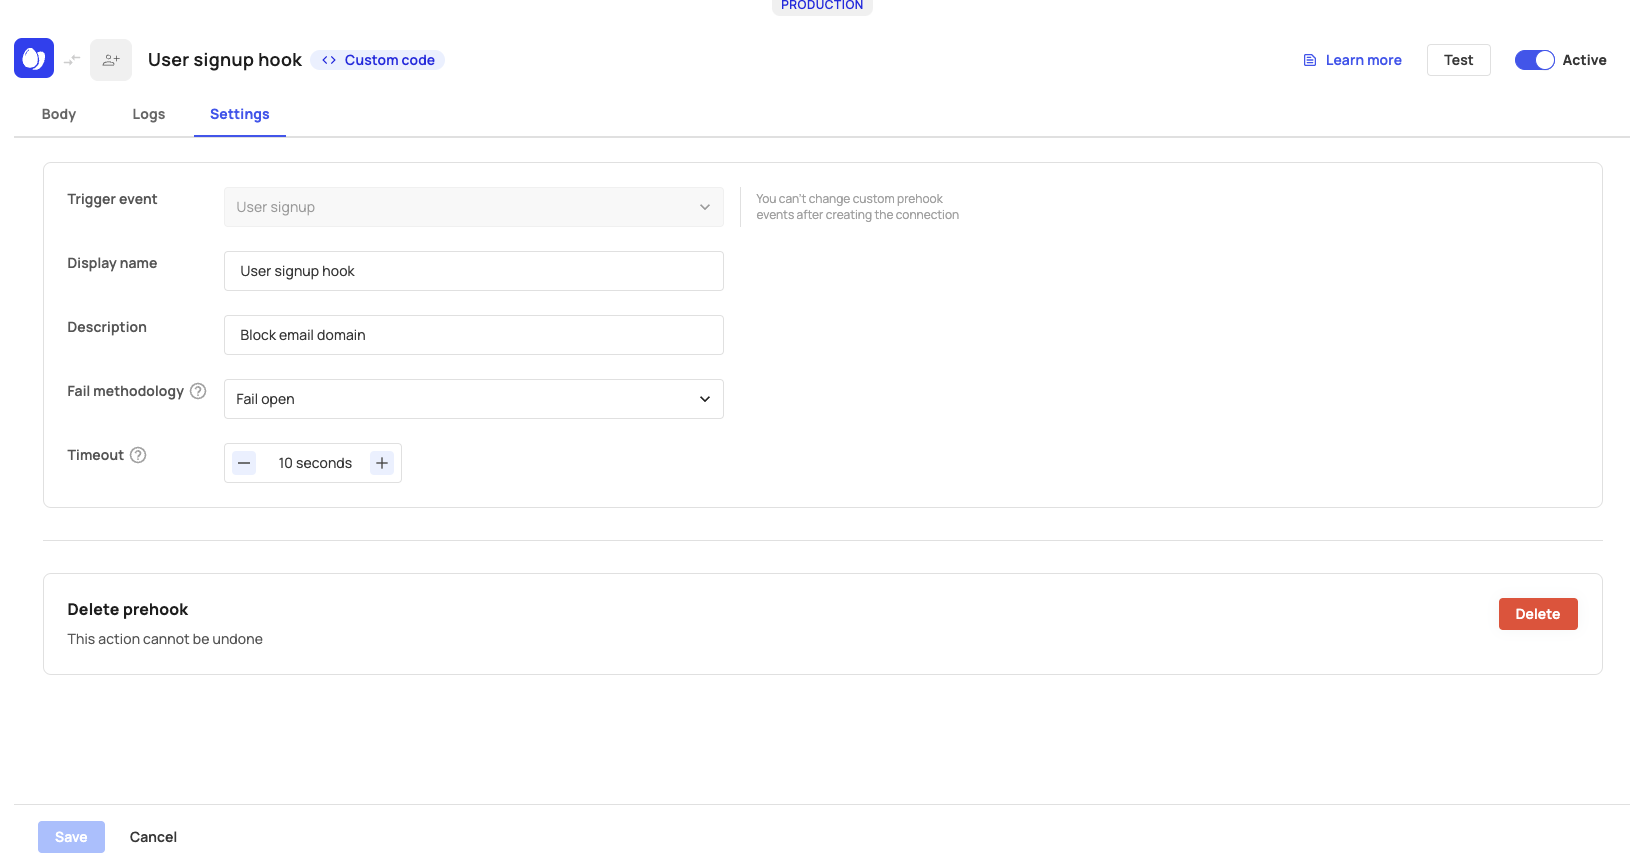
Single prehook view
After testing and creating your prehook, you can view/change its settings and monitor its performance.
Trigger Event
Note that you can't change your hook's trigger event after initiating its connection.
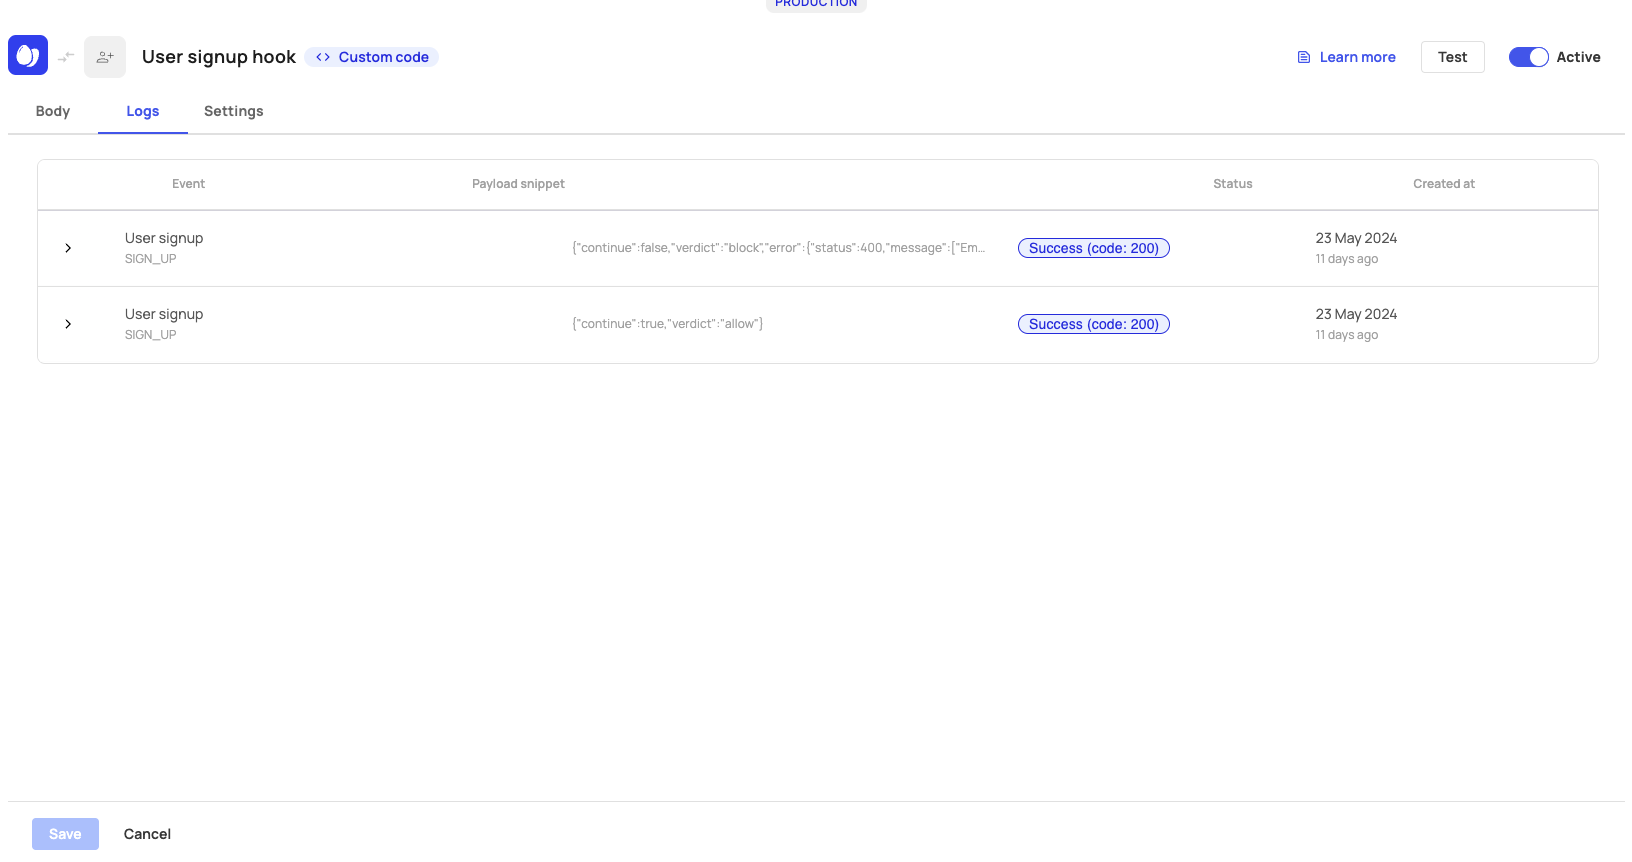
Logs and Monitoring
Your prehooks can be monitored via the Logs tab. You can see the verdict that was determined per flow (Learn more about prehook verdicts in the general Prehooks topic) and whether the prehook was successful or not.
Updated 2 months ago