Google Login
To enable your users to login with Google, you must enable Google login in the builder and then create an application with Google to serve as the OAuth provider.
Read below to learn how.
Enabling Google Social Login In Builder
Go to Home and click on the Login Box builder.
In the left panel, toggle the switch to on for Google.

When making changes to the settings in the builder, be sure to commit your changes and then publish for them to take effect and to configure them in your environments.
Create Google App
Follow the steps below to configure Google login.
Moving Environments
When moving a project from one environment to another, Frontegg moves the social login environment configurations for you. For instance, if moving from development to production, Frontegg moves the development social login configurations to production.
Step 1: Open Project
In order to create your OAuth application, go to your [Google Developers Console] (https://console.developers.google.com/). In the dropdown at the top of the page, select your project.

Step 2: Create Credentials
Open the Credentials menu. Click on Create Credentials and select "OAuth Client ID".

Follow the instructions to create and configure the consent screen.

Enter your application name and contact email. Then complete the numbered steps for building the consent screen.

Important: App name
- Note that if you are using Frontegg's hosted login mode without a custom domain, then when users will try to login with Google, the text displayed would be "to continue to frontegg.com".
If you are using a custom domain, Google will display a "to continue to YOUR_APP_NAME" message instead.- If you are using Frontegg's embedded login, Google will always display "to continue to YOUR_APP_NAME"— regardless of the domain setup.
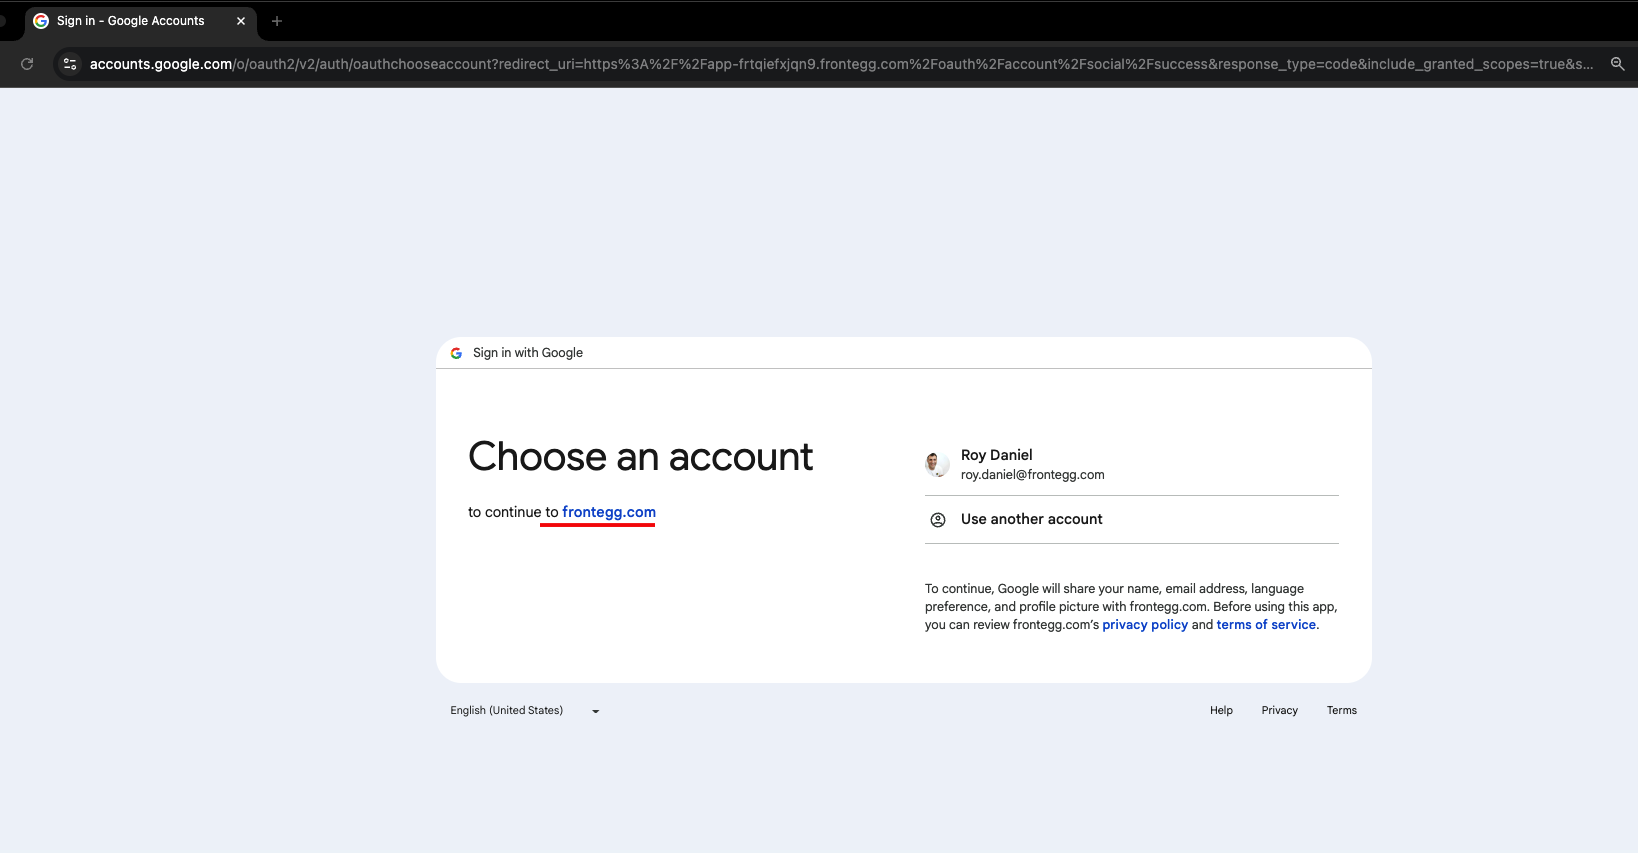
Hosted integration, no custom domain
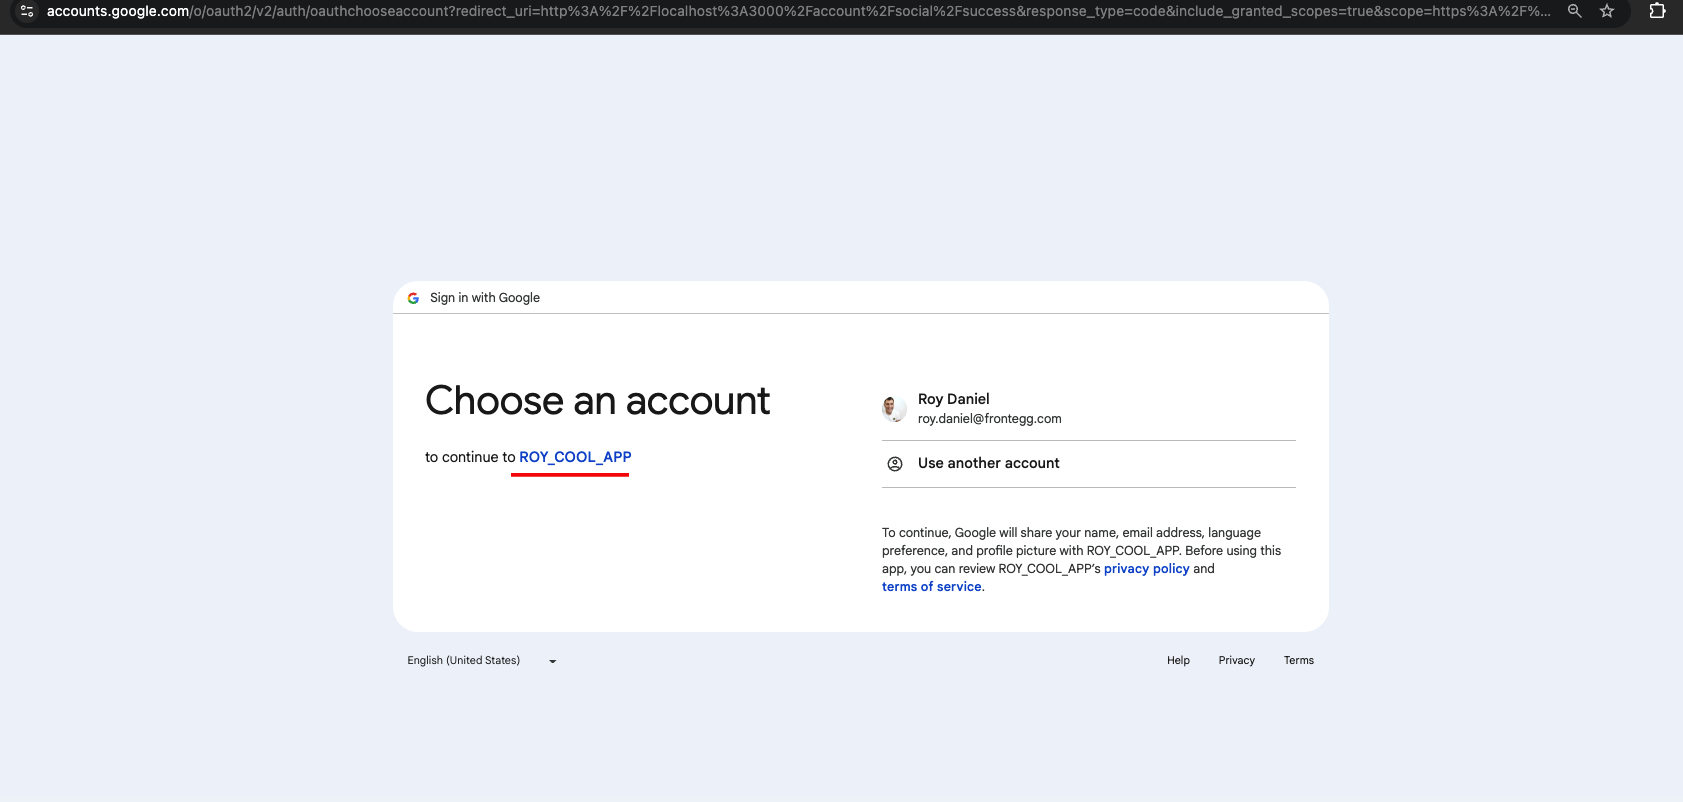
Embedded integration/ Hosted with custom domain
Step 3: Create a Client ID
Return to Credentials menu and create an OAuth2 Client ID.
- For Application Type, select "Web Application".
- For Authorized JavaScript Origins, set your application URI (for example, http://localhost:3000).
- For Authorized Redirect URIs, set your redirect URI (for example, http://localhost:3000/account/social/success).

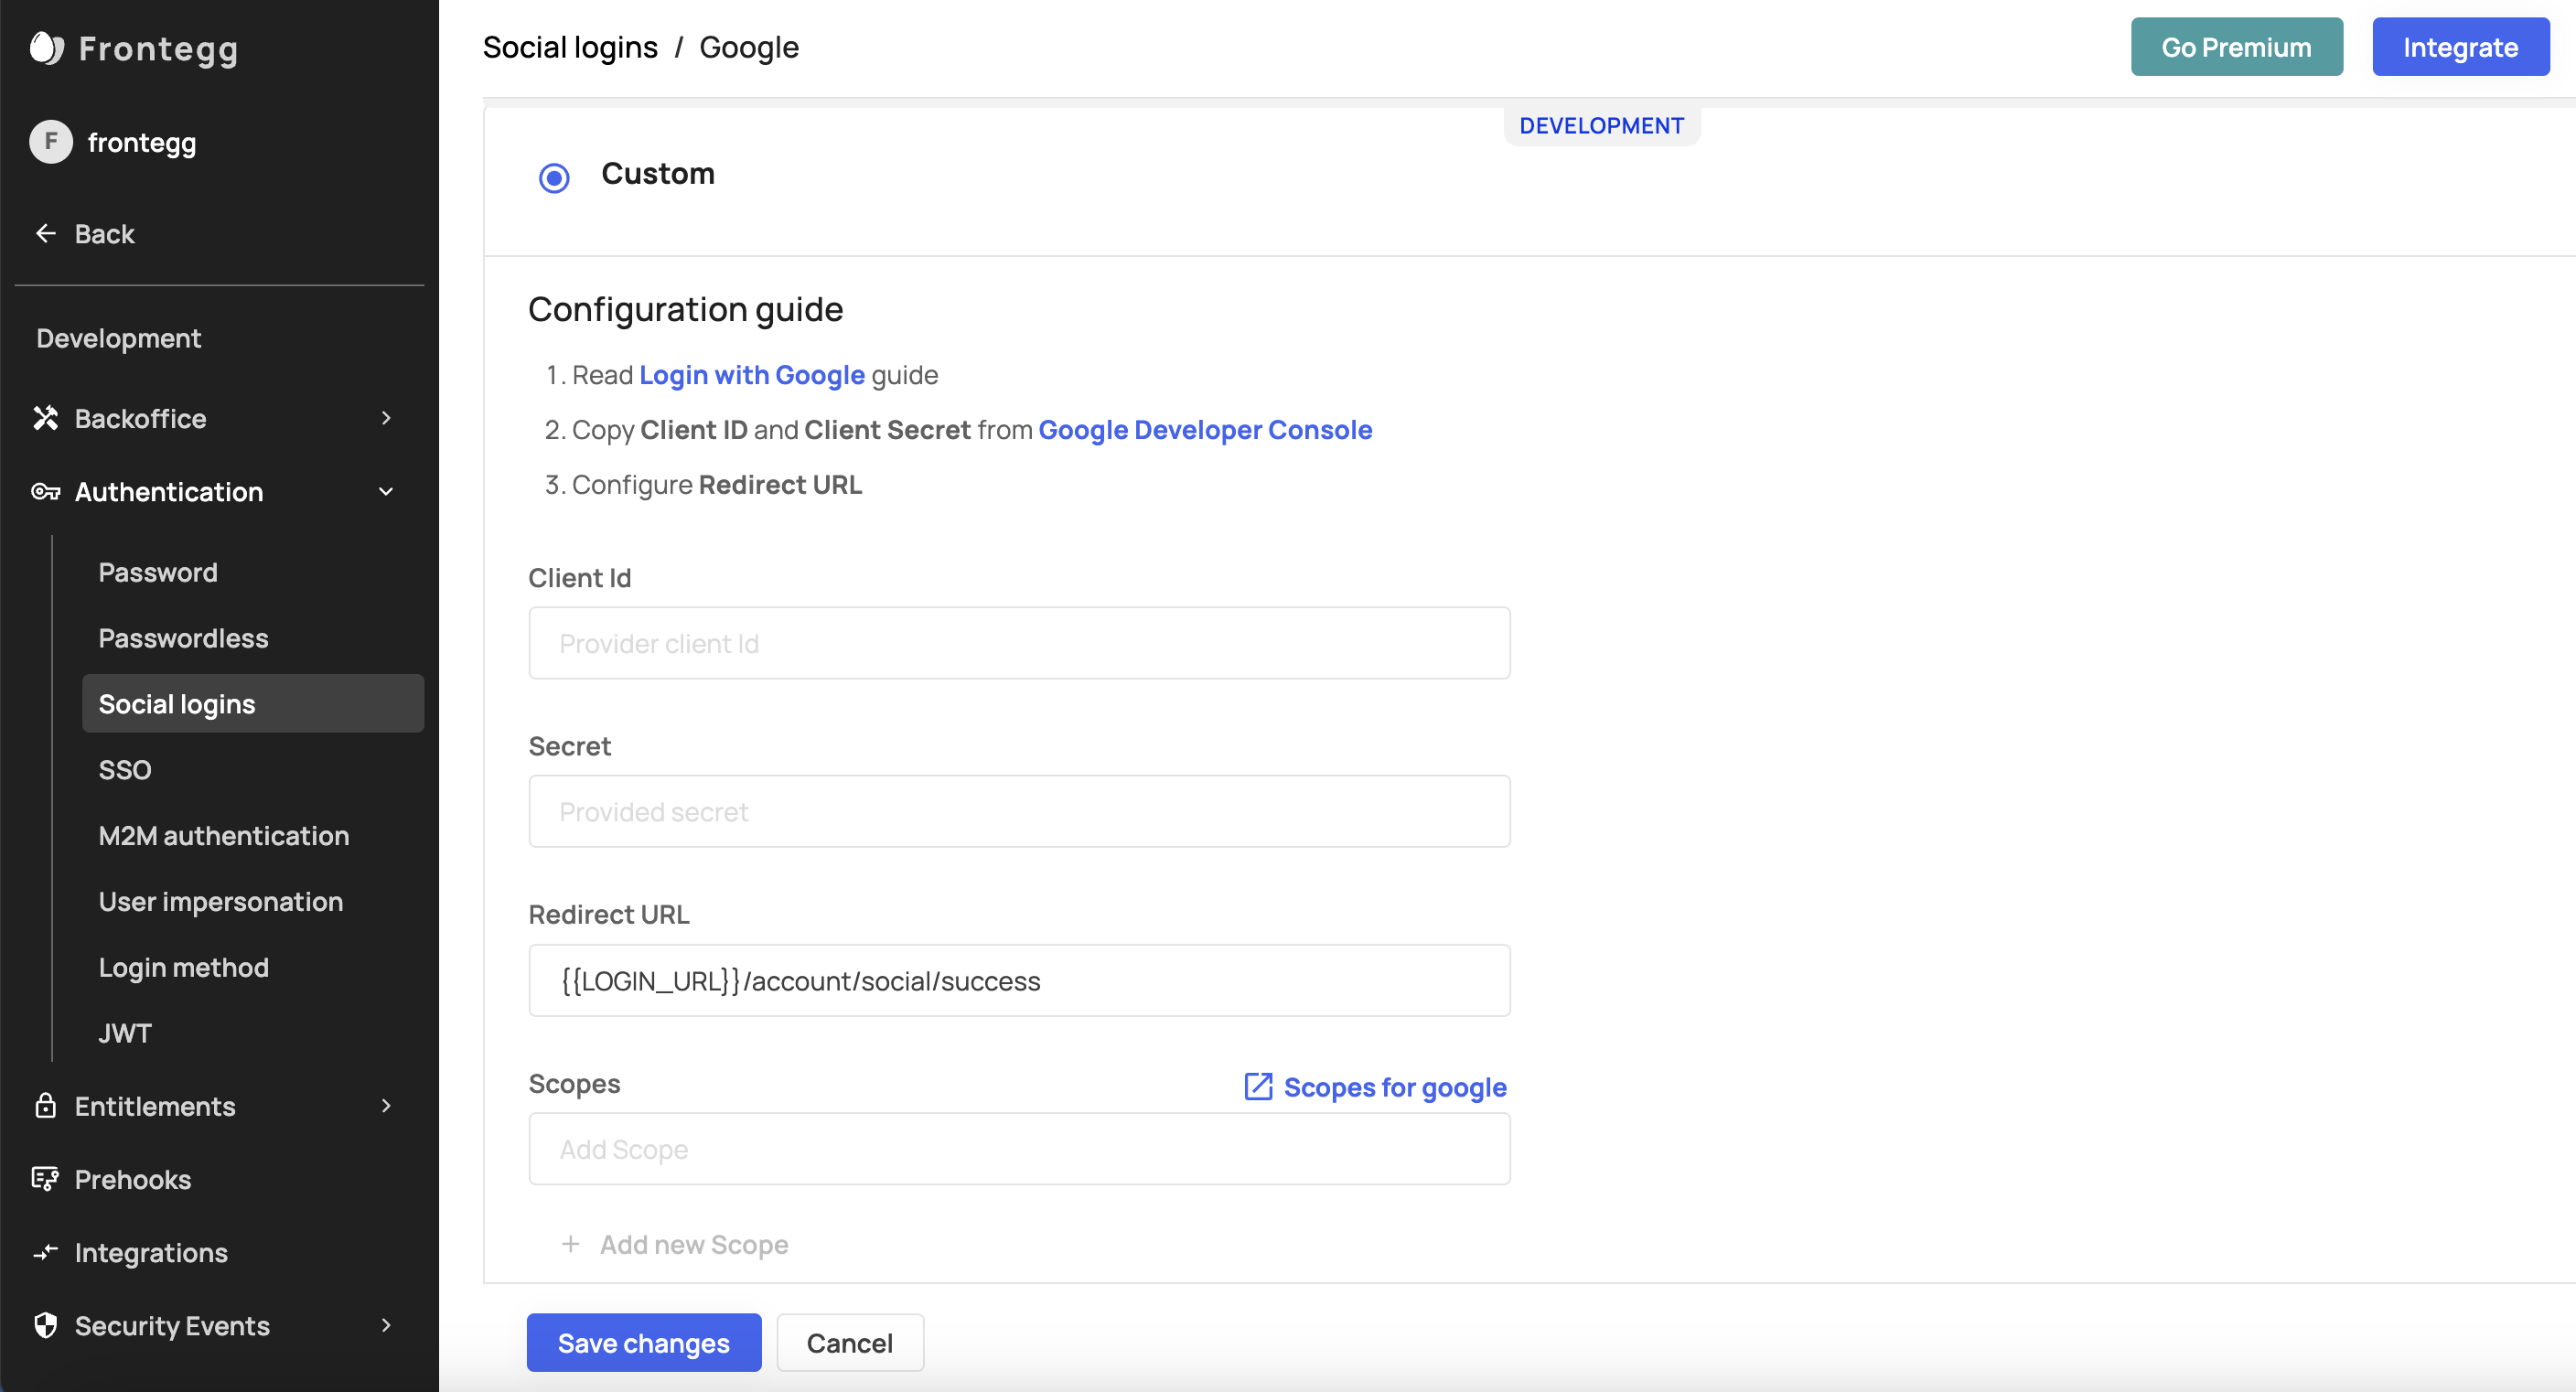
Step 4: Enter Credentials In Frontegg
Copy the Client ID and Client Secret from Google.

Go to Environments ➜ [NAME OF ENVIRONMENT] ➜ Authentication ➜ Social Logins.
Click on the Google manage button.

Enter your Google Client ID, Client Secret, and Redirect URL. Then save and publish.
Step 5: Test Google Button
On your login screen, you should see a Google button that redirects to the Google OAuth Consent screen for login. Test it to make sure it works.

Set Who Can Login With Google
By default, only invited users can login with Google. If you want to allow new users to signup with Google, go to the Login Box builder and enable Allow Signups in the left panel.
Customizing Authentication Scopes for Google
Customizing Scopes for Google Social Login
Scopes let you specify exactly what type of information your application can fetch from your users after they grant it access— and the generated access token includes these approved scopes. Frontegg currently fetches a user profile and user email as default scopes when users authenticate via their Google account. You can add additional, custom scopes to your social login via your Frontegg portal. To do so, go to [Environment name] > Authentication > Social login > Custom > Scopes. You can check Google's supported scopes here.
Supporting Google One Tap
The Frontegg login dialog supports Google One Tap out of the box. The Google One Tap will show on supported browsers by default for both hosted login and embedded login.
In order to allow Google One tap, a change in the go to your [Google Developers Console] (https://console.developers.google.com/) is required. On your Google Developers Console, Go to OAuth project and OAuth credentials, your credentials and add the following under Authorized JavaScript origins:
- For hosted login mode, add https://[YOUR-FRONTEGG-DOMAIN]/oauth
- For embedded login mode, add https://[YOUR-APP-URL] (In case of using http://localhost:[PORT] add http://localhost as well for the Google One Tap to load correctly)

Updated 3 months ago