Customer SAML IDP Setup
Before you start
The following topic covers your users' SAML configuration. To allow them to do so, SAML needs to be enabled and configured for your application prior.
What's SAML?
SAML (Security Assertion Markup Language) configuration is a process that allows identity providers (IdP) to pass authorization credentials to service providers (SP). It's a type of single sign-on (SSO) standard that helps in managing user identities across various systems and applications.
The following guide outlines the steps your users need to take to can create a SAML application in Okta (IDP) and configure the connection from their admin portal section.
To enable users to configure SSO connections, make sure to check the Vendor SAML Configuration first.
Customer Configuration
If SAML is enabled and configured, an end user can configure an SSO connection and allow other users to sign in to their account using SAML SSO.
Walkthrough Guides
Frontegg client-side SDKs include detailed walkthrough SAML guides for most popular Identity Providers. If you don't see your required IdP on the list of providers, please use the Custom SAML option to configure your connection.
Configuring a New SAML Application
Create a new SAML application that you can use as the Identity Provider for users. To set up a new connection, press the profile pic in the top right corner of the page > and choose Administration, like so:
Follow the guidelines provided in your IdP of choice— or configure a custom connection. IdP setup requirements change from one provider to another so follow the instructions closely.
Use case: Configuring an Okta connection
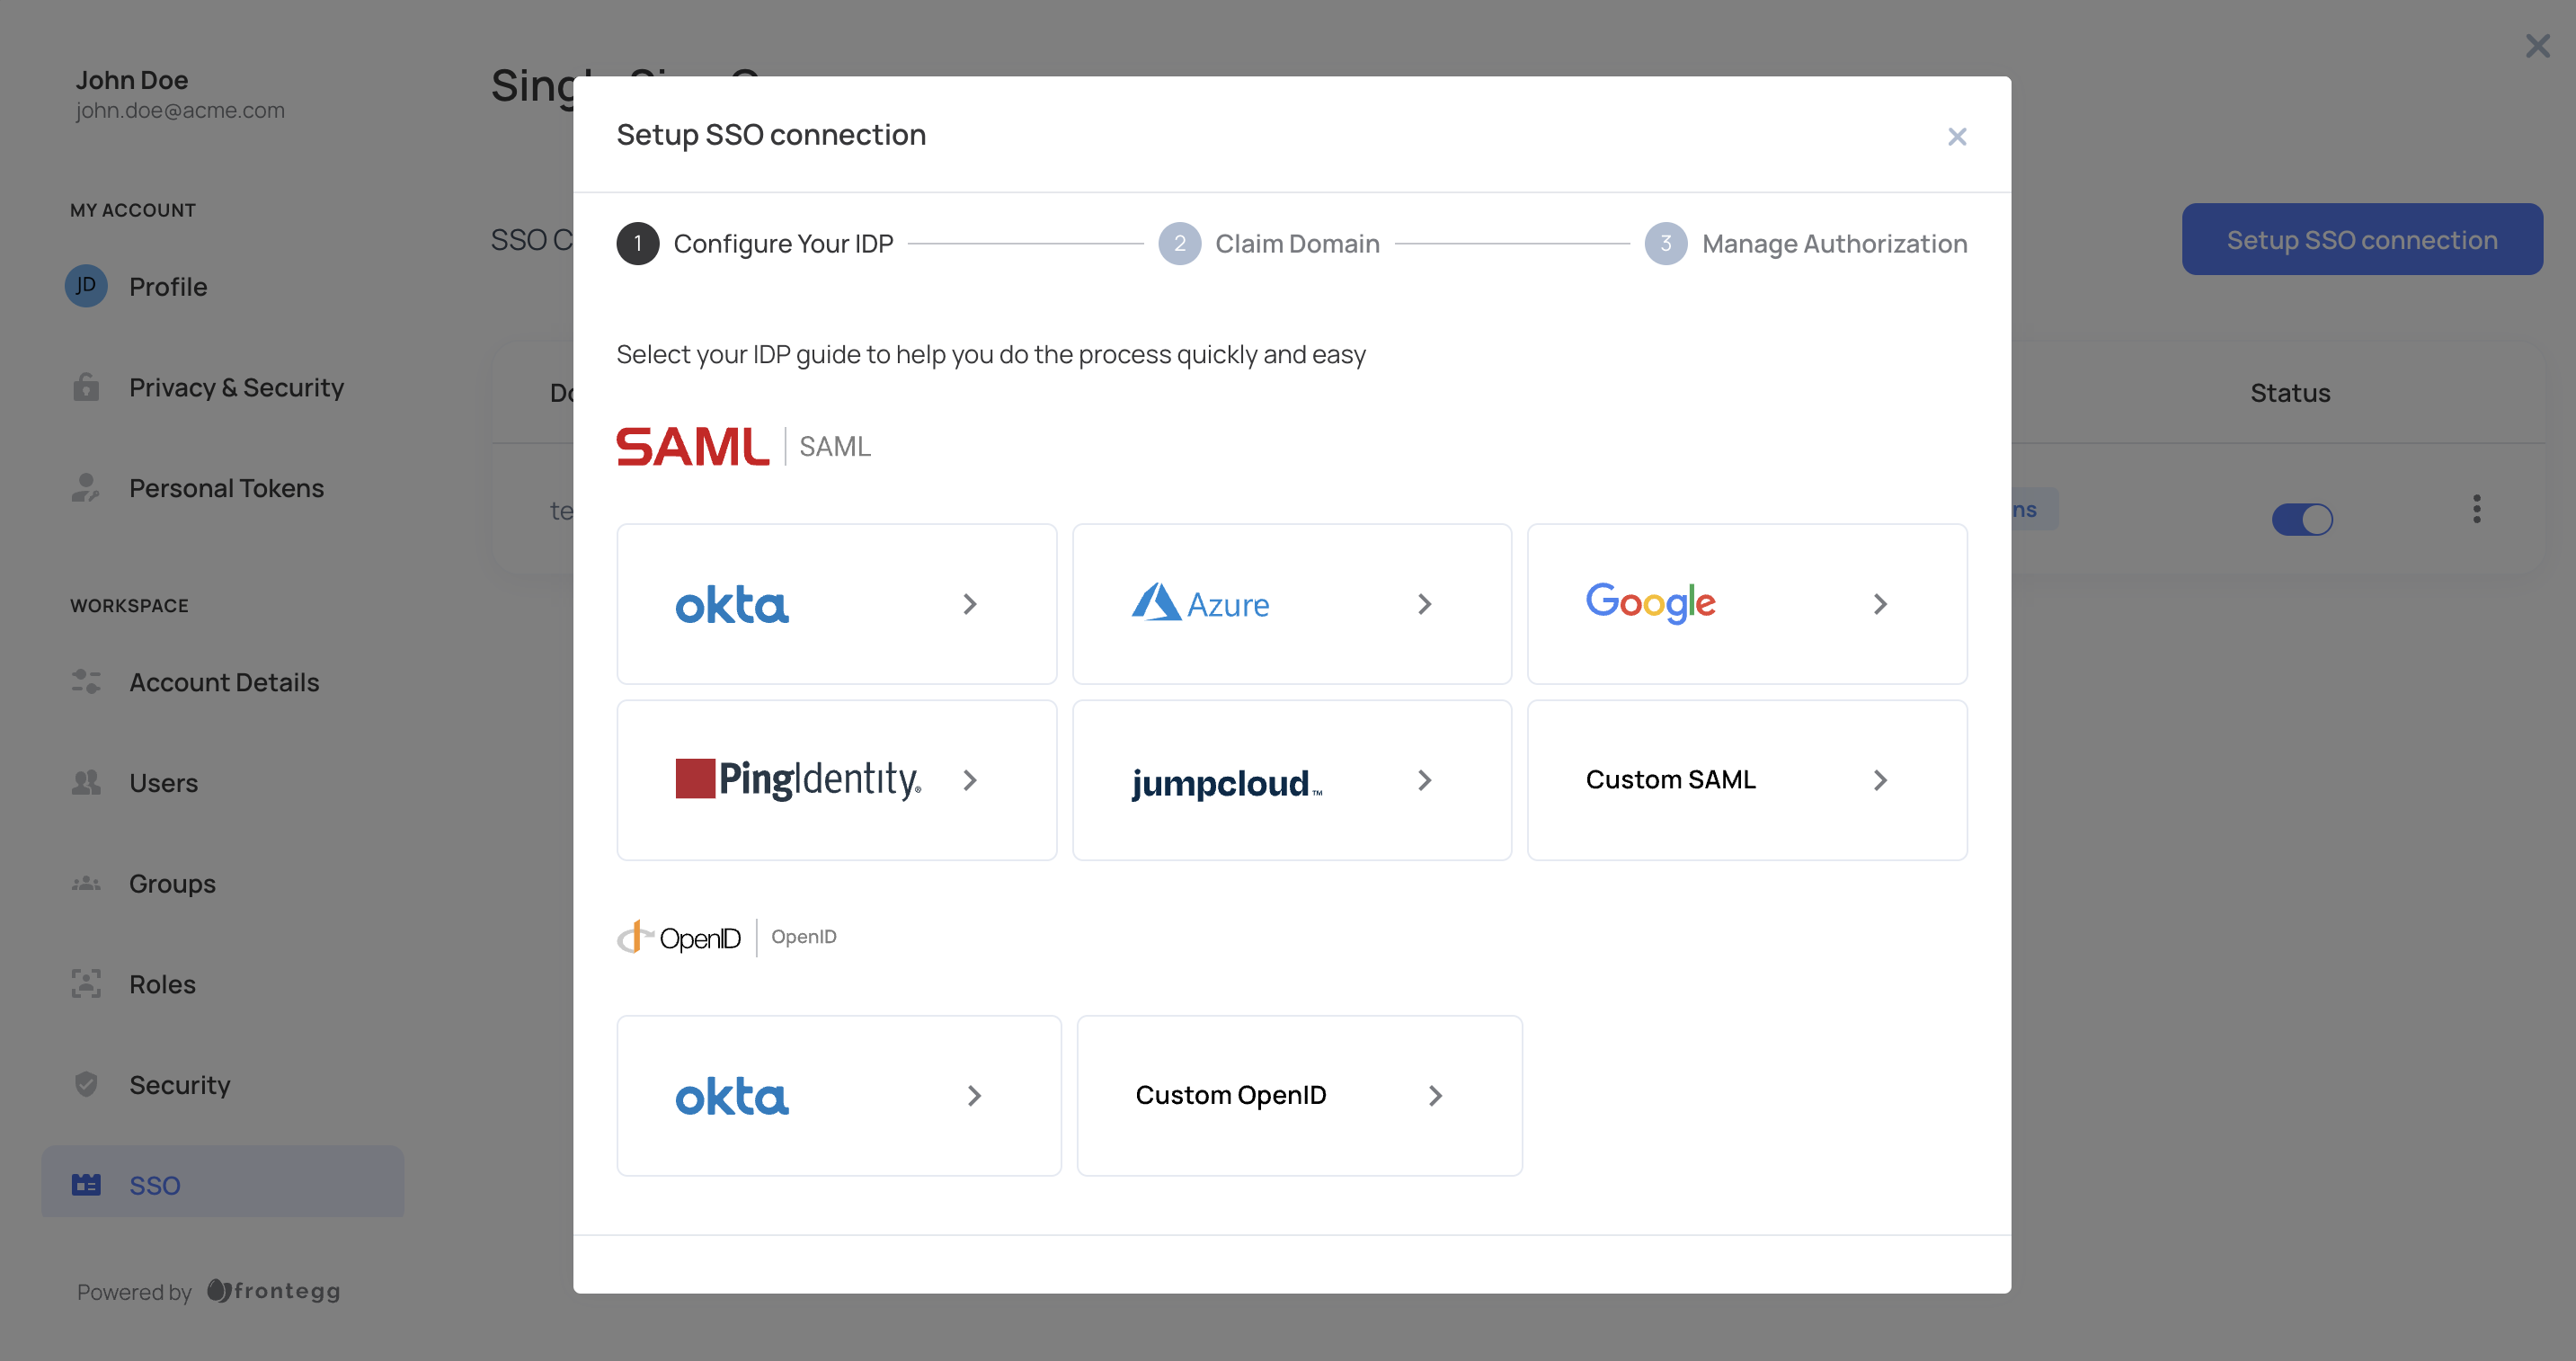
To configure Okta as your SAML provider, go to the Admin Portal ➜ SSO in your application.

Click the add new button to configure the type of connection and choose the Identity Provider from the list or Custom SAML.
Follow the steps provided in your relevant IdP guide to configure your SAML application on the IdP side.
If you choose to add Okta as your preferred integration, follow the steps outlined in the Okta in-app guide.

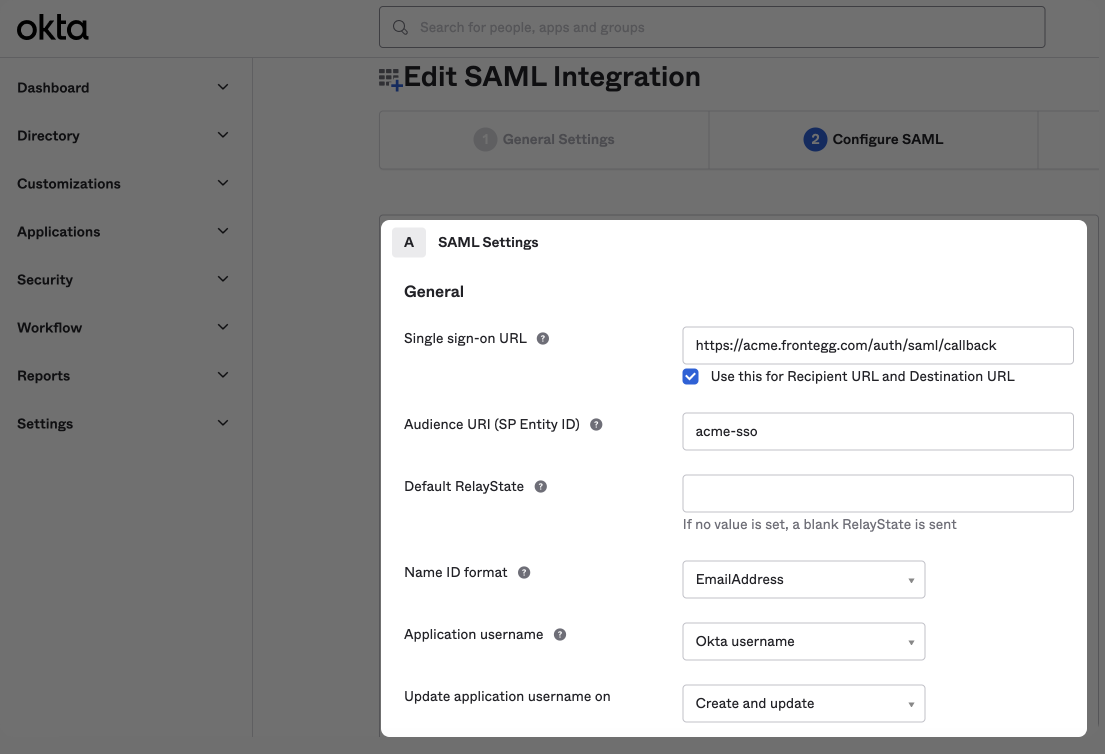
SAML settings
Ensure you choose the EmailAddress option in the Name ID format field and set your Application username to Okta username.
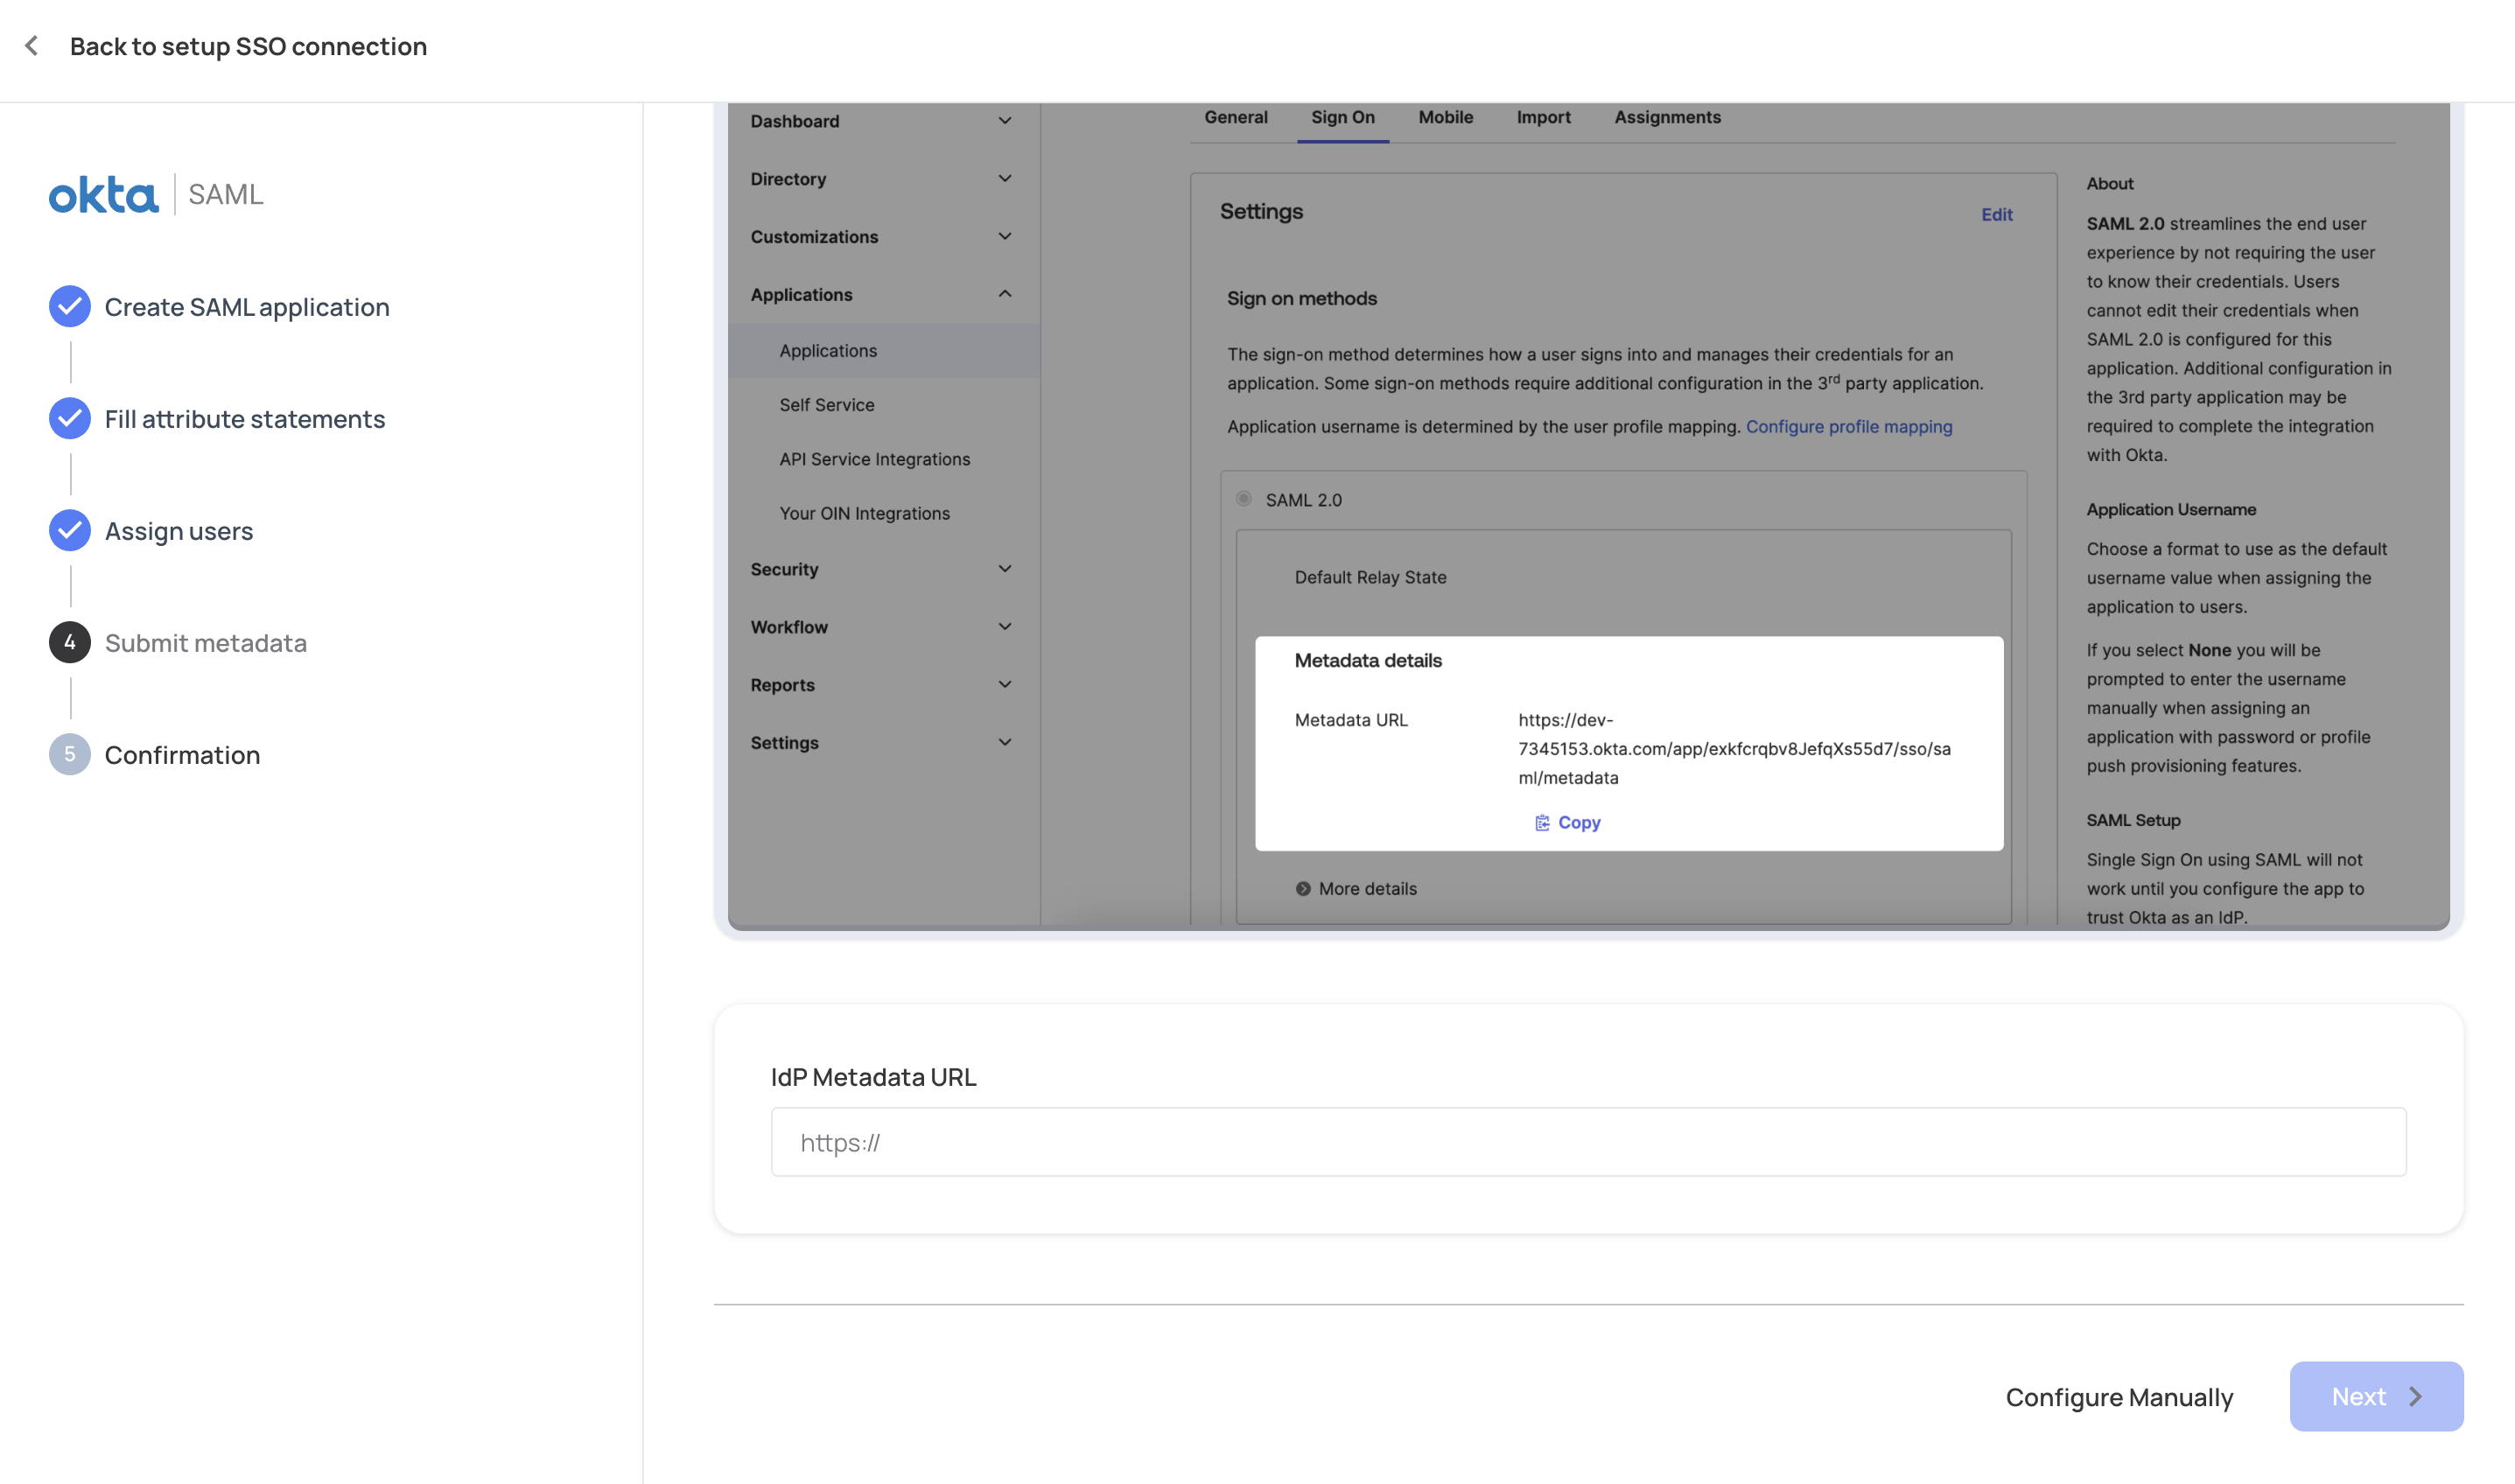
STEP 4: Add IdP Details
After configuring the above values for your IdP, either get the SAML application metadata, and insert that URL in the Metadata URL (see below), or get the SSO Endpoint and the Public Certificate from the IdP and upload them manually.
Paste the IdP Metadata URL or the SSO Endpoint and Public Certificate into the relevant fields.
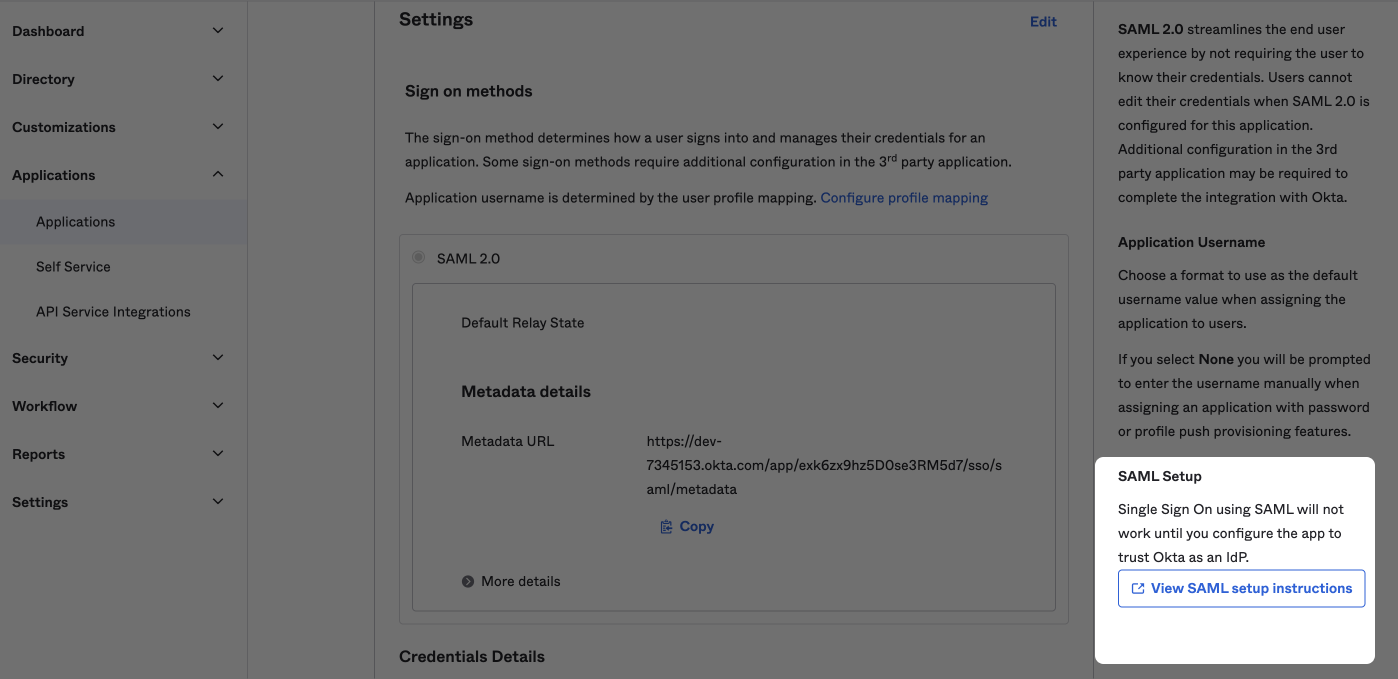
Configure your app to trust your IdP
Note that SSO with SAML will not work until you configure it as a trusted resource in your app.
STEP 5: Claim Domain
Users will be redirected to the SSO flow based on their email domain. For example, if a user from this organization will be logging in with [email protected], configure the following step with acme.com. Claiming one or more domains for the account is necessary to prevent domain abuse.

The domain needs to be claimed by copying the TXT record and applying it to your DNS provider. If you cannot obtain access to your organization's DNS, please contact your application Administrator.
You can configure multiple domains for an account. This can be useful if you're using multiple environments for development or multiple production applications on separate domains and need the SSO connection to cover several domains.

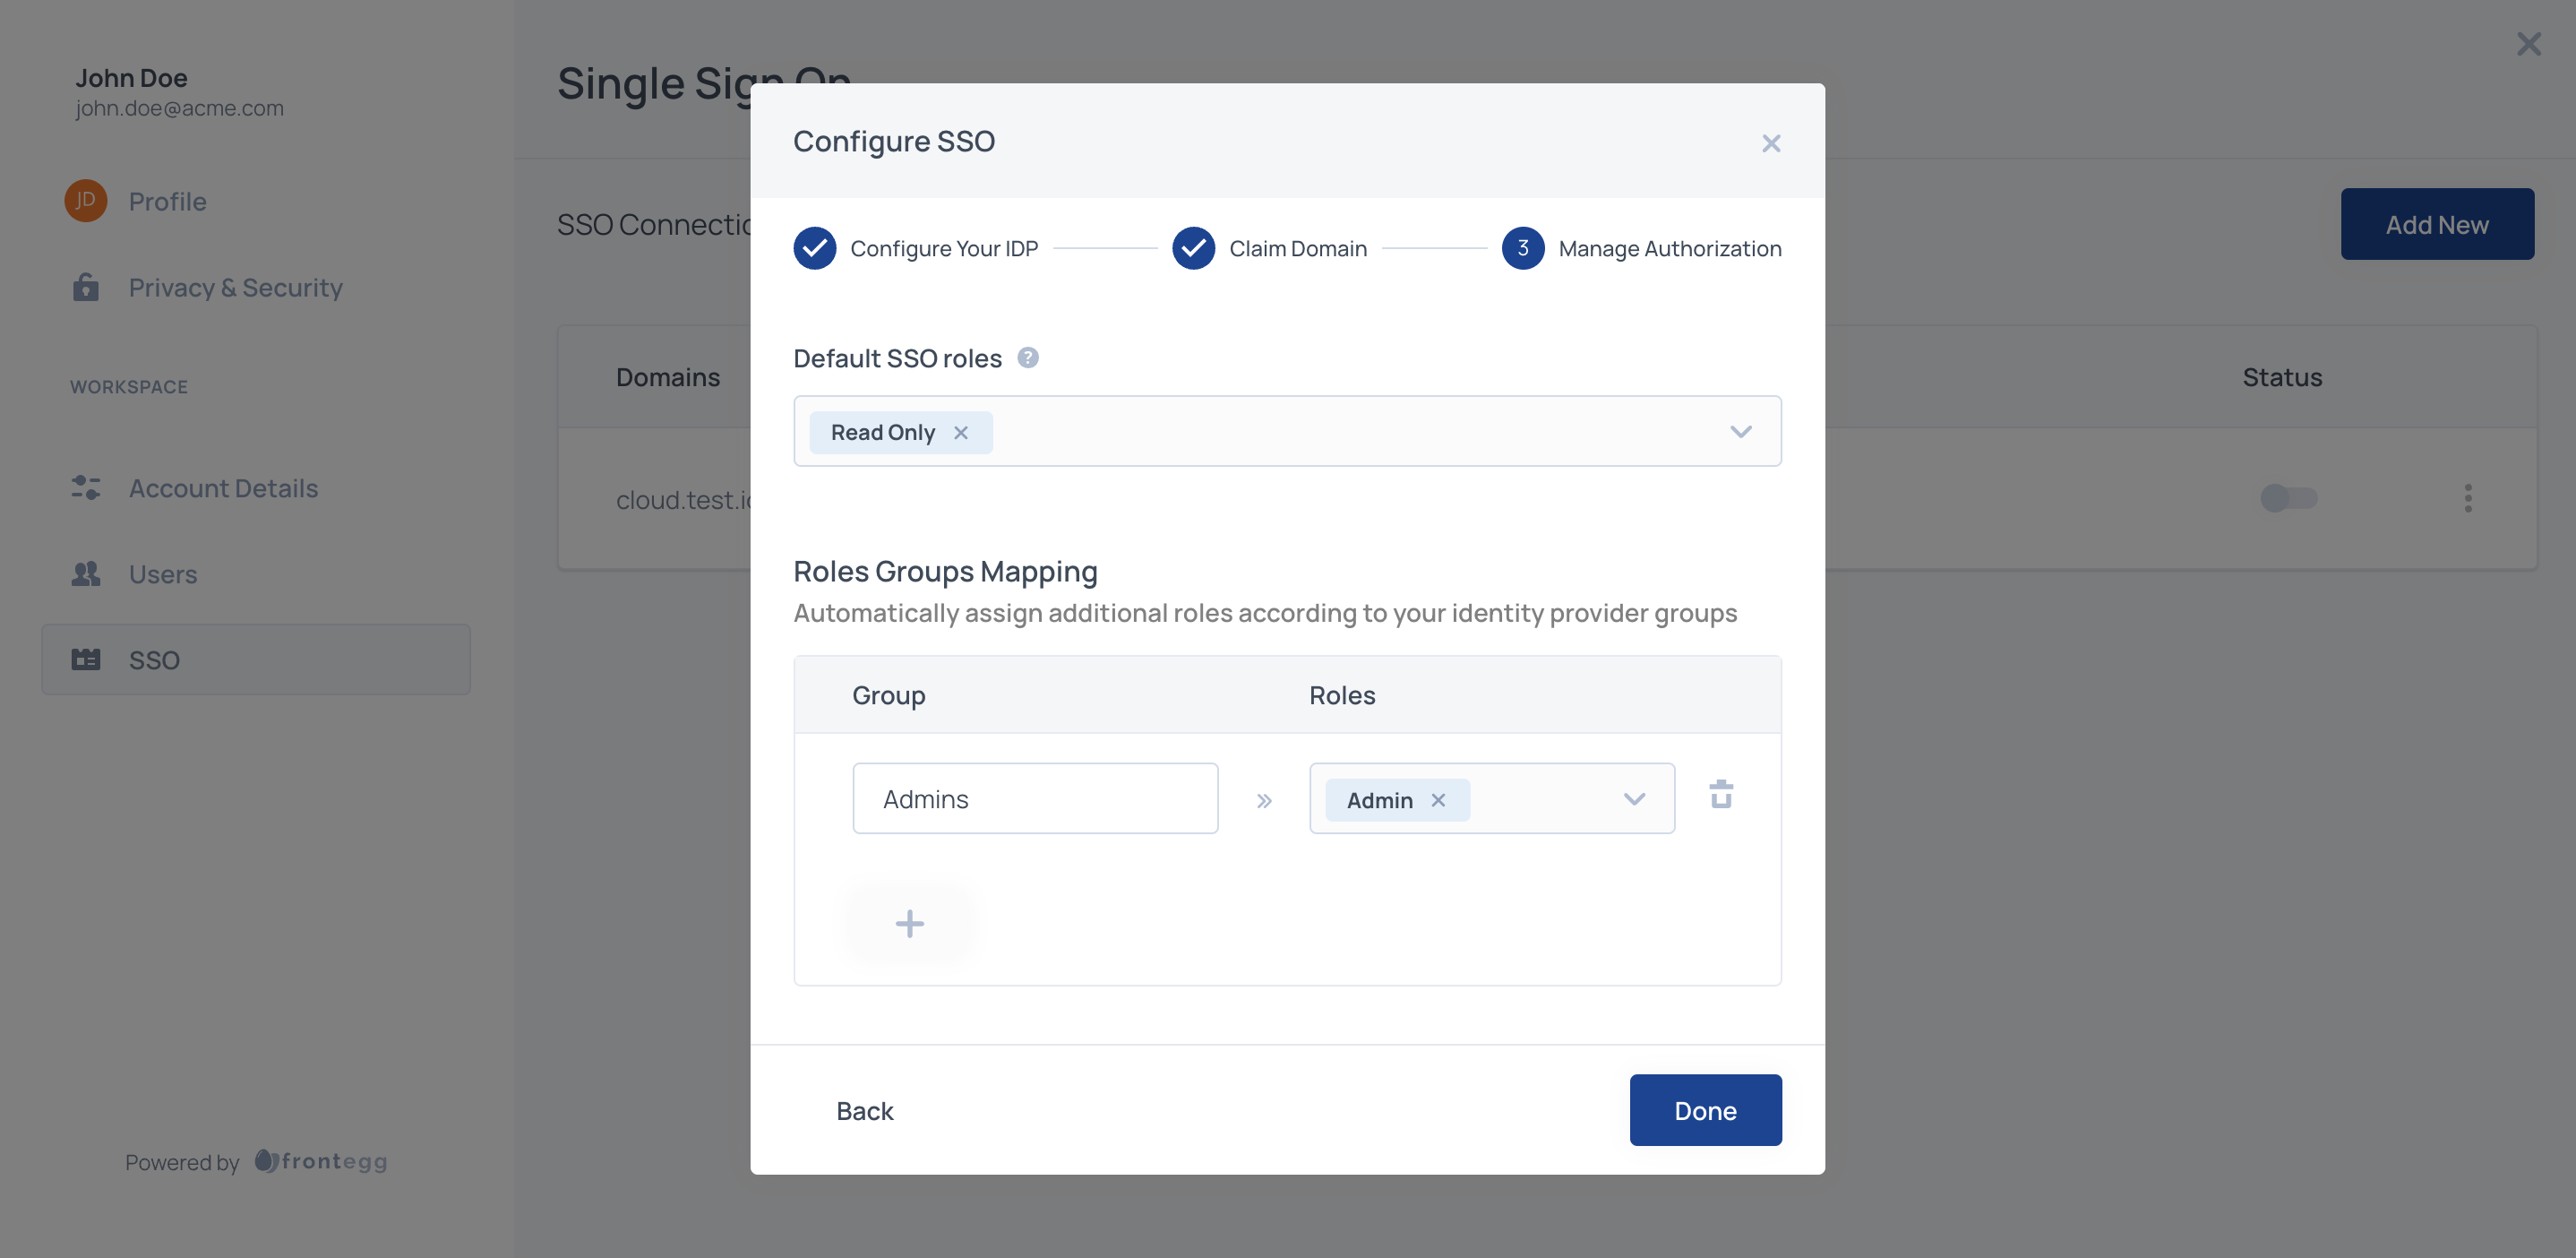
STEP 6: Manage Authorization
Select which roles should be assigned to SSO users by default and map IDP groups to specific roles (see step 7). Roles you assign to users through SSO will apply regardless of the additional roles you assign.
Default SSO Roles
Assign default roles to all SSO users by adding one or more Frontegg roles from your list of predefined roles.

Whichever roles you include in the input, those roles will be assigned to all SSO users.
By default the groups that the user passes from the IDP are being checked only upon user creation - first login via SSO. If you'd like to check for the users groups' on each login, please contact Frontegg.
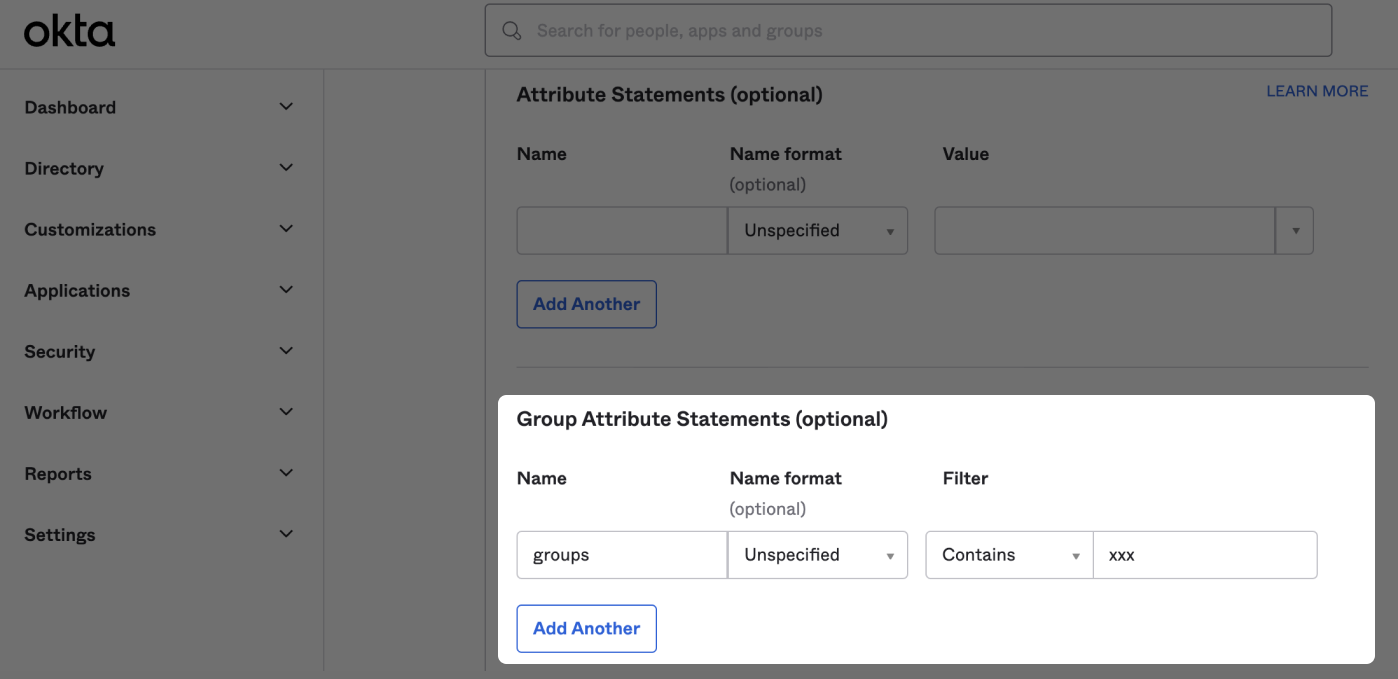
STEP 7: Mapping Groups to Roles (Optional)
When configuring SSO for an account, you have the option to map your IDP groups to roles available in the application.
For the mapping to work, first, you should configure your IDP so that the name of the group attribute that is sent in the SAML response is groups.
You'll also need the IDP group names from your IDP that you want to map to your roles. Below is an example of how to find IDP group names in Okta.
Sign in to your Okta account and go to Directory and find the Groups page. In the image below of an example Okta account, Managers is an Okta Group Name.
Use those Group Names to map groups to roles.
In the configuration section of the Admin portal map the groups that your users will be passing to corresponding roles in your application.
Step 8: Save the SSO connection
Save the connection and make sure that it is enabled
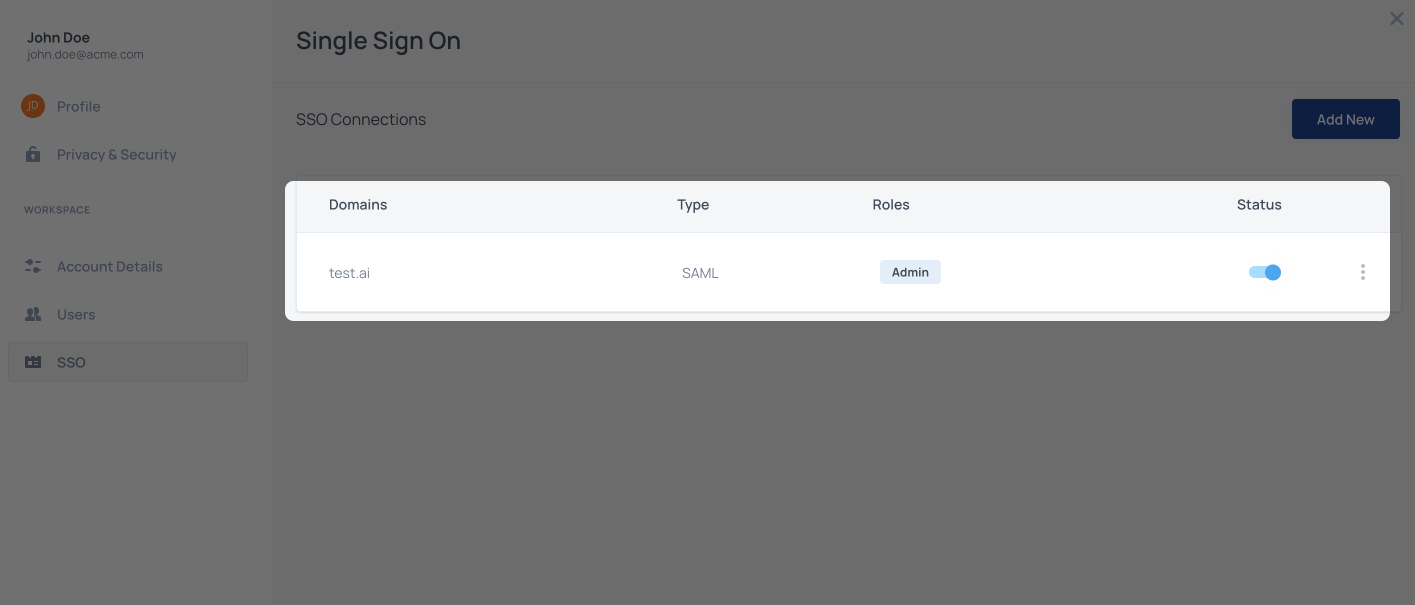
That's it! Now all users with the domain that was configured for the connection, will be redirected to their IDP when they will try to sign in.
Additional resources
FAQs related to SAML SSO
What do tenant SSO failed logs mean?
Why do I get an error when uploading an XML file from Jumpcloud?
Updated 3 months ago