Customer OpenID Connect IDP Setup
OpenID Connect (OIDC) is an open identity authentication protocol that works on top of the OAuth 2.0 framework. OIDC allows individuals to use SSO to access relying party sites.
The following guide explains how to create an OpenID application in Okta (IdP) and configure the connection in the account's Admin portal section.
Before you start
The following topic covers your users' OIDC configuration. To enable them to do so, OIDC needs to be enabled and configured for your application prior.
Customer Configuration
If OpenID Connect is enabled and configured your user can configure their OIDC connection and allow other users to sign in to their account.
Walkthrough Guides
Frontegg client-side SDKs include detailed walkthrough guides for most popular Identity Providers. If the required IdP doesn't appear on the list of providers, please use Custom OpenID.
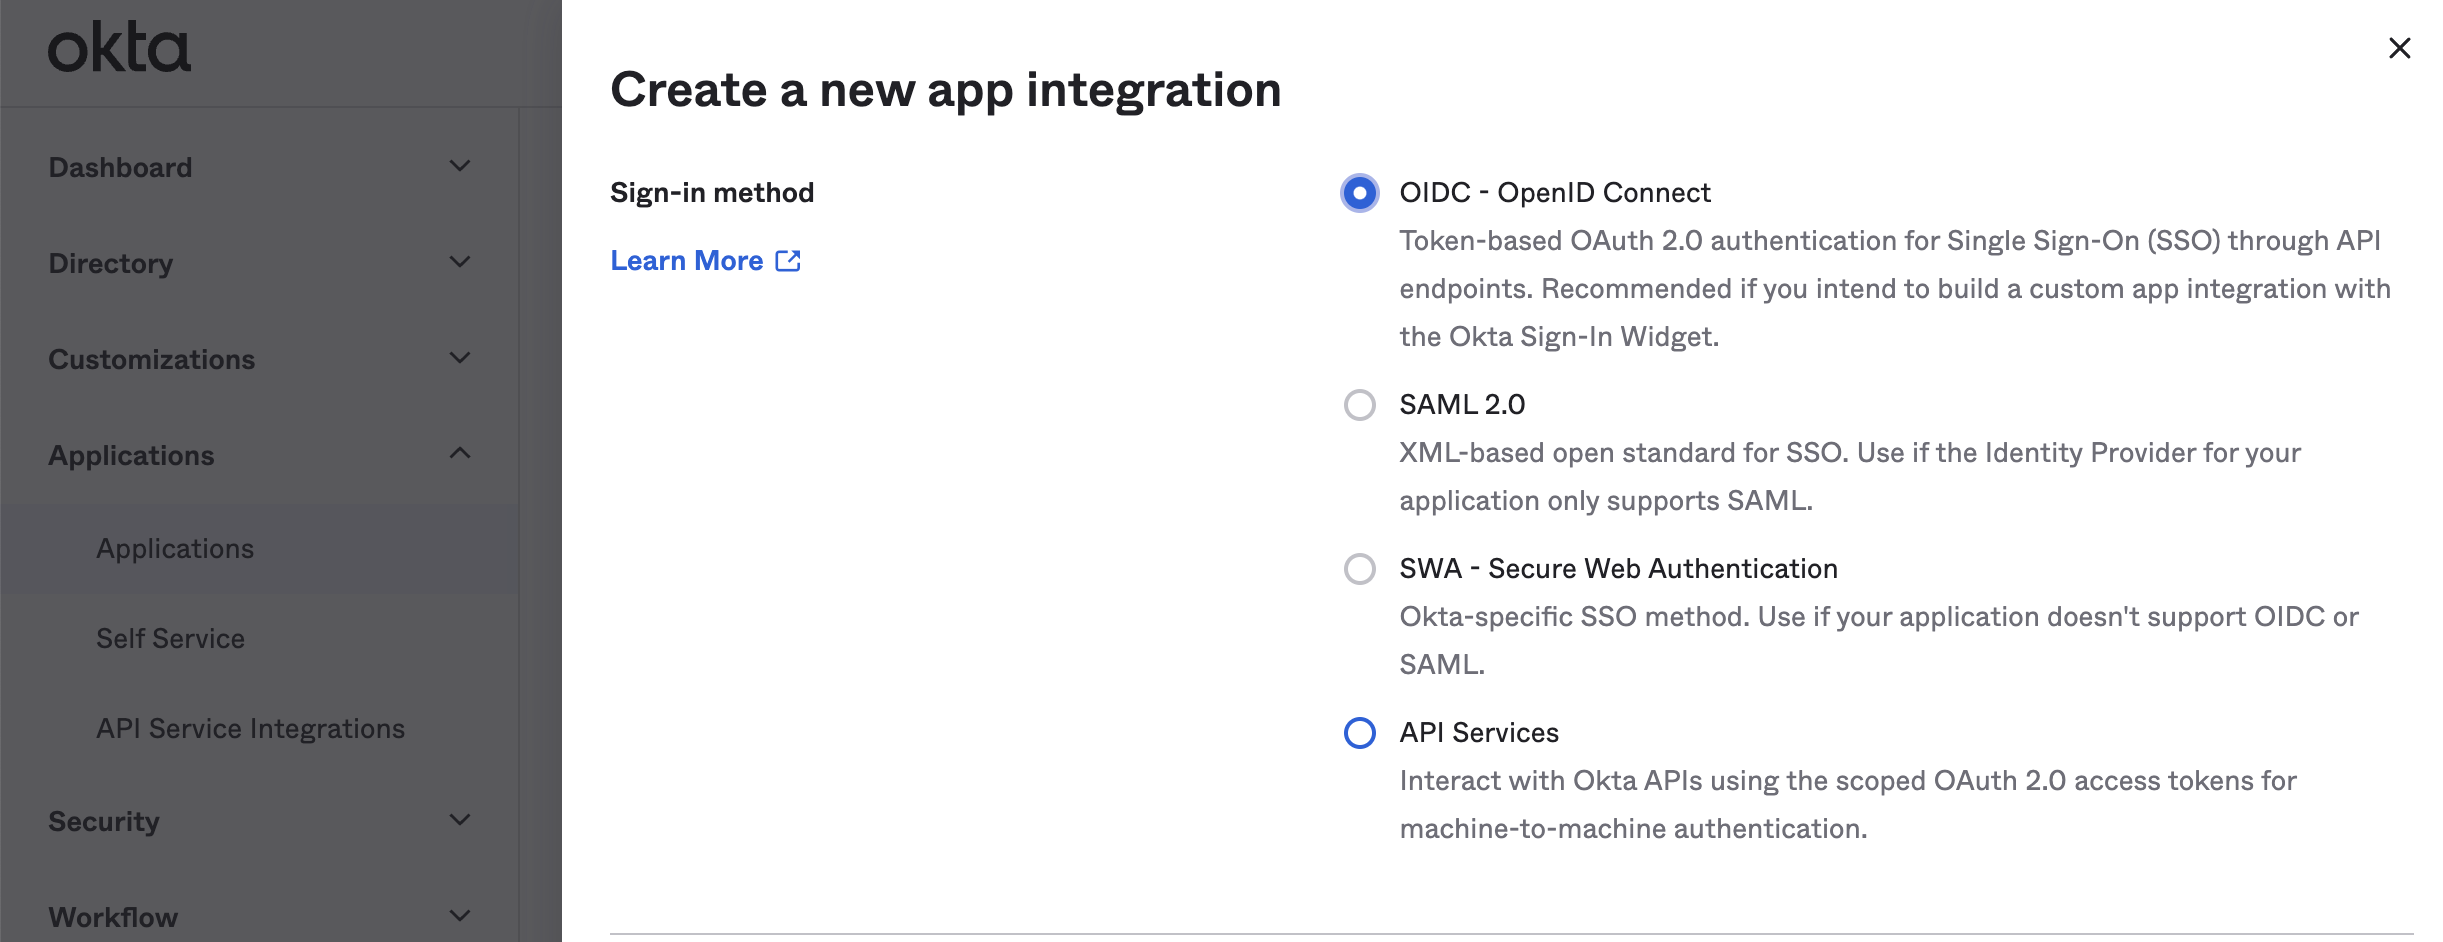
STEP 1: Create a New OpenID Application
Create a new OpenID Connect application that you can use as the Identity Provider for users.
STEP 2: Find Admin Portal
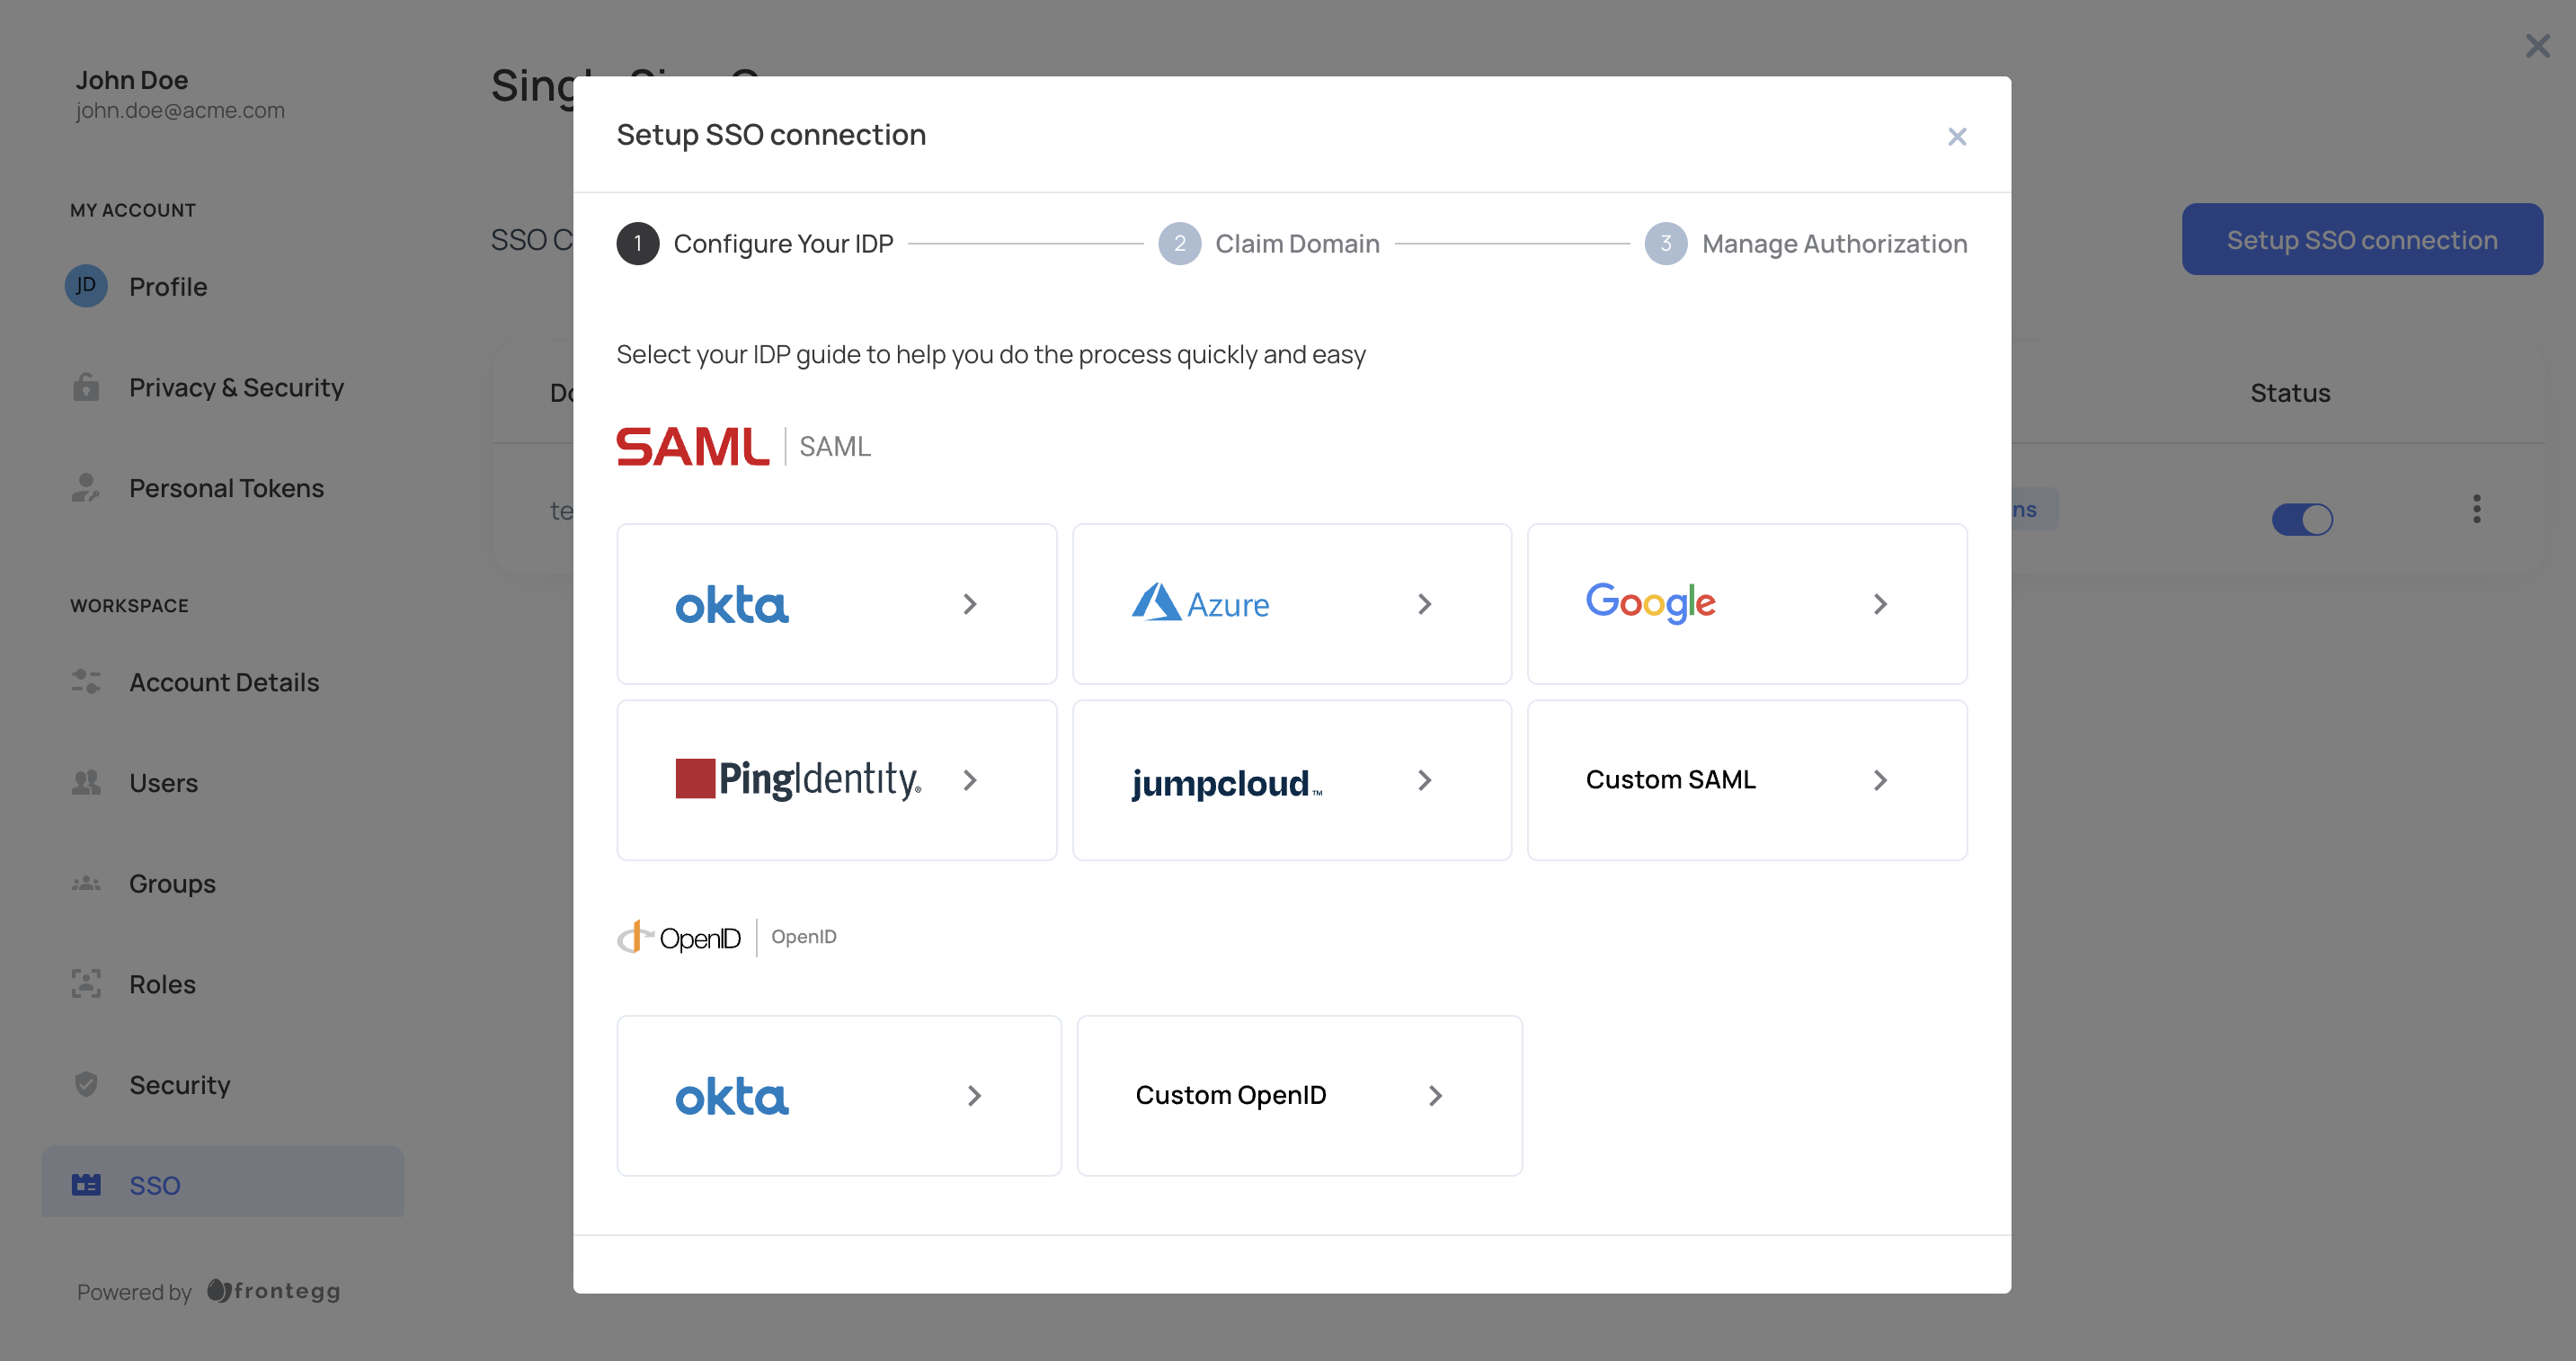
Go to the Admin Portal ➜ SSO

STEP 3: Configure the IdP
Choose Okta detailed walkthrough or Custom OpenID for other providers.

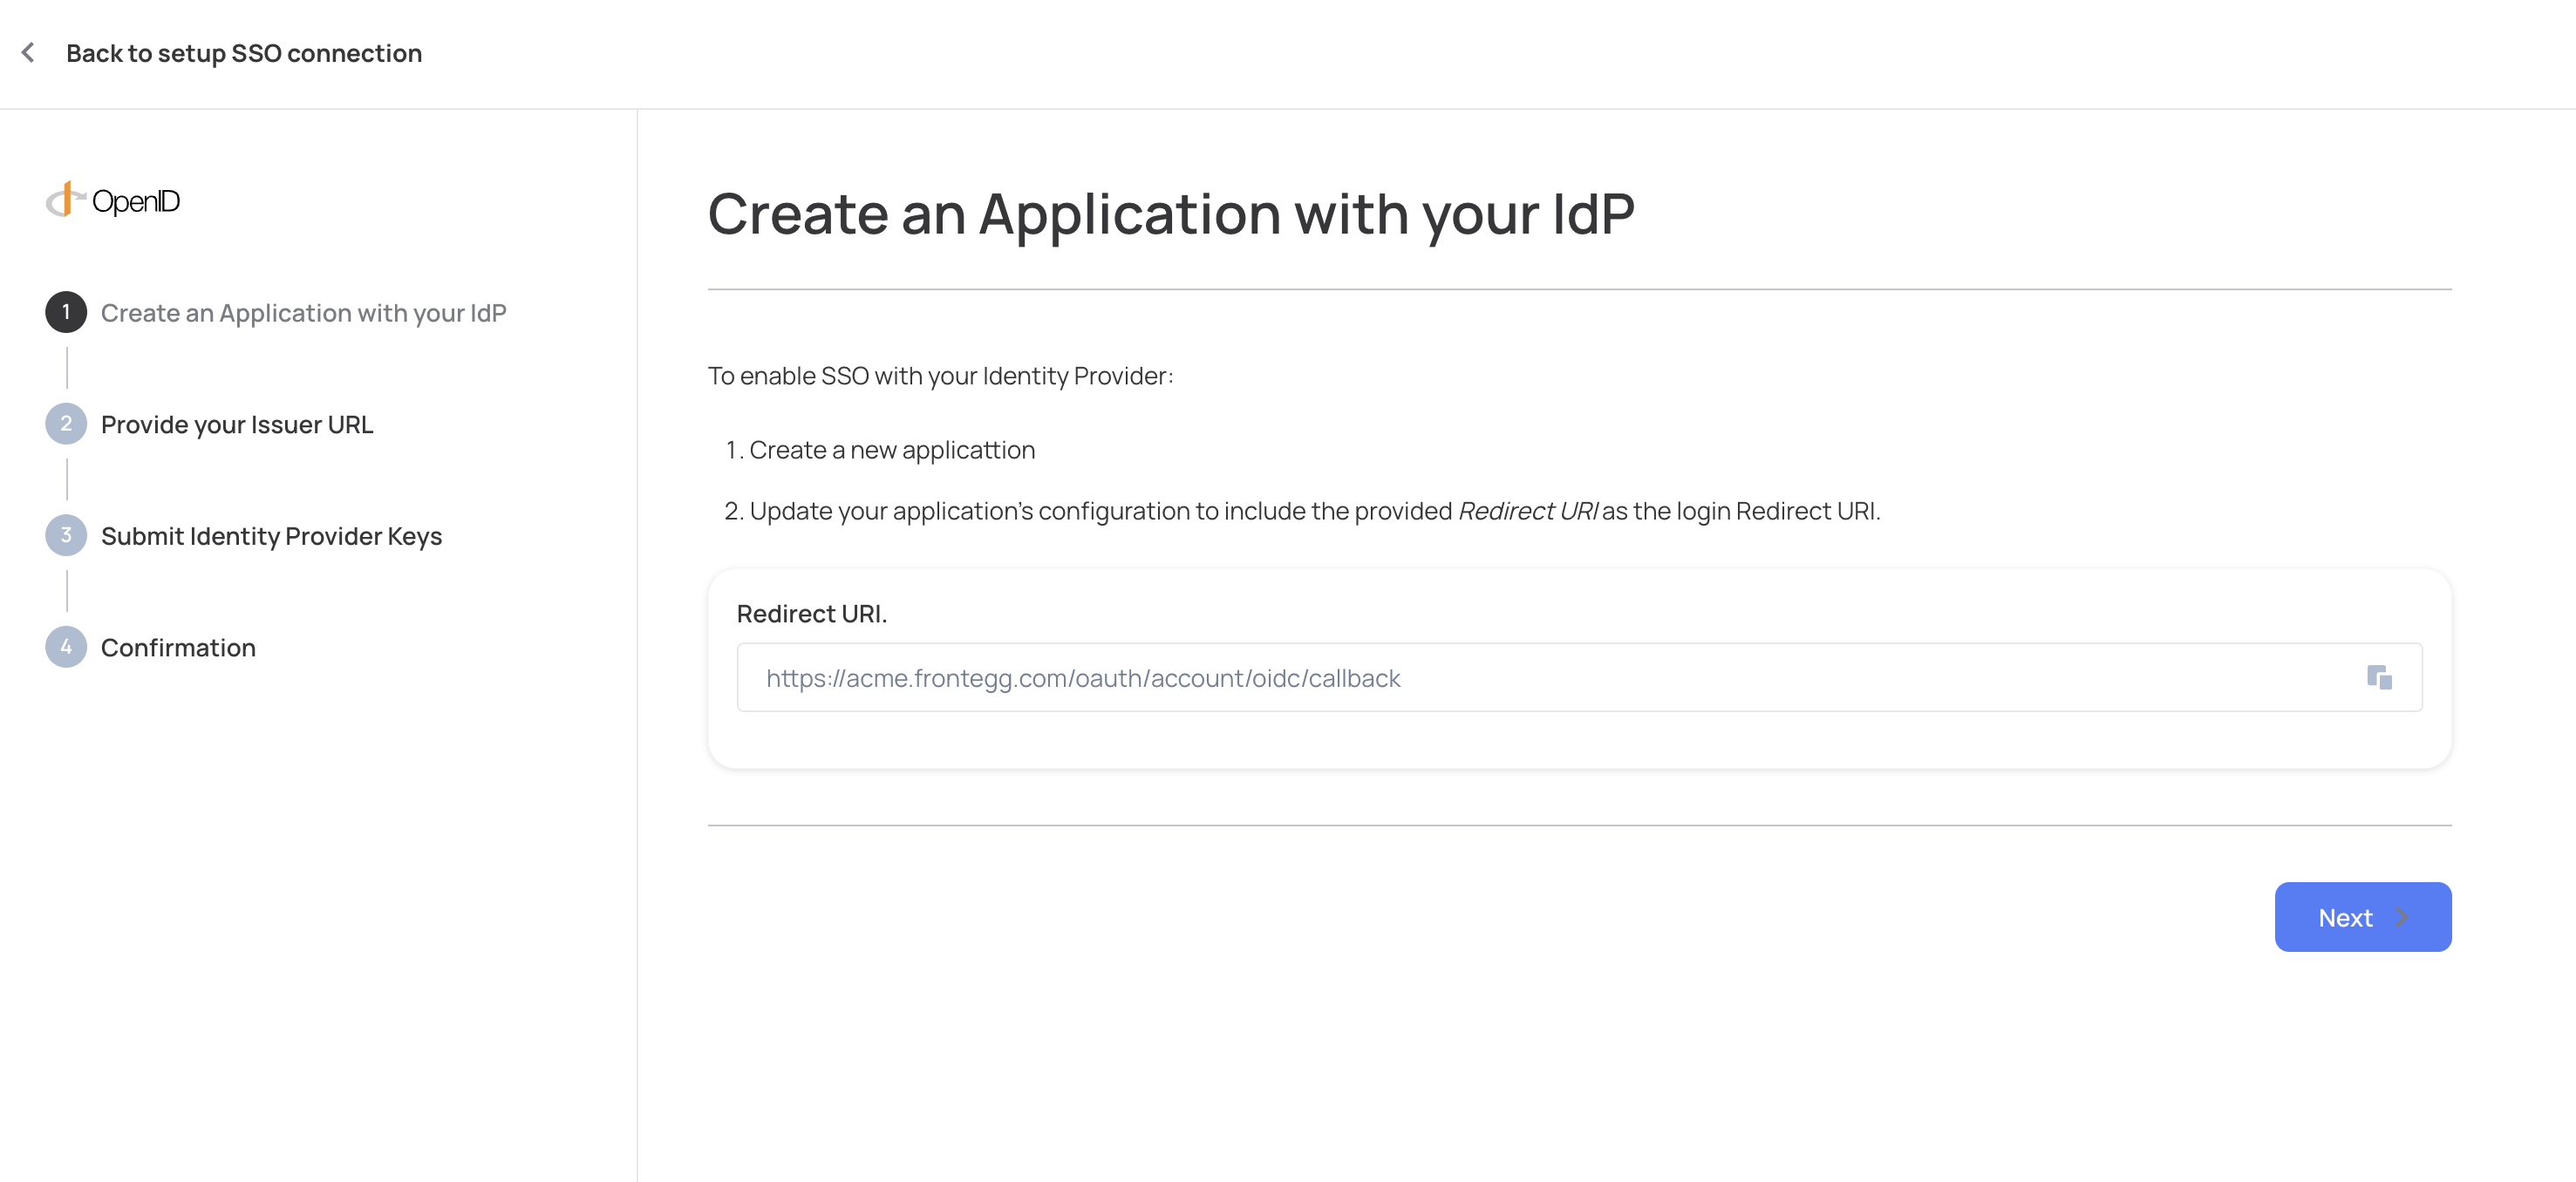
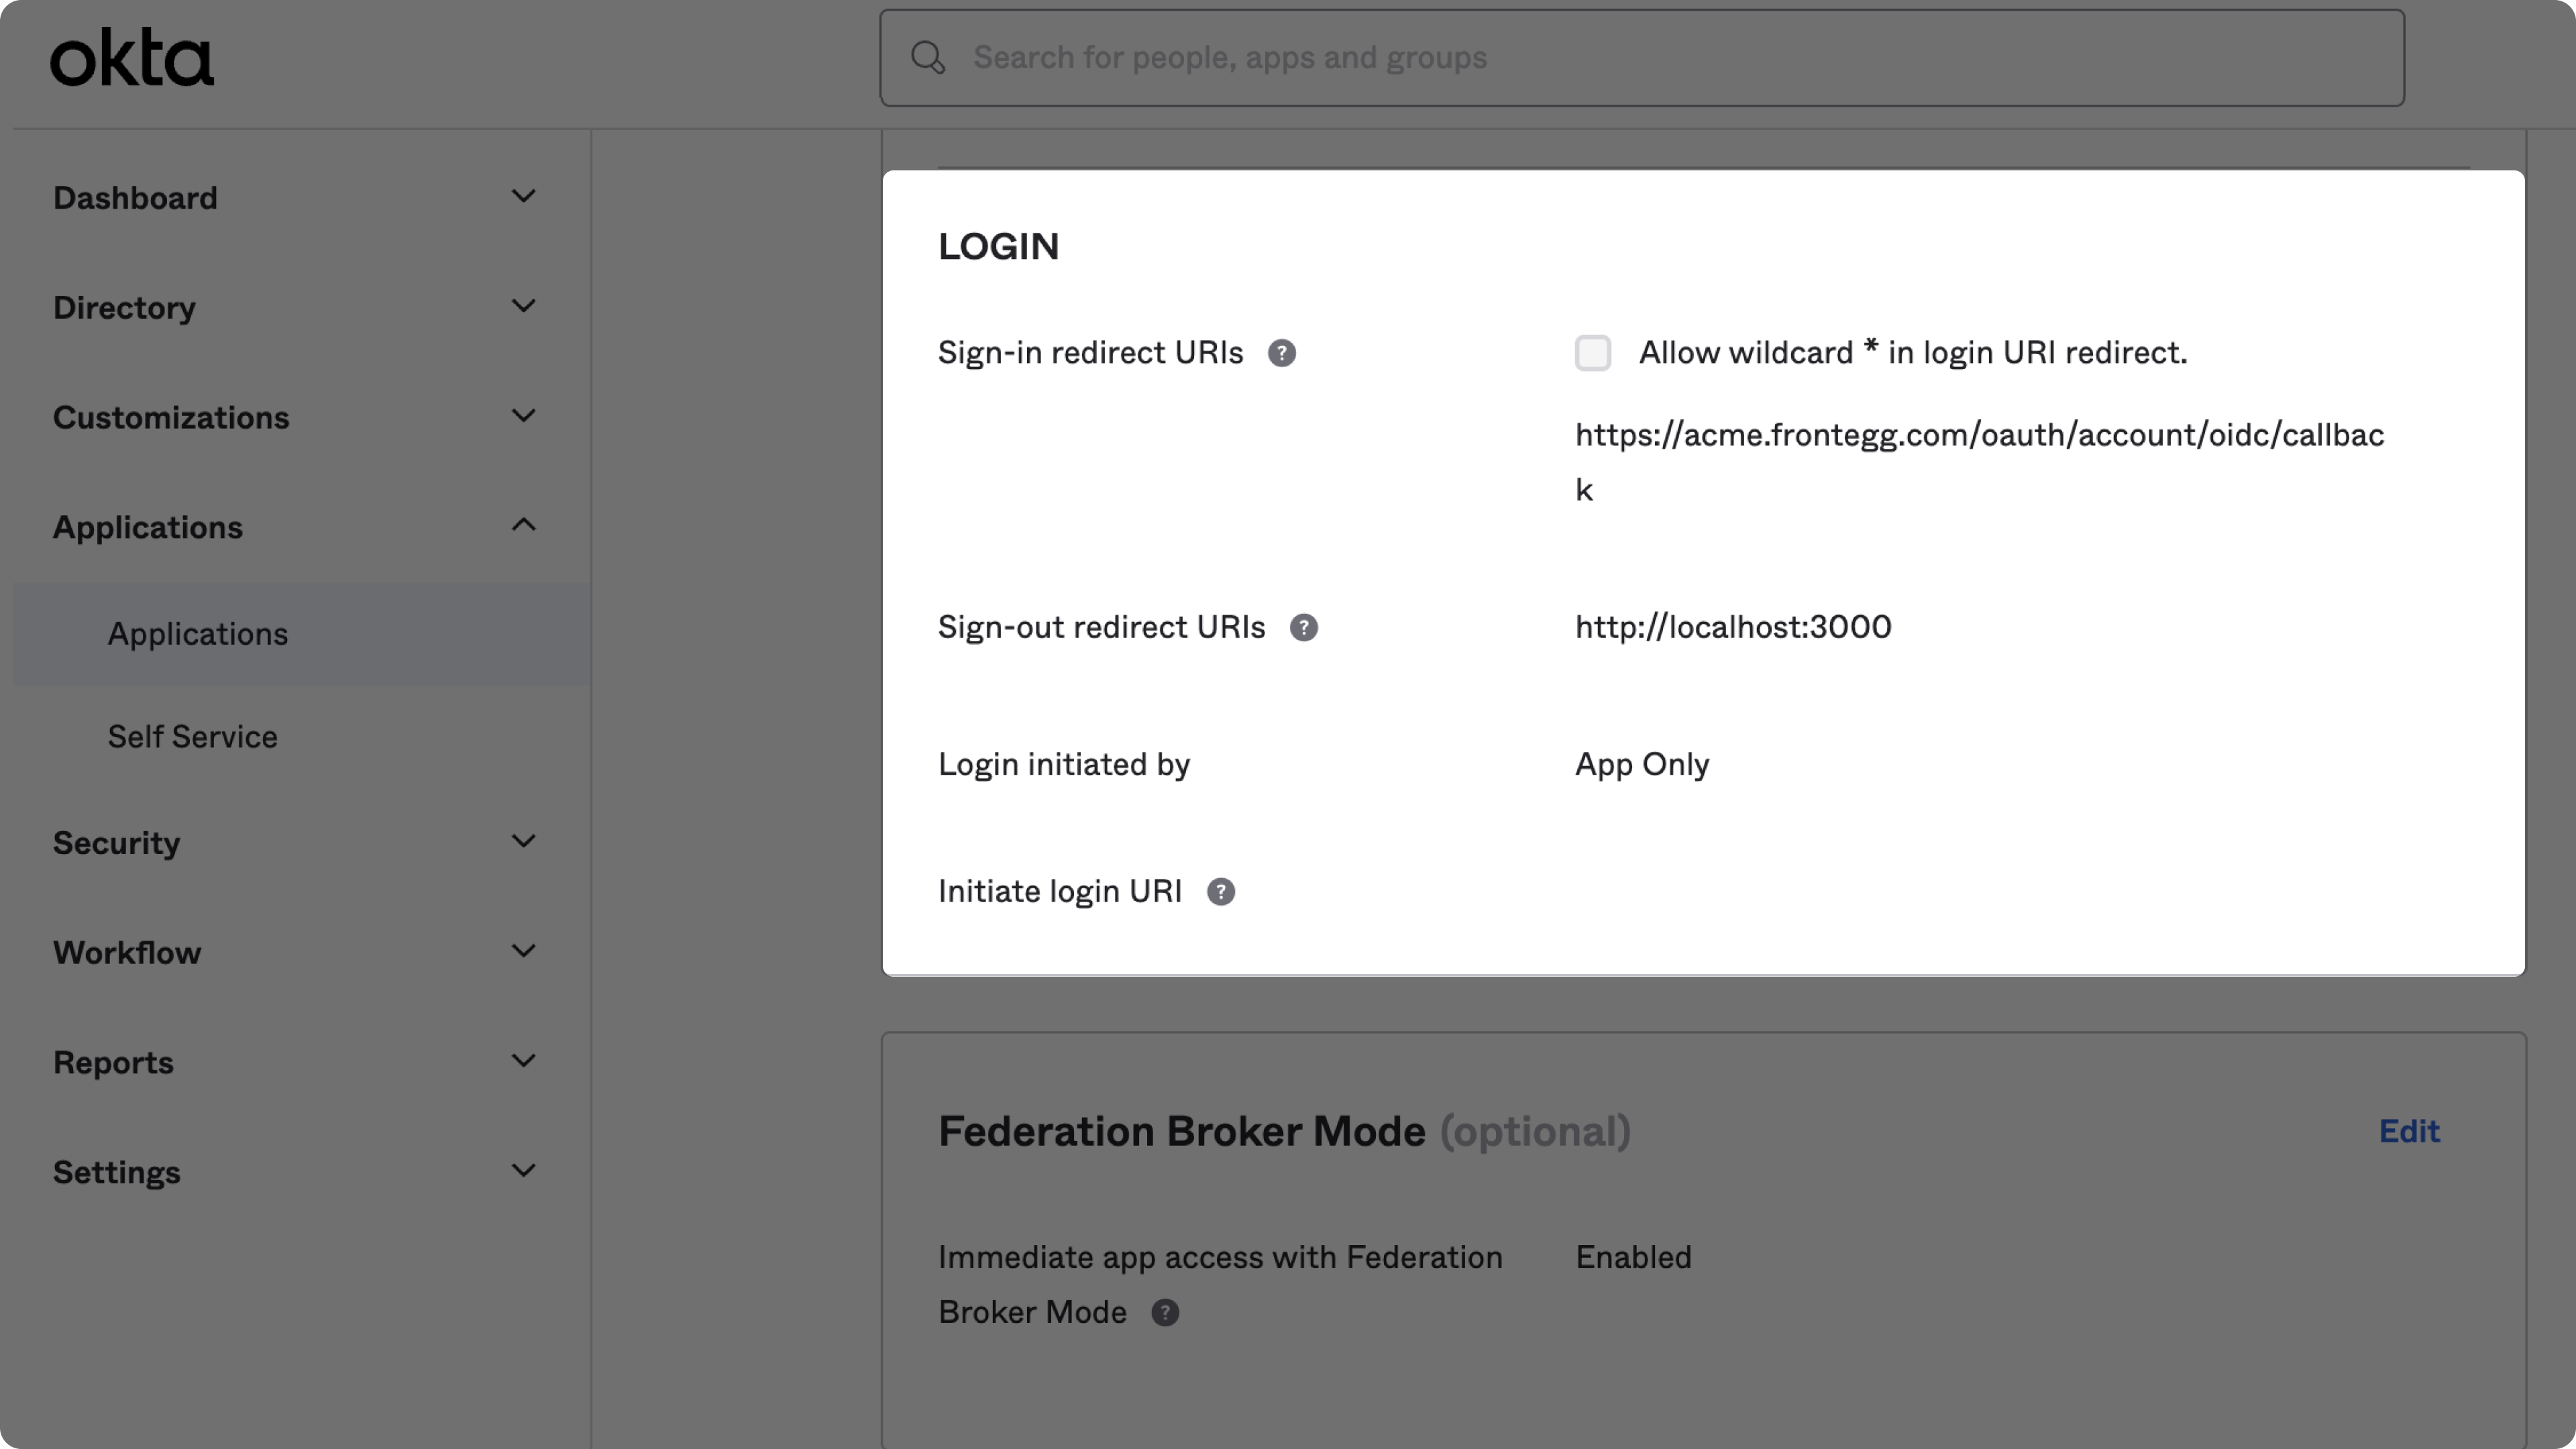
Use Redirect URI from the Admin portal as Sign-in redirect URIs on Okta:
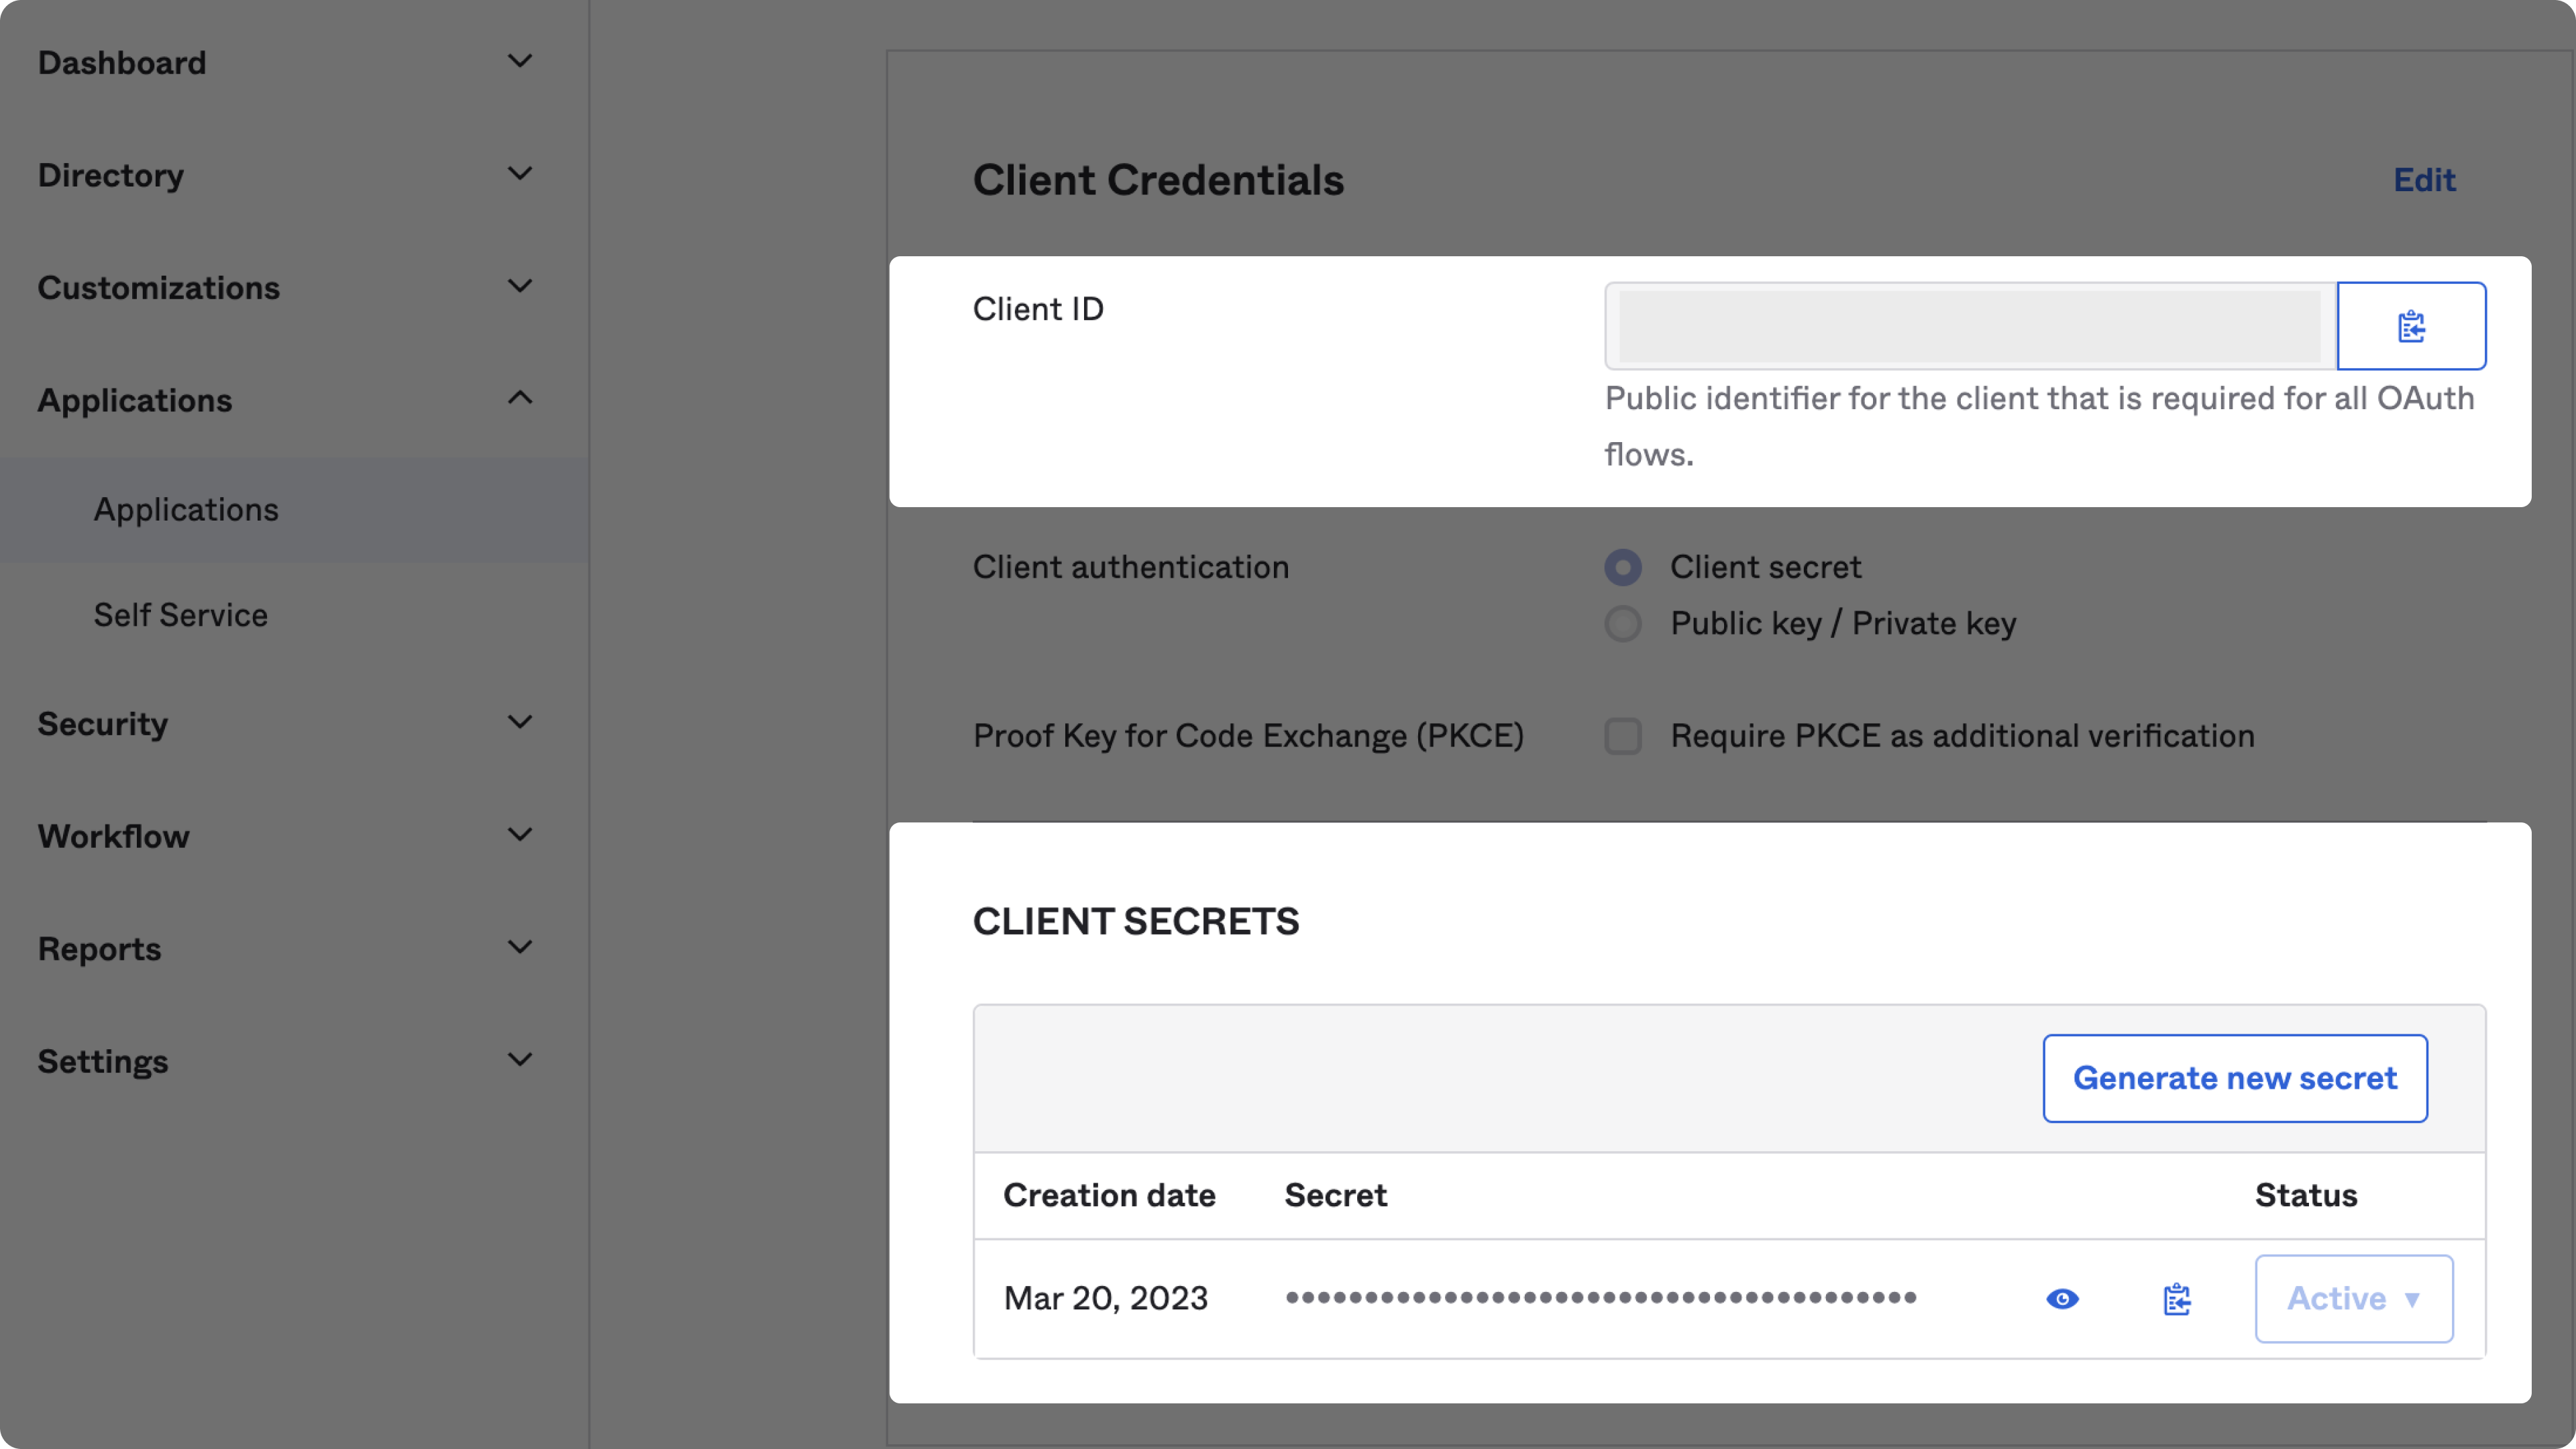
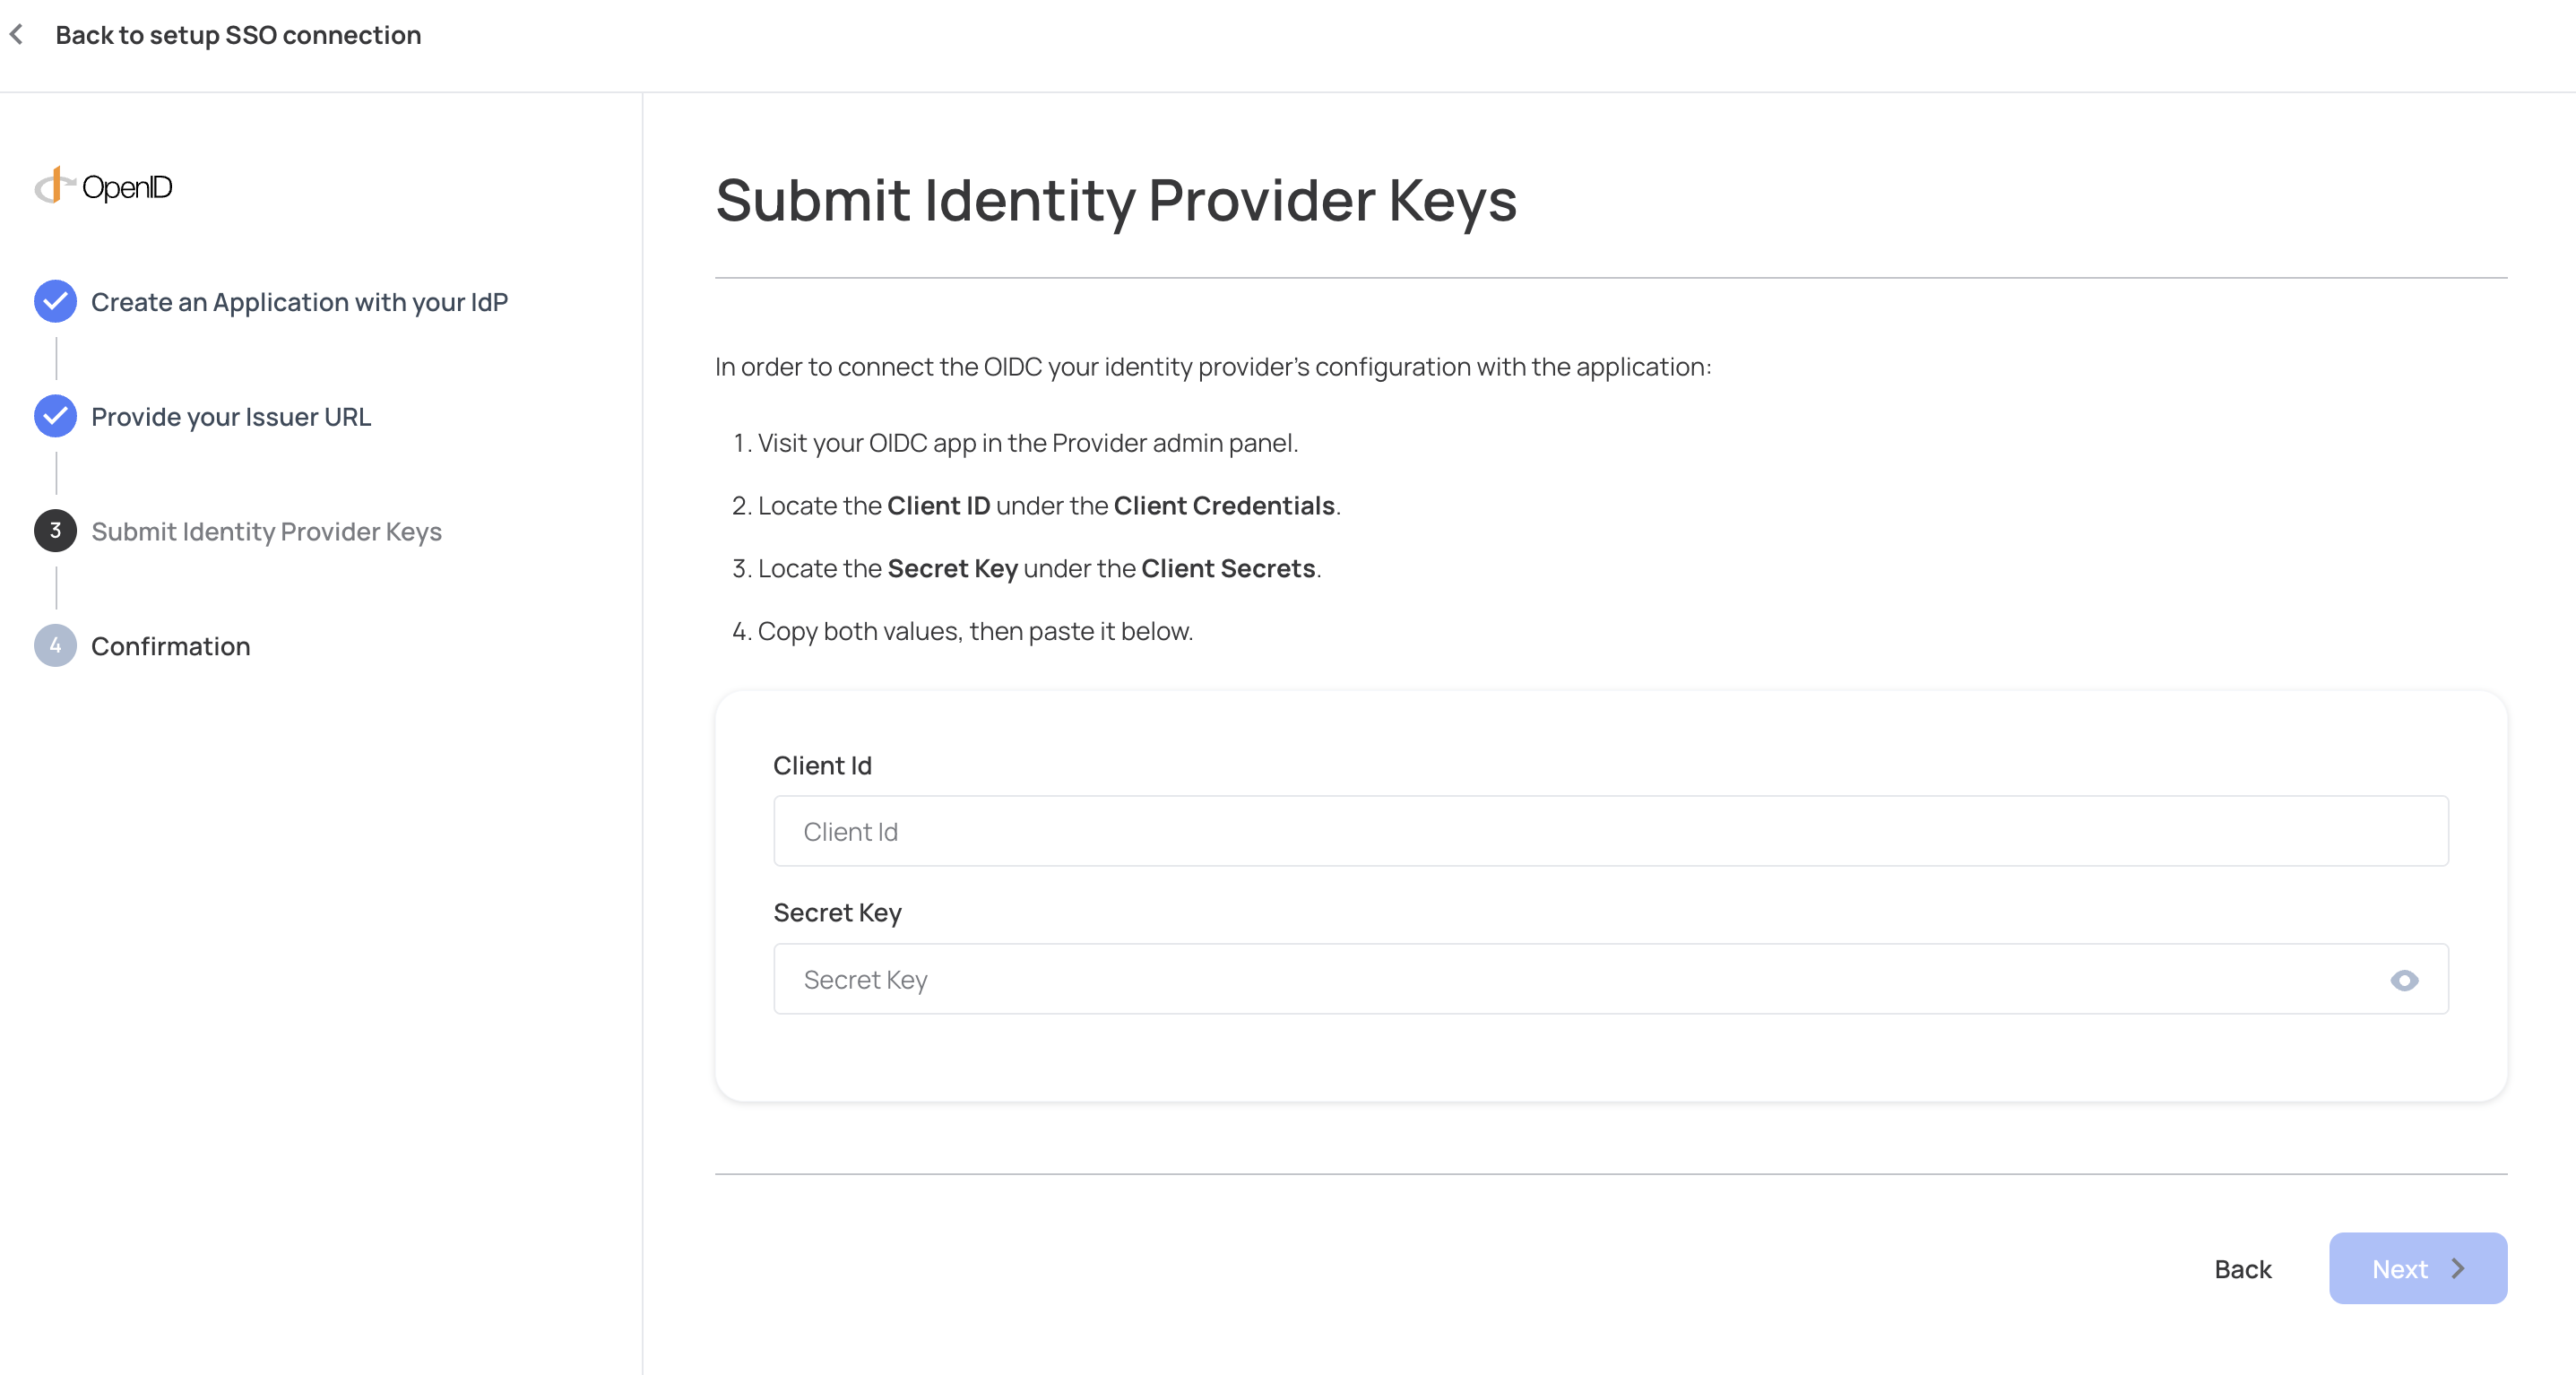
Get the Client ID and secret from your Okta application and insert them in the Admin portal OpenID configuration.
OpenID Connect parameters overview:
| Configuration | Description |
|---|---|
| Issuer URL | This is a URL that is given by the IdP. This URL provides instructions on how to communicate with the IdP. If you are unsure you have the right URL, insert in in the issues URL field and it will be validated automatically. |
| Client ID | The clientId is given by the IdP. This allows the IdP to identify who is requesting to authenticate. |
| Secret Key | The secret key allows authentication with the IdP to validate the user who tries to log in. It must correspond to the secret key inserted for the clientId. |
| Redirect URI | This is a pre-configured value that lets the IdP know where it should return the user after the user is authenticated within the IdP. The redirect URI value must be configured in the IdP itself. |
STEP 4: Claim Domain
Users will be redirected to the SSO flow based on their email domain. For example, if a user from this organization will be logging in with [email protected], configure the following step with acme.com. Claiming one or more domains for the account is necessary to prevent domain abuse.

The domain needs to be claimed by copying the TXT record and applying it to your DNS provider. If you cannot obtain access to your organization's DNS, please contact your application Administrator.
You can configure multiple domains for an account. This can be useful if you're using multiple environments for development or multiple production applications on separate domains and need the SSO connection to cover several domains.

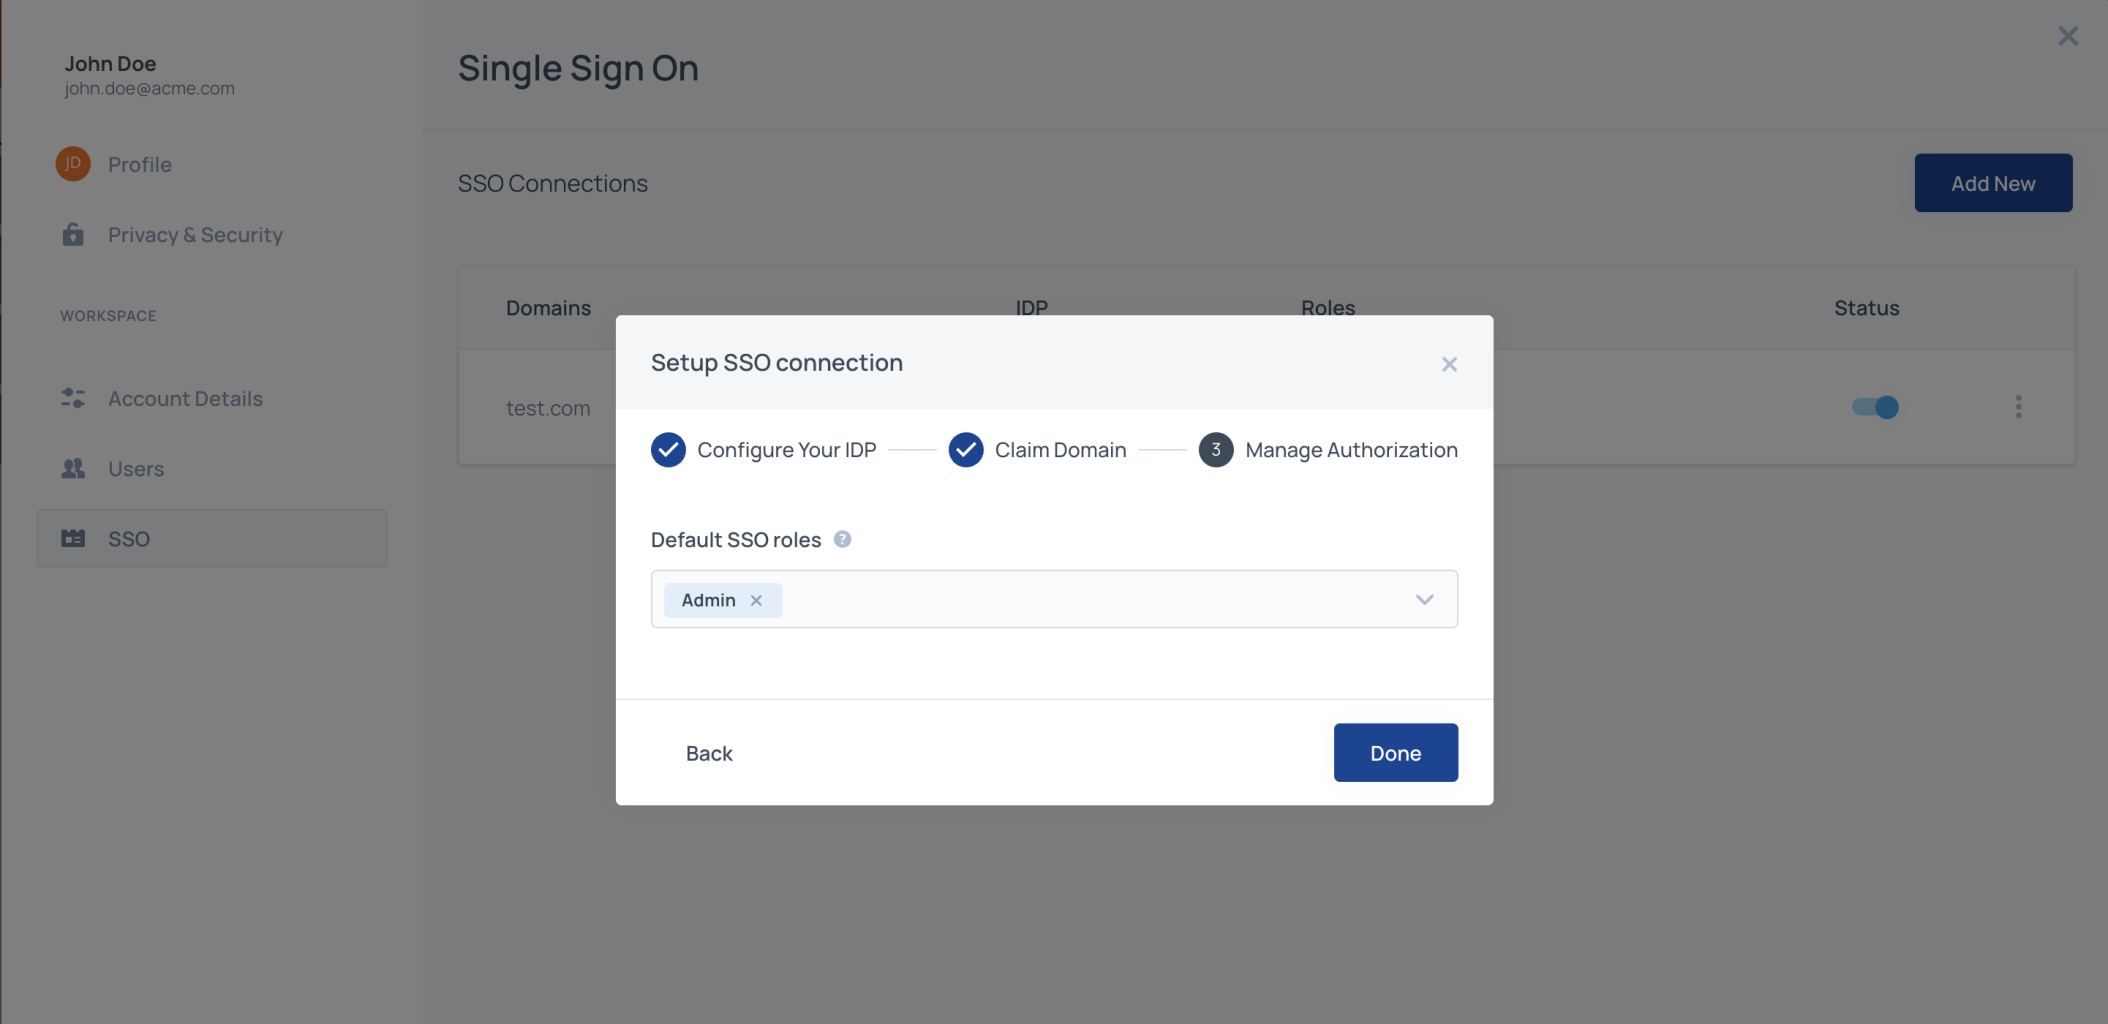
STEP 5: Manage Authorization
Select which roles should be assigned to SSO users by default and map IdP groups to specific roles. Roles you assign to users through SSO will apply regardless of whatever additional roles you assign to those users.
Default SSO Roles
Assign default roles to all SSO users by adding one or more Frontegg roles from your list of predefined roles.
STEP 6: Mapping Groups to Roles (Optional)
Mapping groups to roles with OpenID connect is currently only possible for the application owner via Frontegg APIs or using Frontegg Backoffice.
Step 7: Save the SSO connection
Save the connection and make sure that it is enabled
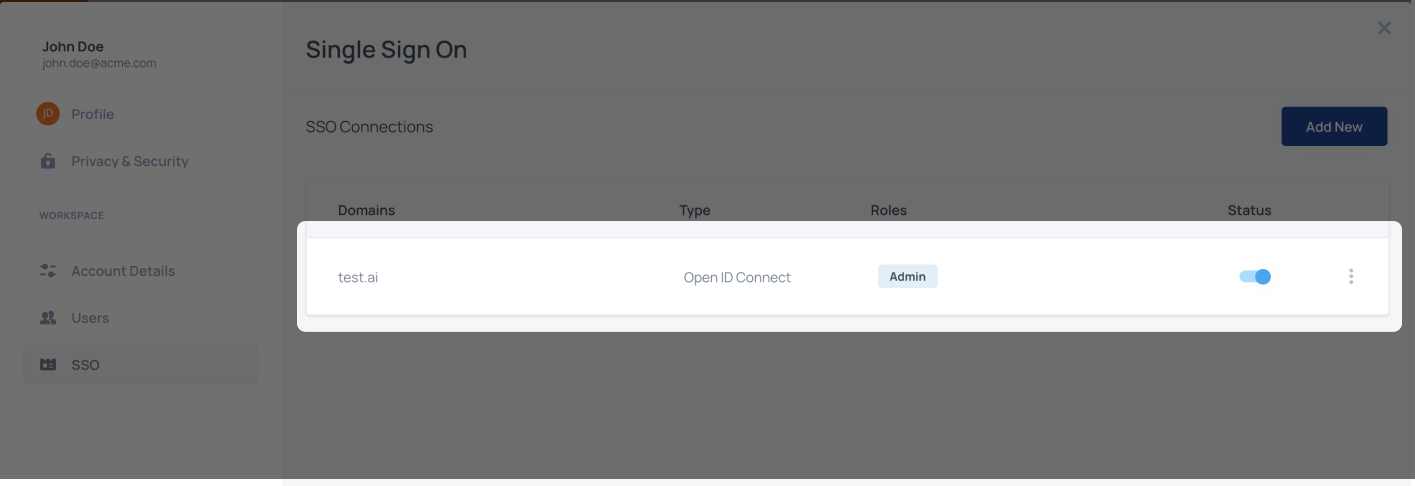
That's it! Now all users with the domain that was configured for the connection, will be redirected to their IdP when they will try to sign in.
Updated 4 months ago