Create and configure

Prerequisites
Note that the following versions are required to use the feature:
@frontegg/[email protected]
@frontegg/[email protected]
@frontegg/[email protected]
@frontegg/[email protected]
@frontegg/[email protected]
This guide will walk you through the process of creating multiple applications and adjusting their settings. You may recall from the Environment Integration and App Settings topic that once you open your first Environment , a Frontegg Sample app is generated by default. To add more applications to your account, you can do so via the [Name of Environment] -> Applications tab. Press the Create new button to add a new application.
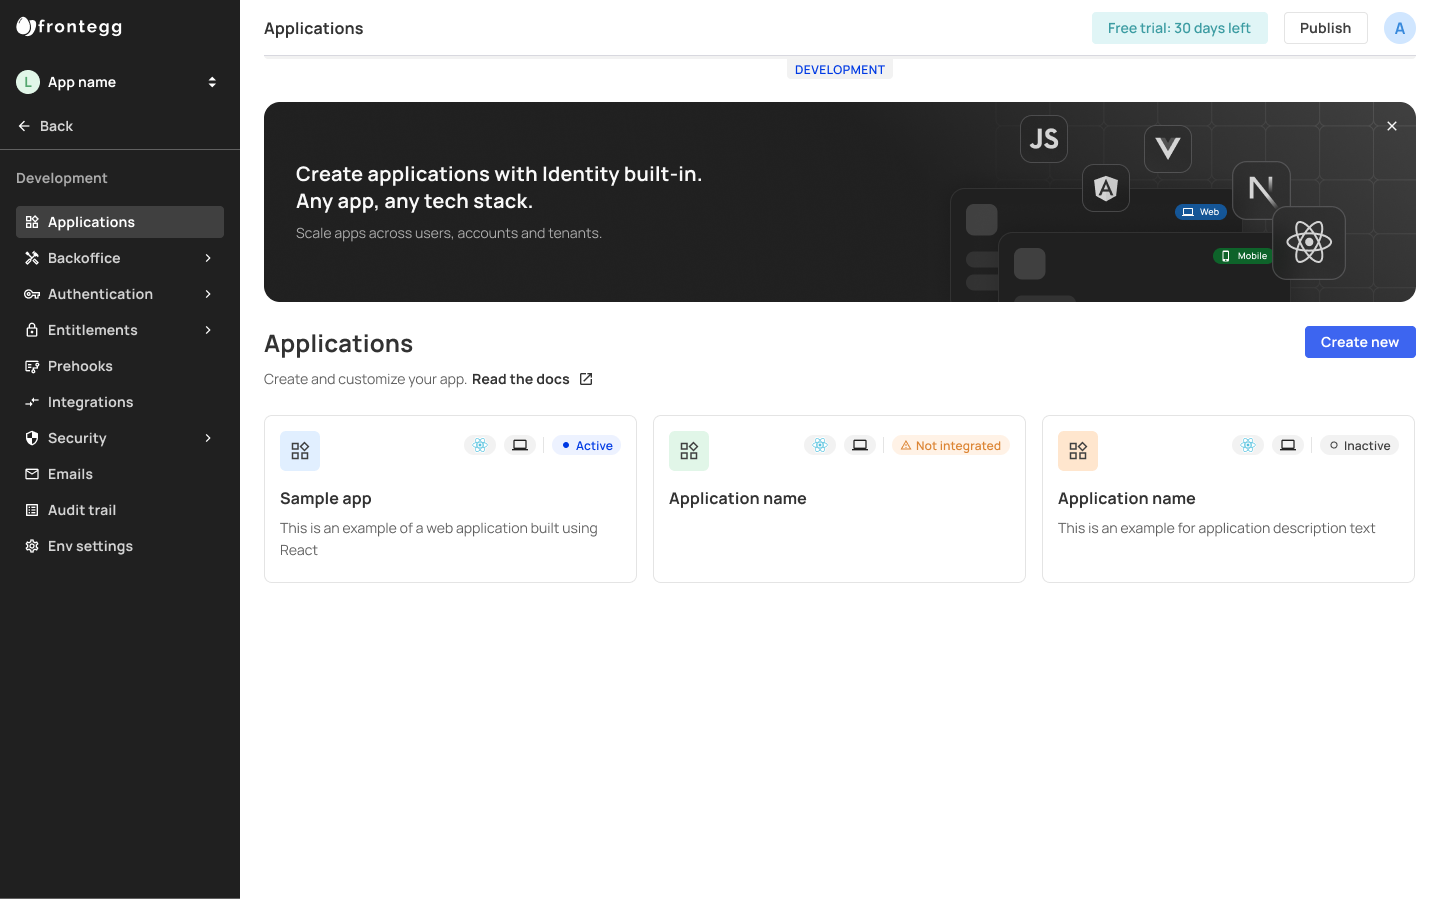
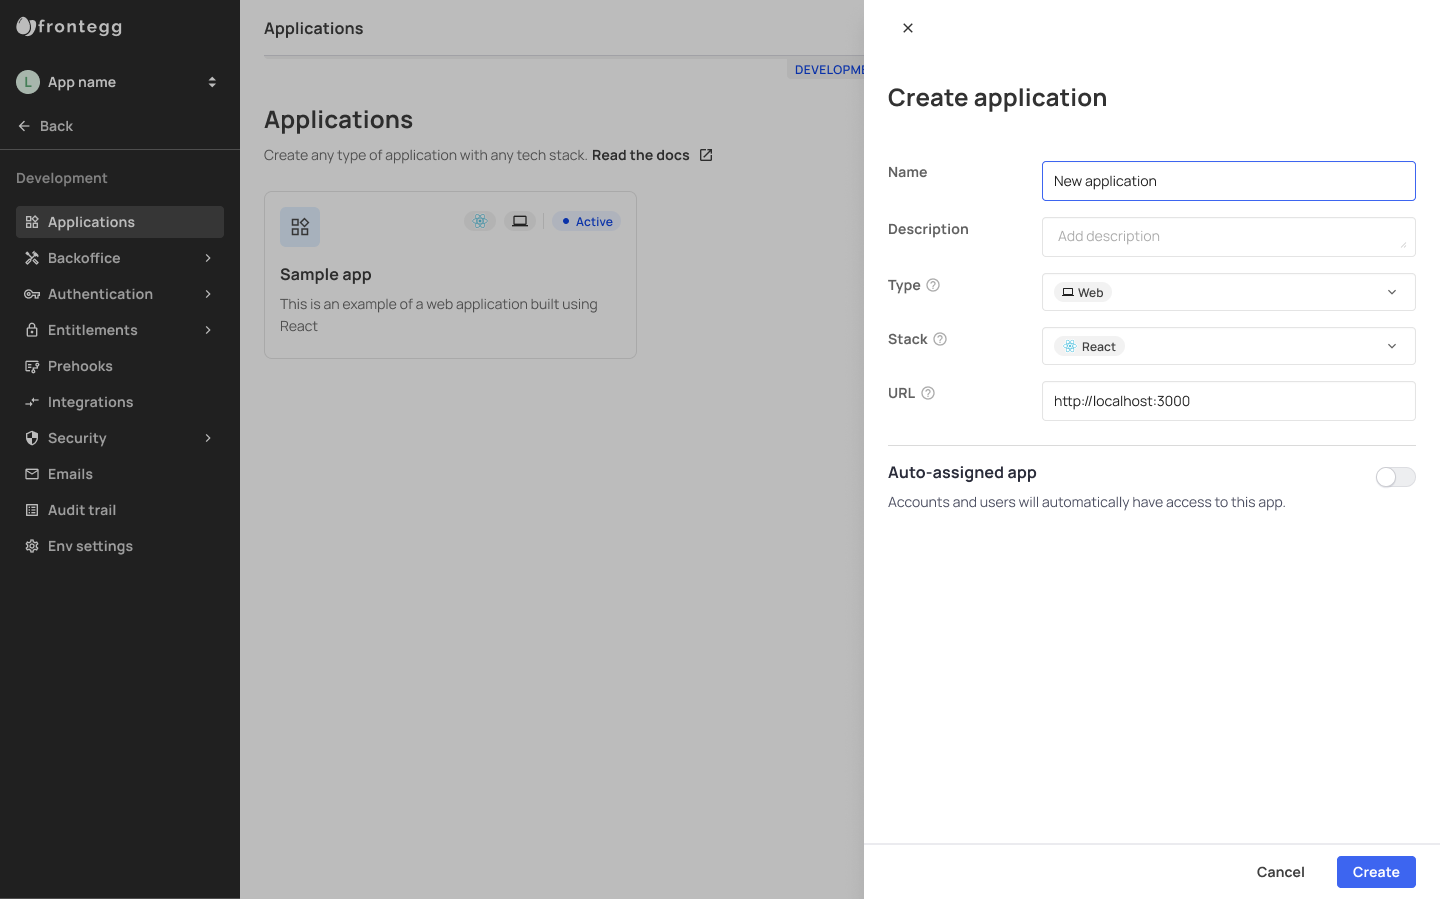
The button will open a drawer for you to fill in the relevant information to set up your new application. App Name, Description, Type, Stack, and URL are all required. Once you are done, press Create.
After creating your app, you will be redirected to that single app view where you can manage your app settings and integrate it with your environment.
Multi-apps in Different Environments
Note that adding multiple applications to one environment, does not mean they are copied automatically to additional environments— each environment is treated as a separate entity, so you will need to add applications to all the environments you wish to use them , manually.
App Settings Tab
Your app settings tab showcases your app's settings, such as your App ID and API Key. Via this tab, you can configure actions relevant to your app's functionality, such as Auto-assign app, Default app, and also perform further actions like Delete app. Note that the status of your app (Active, Not Integrated, etc.) will be displayed at the top of the page.
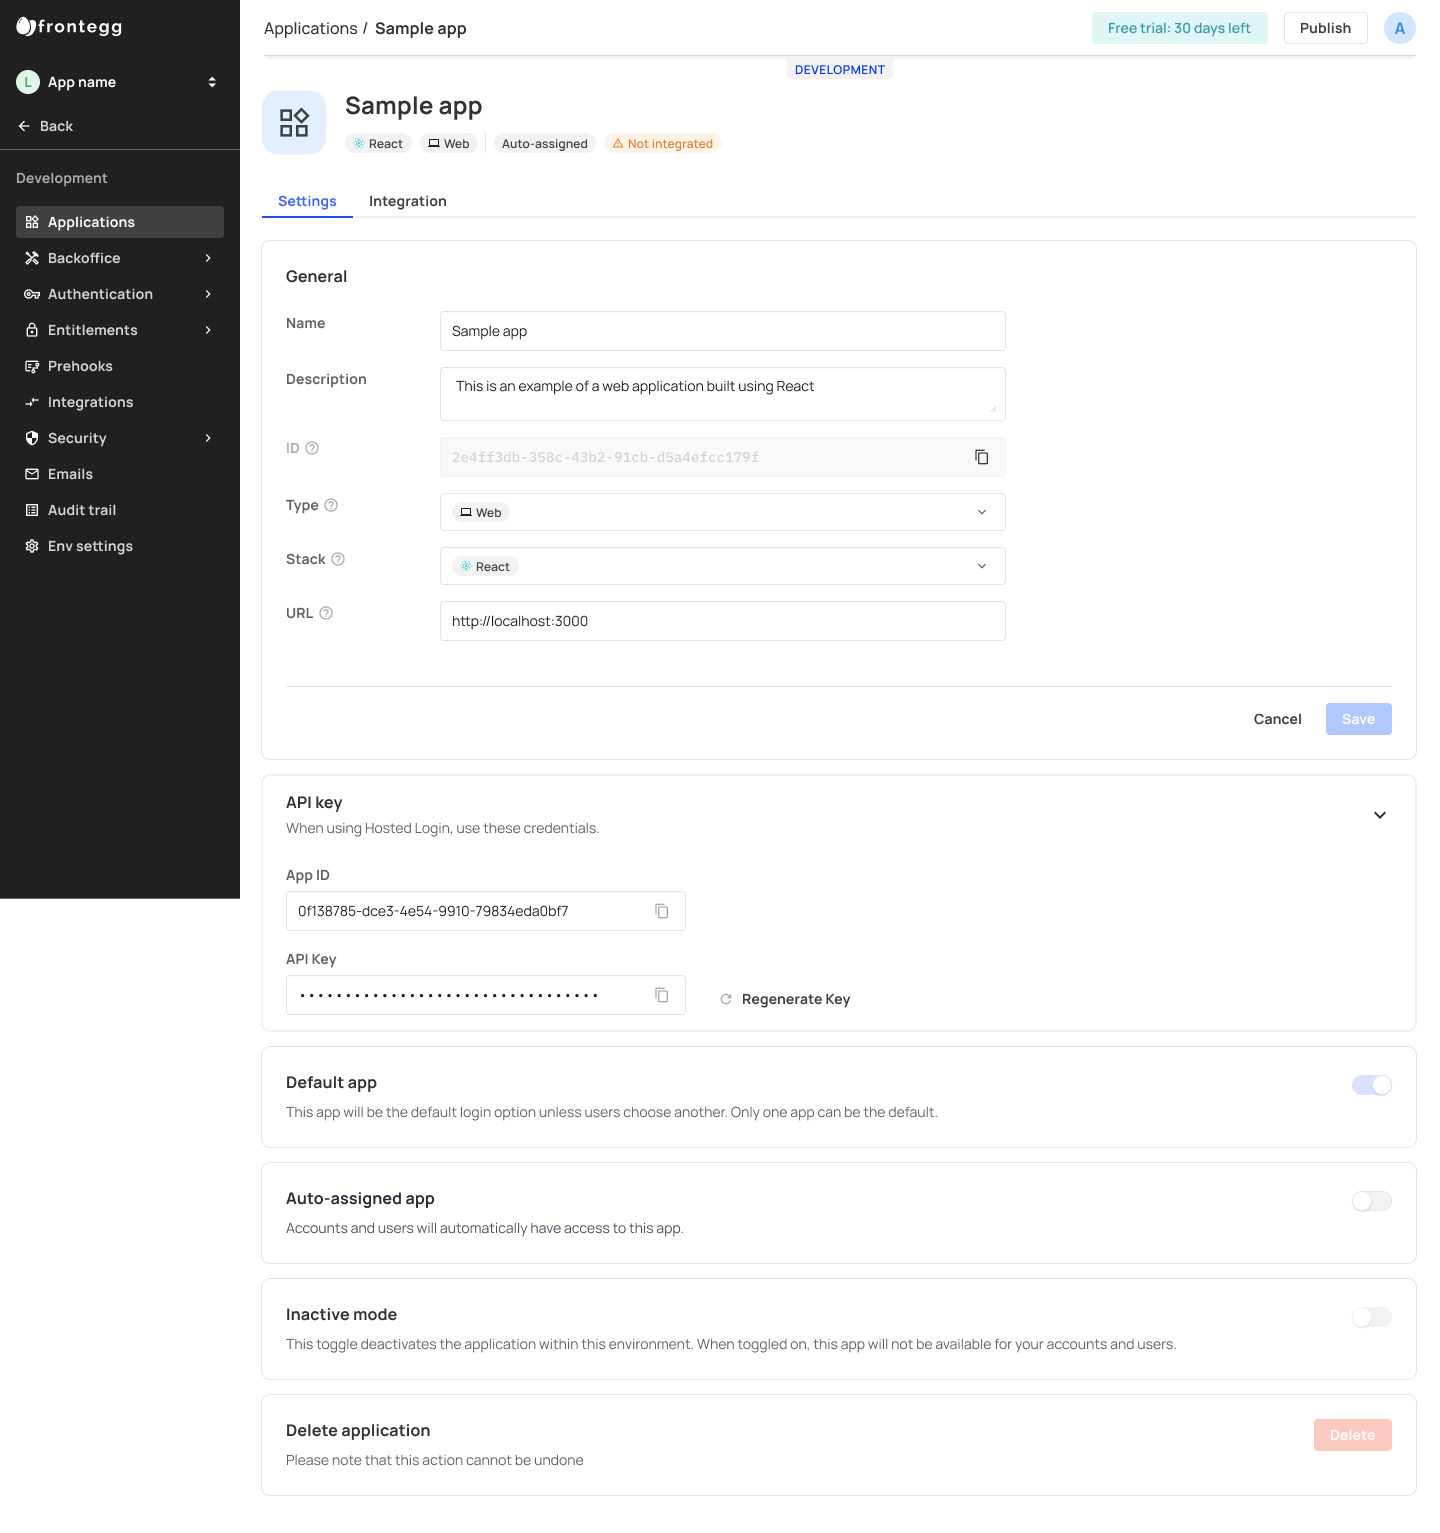
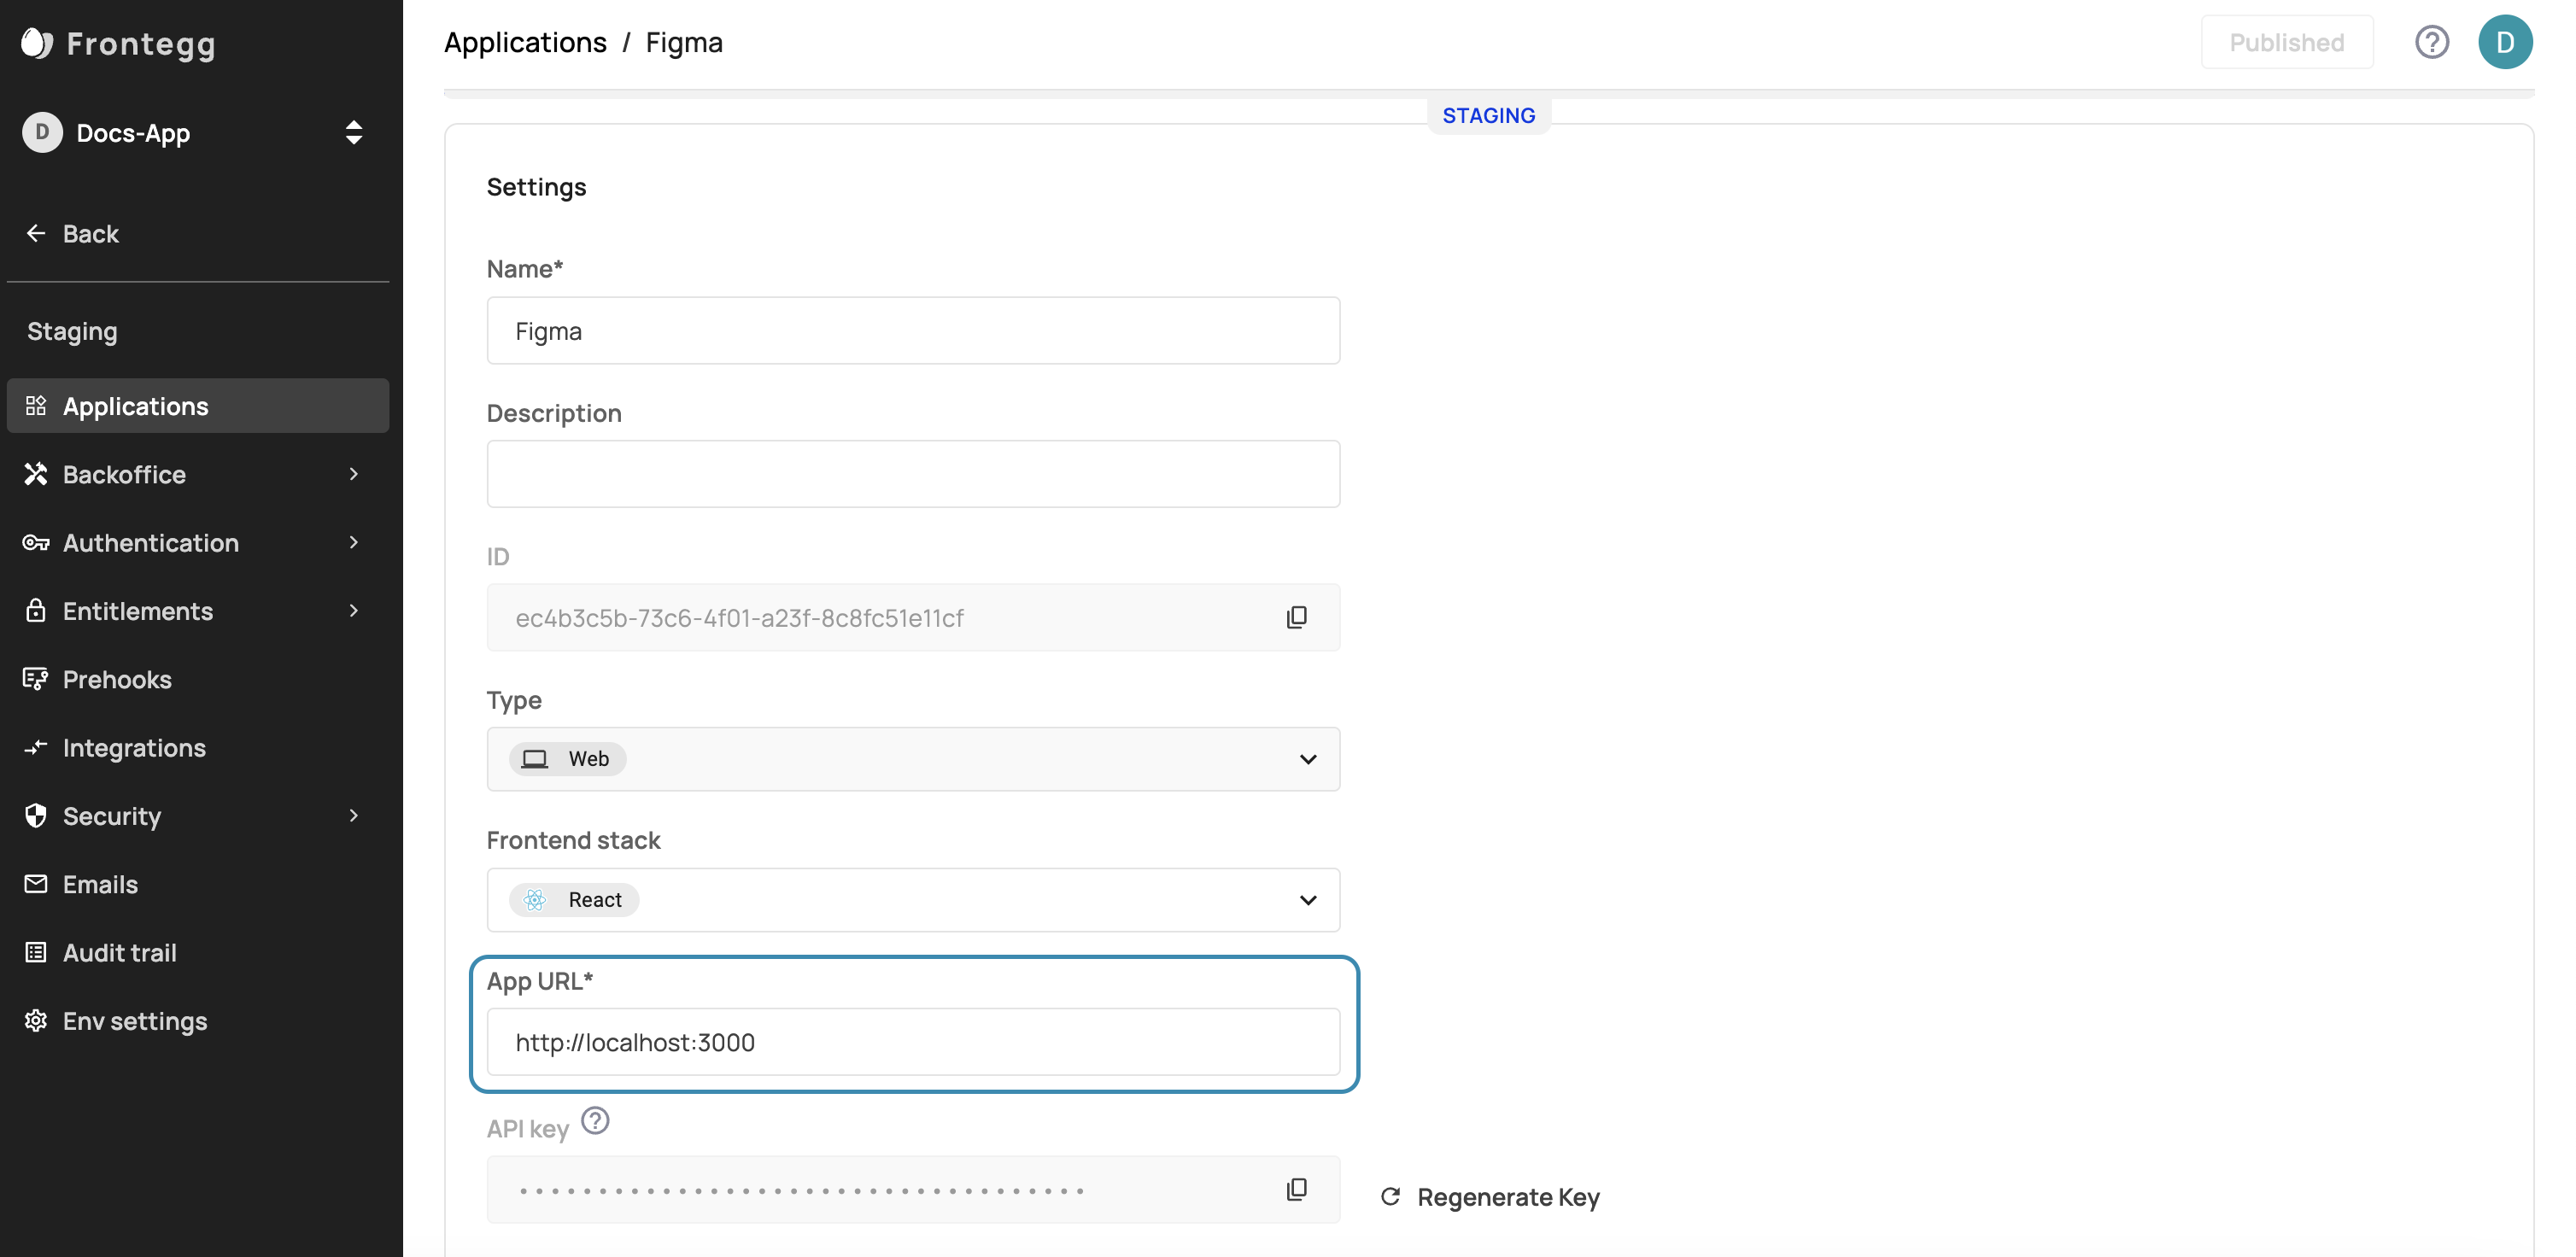
App URL
Each app has its own app URL (located under its settings tab).
Allowed Origins
Every application has its own app URL, located within the Settings tab (in the URL field). To avoid errors, go to your Env Settings > Domains > Allowed Origins, and list all of your URLs.
Customizing Your App Settings
Via your app Settings tab, you can control and adjust the following:
Default app: When using multiple applications, you can indicate which login option will be defined as your users' default login— if they haven't opted to login via a specific app.
Auto-assigned app: Accounts and users will be automatically assigned an app if its auto-assigned option is toggled on. Users and accounts will not be able to control this setting.
Inactive mode: This option will make the app unavailable for user access. For apps that have already been integrated, you can switch between Inactive/Active modes interchangeably.
Delete application: this option will delete that application from your application list. This action is irreversible.
App Integration and Status
While you can add multiple applications to accounts without integrating them prior, they won't become active (i.e., usable ) for your users unless you integrate them.
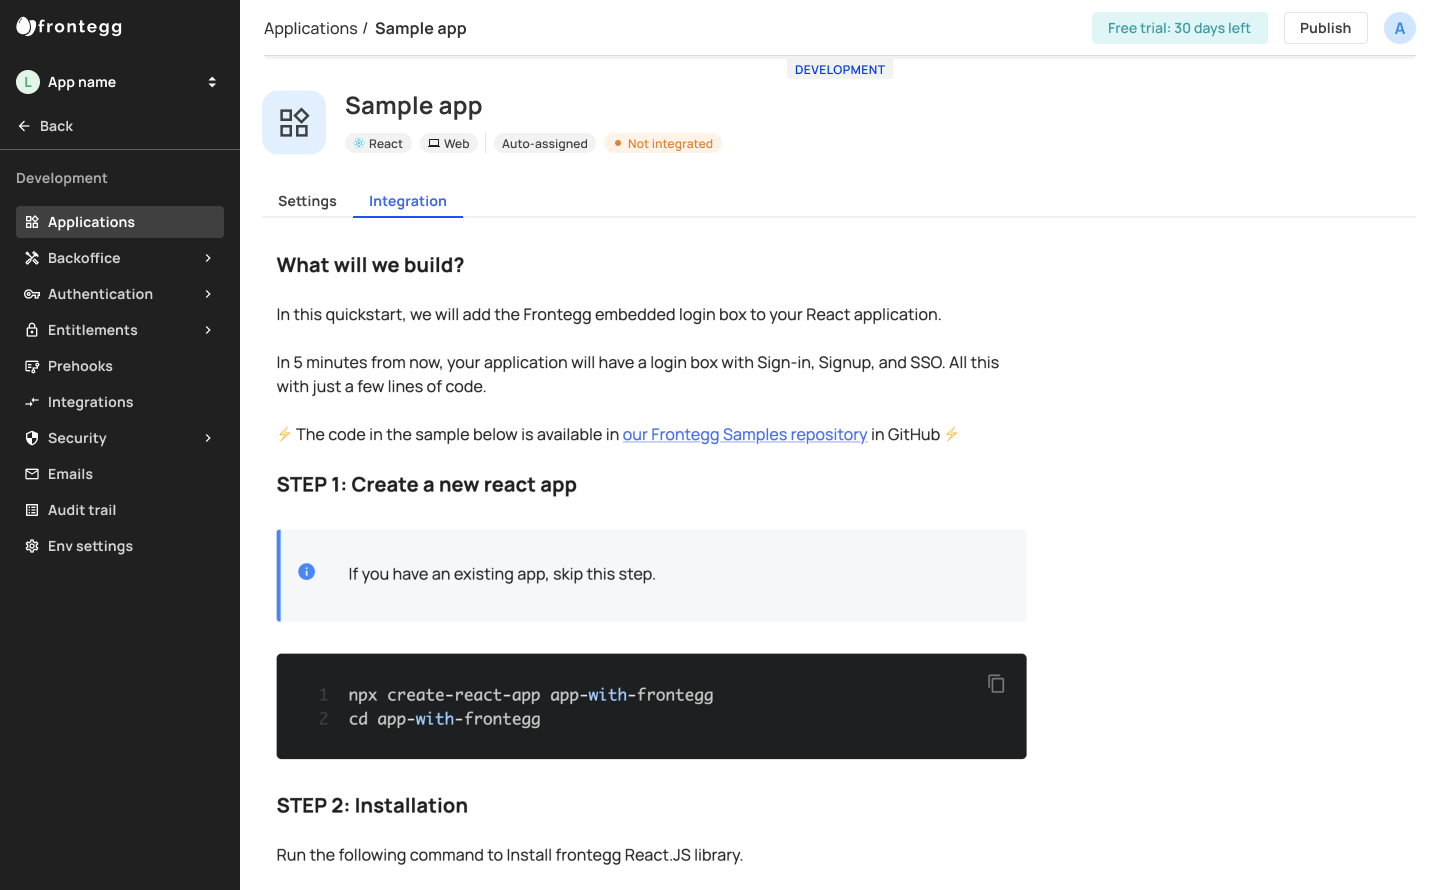
App Integration Tab
To make your app active, you must proceed with integrating it via the Integration tab.
Note that for multiple applications, you will need to include the following contextOptions to your code:
contextOptions={{
          baseUrl: 'my-base-url',
          clientId: 'my-client-id',
          appId: 'my-app-id'
}}
After integration, the app will be marked as active in your Applications view. You can always return to this page to check for your applications status.

Updated about 1 month ago