Enabling SSO In the Admin Portal
Single Sign-On (SSO) simplifies the login process by allowing users to sign in using existing credentials. This convenience eliminates users' need to create a new username and password specifically for a customer's application, streamlining access and enhancing user experience.
Two widely recognized SSO web standards are SAML (Security Assertion Markup Language) and OpenID Connect. Both standards are crucial in managing and authenticating individual users across multiple applications. These authentication methods are particularly prevalent in enterprise environments and web applications, aiming to simplify user access and bolster security measures. The adoption of SSO is particularly beneficial in scenarios where users are required to access multiple applications within an organization, as it negates the need for repeated credential entries.
This guide serves as an introductory resource for integrating SSO into your Frontegg application, enabling users to sign in using their SAML or OpenID Connect credentials. Before diving into the configuration process within the builder and enabling SSO for user accounts, it's essential to first set up SSO in your back office. This preliminary step ensures that the necessary groundwork is laid, facilitating a smoother integration process.
To begin the integration process in the Frontegg platform:
- Navigate to the SSO configuration section in your back office. Here, you'll specify the settings and parameters required for SSO functionality, tailoring the setup to meet your application's specific needs. go to Configuring SSO for SAML and OIDC to learn more.
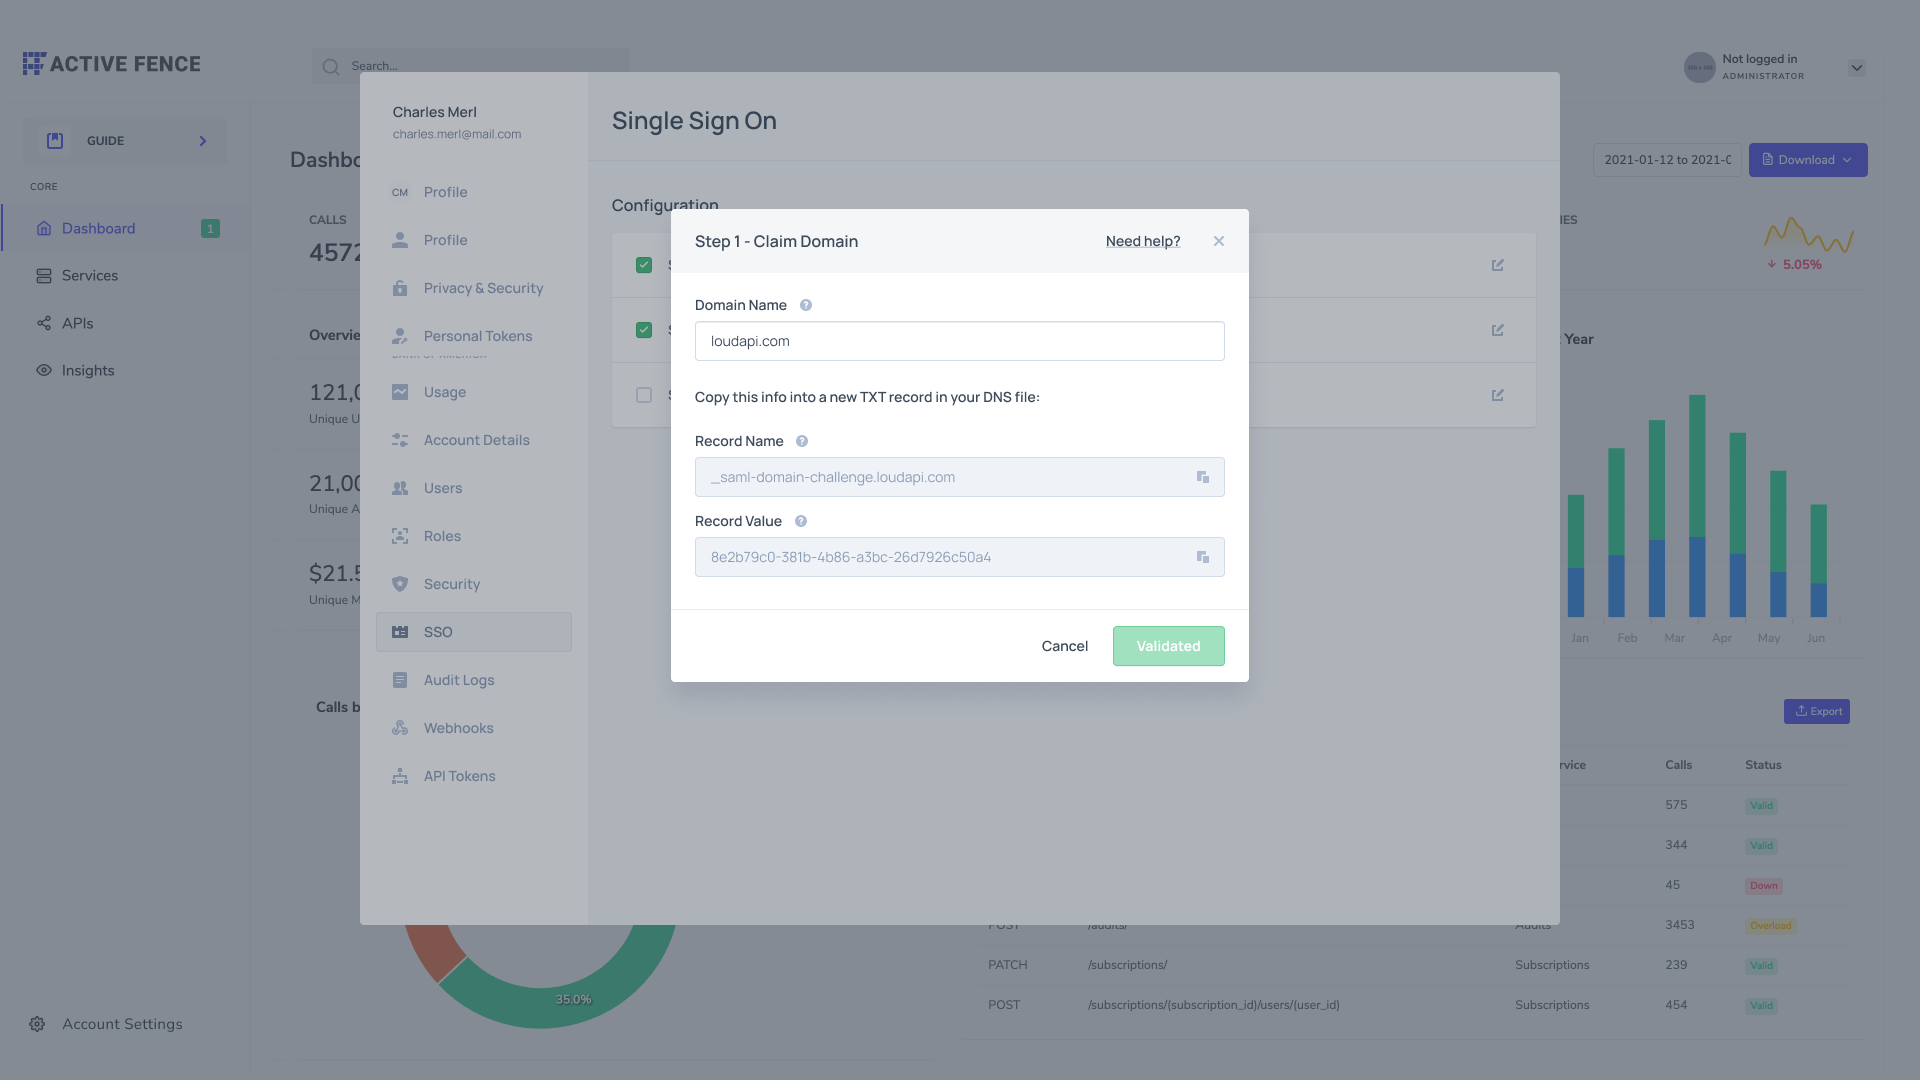
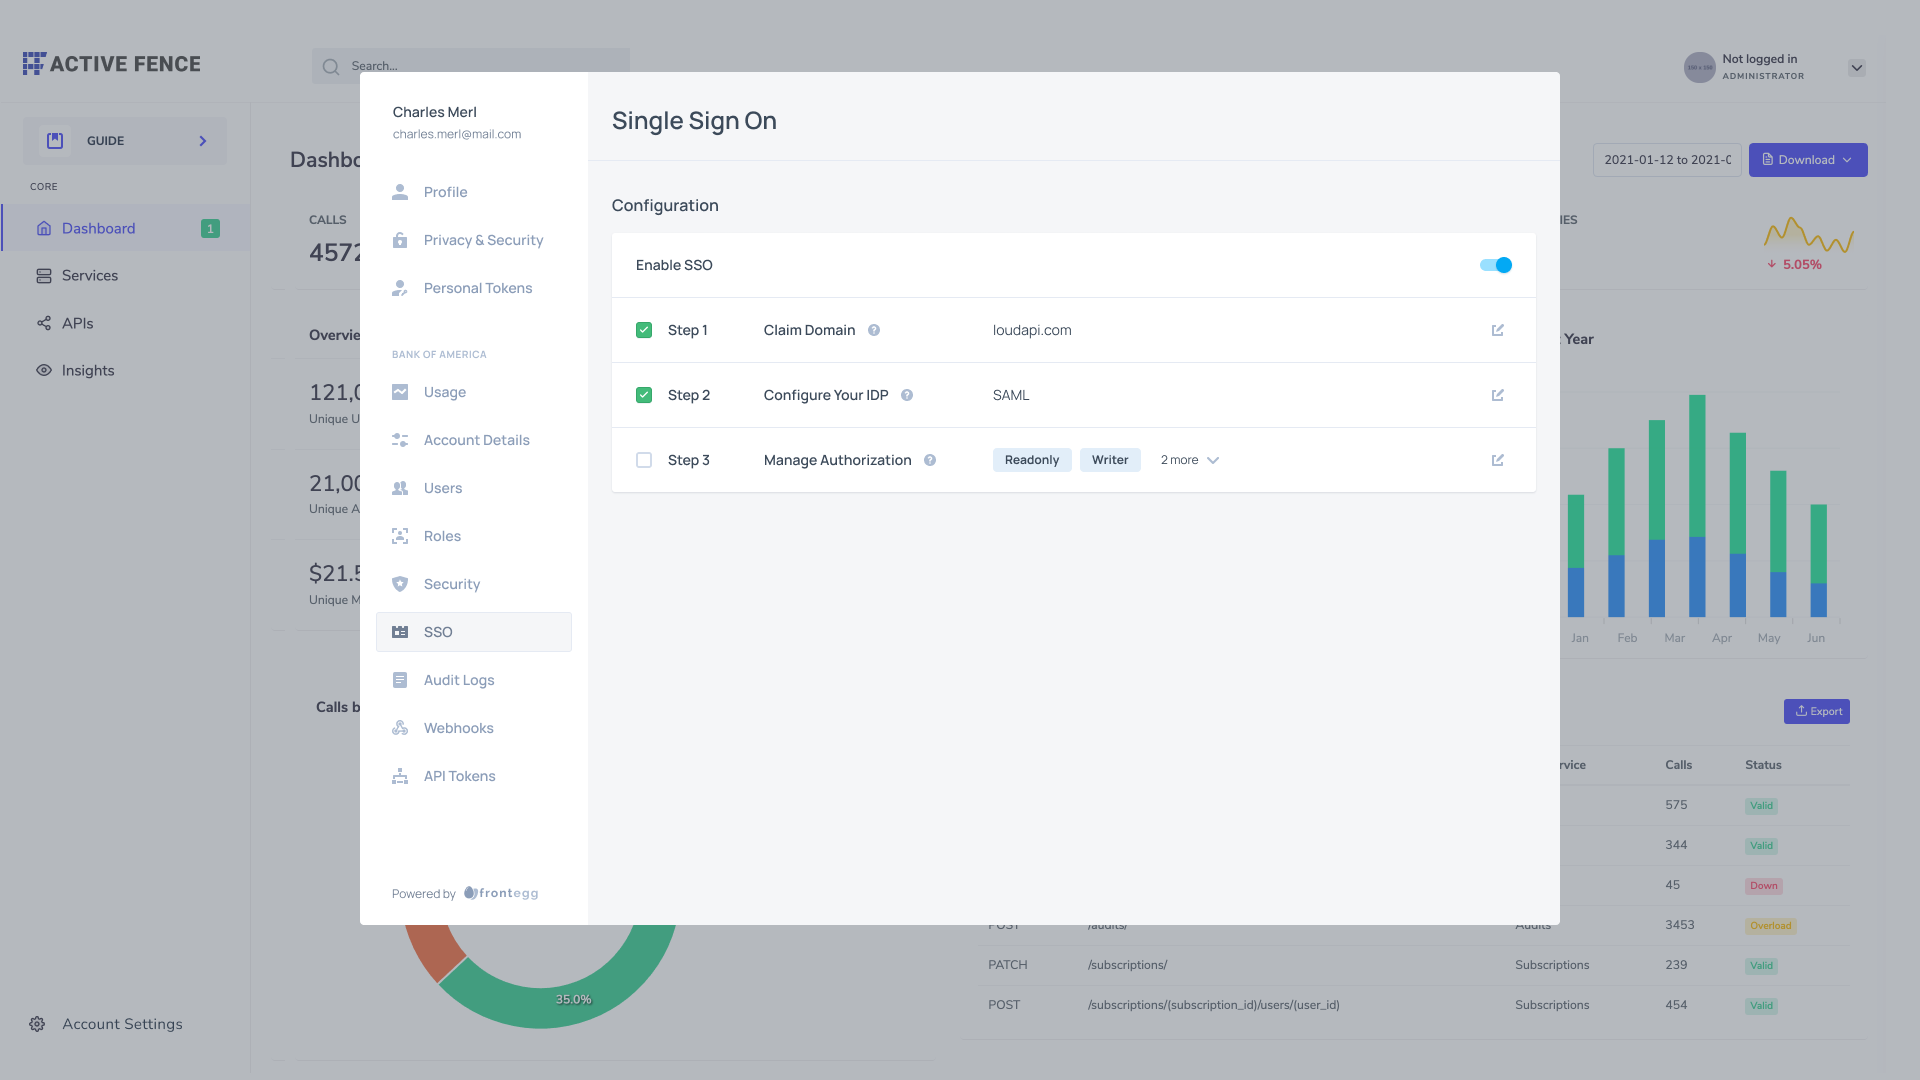
- Once the SSO configuration is completed, proceed to the Frontegg builder. To enable SSO, you must com Claim Domain, Configure Your IDP, and Manage Authorization.

Claim Domain (verify and validate)
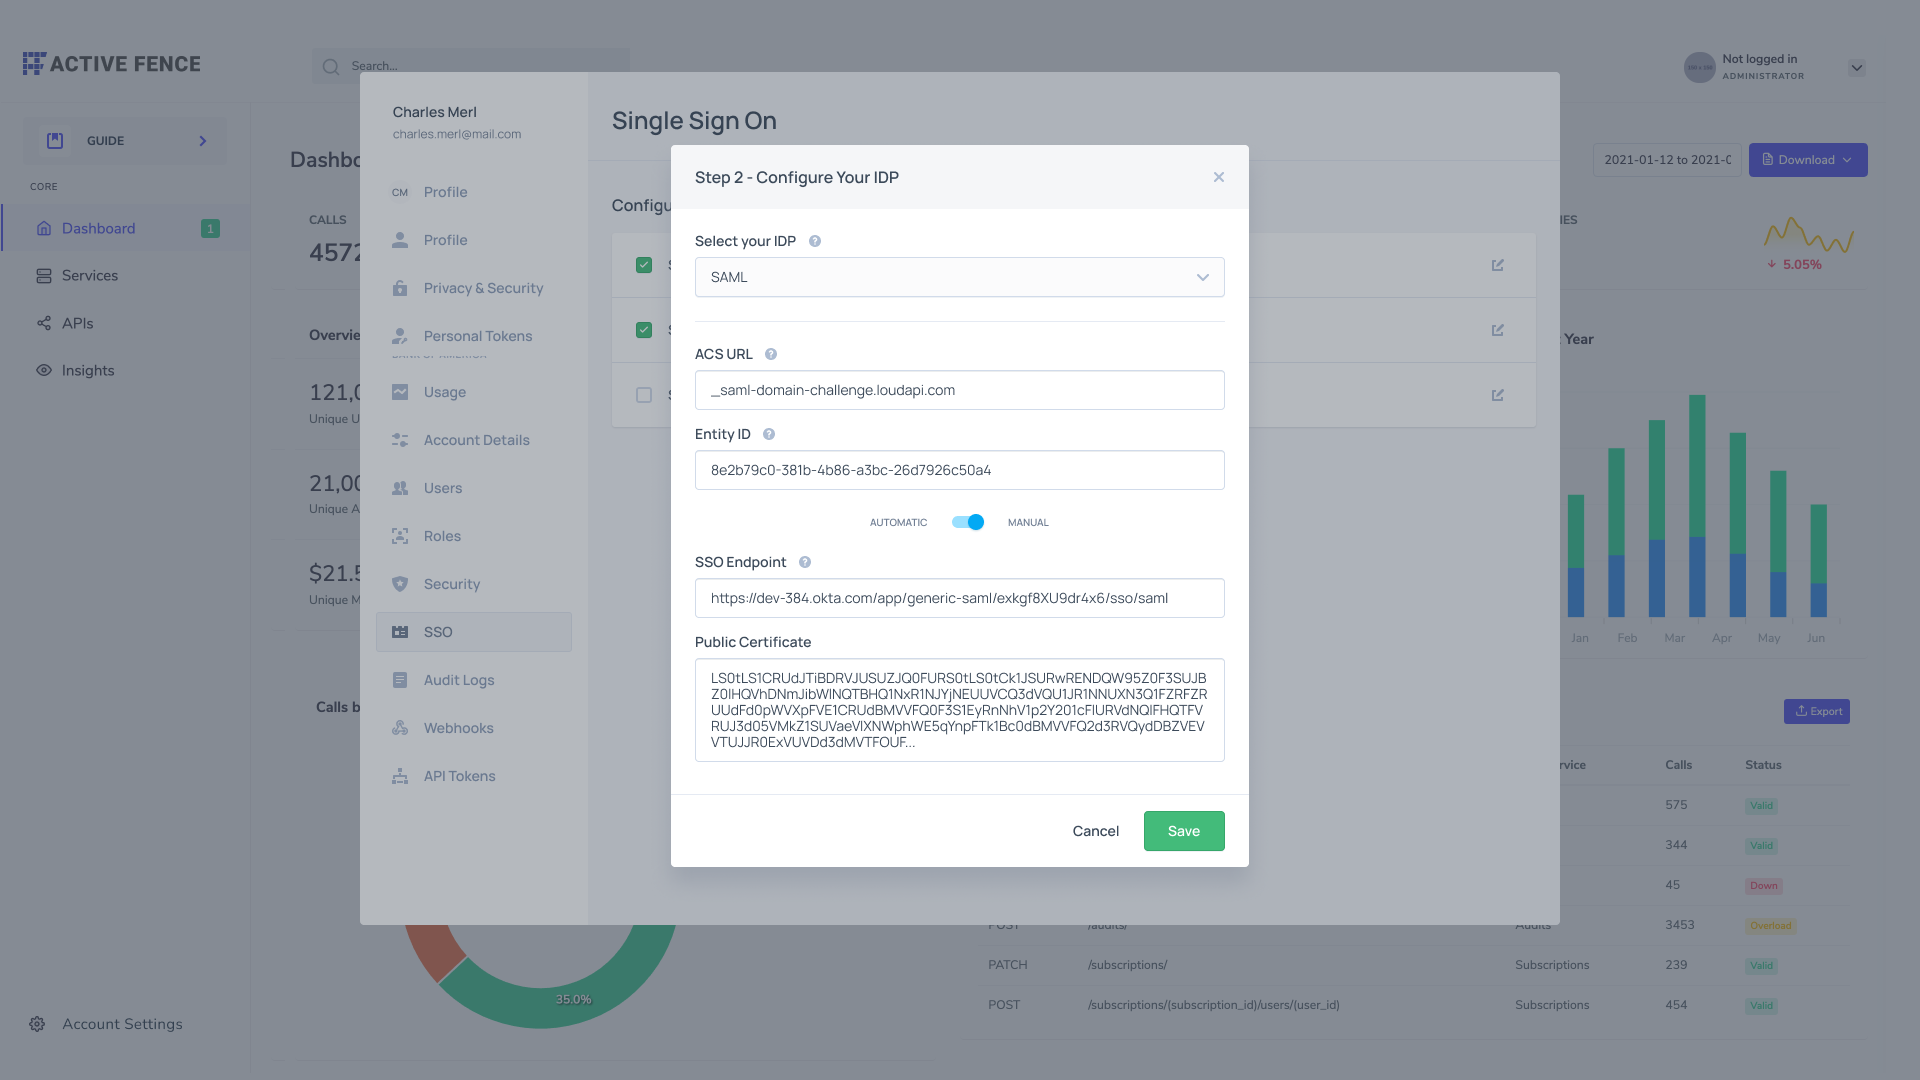
In the left panel, you can toggle the switch to on for each SSO standard (SAML or OpenID Connect) you wish to enable. This action activates the SSO feature for your application, allowing users to utilize their existing credentials for authentication. You would need to configure your IDP by filling in the fields shown below:

Configure your IDP

Updated 8 months ago