Use cases
Creating user pools in Frontegg, whether from external sources or via Identity Providers (IdPs), offers significant flexibility and control over user management and authentication. External user pools allow organizations to integrate and sync user data from various external databases or custom code— ensuring seamless user migration and minimal disruption to user experience. On the other hand, IdP user pools enable authentication through trusted identity providers, leveraging existing credentials and enhancing security without migrating users to Frontegg. The following topic outlines common use cases of creating and configuring user pools via external or IDP user pools, e.g., Auth0, Amazon Cognito, Google Firebase, etc.
External User Pools
Auth0
When creating an OAuth user pool, you must perform several actions on your OAuth account to ensure proper configuration and sync of this pool with Frontegg:
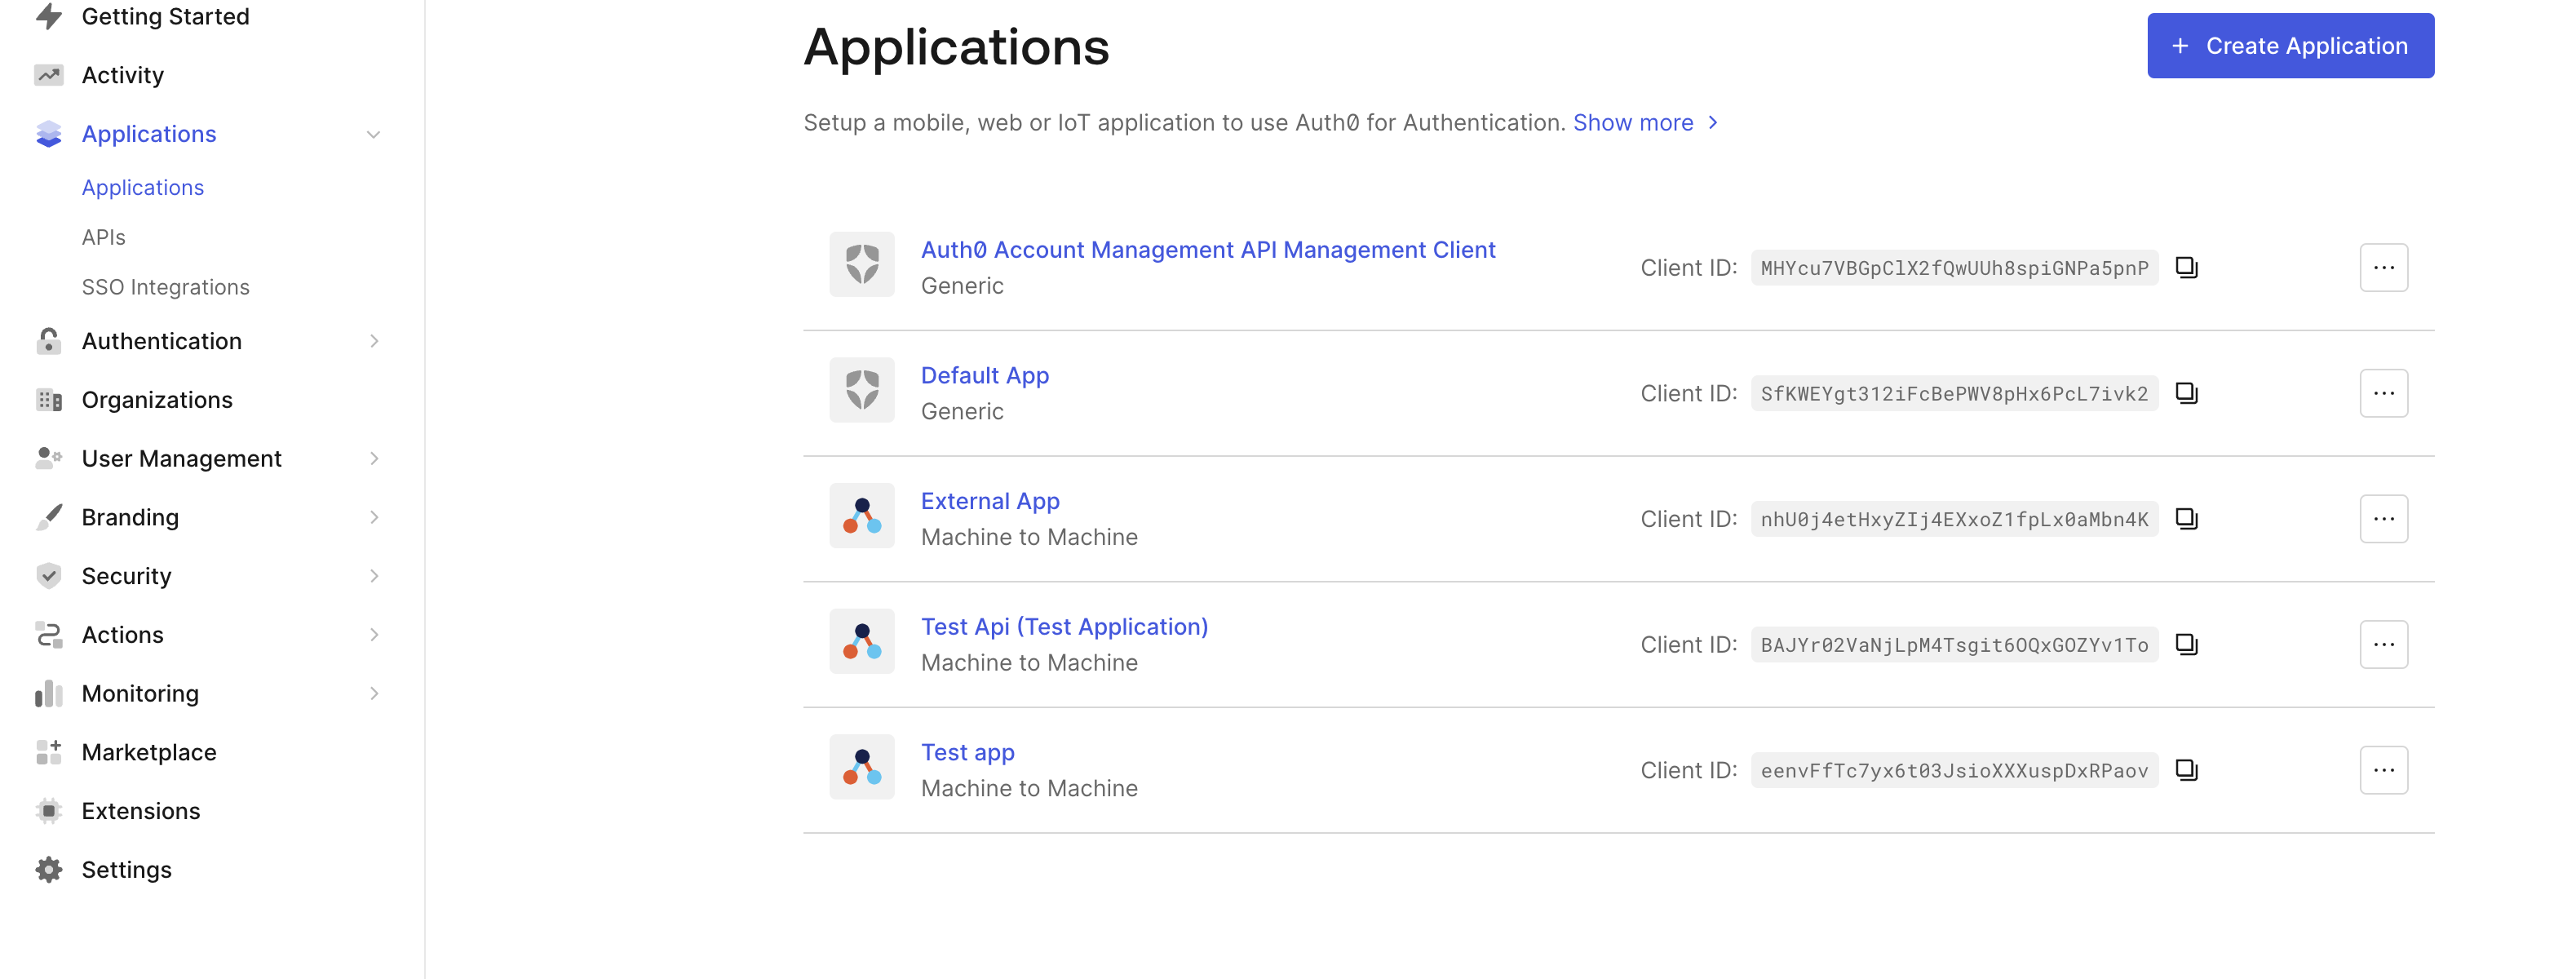
- Go to your OAuth account and to your Applications view.
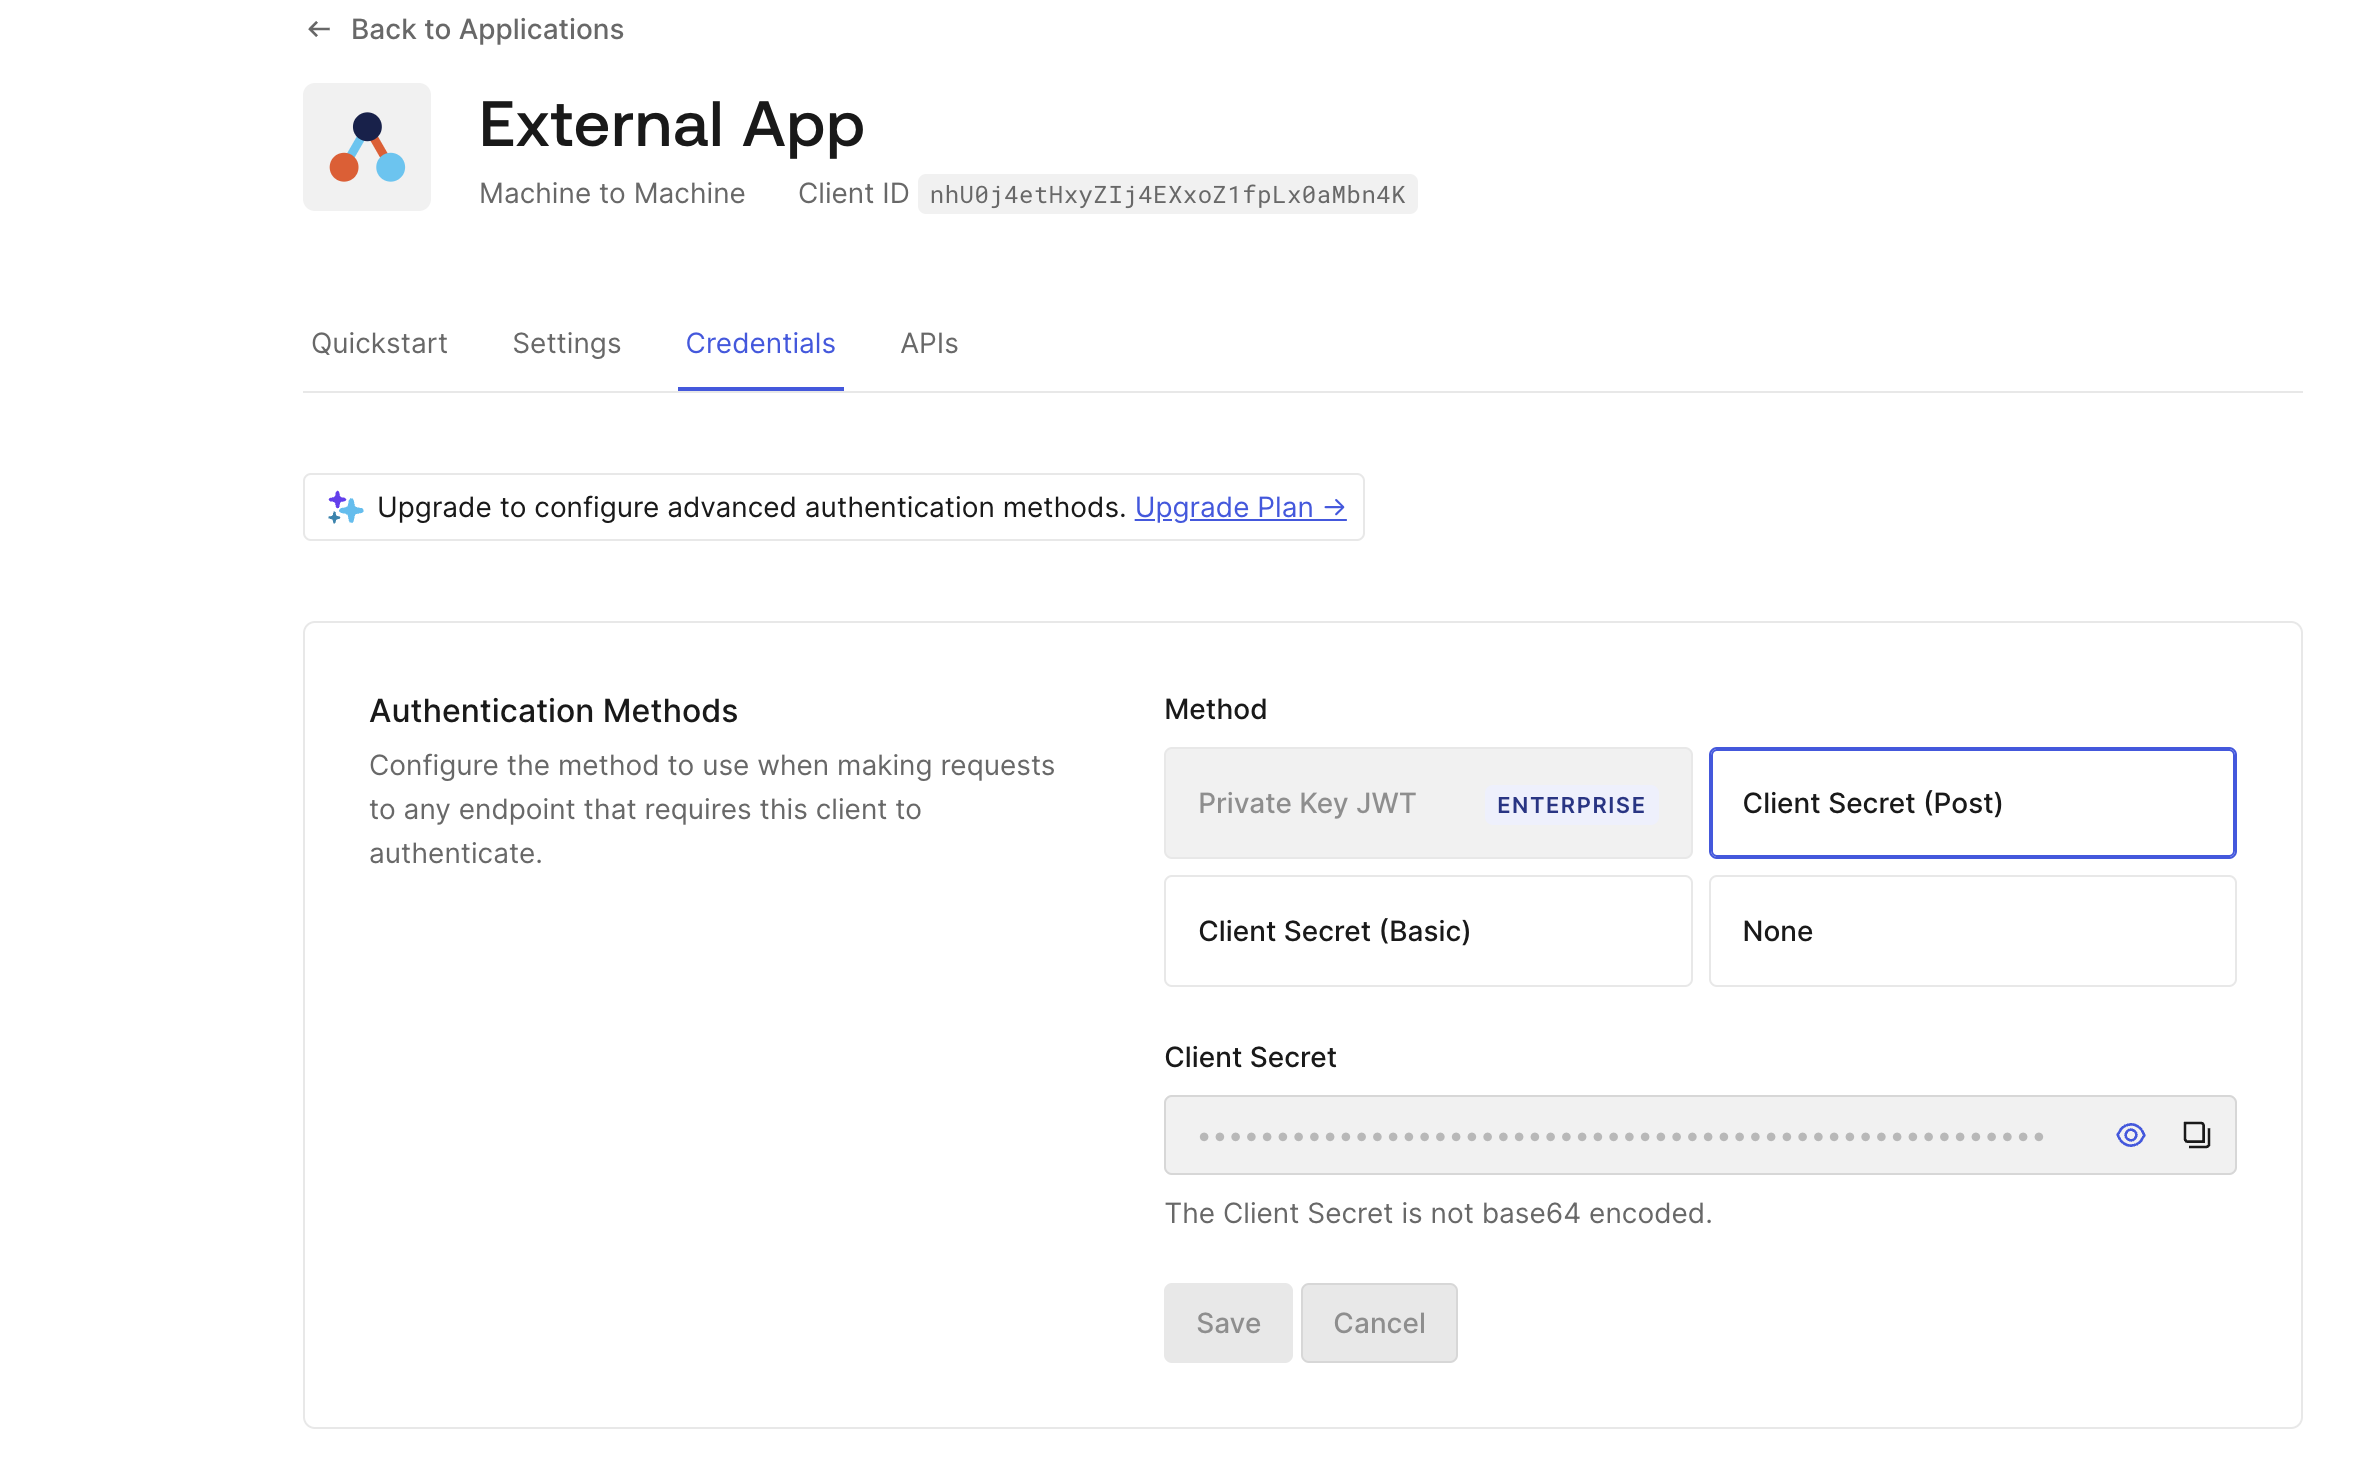
- Go to your app → Credentials tab → and choose the Client Secret (Post) Method.
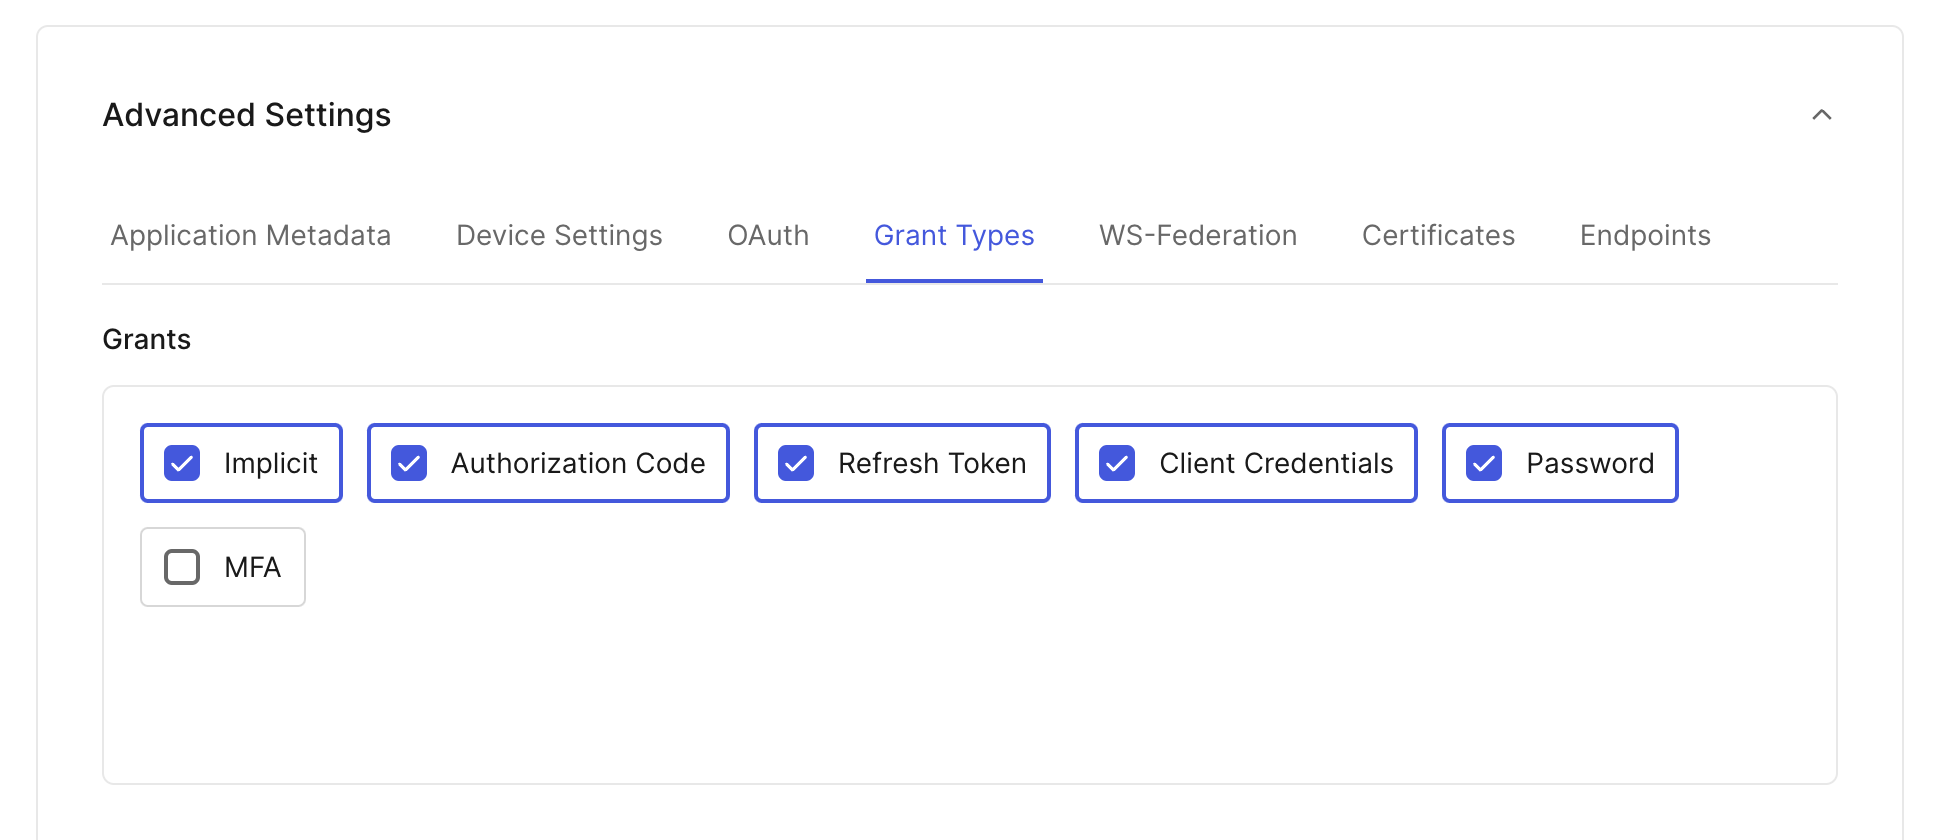
- Go to your Advanced Settings → Grant Types tab, and check the box next to the Password option.
-
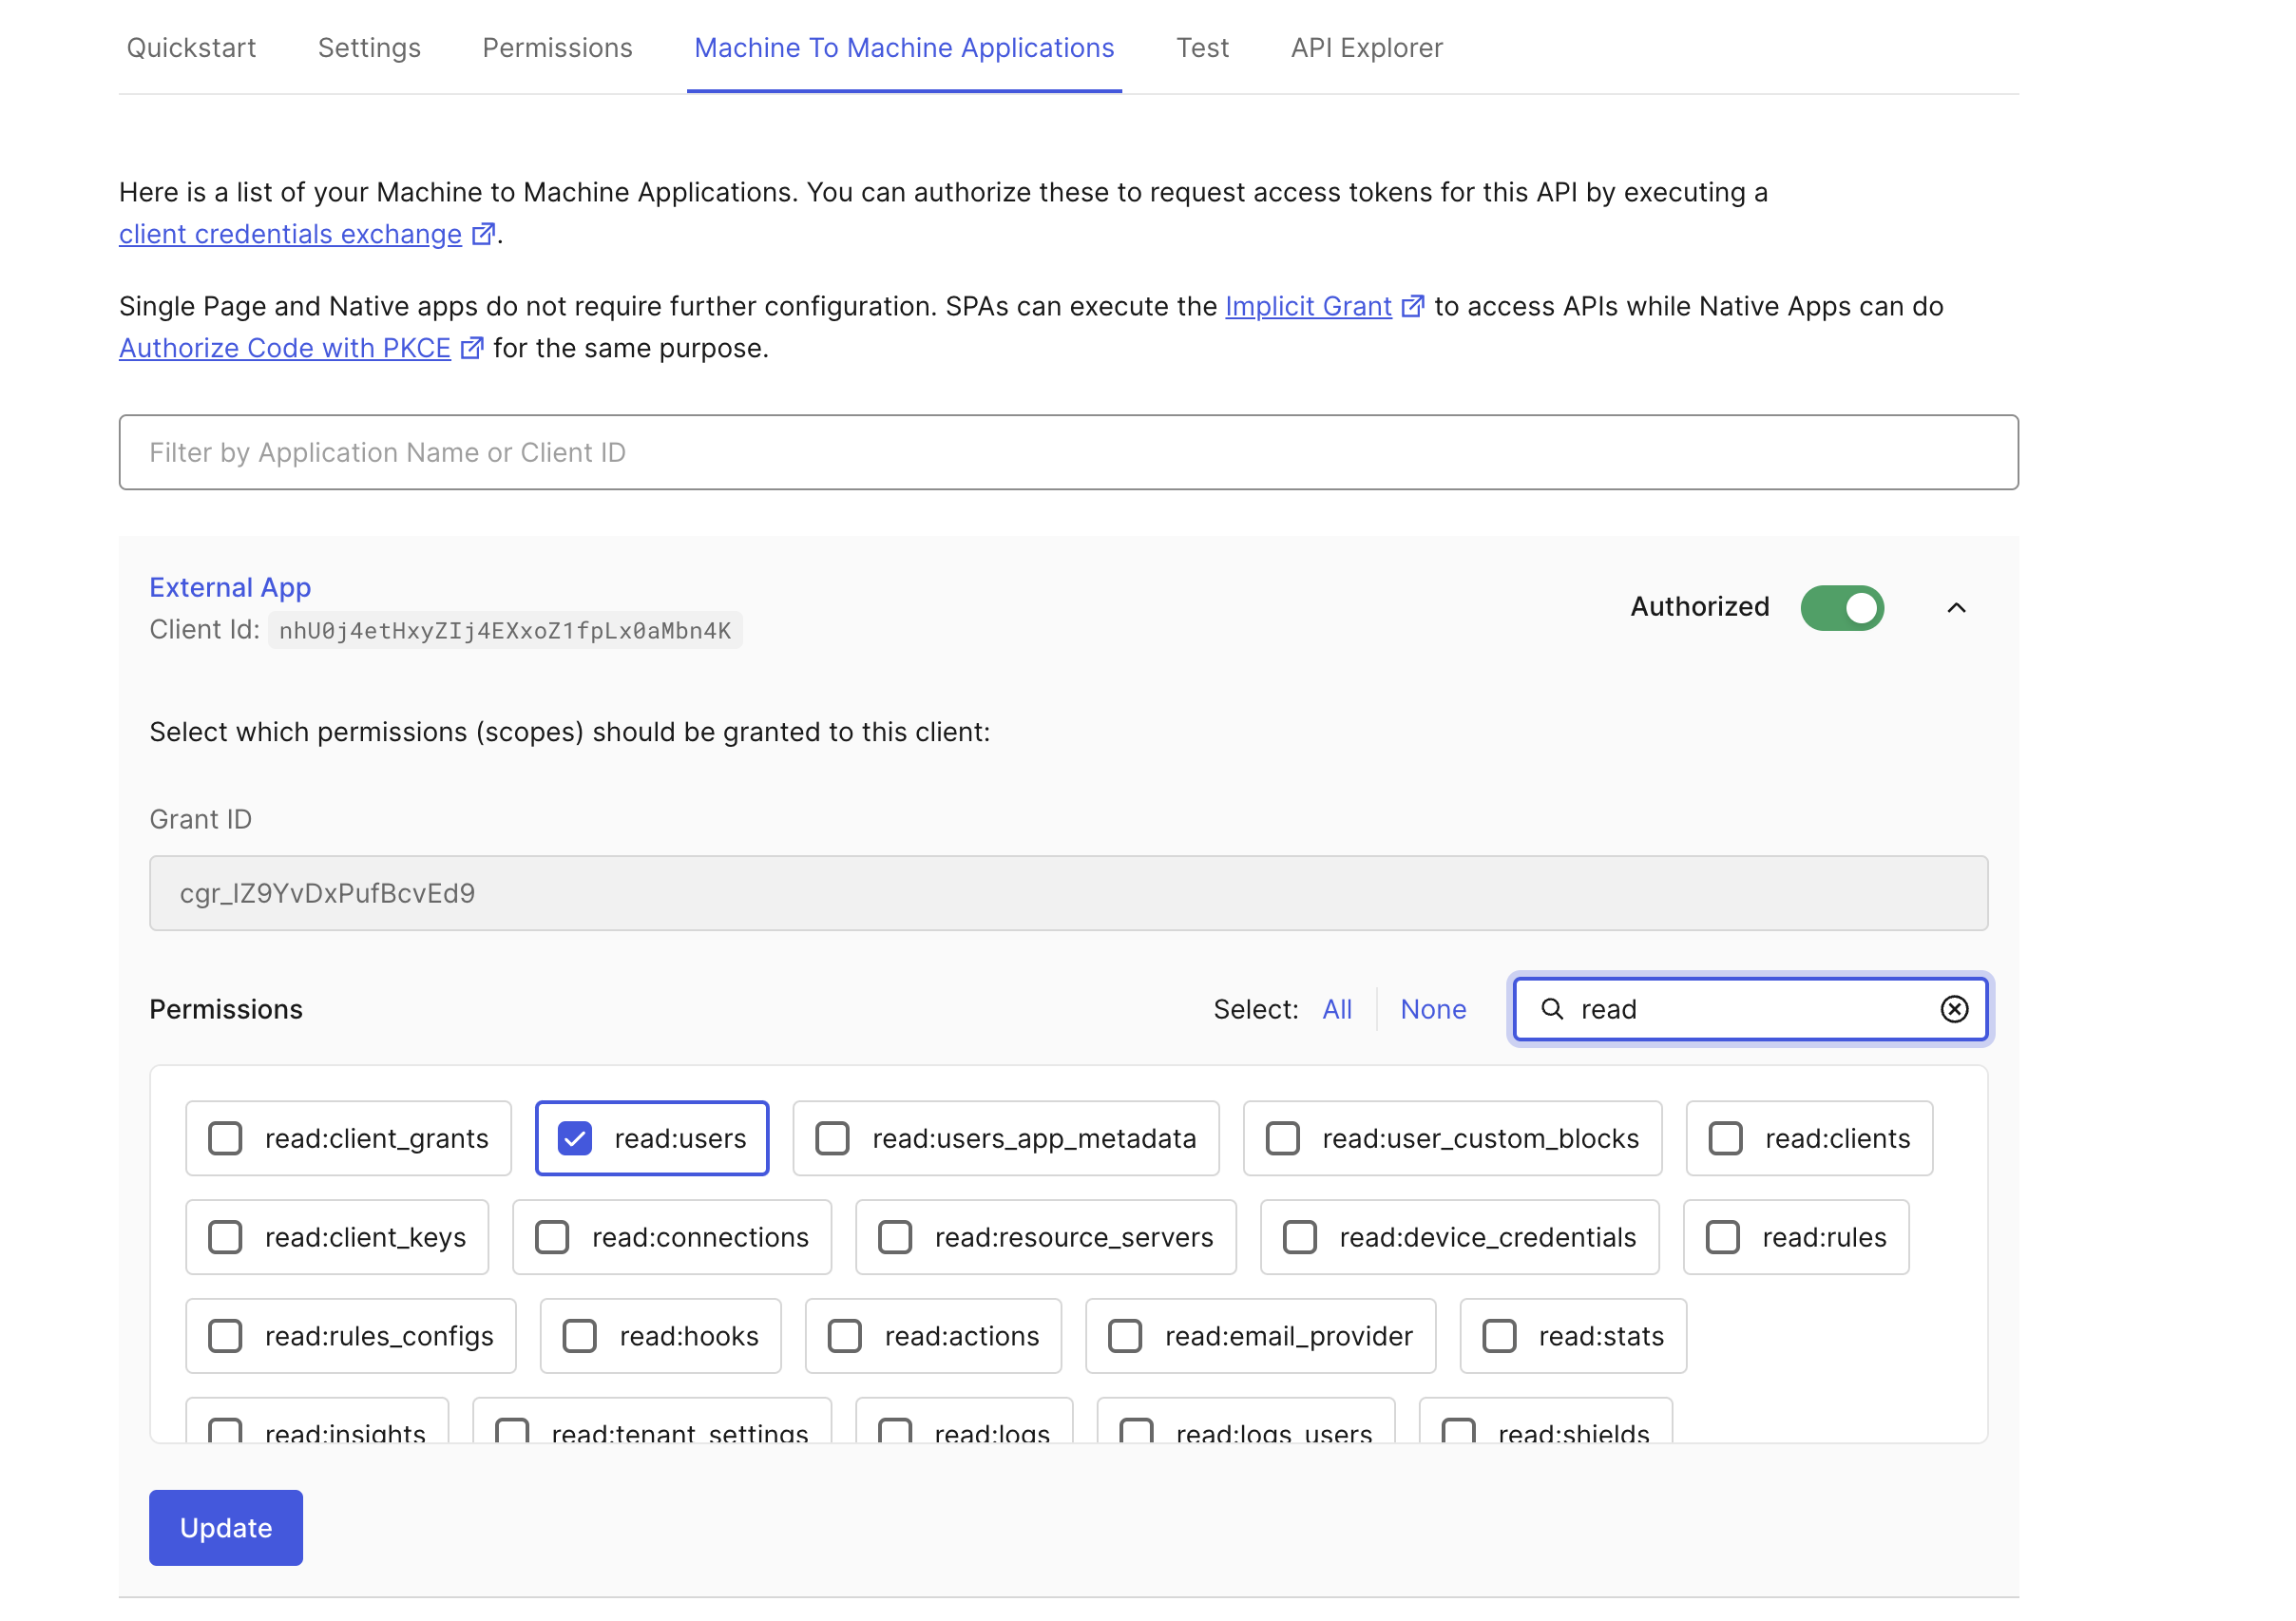
Go to Applications → APIs → Auth0 Management API → Machine to Machine Applications tab:
- Authorize your app via the toggle.
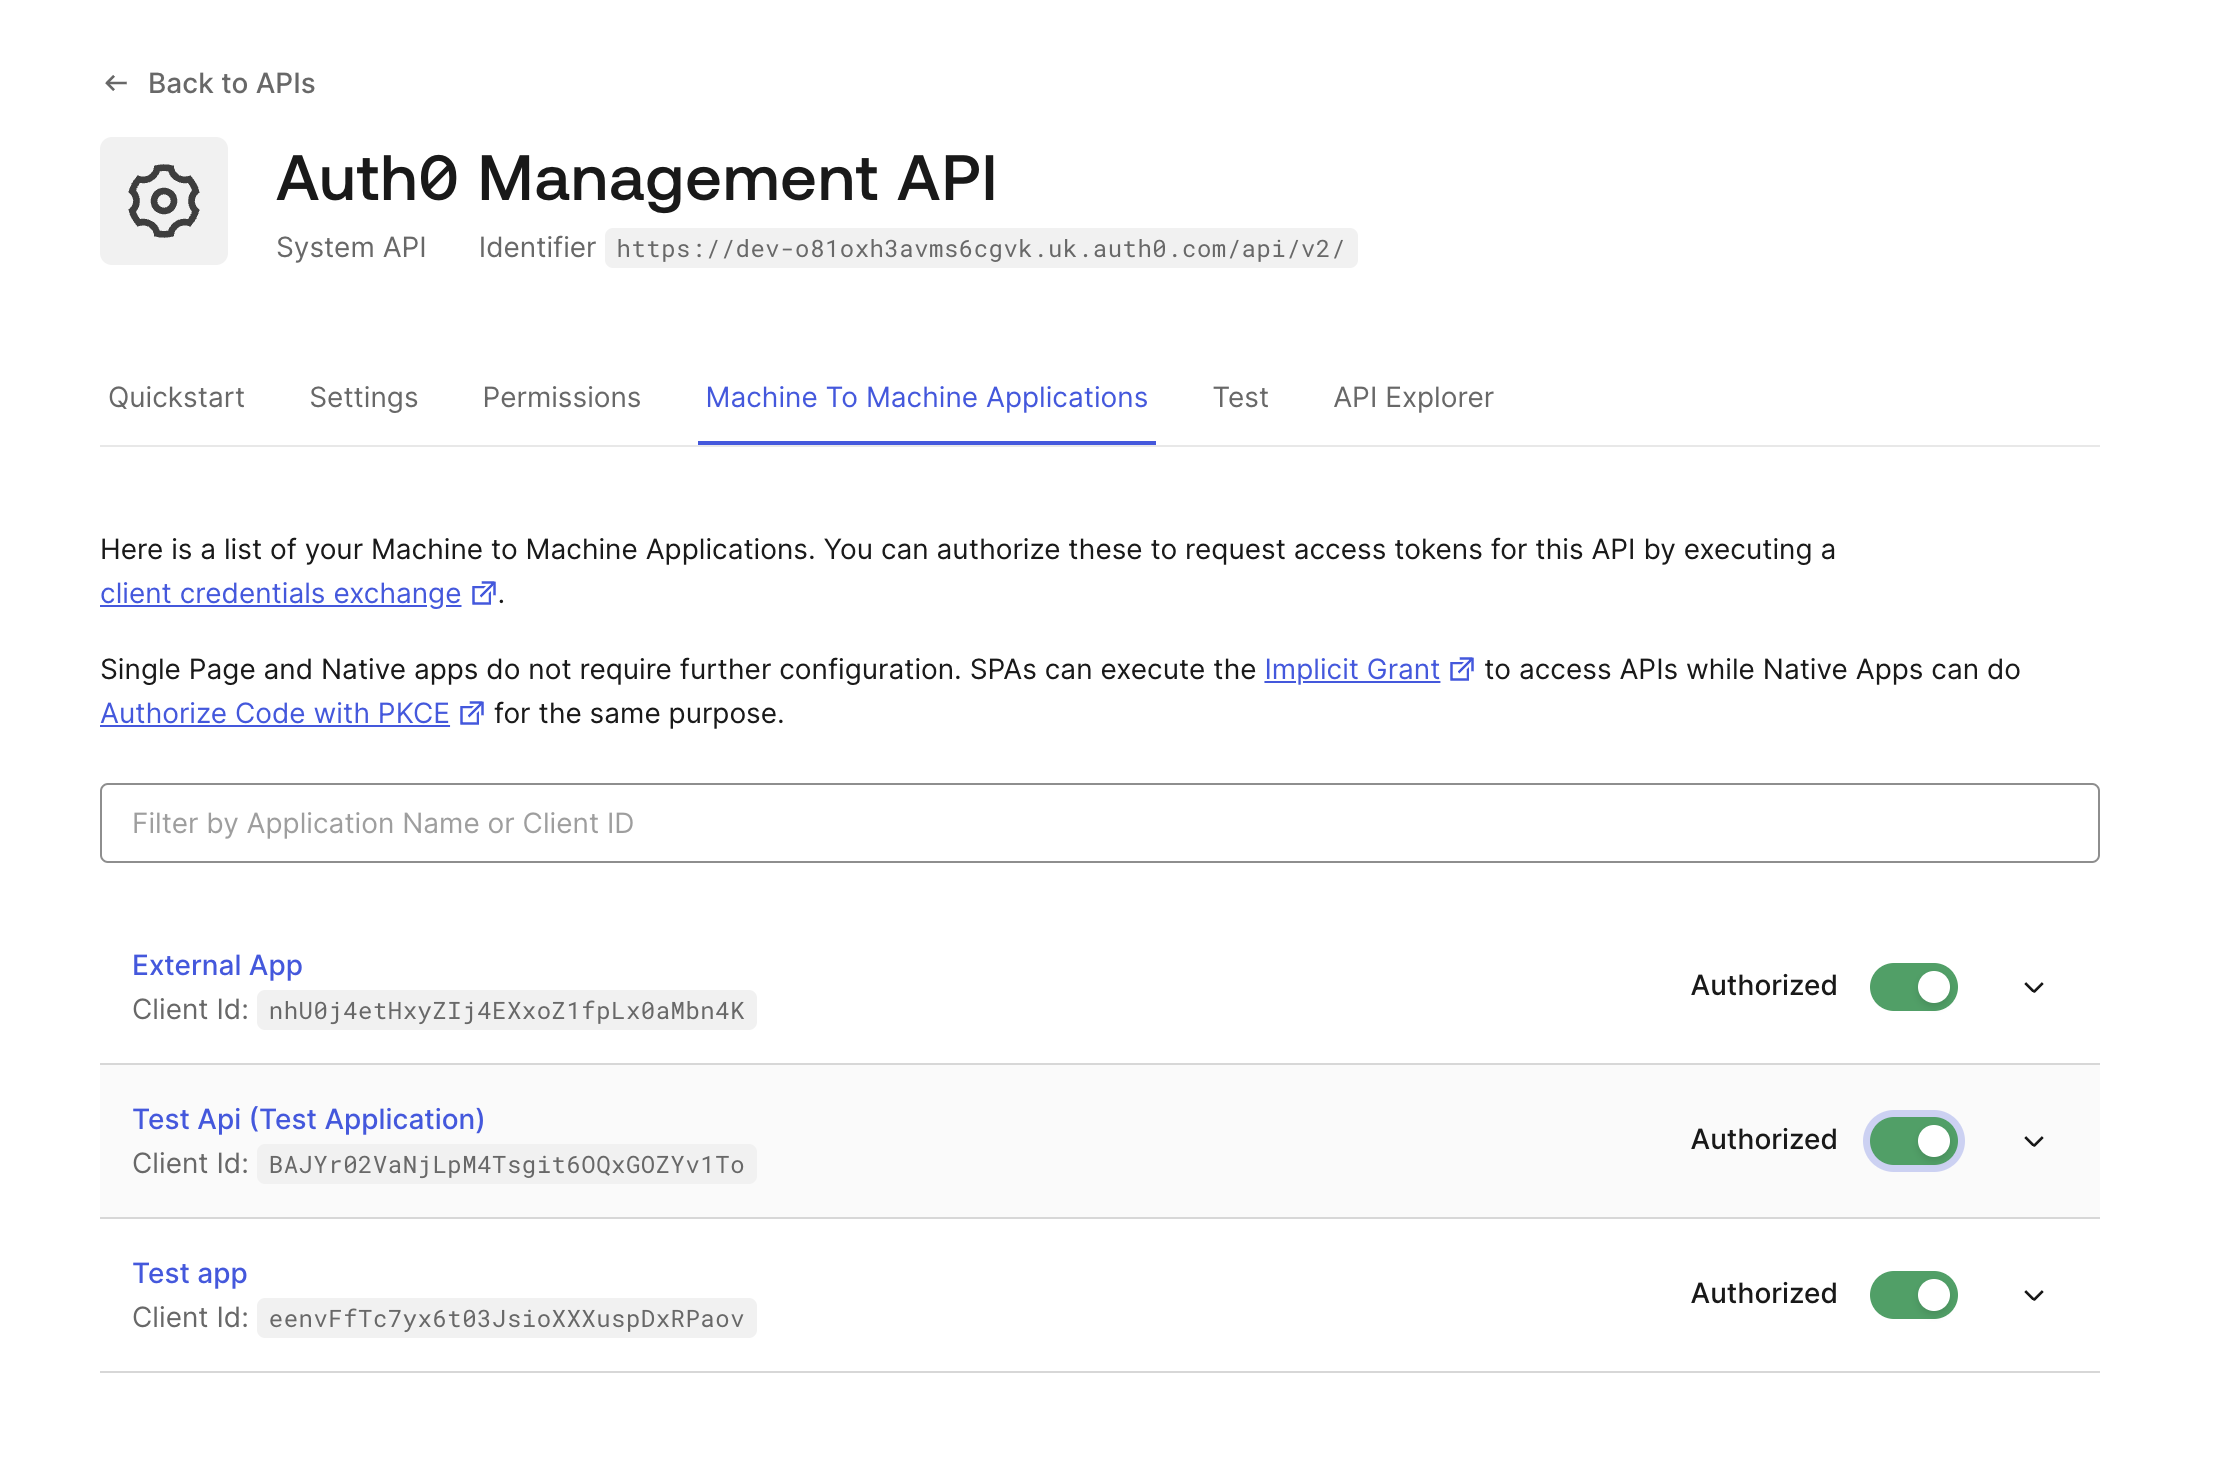
- Open the dropdown menu and select the permissions you want to give the app. Check the
read:usersandread:rolespermissions' boxes. Click the Update button to finalize the configuration.
-
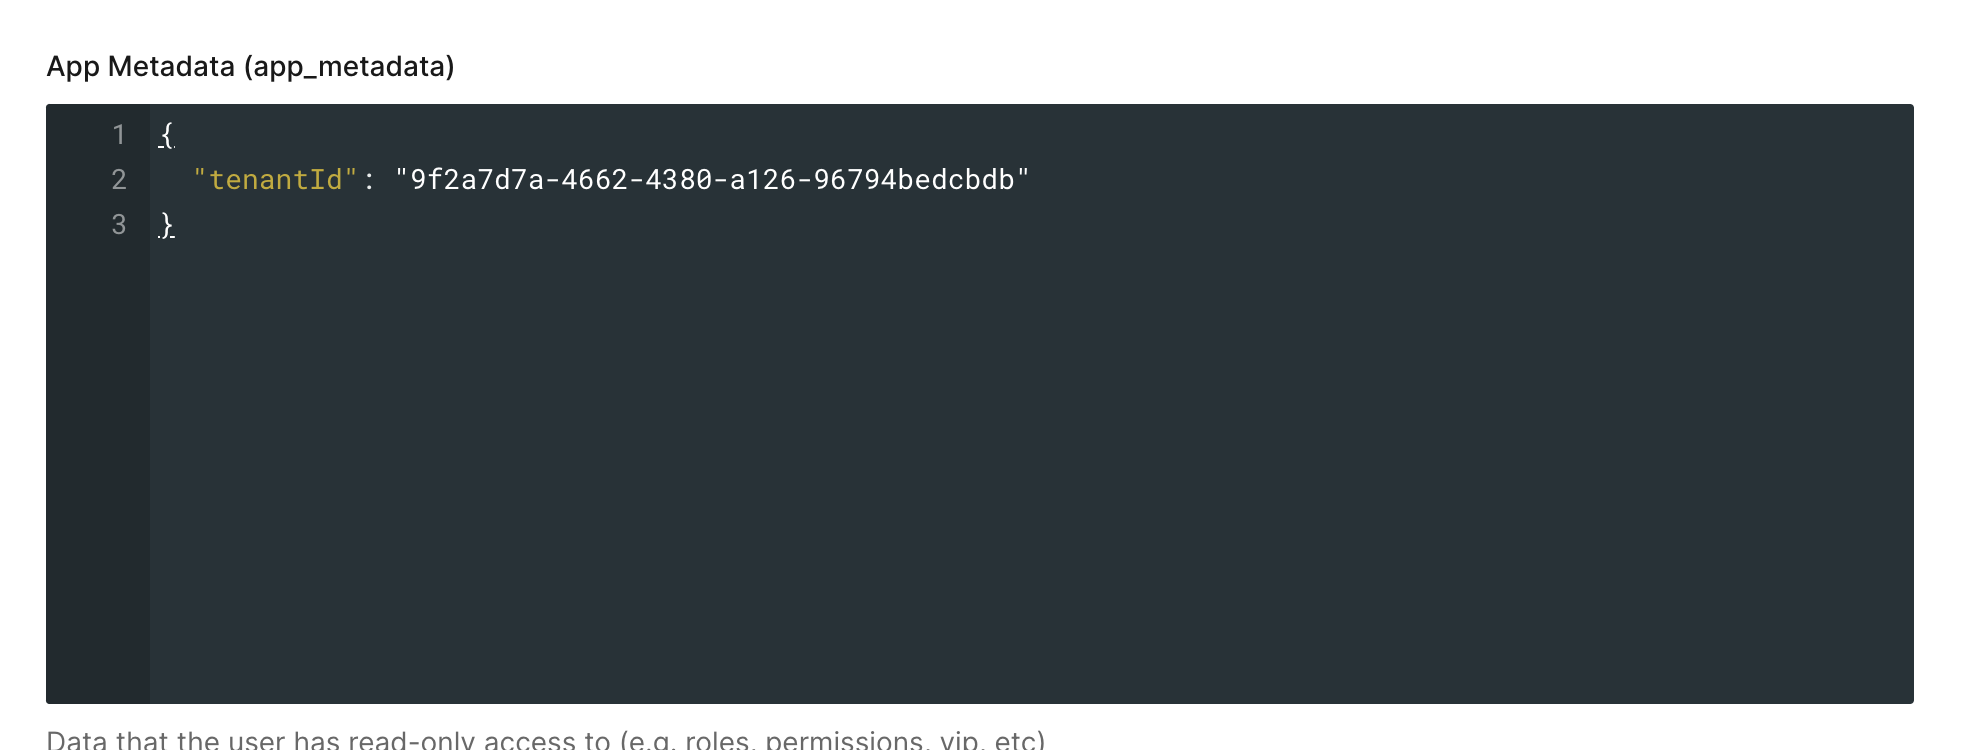
Users Page → [USER] → app_metadata → <
tenant_id_field_name>: <frontegg_tenant_id>
-
To map user roles, add the role on Auth0 - set the name of the role as the same
keyof the corresponding Frontegg role.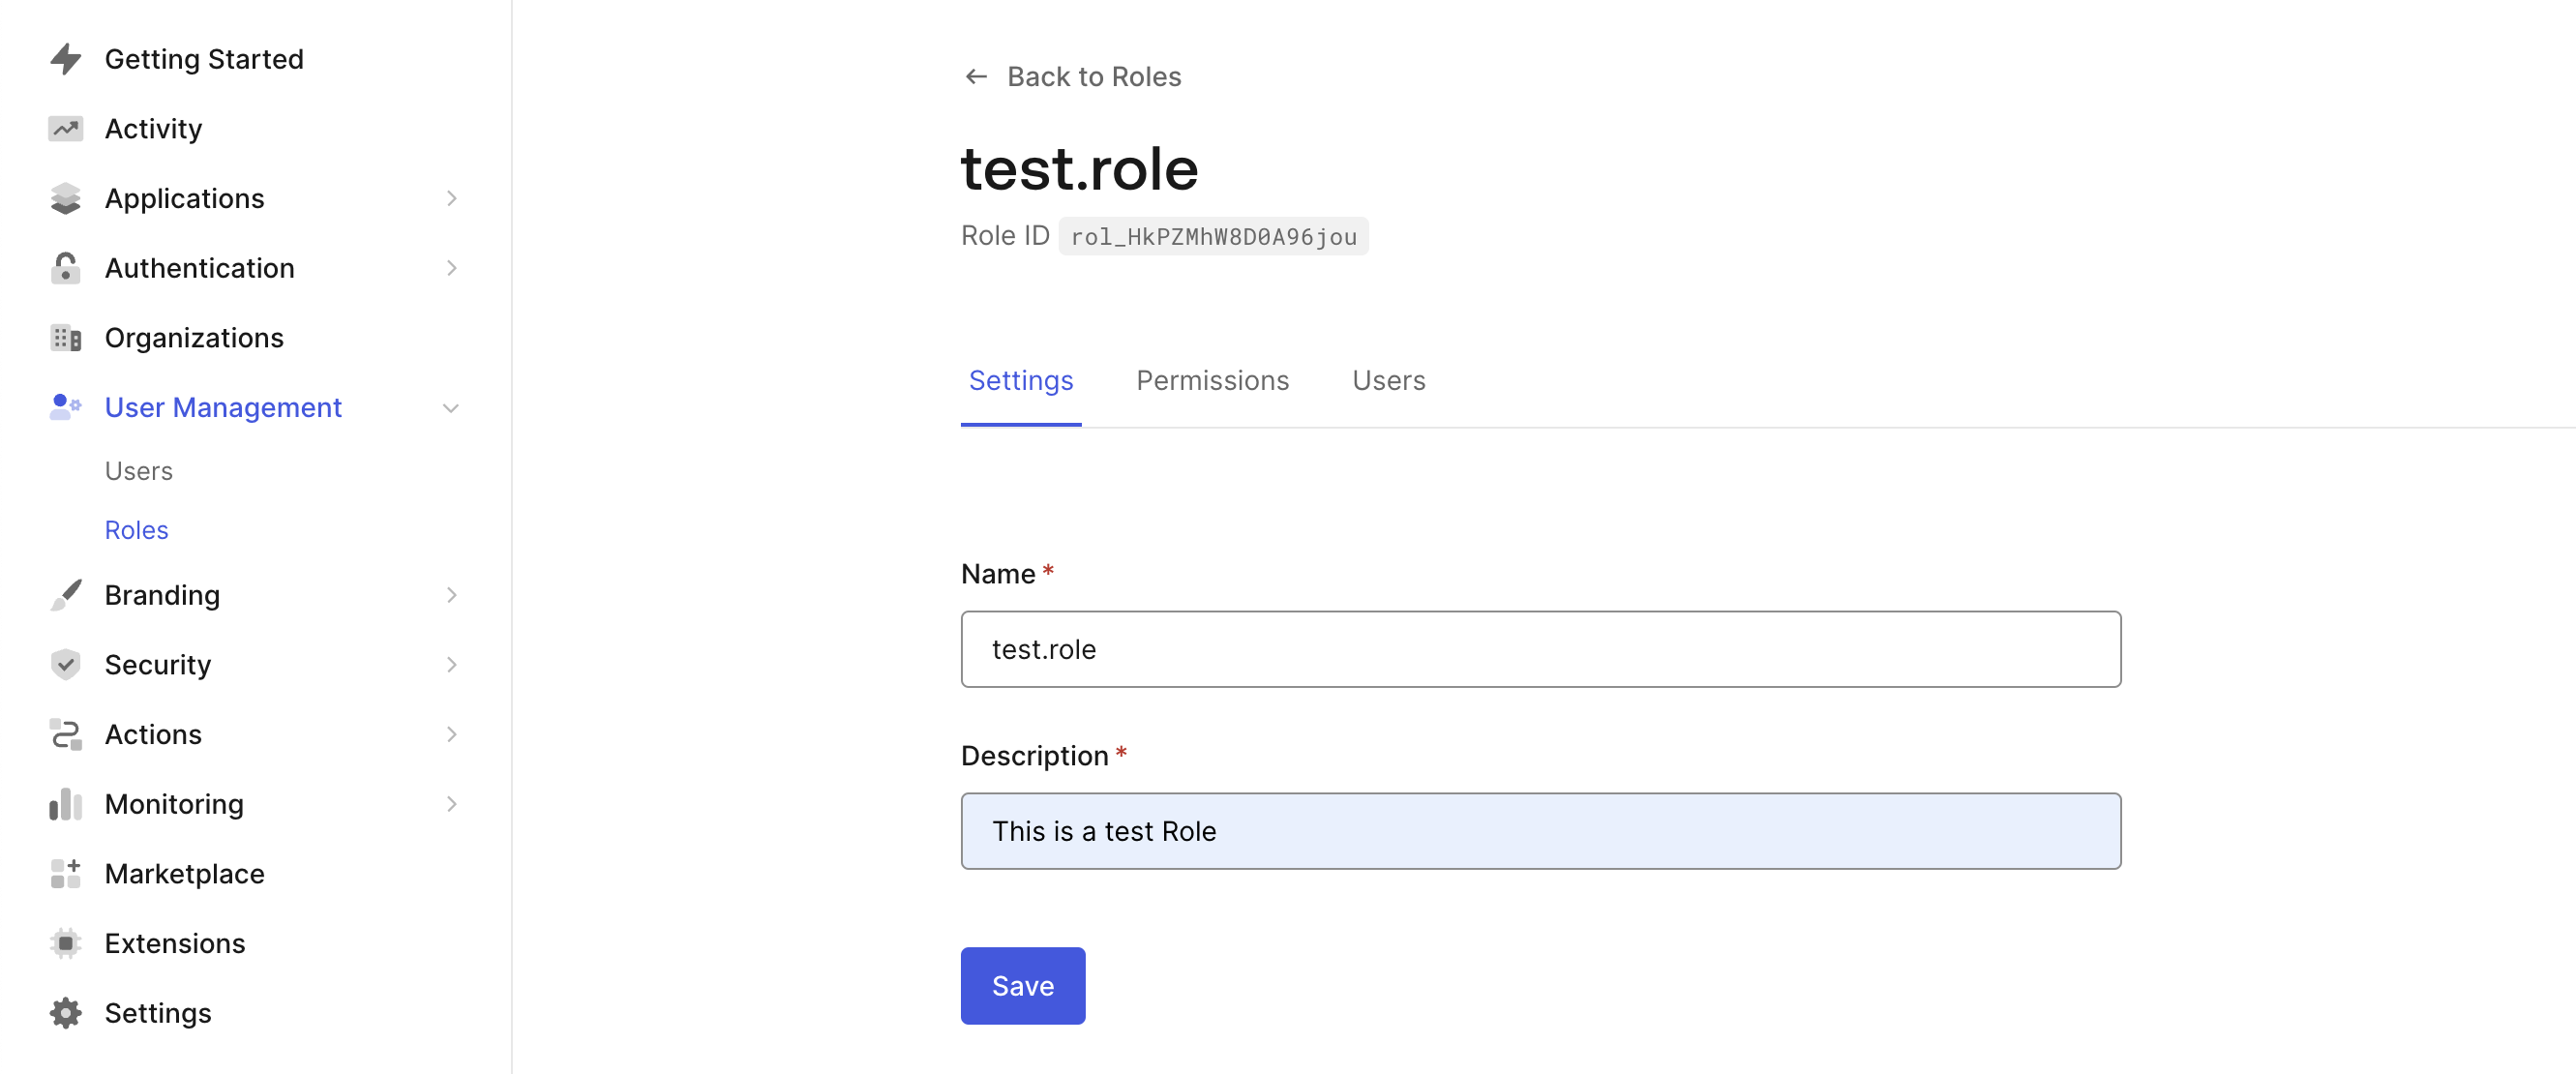
Custom Code
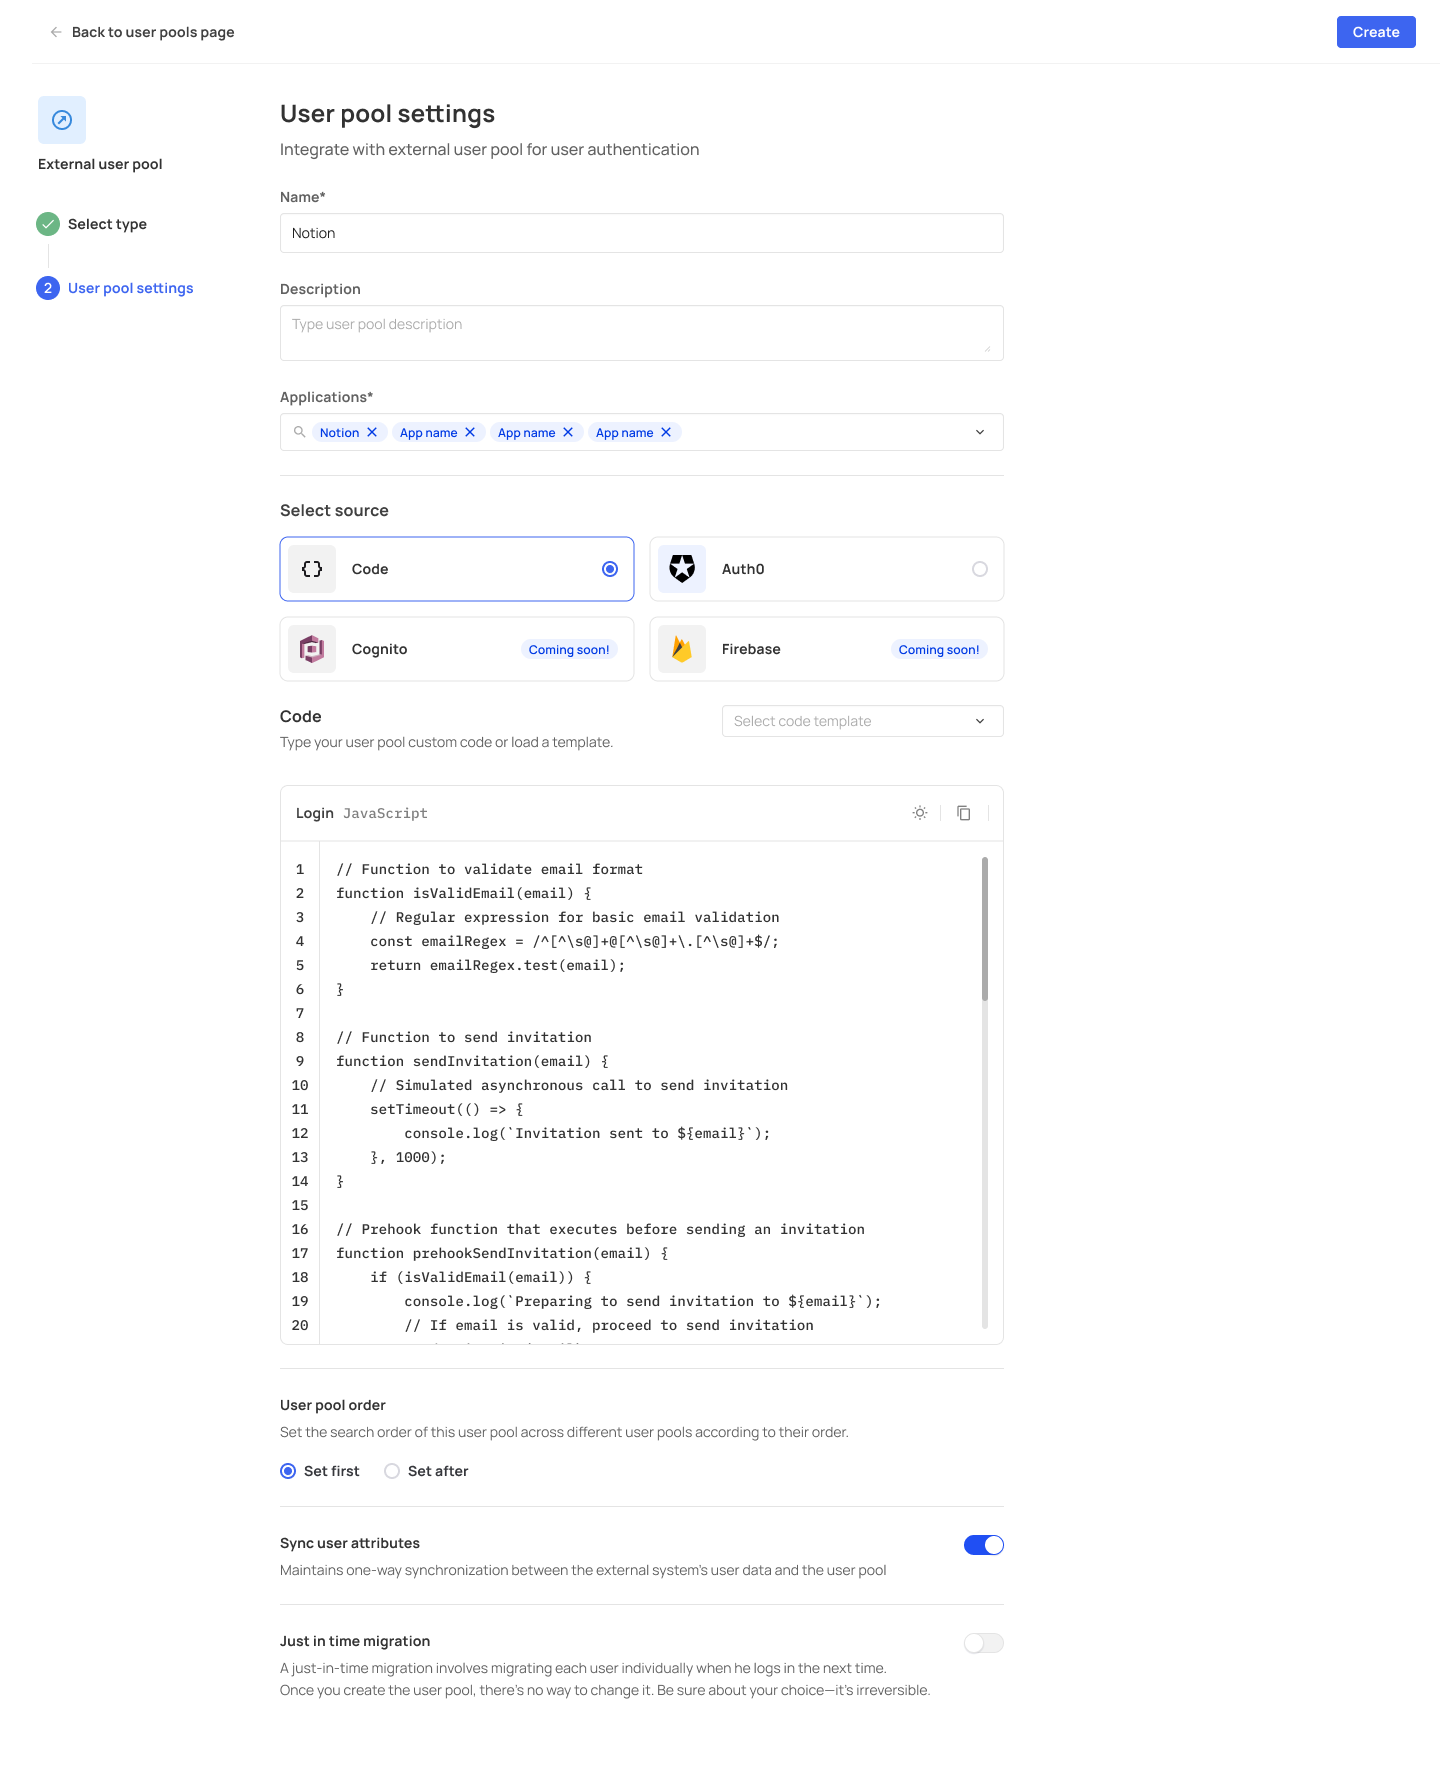
You can choose to fetch user pools from external resources via custom code, which is available under the Other Source option.
Amazon Cognito
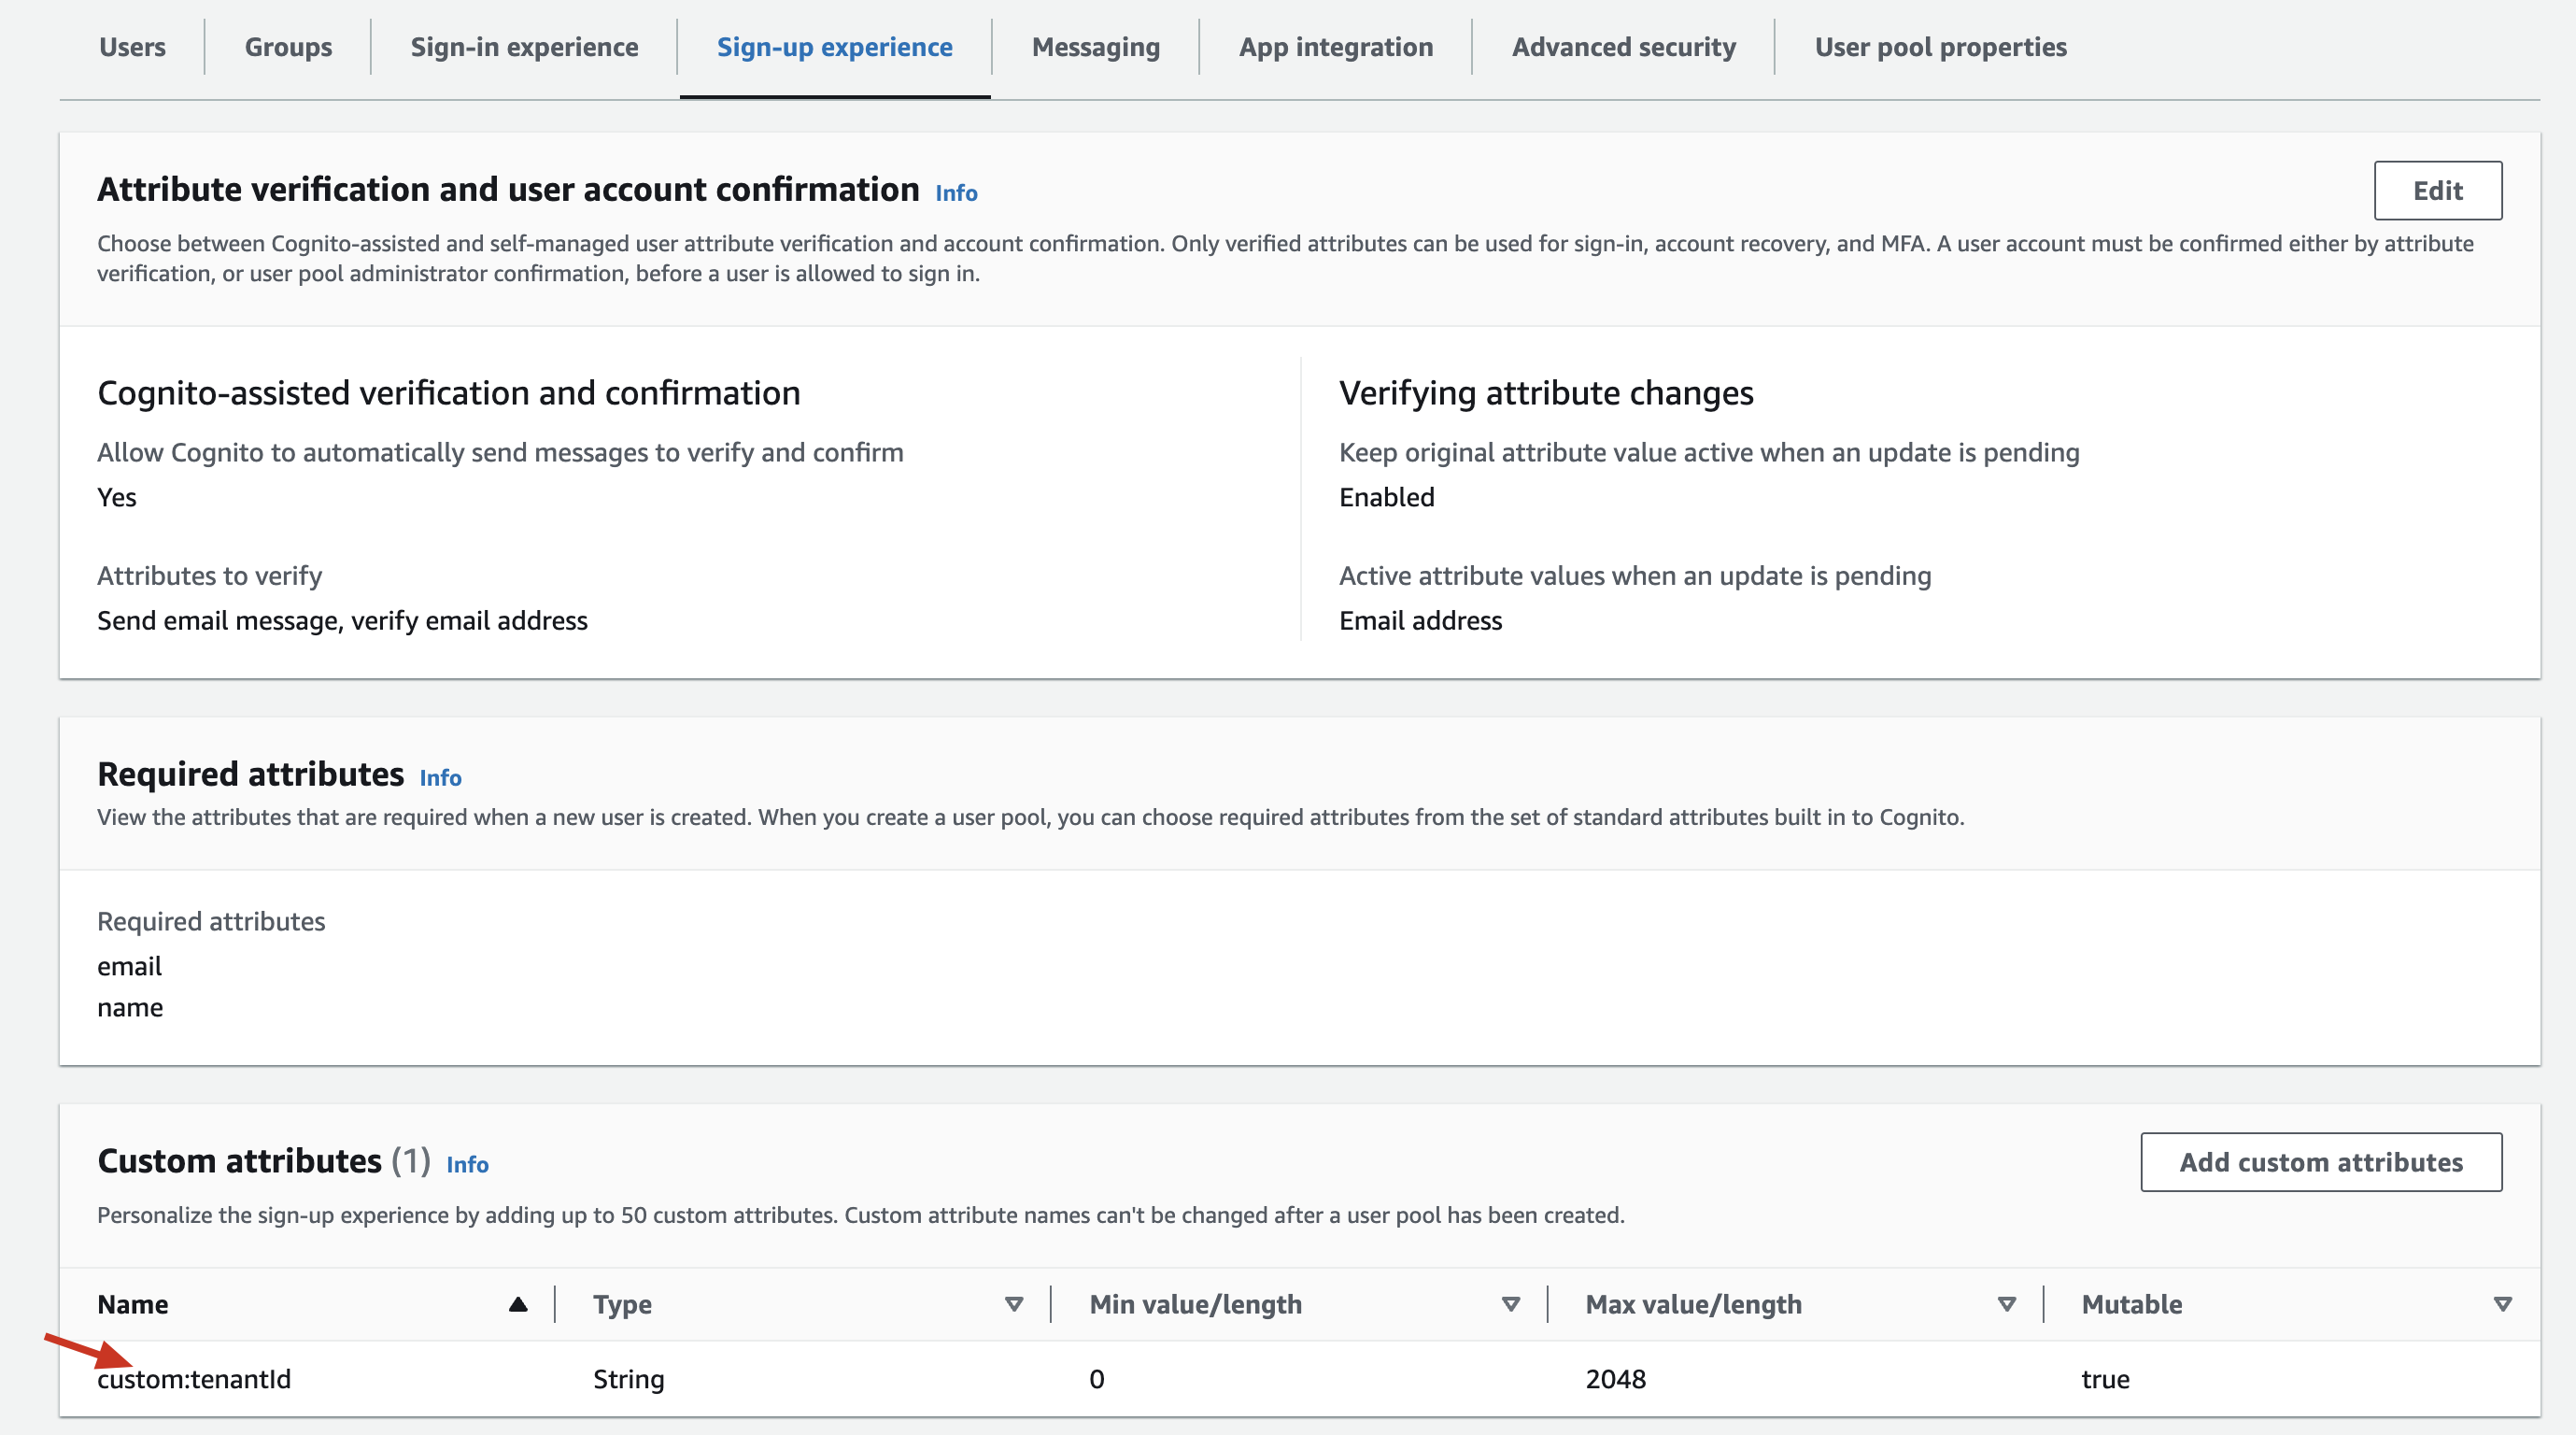
You can create user pools originating in your Amazon Cognito account. To allow proper synching of your Cognito users into Frontegg's user pool, you will need to adhere to the following guidelines:
-
Each user on Amazon Cognito's side should have a custom attribute where the Name of the attribute should be identical to the value of the
custom:<tenantIdFieldName>that was used in the pool’s configuration.
-
Next, in the Edit User section (Amazon Cognito > User Pools) , under the Optional attributes section, then enter the ID of the relevant Frontegg tenant as the Value of the
custom:tenantId: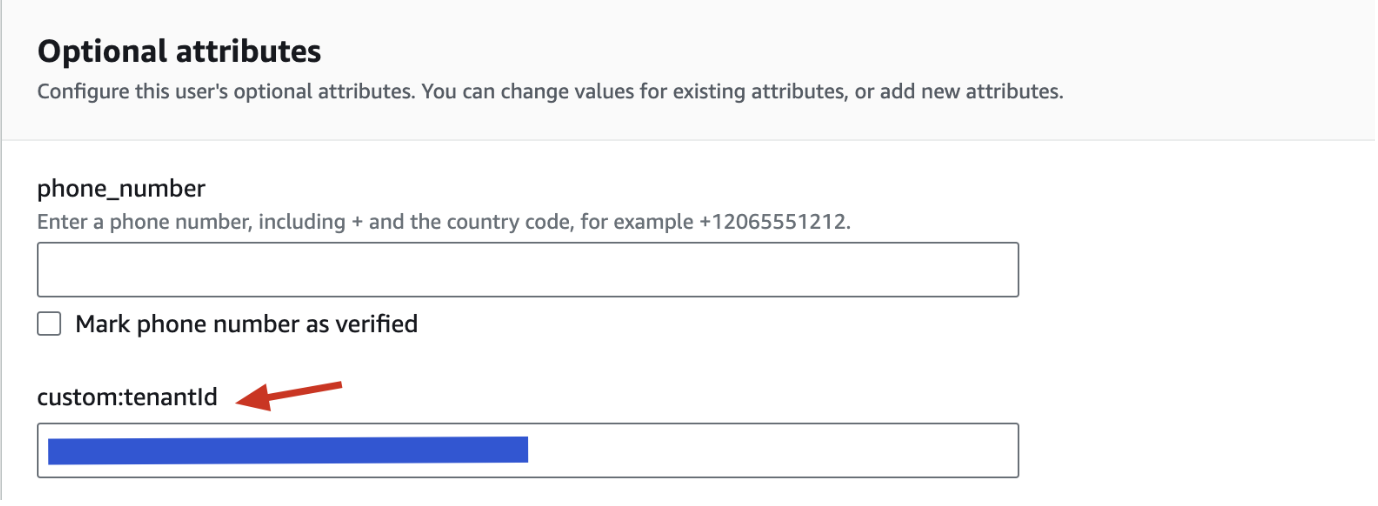
-
Go to the Edit app client information to enable the
ALLOW_USER_PASSWORD_AUTHauthentication flow, like so:
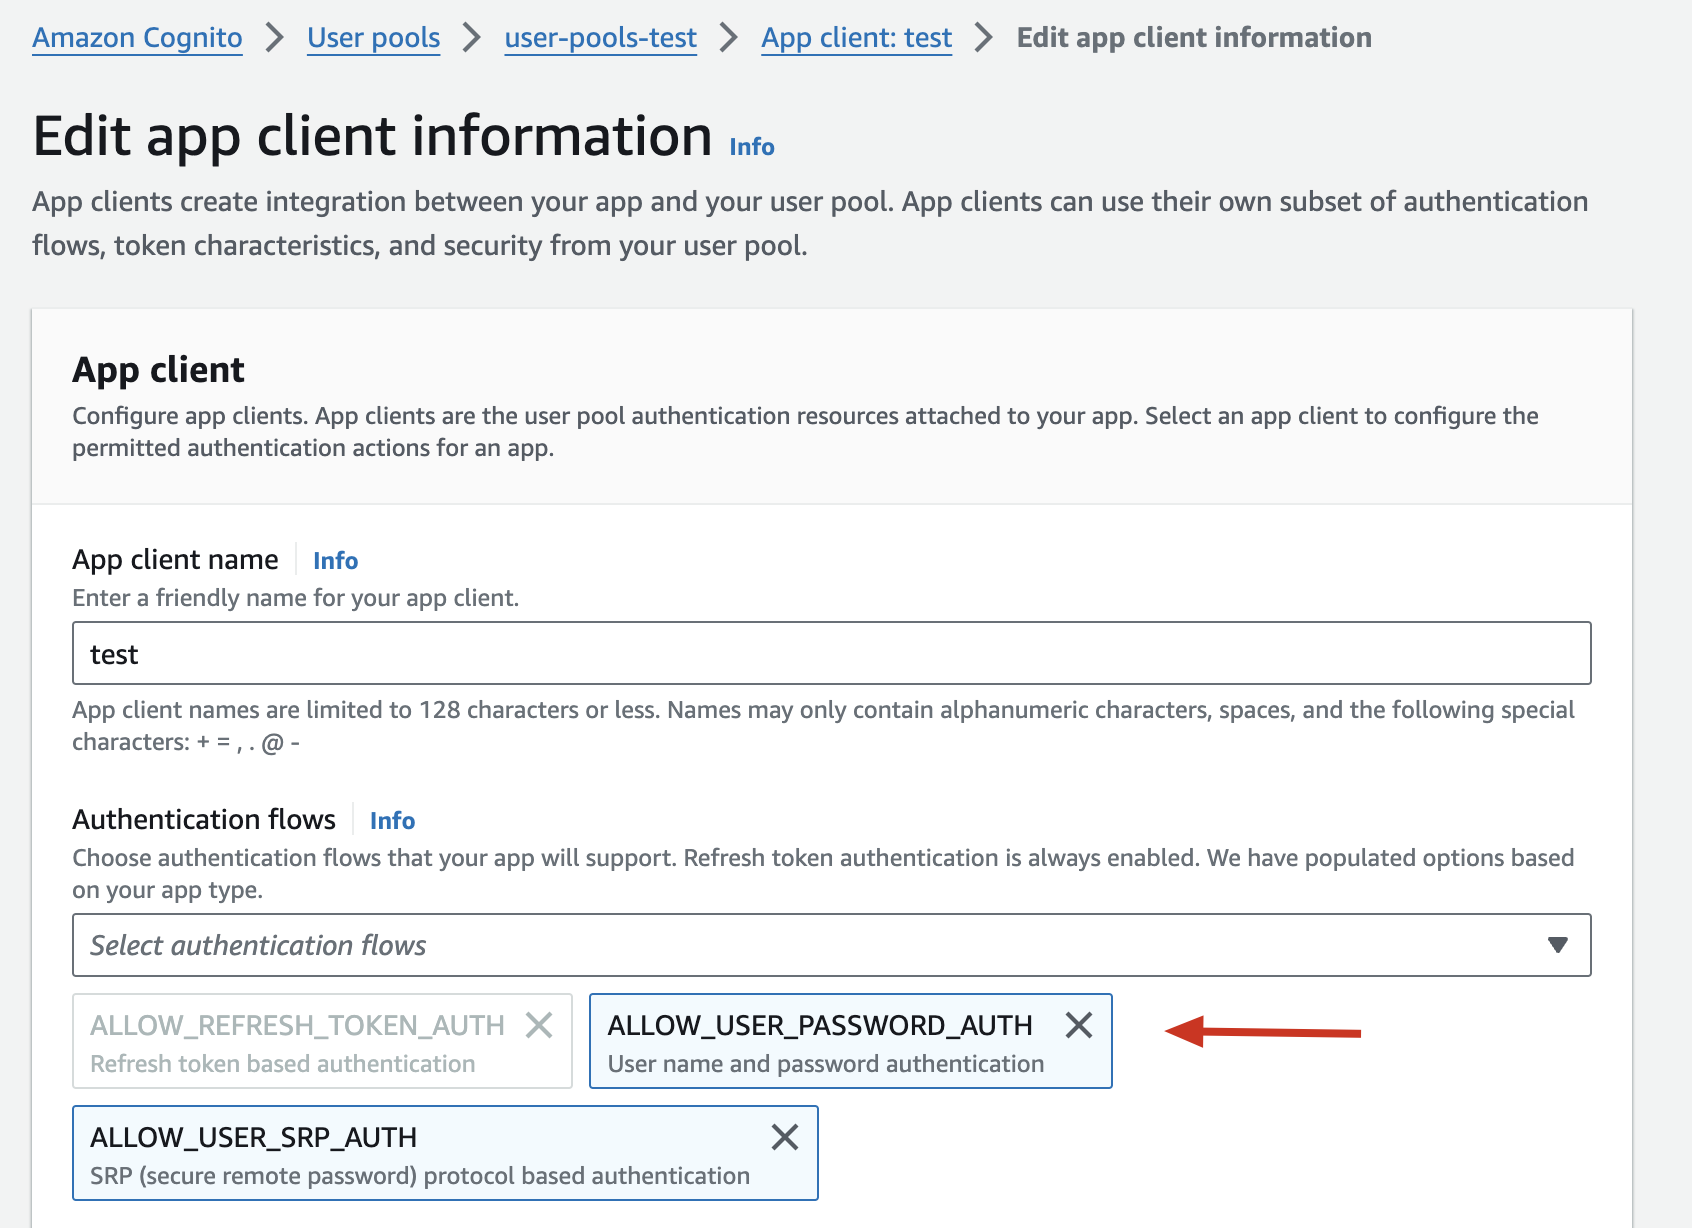
- If your Cognito app is using a
client secret, you should include it when configuring the pool (the FronteggclientSecretfield).
{
  "region": "<AWS_REGION>",
  "clientId": "...", // the client id of the cognito application
  "userPoolId": "...", // the id of the cognito pool
  "clientSecret": "...", //optional
  "tenantIdFieldName": "...",
  "accessKeyId": "...",
  "secretAccessKey": "..."
 }
- Each user should have a custom attribute as such:
Cognito IAM user
We recommend creating an IAM user with read only permission in Cognito. Subsequently, you should create an access key for this account and provide it when configuring the use pool on Frontegg (i.e., include the
accessKeyId, secretAccessKeyattributes).
Google Firebase
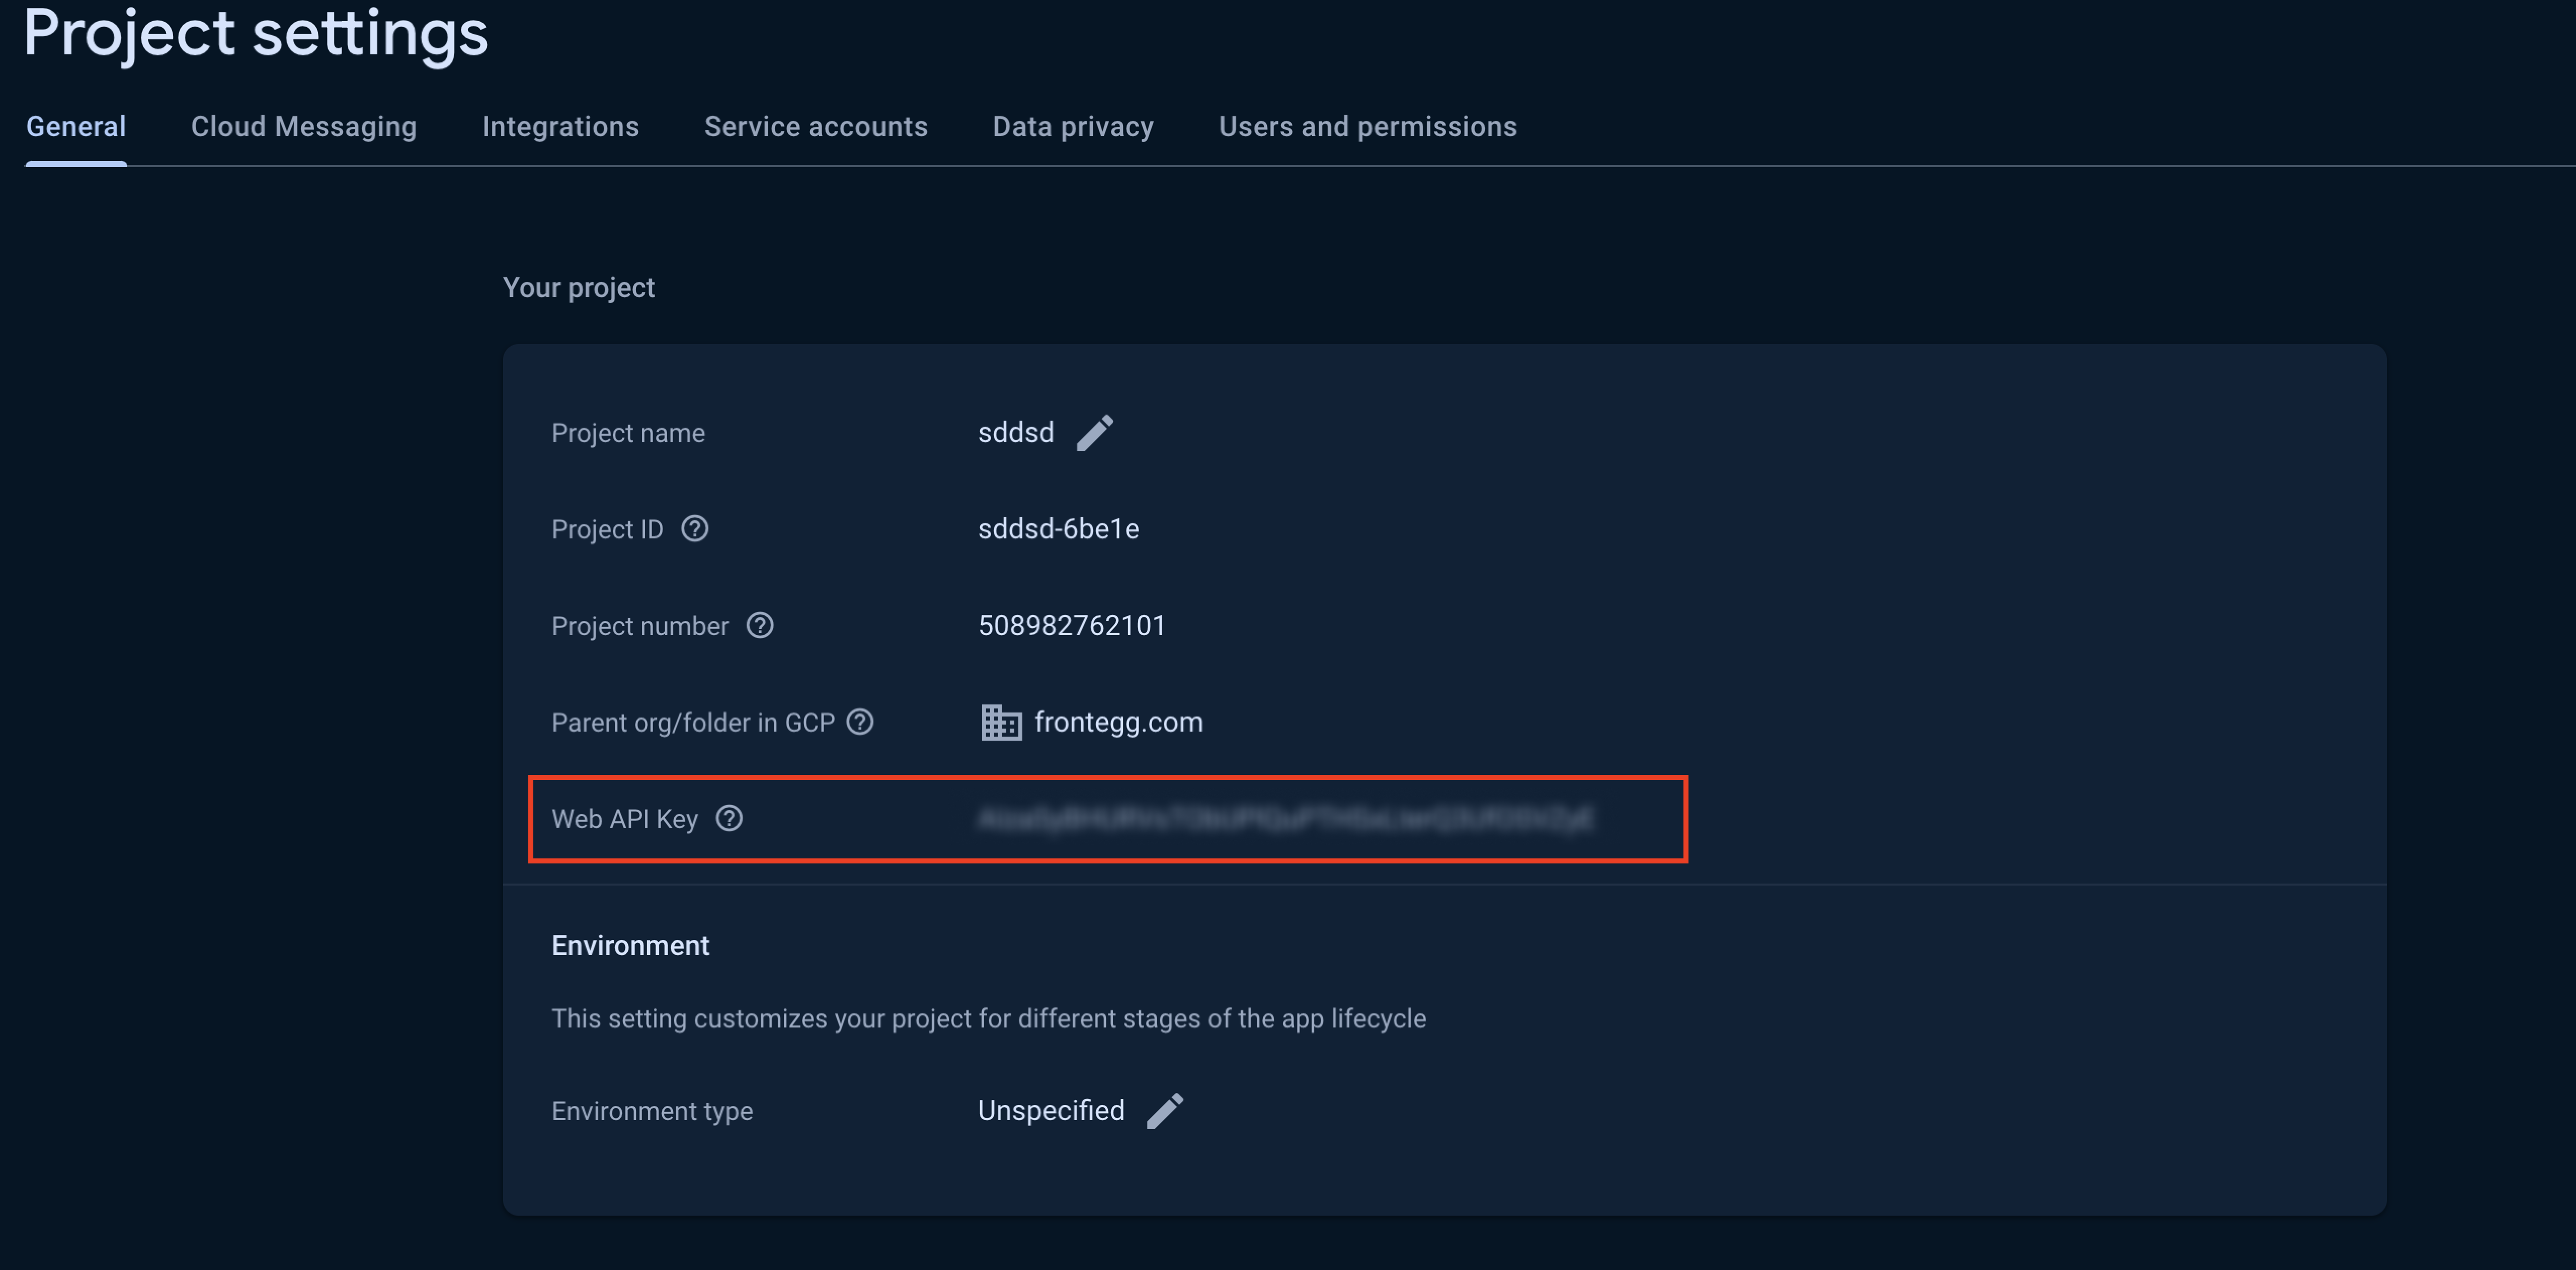
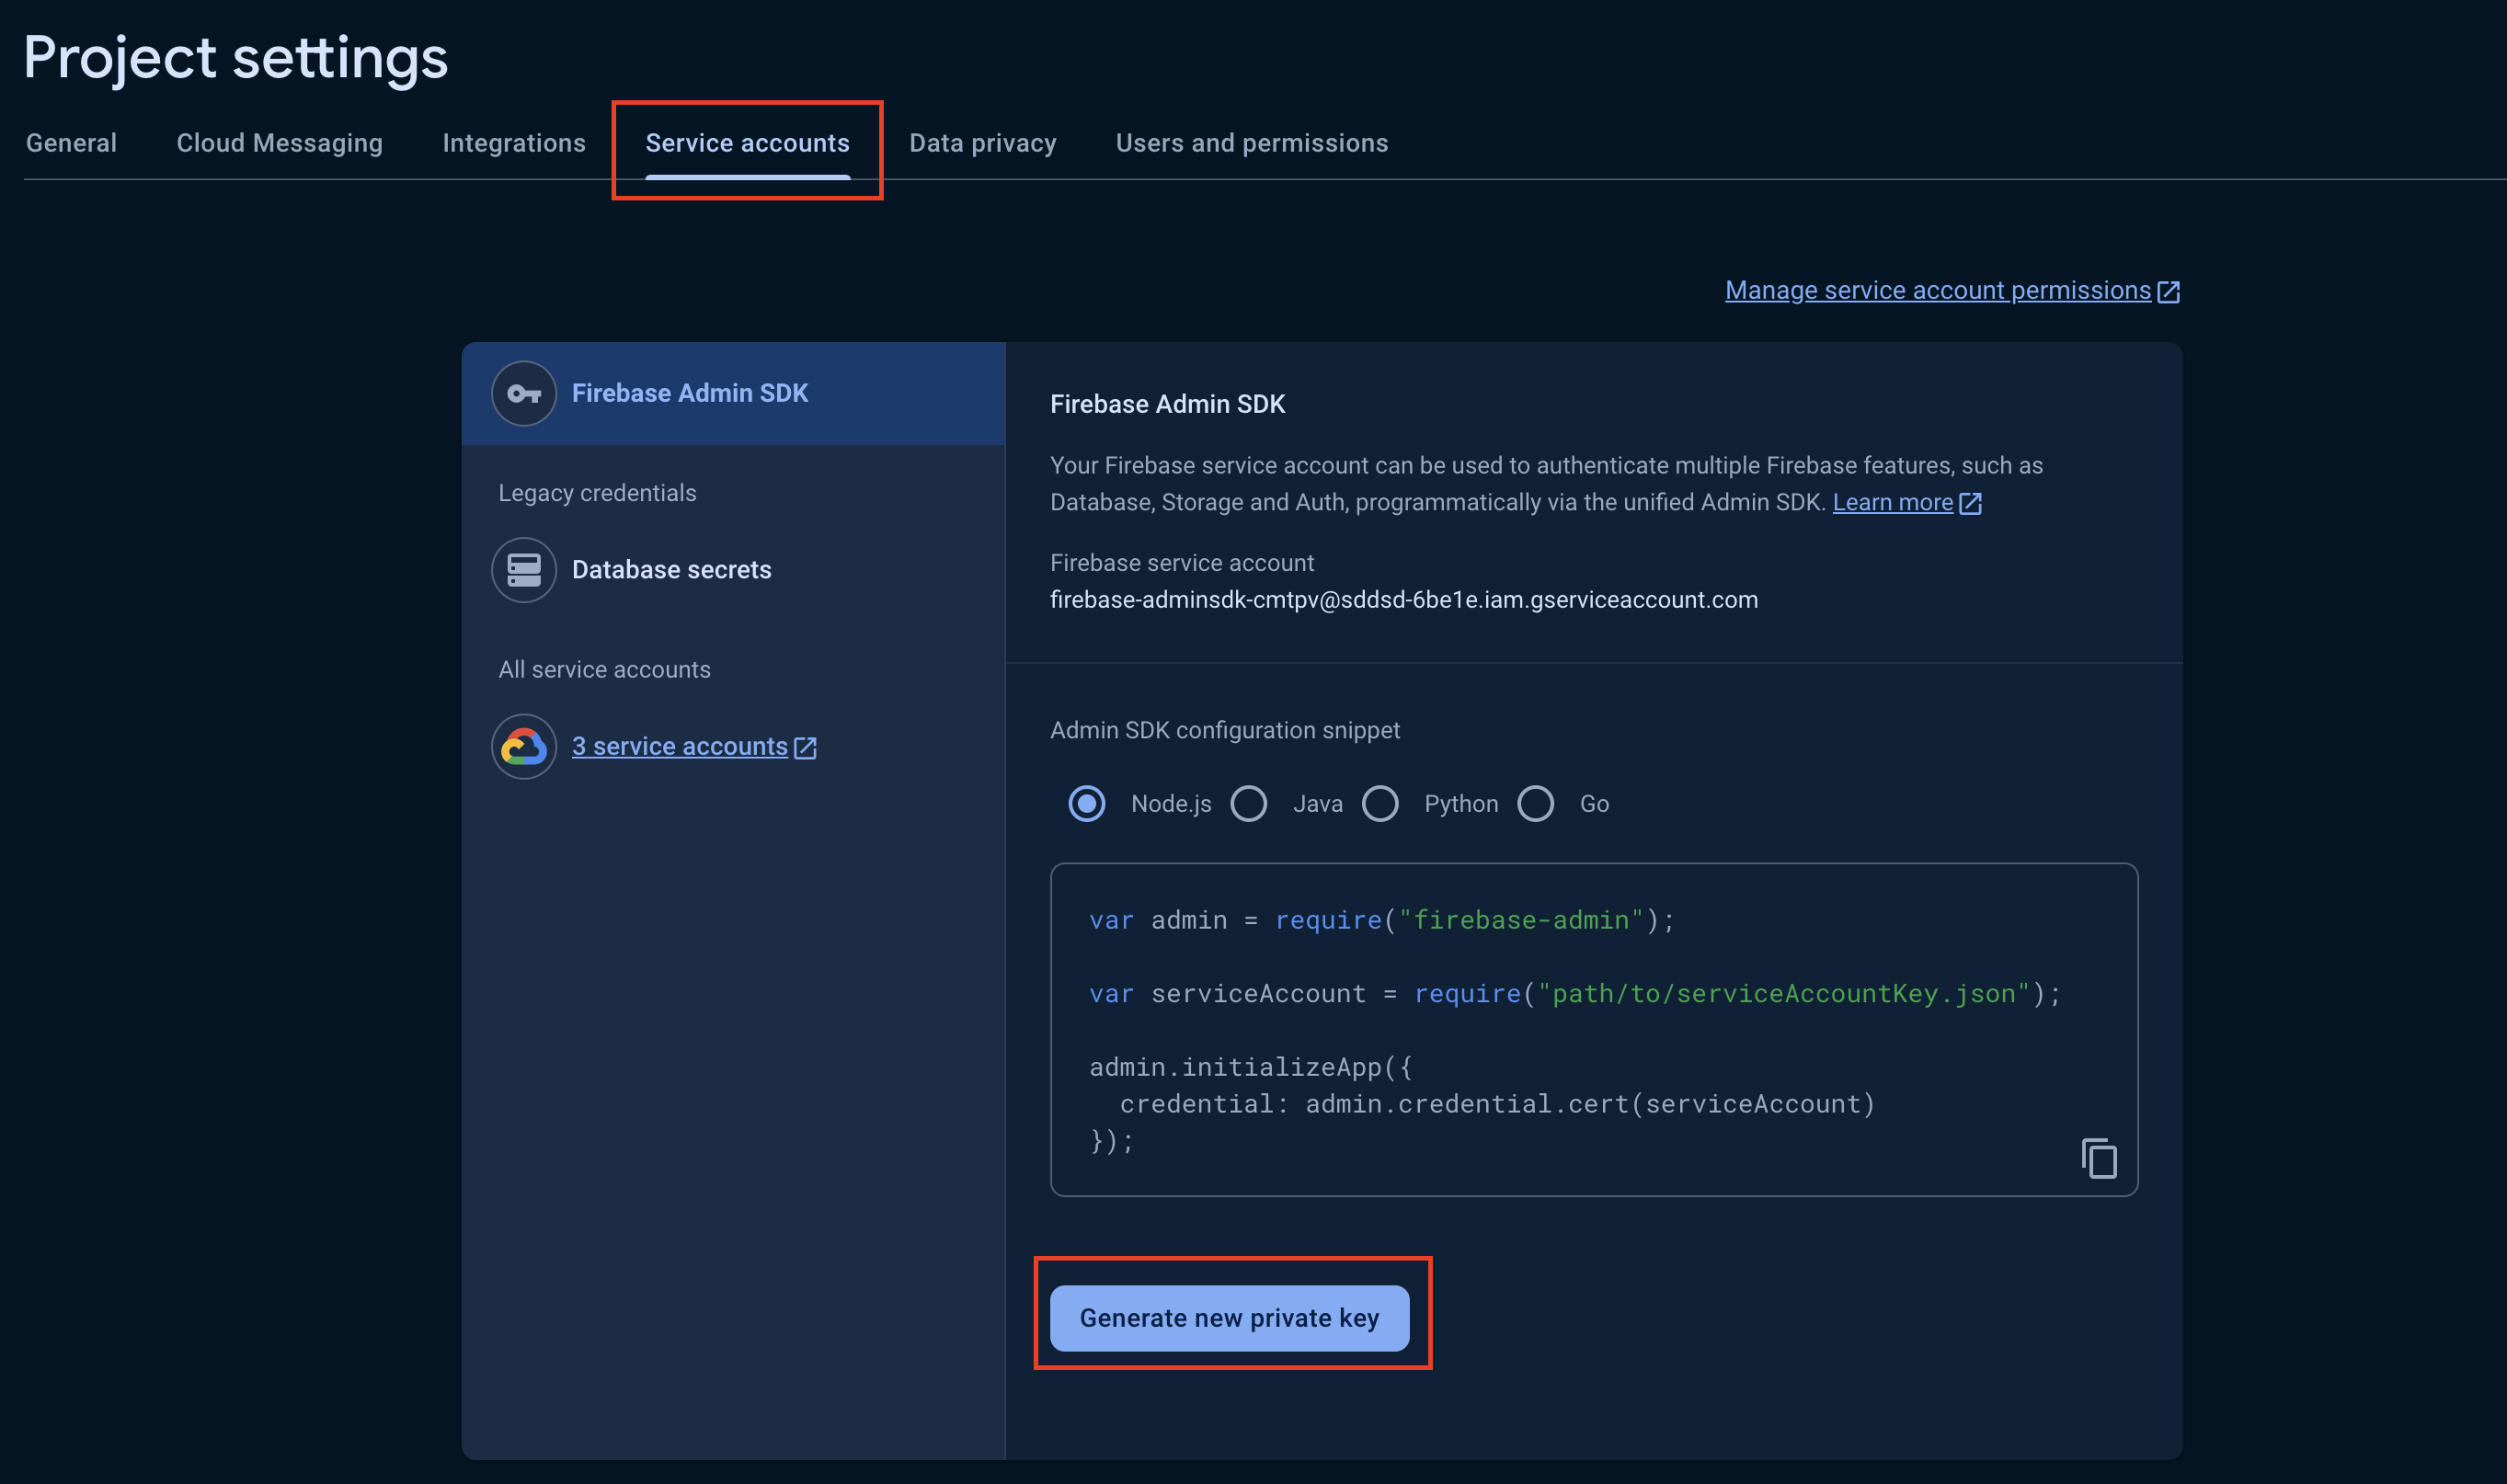
To create a user pool from your Google Firebase account you will need to get a Web API Key and a Private key from your Firebase project.
Go to your Firebase project and copy your Web API Key from the General tab:
Then, go to the service account tab and press the Generate new private key button. Open the downloaded file with your textEditor and copy the key.
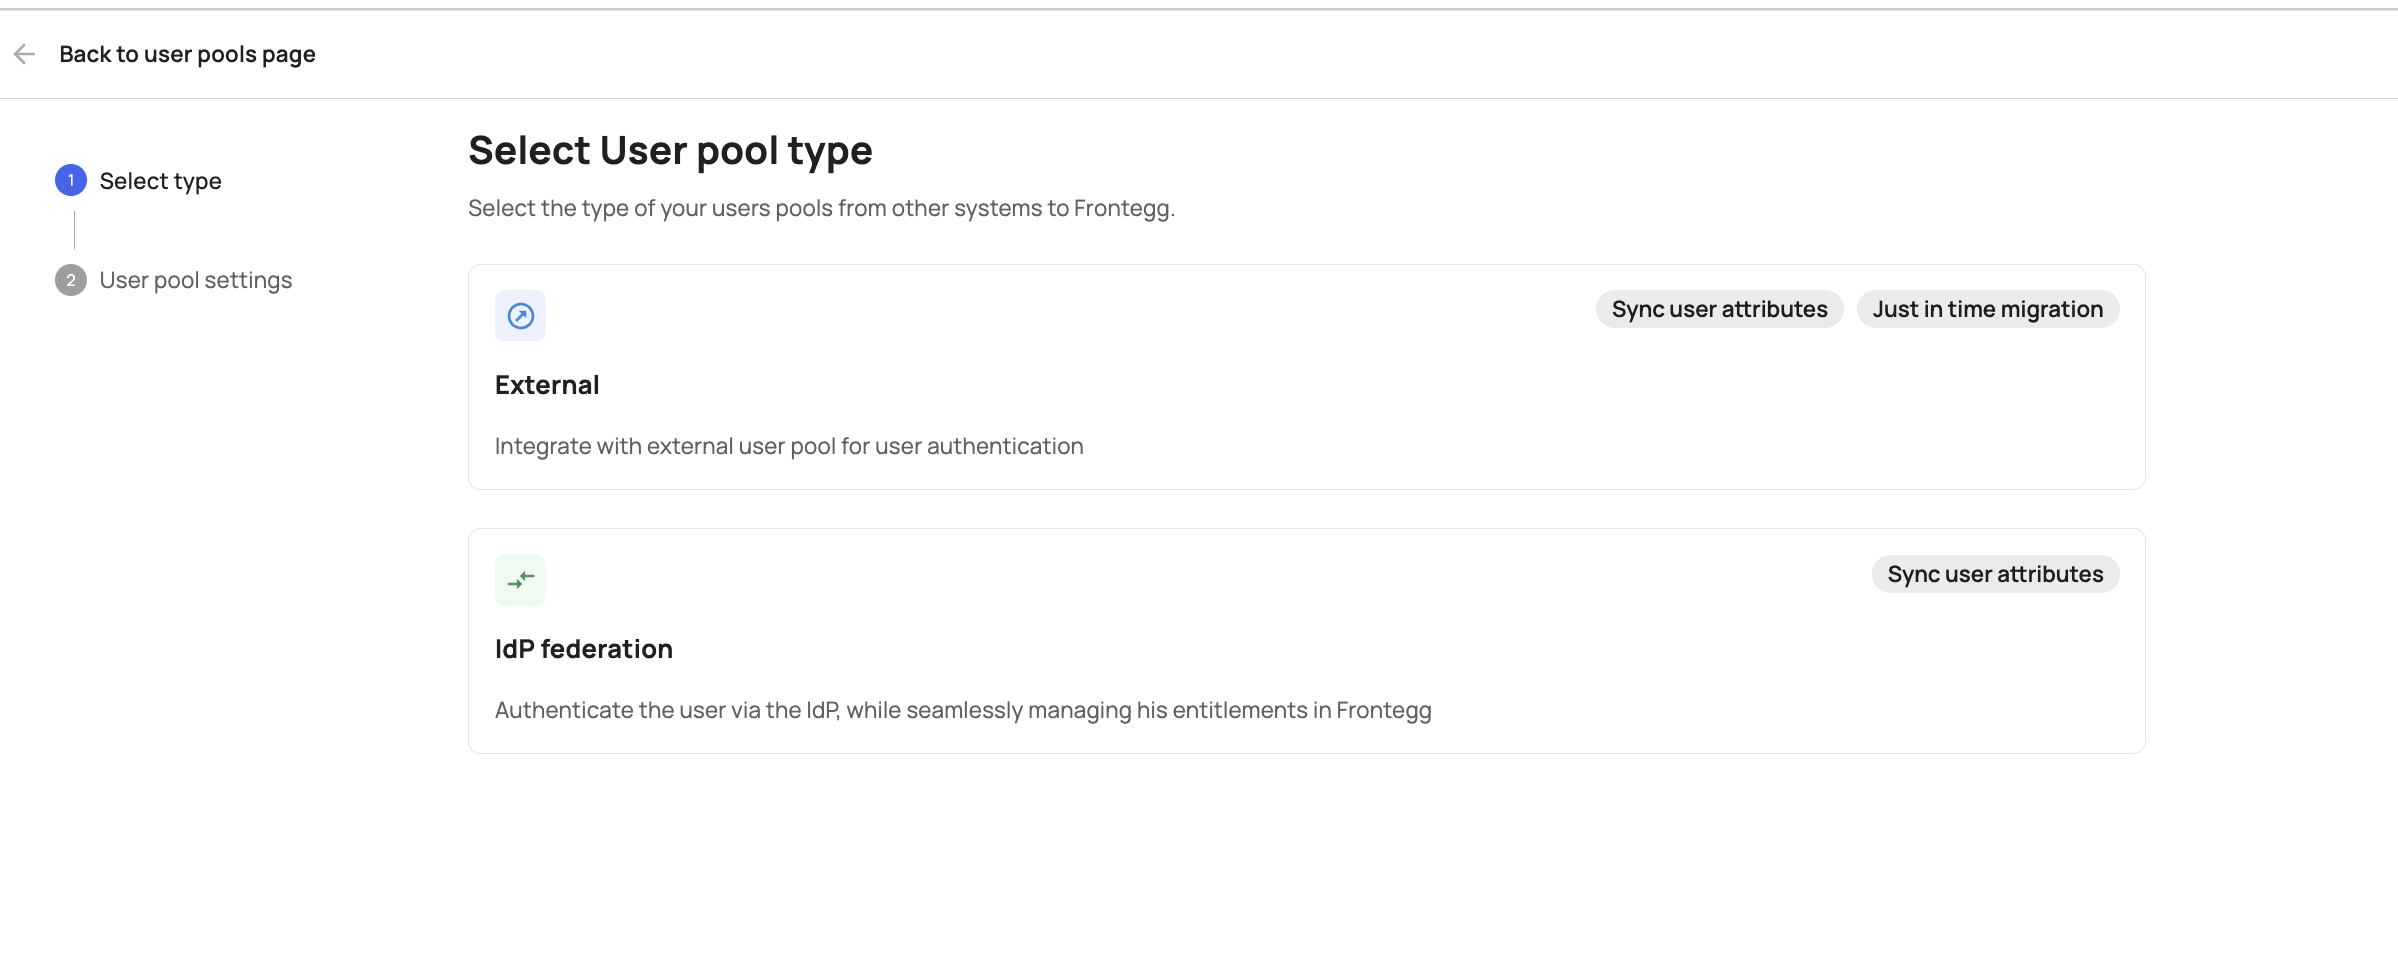
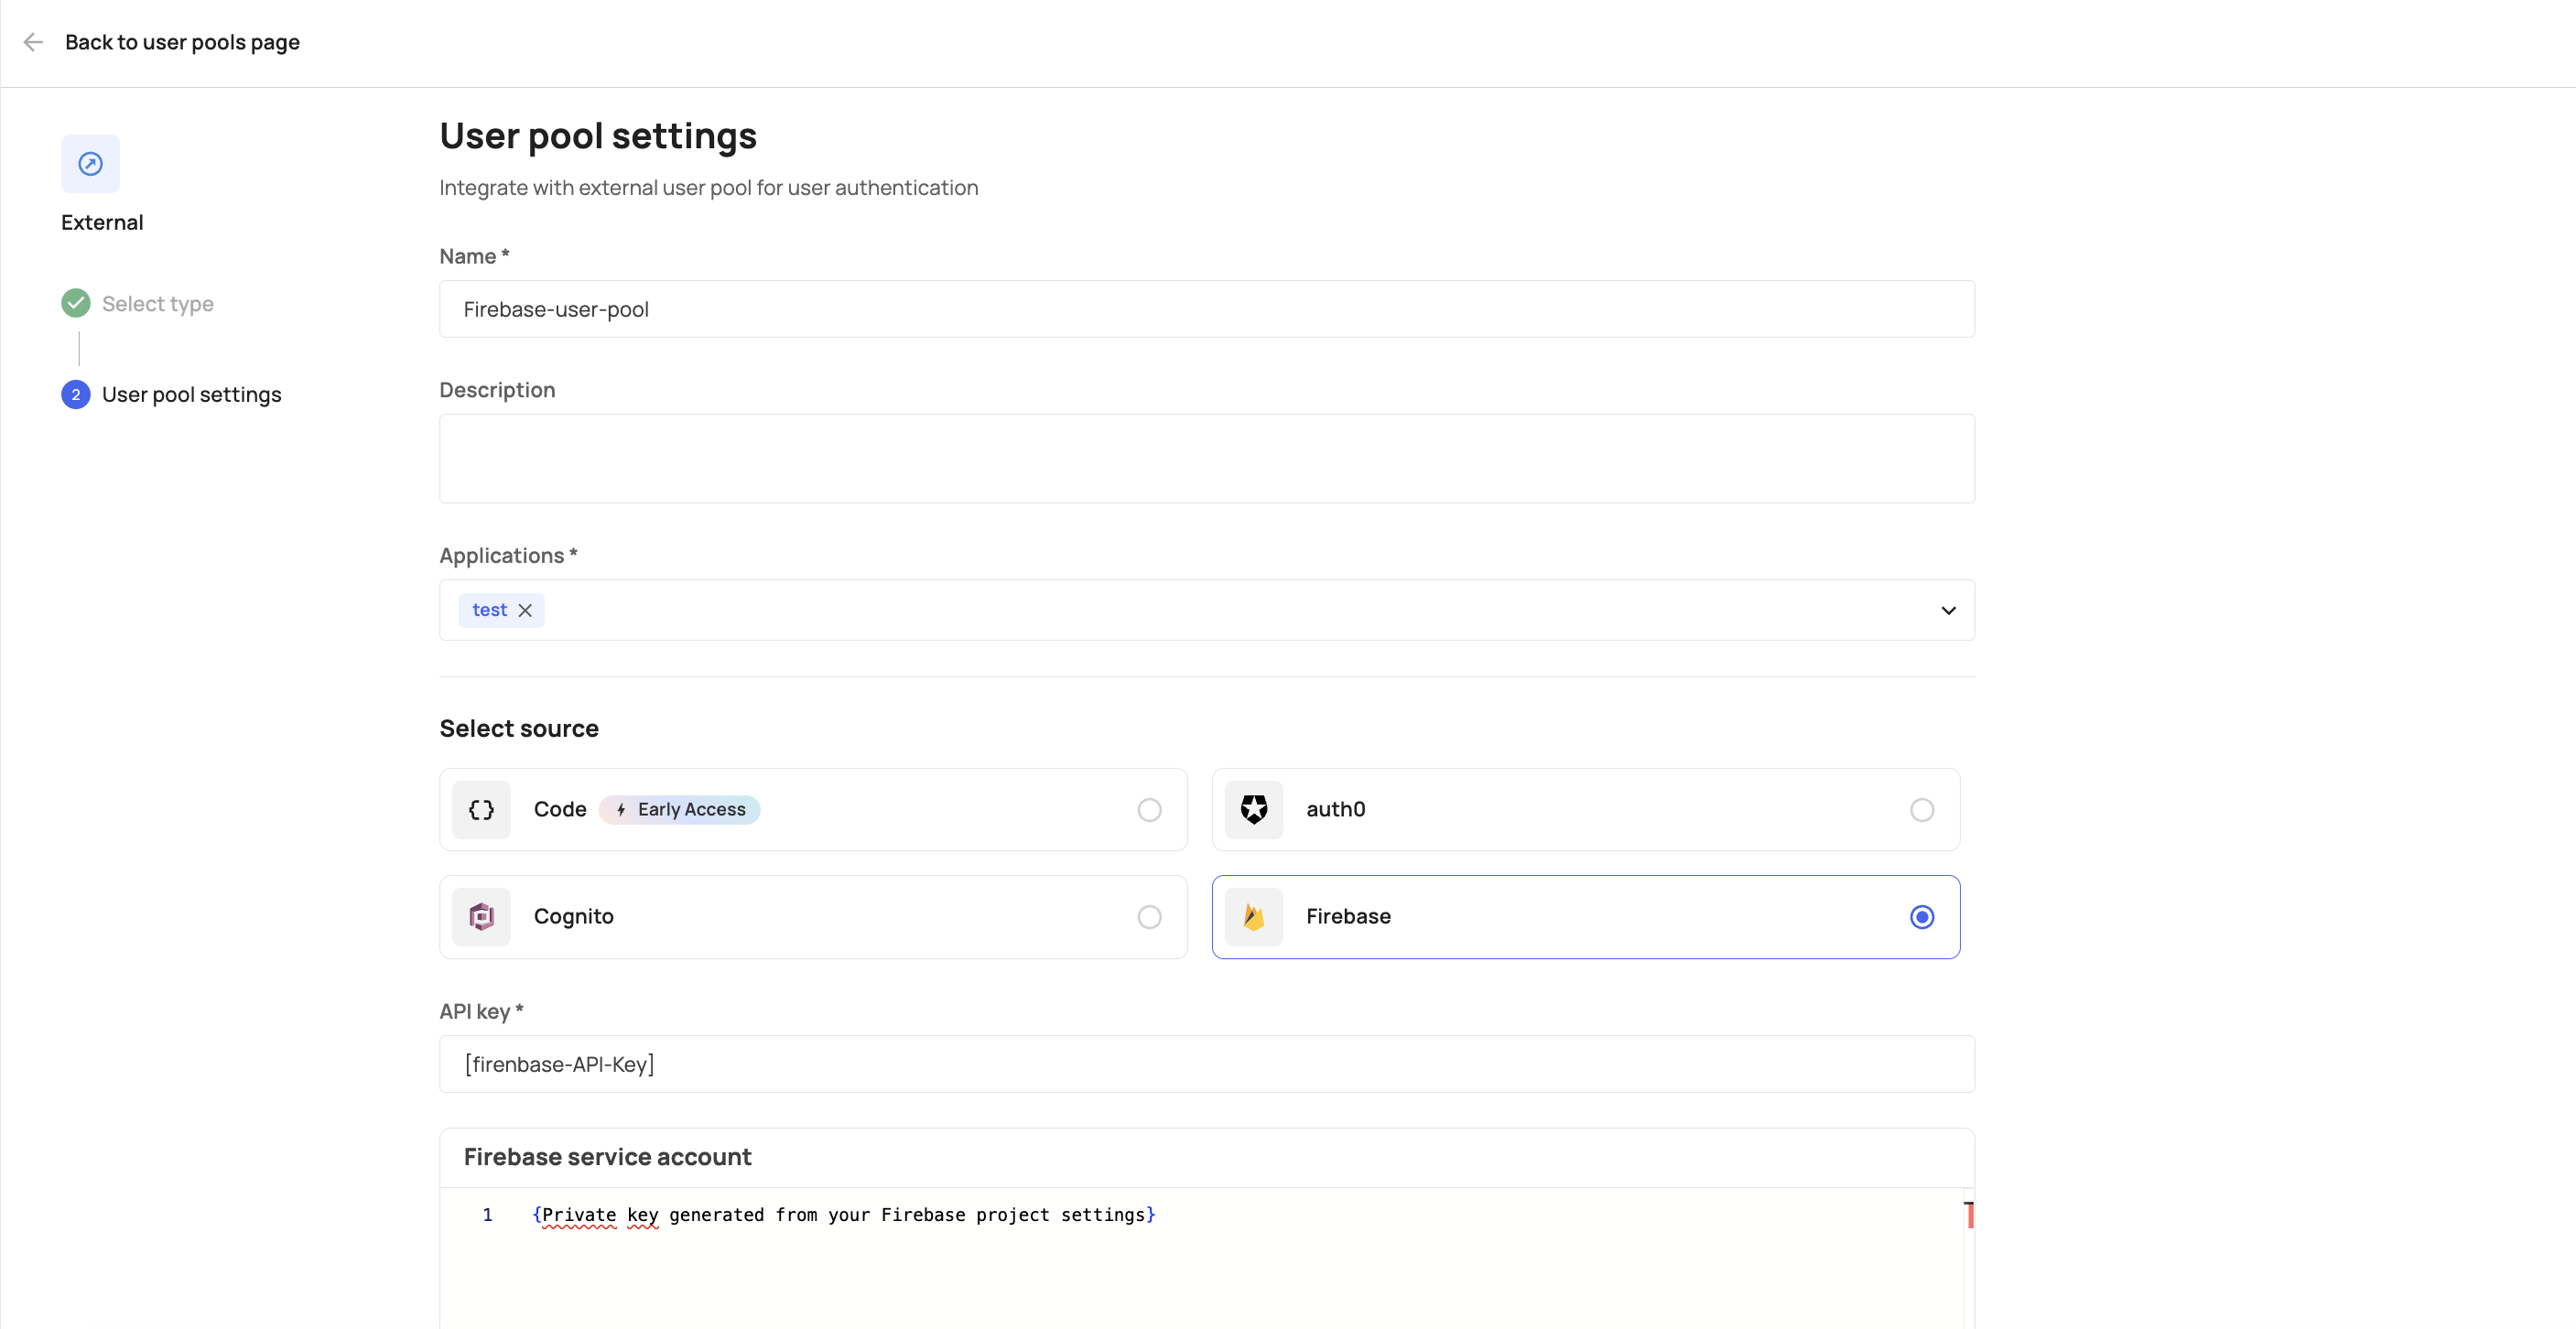
Then, head over to your Frontegg porta -> [Environment] -> User Pools -> and Create a new External user pool.
Select the Firebase option and paste the API key and Private key from your Firebase account into the API Key and _Firebase service account _fields, respectively.
IdP User Pools
Auth0
To create an IdP user pool with Auth0, please complete the following steps:
- To properly create a user pool from Auth0, we expect the
tenantIdto be part of theidToken. To do that, you will need to innclude yourtenantIdfrom the user's Metadata within your app'sapp_metadata, like so:

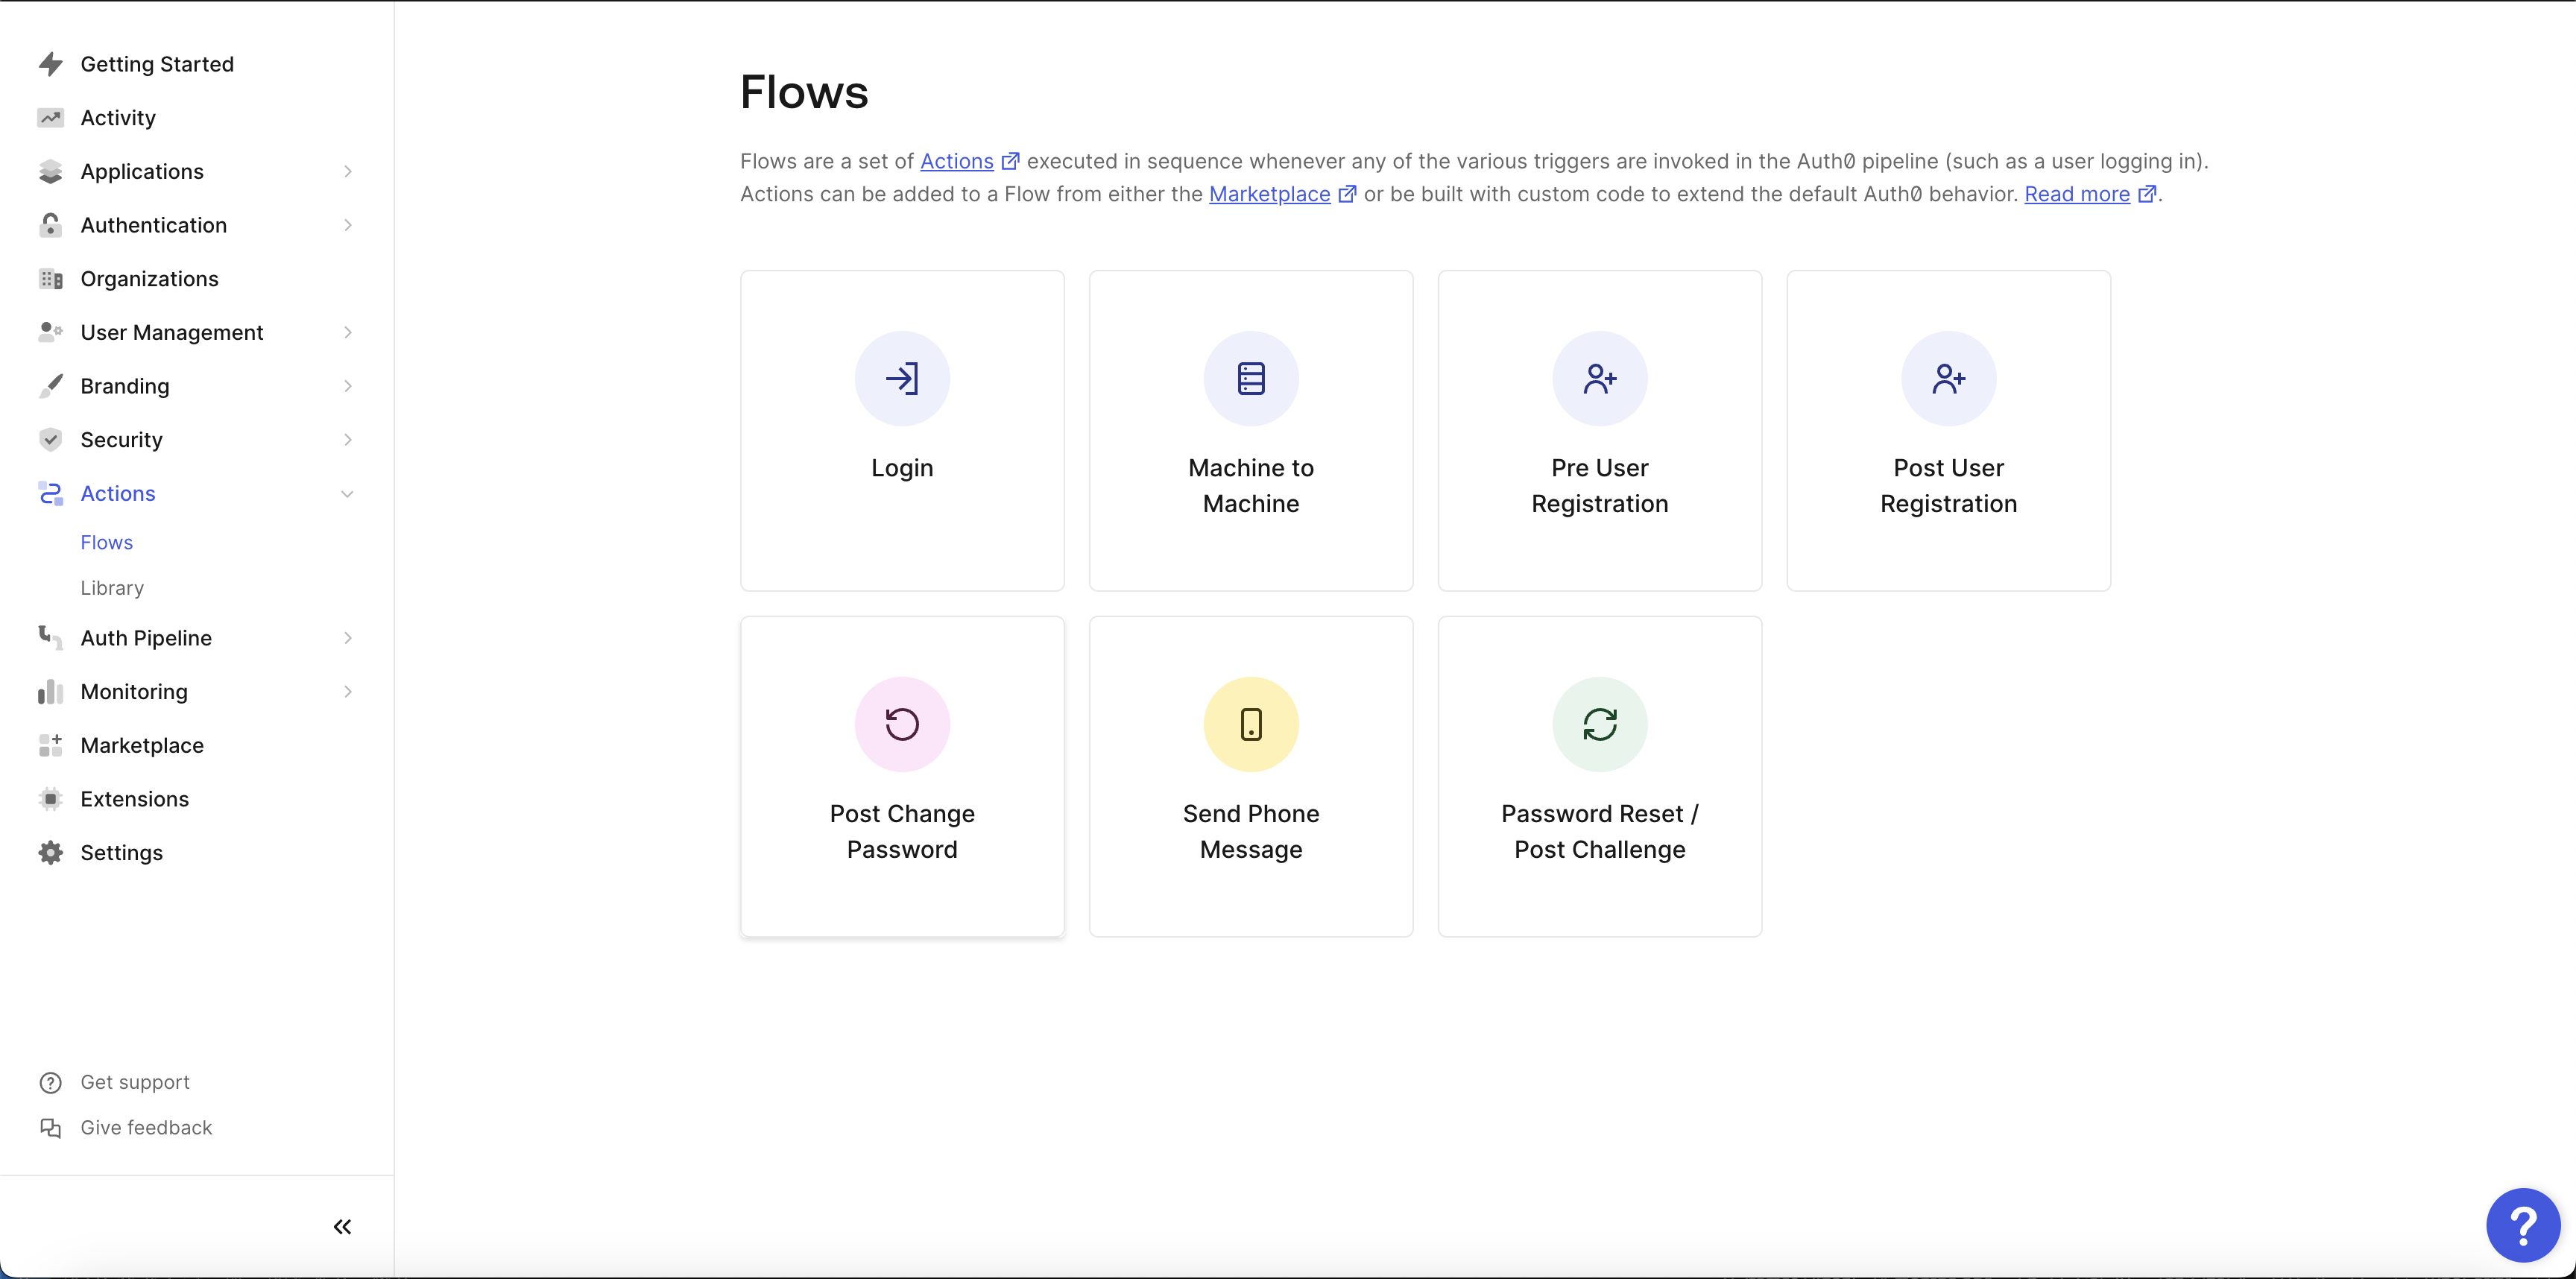
- Next, go to your Auth0 account, Go to the Actions->Flows tab, and choose the Login option.
Once the required configuration on Auth0 is completed, proceed to create a new user pool in Frontegg by following the requirements listed in the External User Pools section.
Updated 2 months ago