Create and configure
The Admin Portal can be fully self-served for your end users— they can control access to tenants on the tree, create new sub-accounts, manage roles etc. After granting an account the capability to manage sub-accounts, users will now have access to a dedicated section within their Admin Portal: the Managed section.
Within this Managed section, a new tab titled 'All Accounts' has been added. Here, users can conveniently oversee and manage all the associated accounts under their purview.
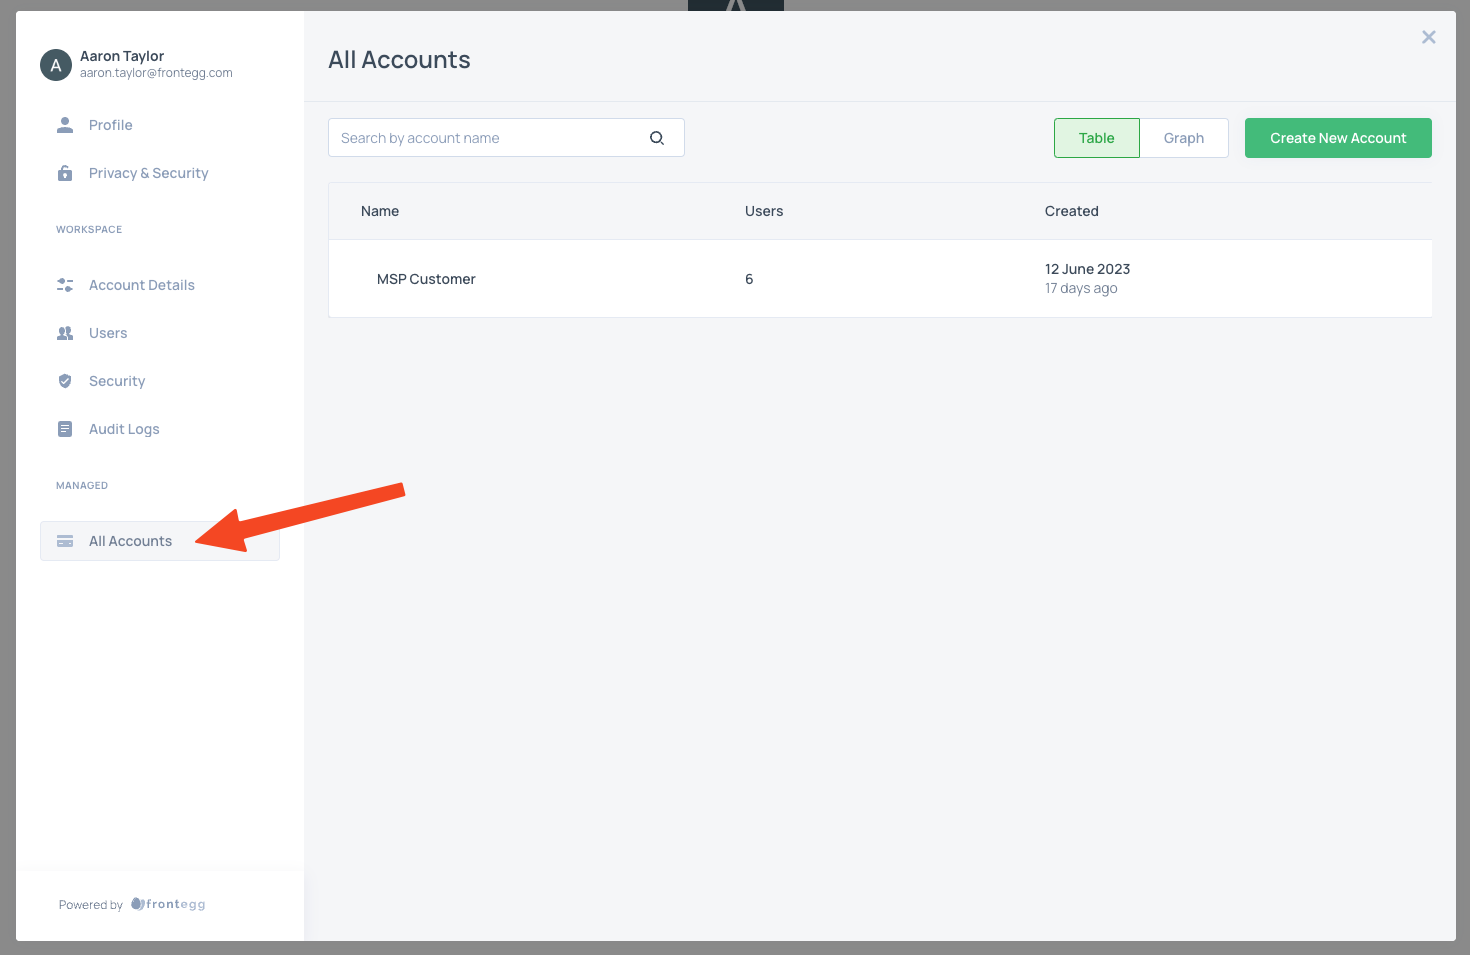
The 'Managed' and 'All Accounts' Dashboard
Creating a new account
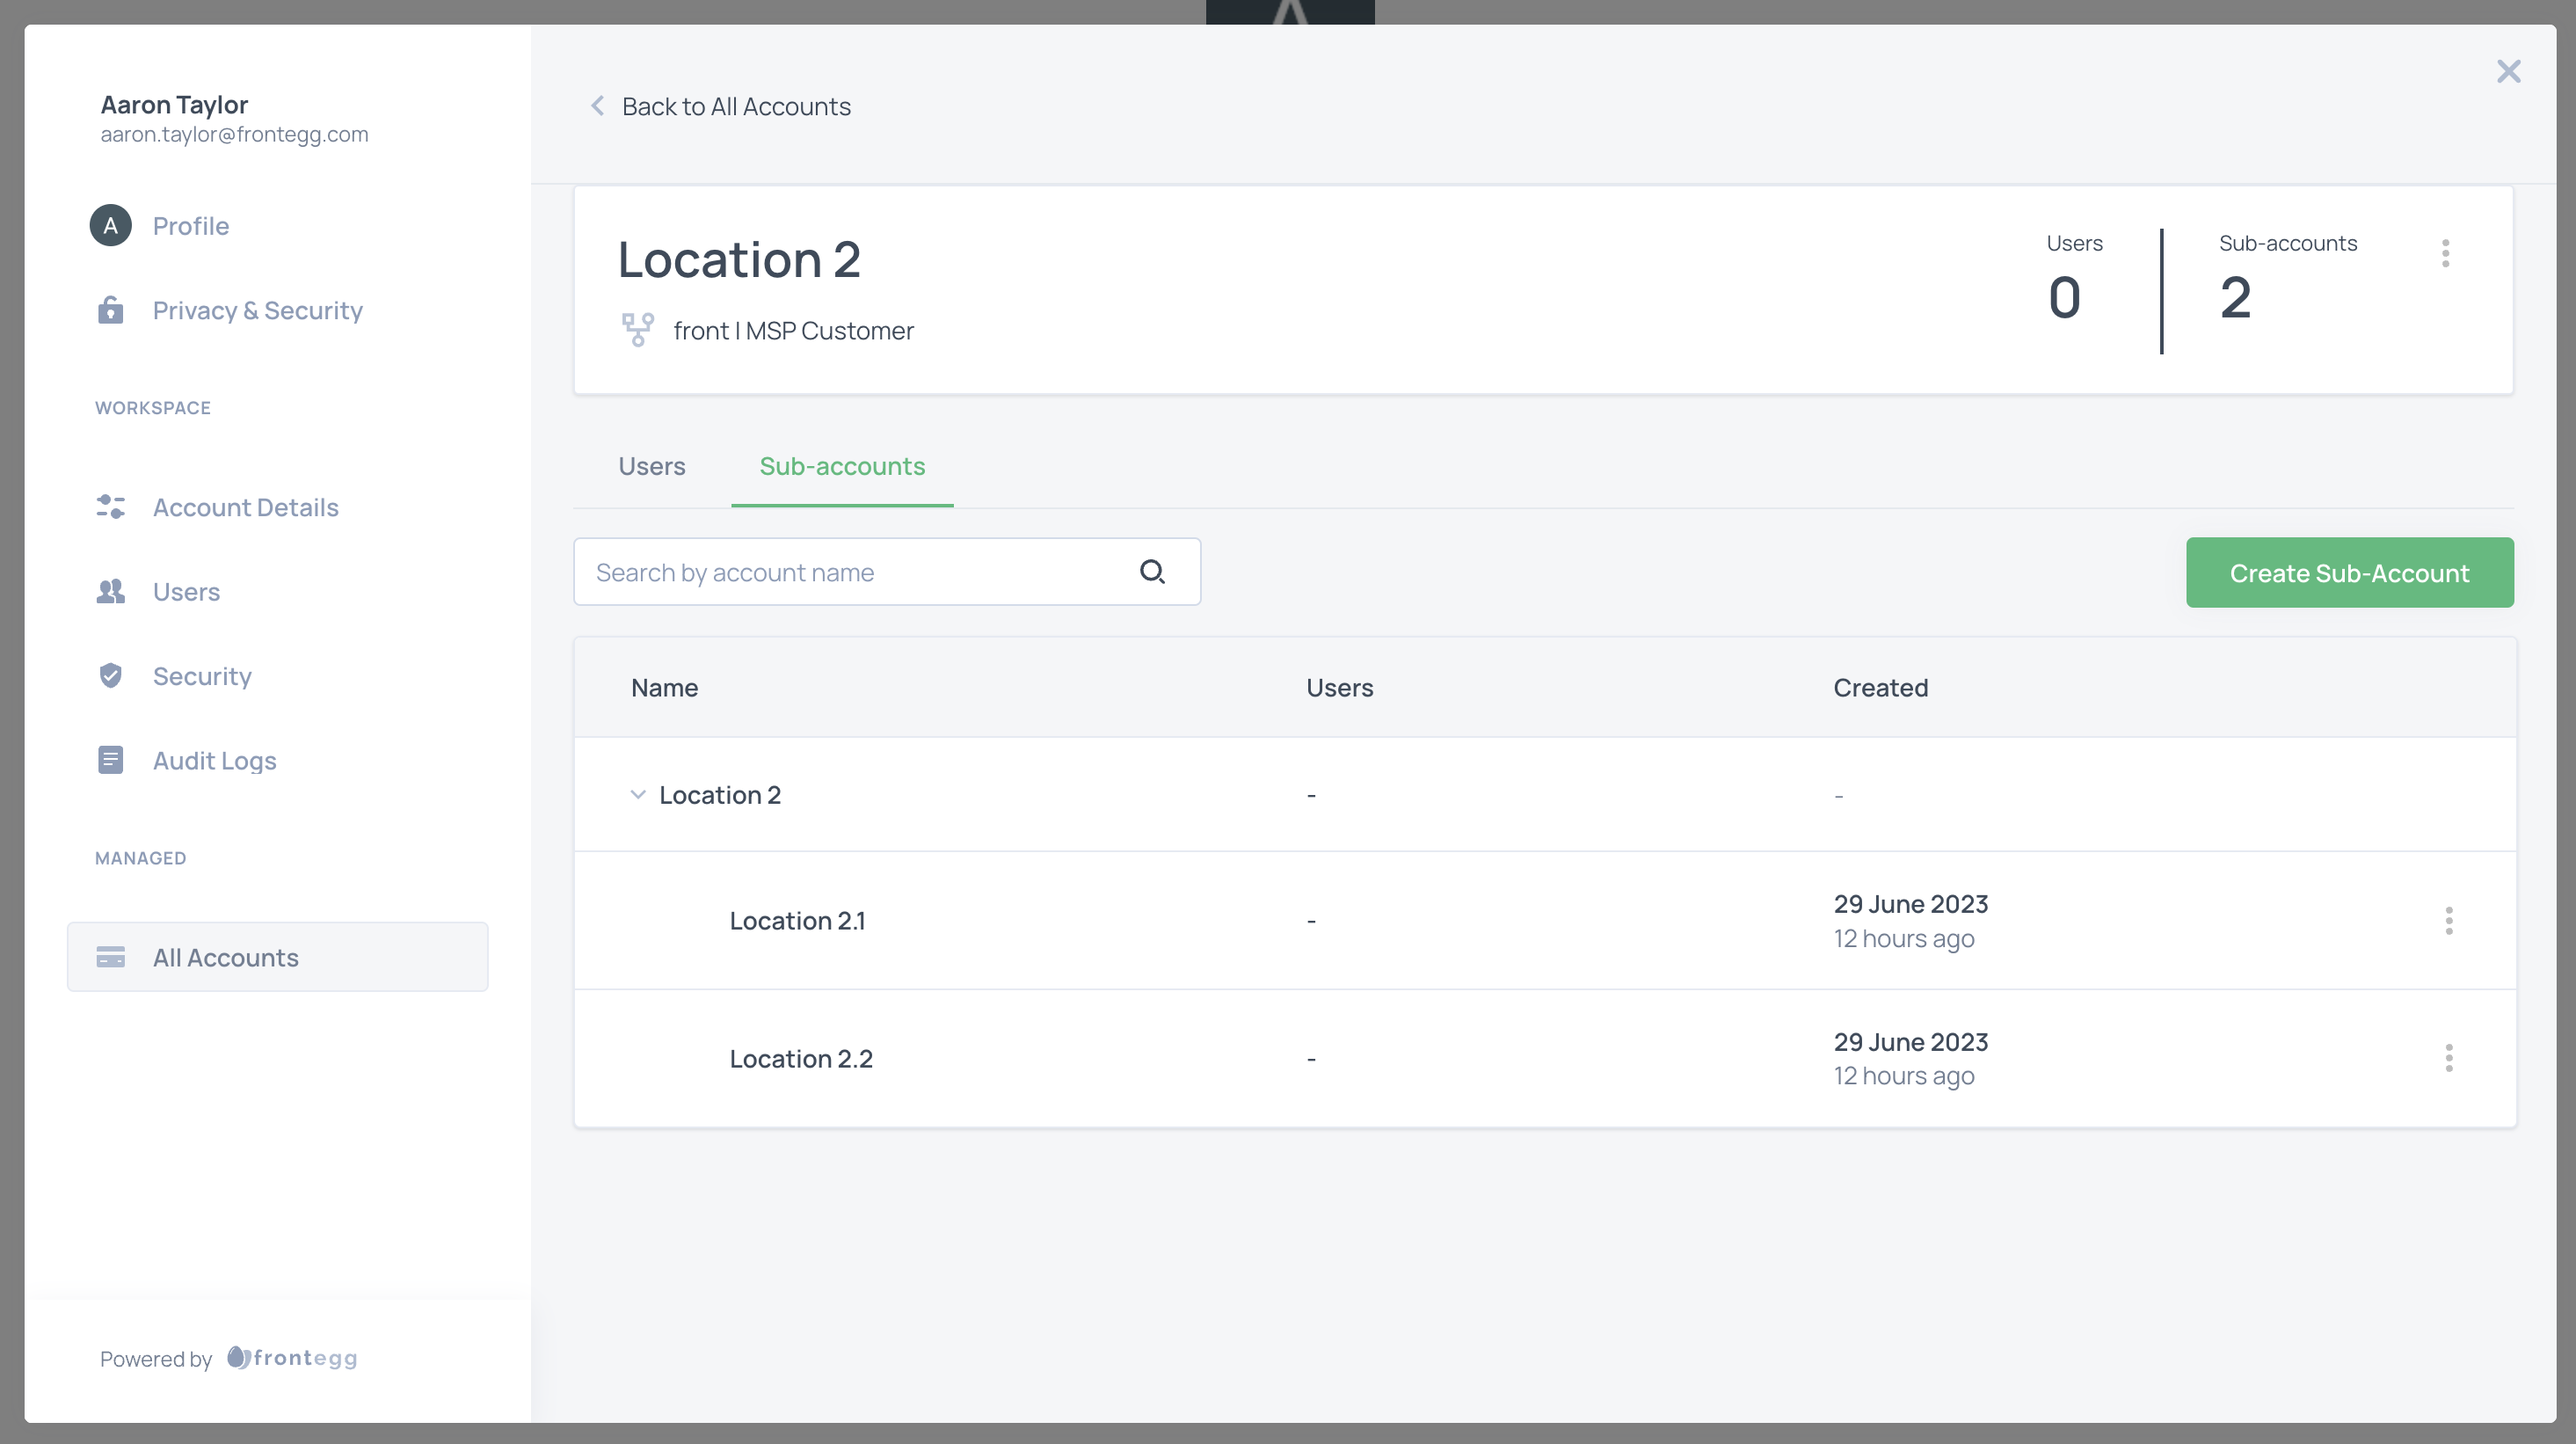
To create a new account, head over to the All Accounts tab. you can view the hierarchy in a table view, or in a graph.
Your main account will be displayed at the top, followed by a comprehensive list of all its associated sub-accounts. This clear layout provides essential details such as the account names, the number of users associated with each sub-account, and the creation dates. This structured presentation ensures you can easily track and manage your accounts and their corresponding information at a glance.
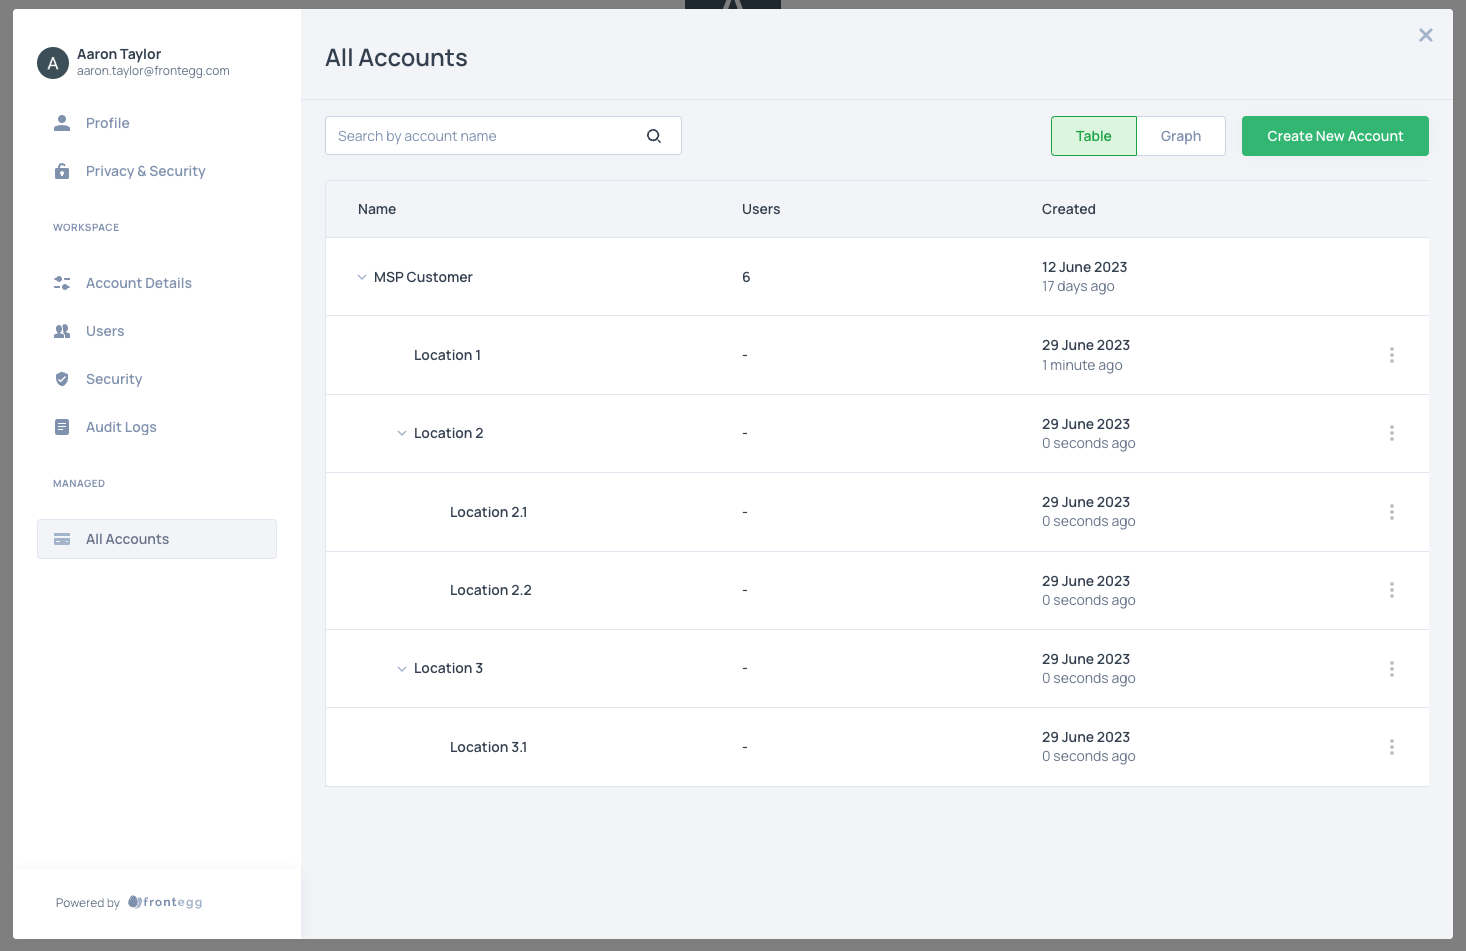
Accounts table view
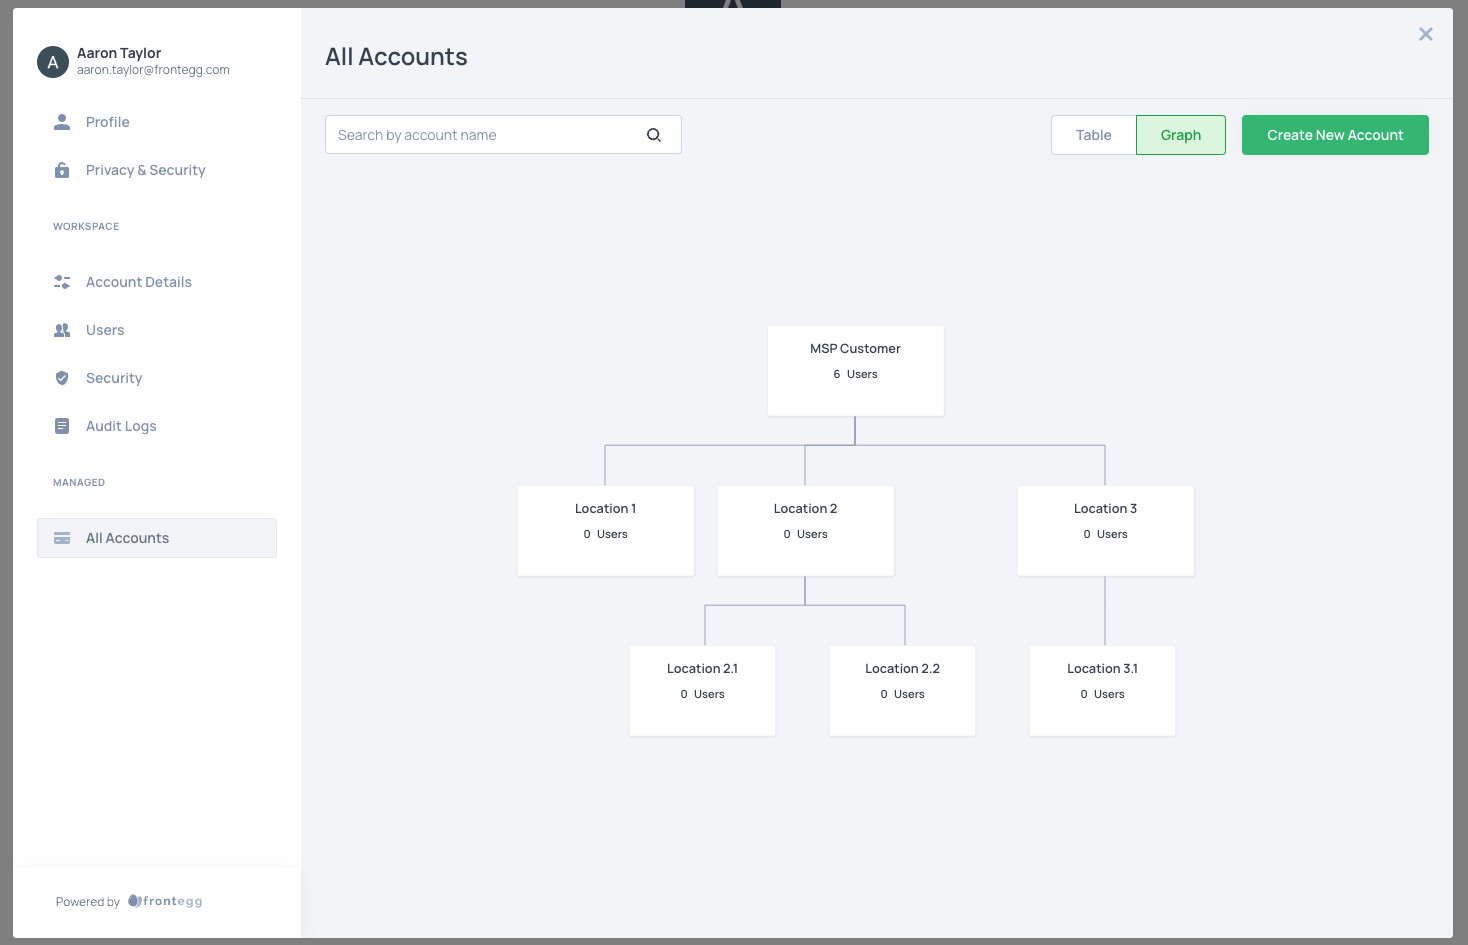
Accounts graph view
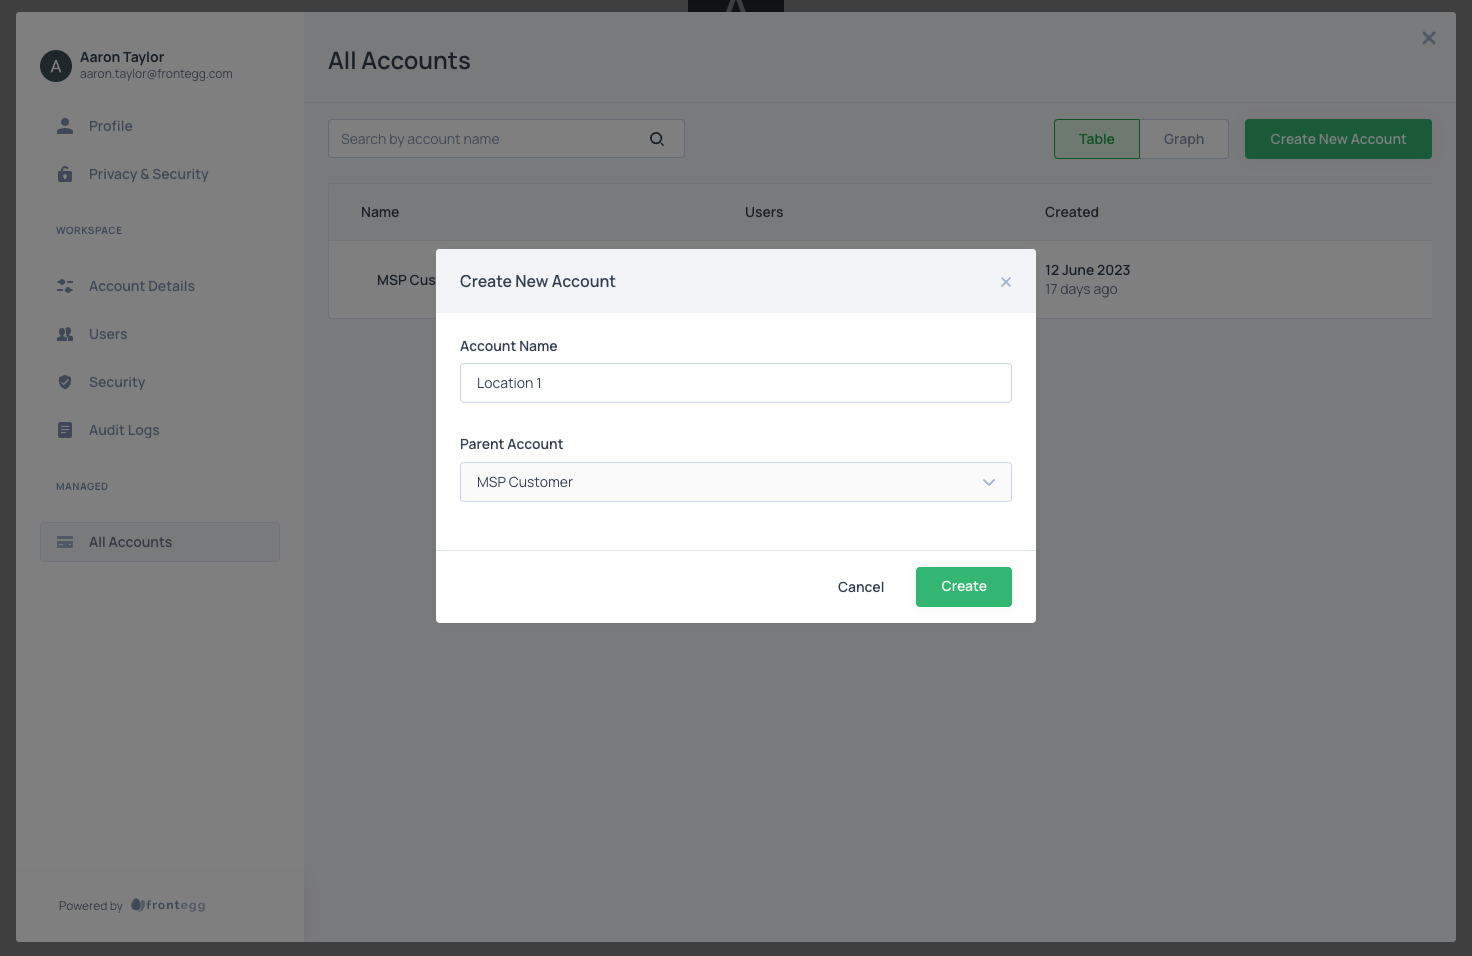
Creating sub-accounts
To create sub-accounts, users with relevant permissions need to go to the All Accounts sections and click the Create New Account button. From there, they simply need to specify a suitable account name and select the appropriate parent account. This straightforward procedure streamlines the creation of sub-accounts, ensuring a hassle-free experience for users.
When a tenant has sub-account management enabled, and hold an fe.account-hierarchy.write.sub-account-management permission, they can enable/disable sub-account management for their child account. If the option is enabled, then the child can see the All Accounts page.
To view specific sub-account details, click on the account name in either the table or graph view.
You'll see a summary there, including the account name, its hierarchy, user count, and sub-account total.
Removing a sub-account
To delete a sub-account, navigate to the sub-accounts section in your master account and choose the sub-account you want to remove. Then, proceed to delete the sub-account, which will promptly remove it from the hierarchy.
Please note that sub-accounts can only be deleted if they have no associated children.
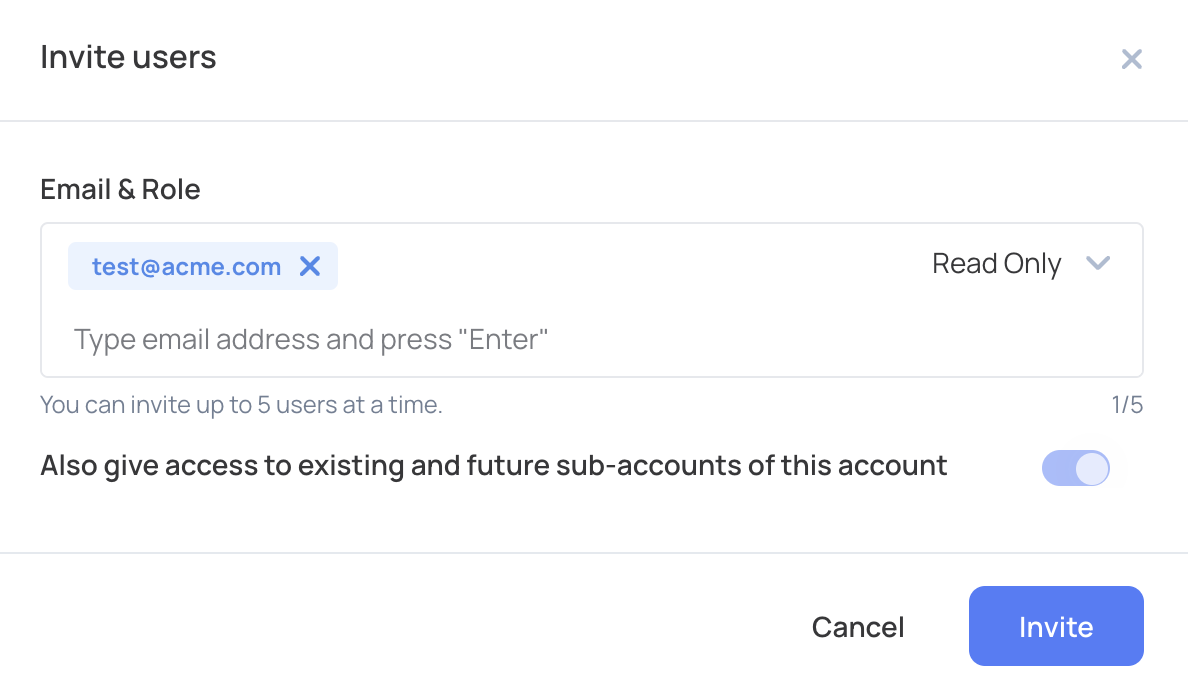
Inviting users to sub-accounts
Users can be invited to sub-accounts through two methods: explicit invitations or by granting access via a parent account.
You can invite users directly to accounts by clicking the Invite Users button. When you do so, they will receive an invitation by email.
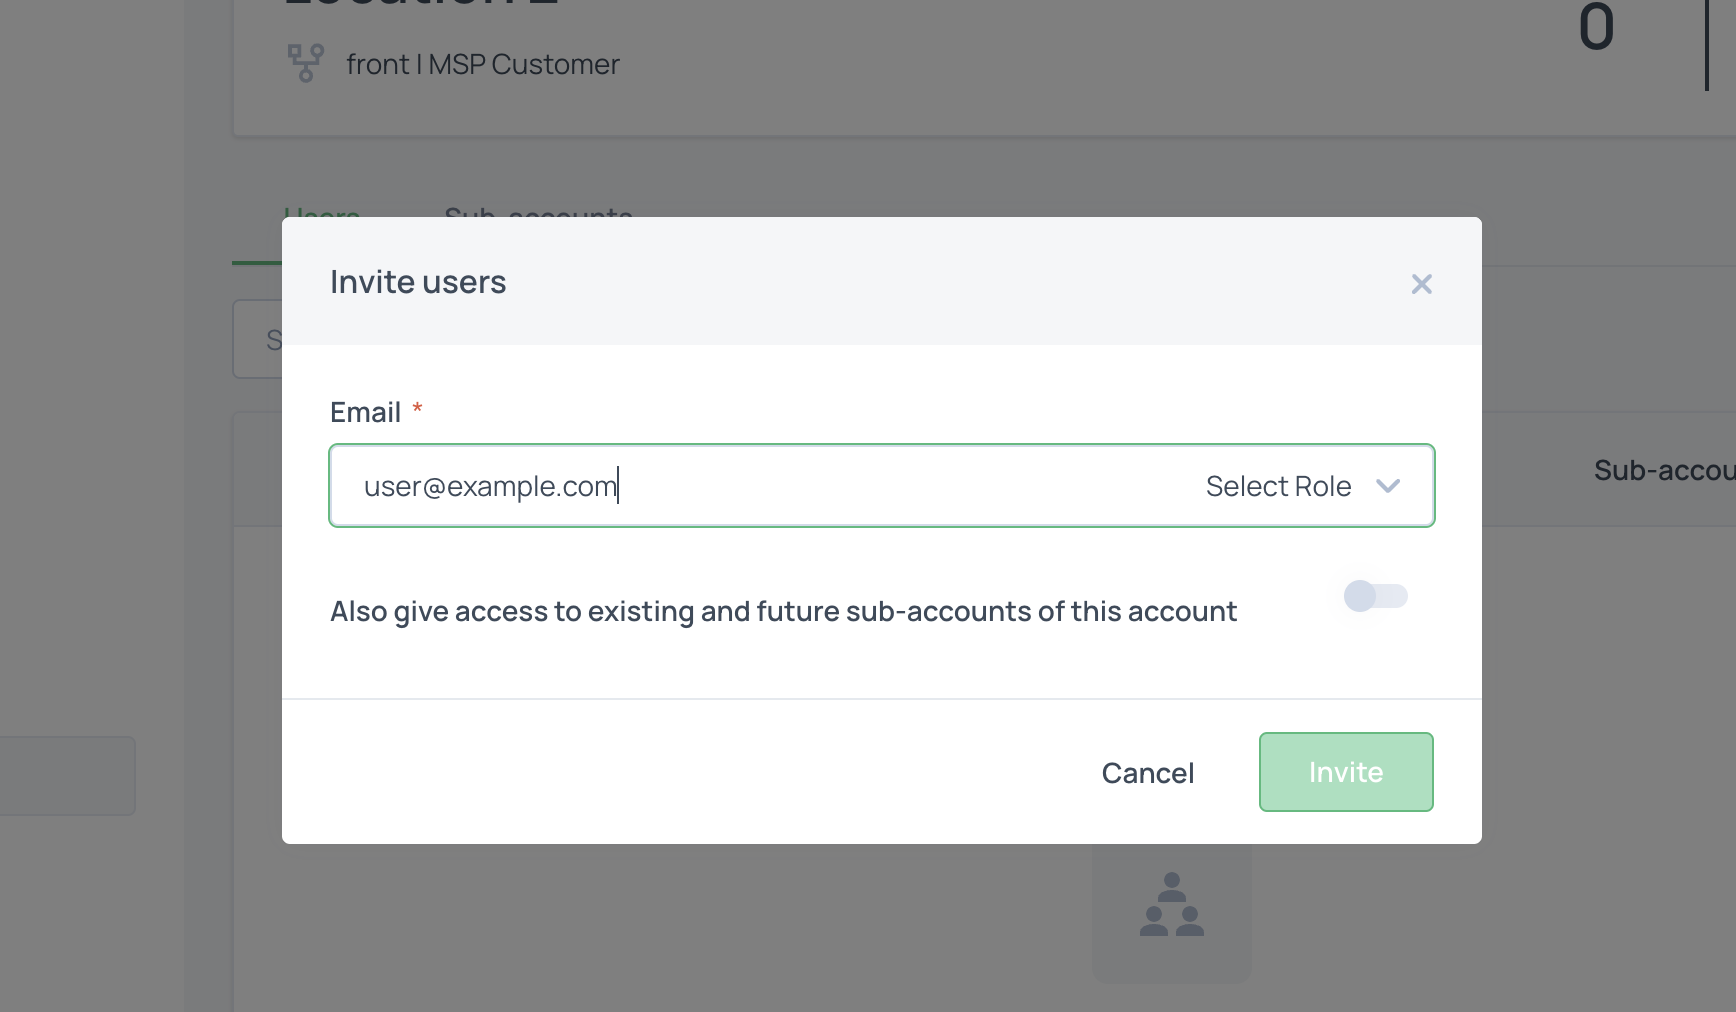
Explicit user invitation
Granting access via parent account
Version Prerequisites
To use this feature, ensure you use the following versions:
@frontegg/[email protected]
@frontegg/[email protected]
@frontegg/[email protected]
@frontegg/[email protected]@frontegg/[email protected]
If you wish to provide user-access to a specific branch of the hierarchy without individually inviting them to each account, you can grant them access from a single account, extending it to all existing and future sub-accounts. While they won't receive individual invitations for each account, they will be able to log into all of them with their credentials. The Role assigned to them from their parent account - the account where the role was set - will be applicable across all sub-accounts within that branch.
Note that sub-account access can be established during the invitation process or later and can be changed at any time— offering flexibility and control over user access within the hierarchy. To set access, go to the All Accounts tab in your portal's workspace and click the three dots at the top right corner of the account page. Select the default state for new users invited.
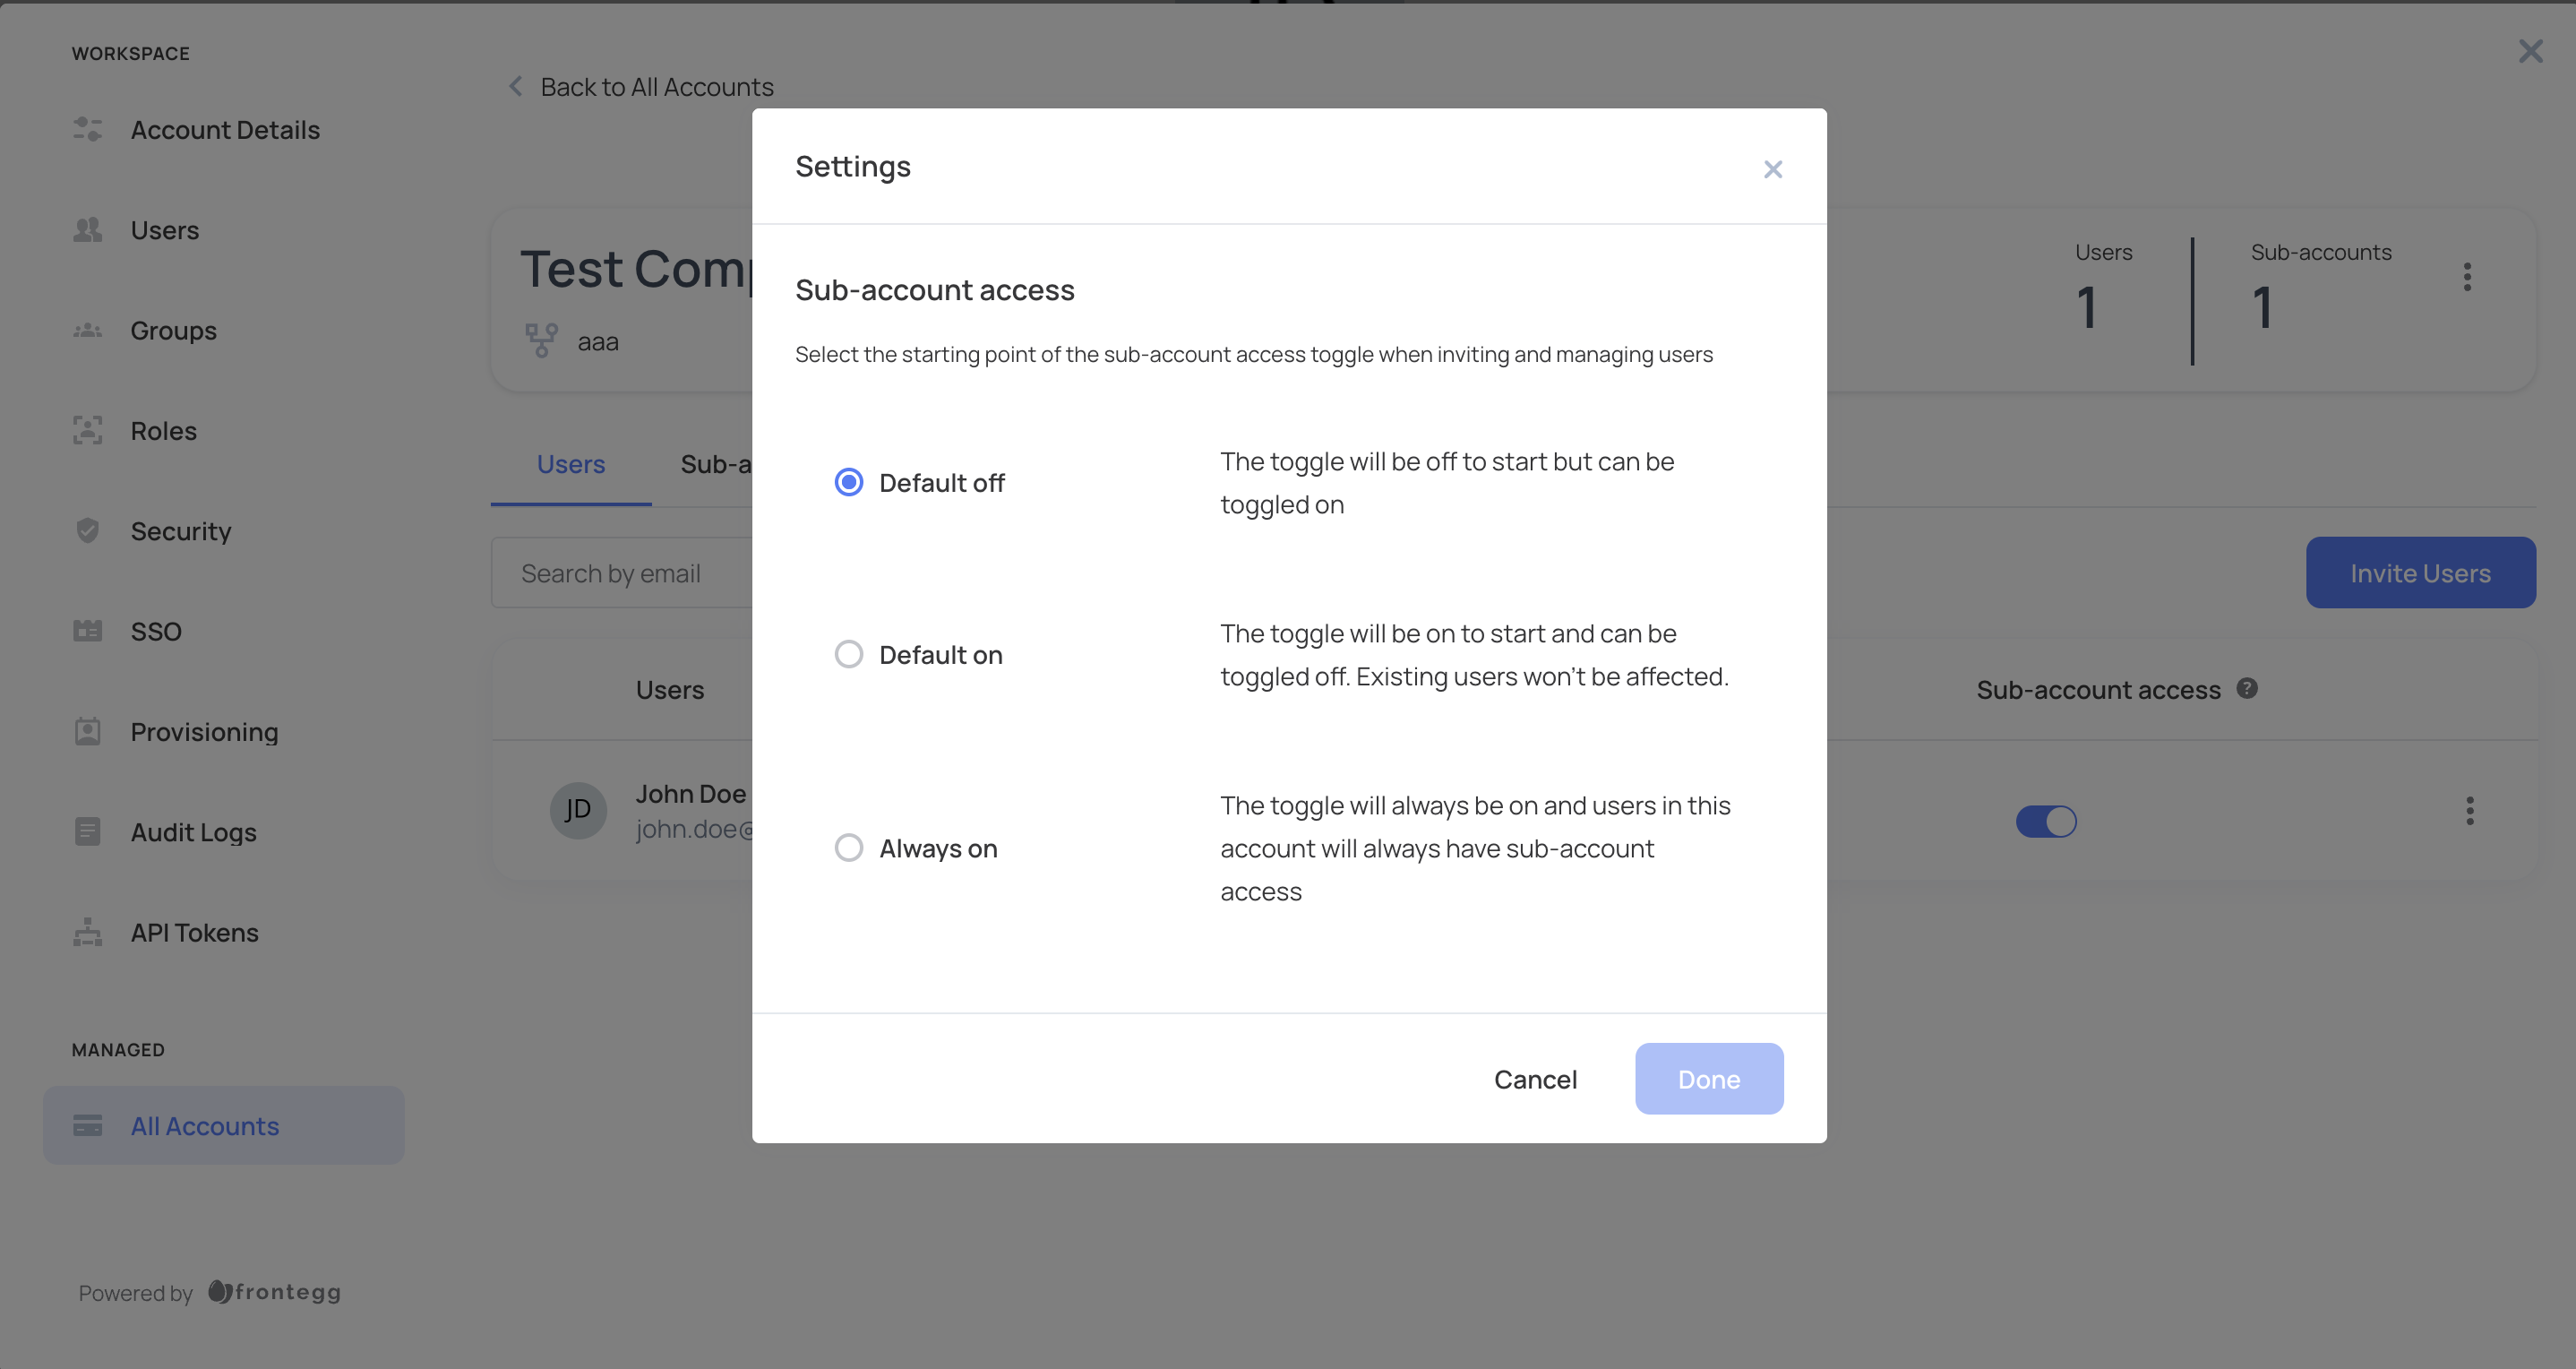
The Default off setting prevents users from accessing sub-accounts upon invitation. You can change this default on demand.
Default on gives users sub-account access by default. You can change this default on demand.
Always on affects all account users (current and future) and cannot be revoked. If you change it later to Default on or Default off, the users who were invited to the account previously will still have access. The settings will only affect future users.
Existing and Future Users
When you invite users to accounts where Always on is enabled, both existing and future users of the account will get sub-account access. For Default on & Default off accounts, the settings will become effective for future users only.
You can also decide that the default setting will be applicable further down the hierarchy, by toggling on the Also give access to existing and future sub-accounts of this account when you invite new users:
Giving access
Updated 2 months ago