Frontegg environments were designed with ease of use in mind. You can now test Frontegg's capabilities and features in a development environment and seamlessly deploy them live to production. We also eliminated the complexities of managing multiple workspaces for development, staging, and production, so you are also liberated from copying the settings of each environment to another!
The flow for using Frontegg environments follows industry best practices— It all starts when you create and thoroughly test Frontegg features and configurations within a dedicated development environment. This hands-on exploration allows you to gain confidence and familiarity with the platform before introducing it to your valued customers.
Once ready, you can deploy it to a production environment and view it live in your application.
Environment integration
To add a new environment, go to Environment Integration.
Configuring URLs
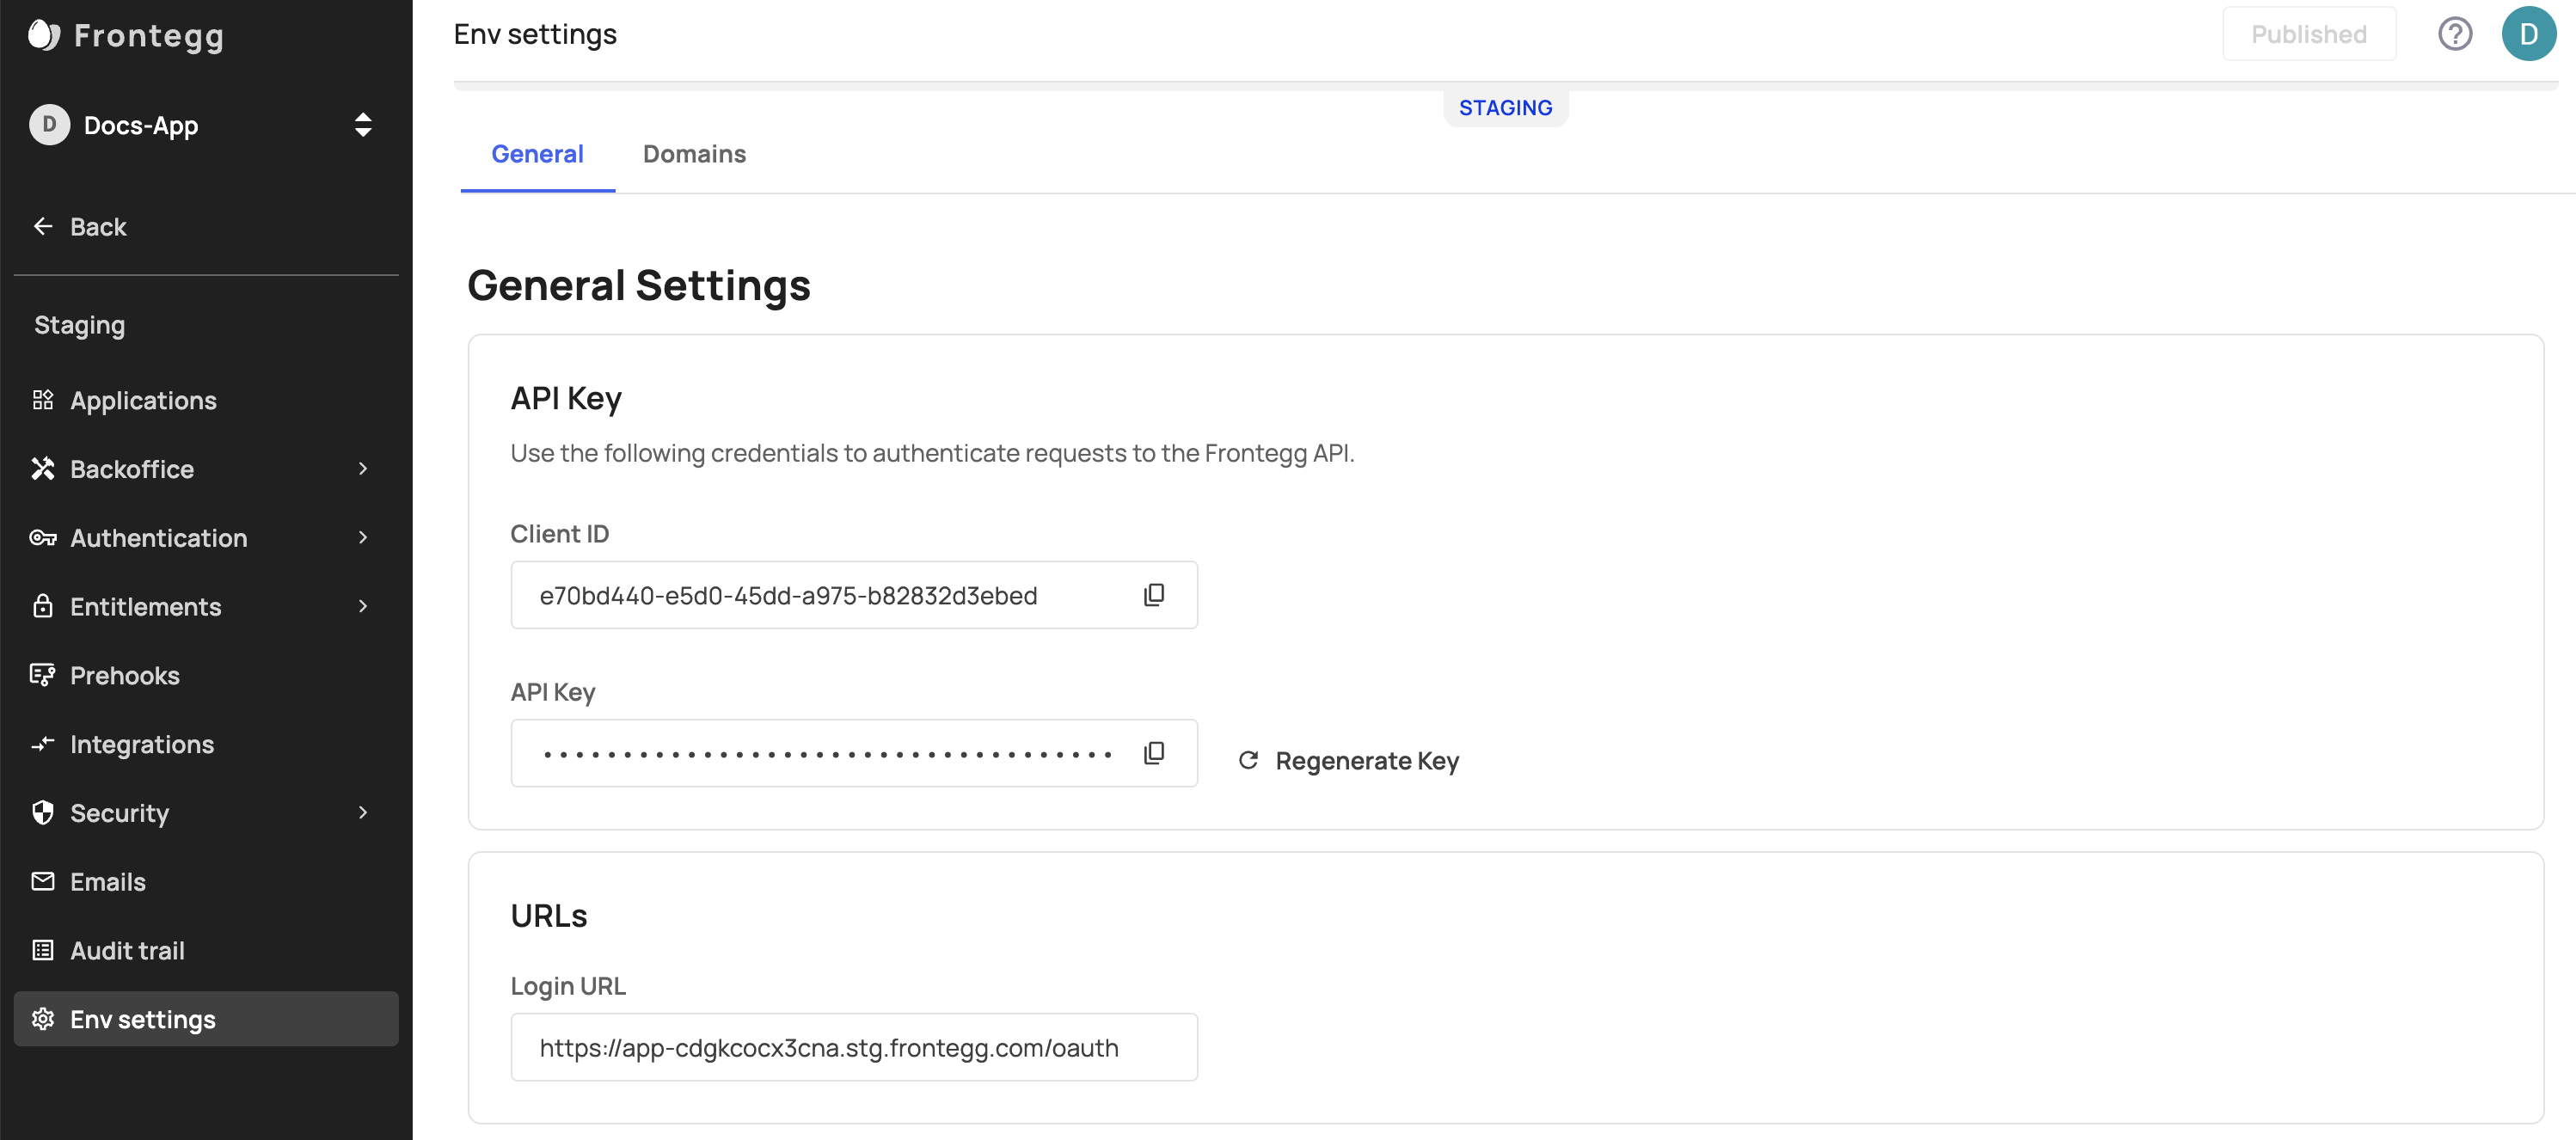
Jumping into the Portal following your initial integration, you will need to go to you Development environment (located in the left menu) and choose Env Settings. The URLs section is designed to facilitate the integration process and allow running Frontegg with minimal manual updates. This section is unique for each environment and includes the App URL that was inserted upon the creation of the environment, and Login URL that is constructed from your frontegg-subdomain/oauth. The defaults of this section are designed for Hosted Login which is the default Frontegg Integration type:
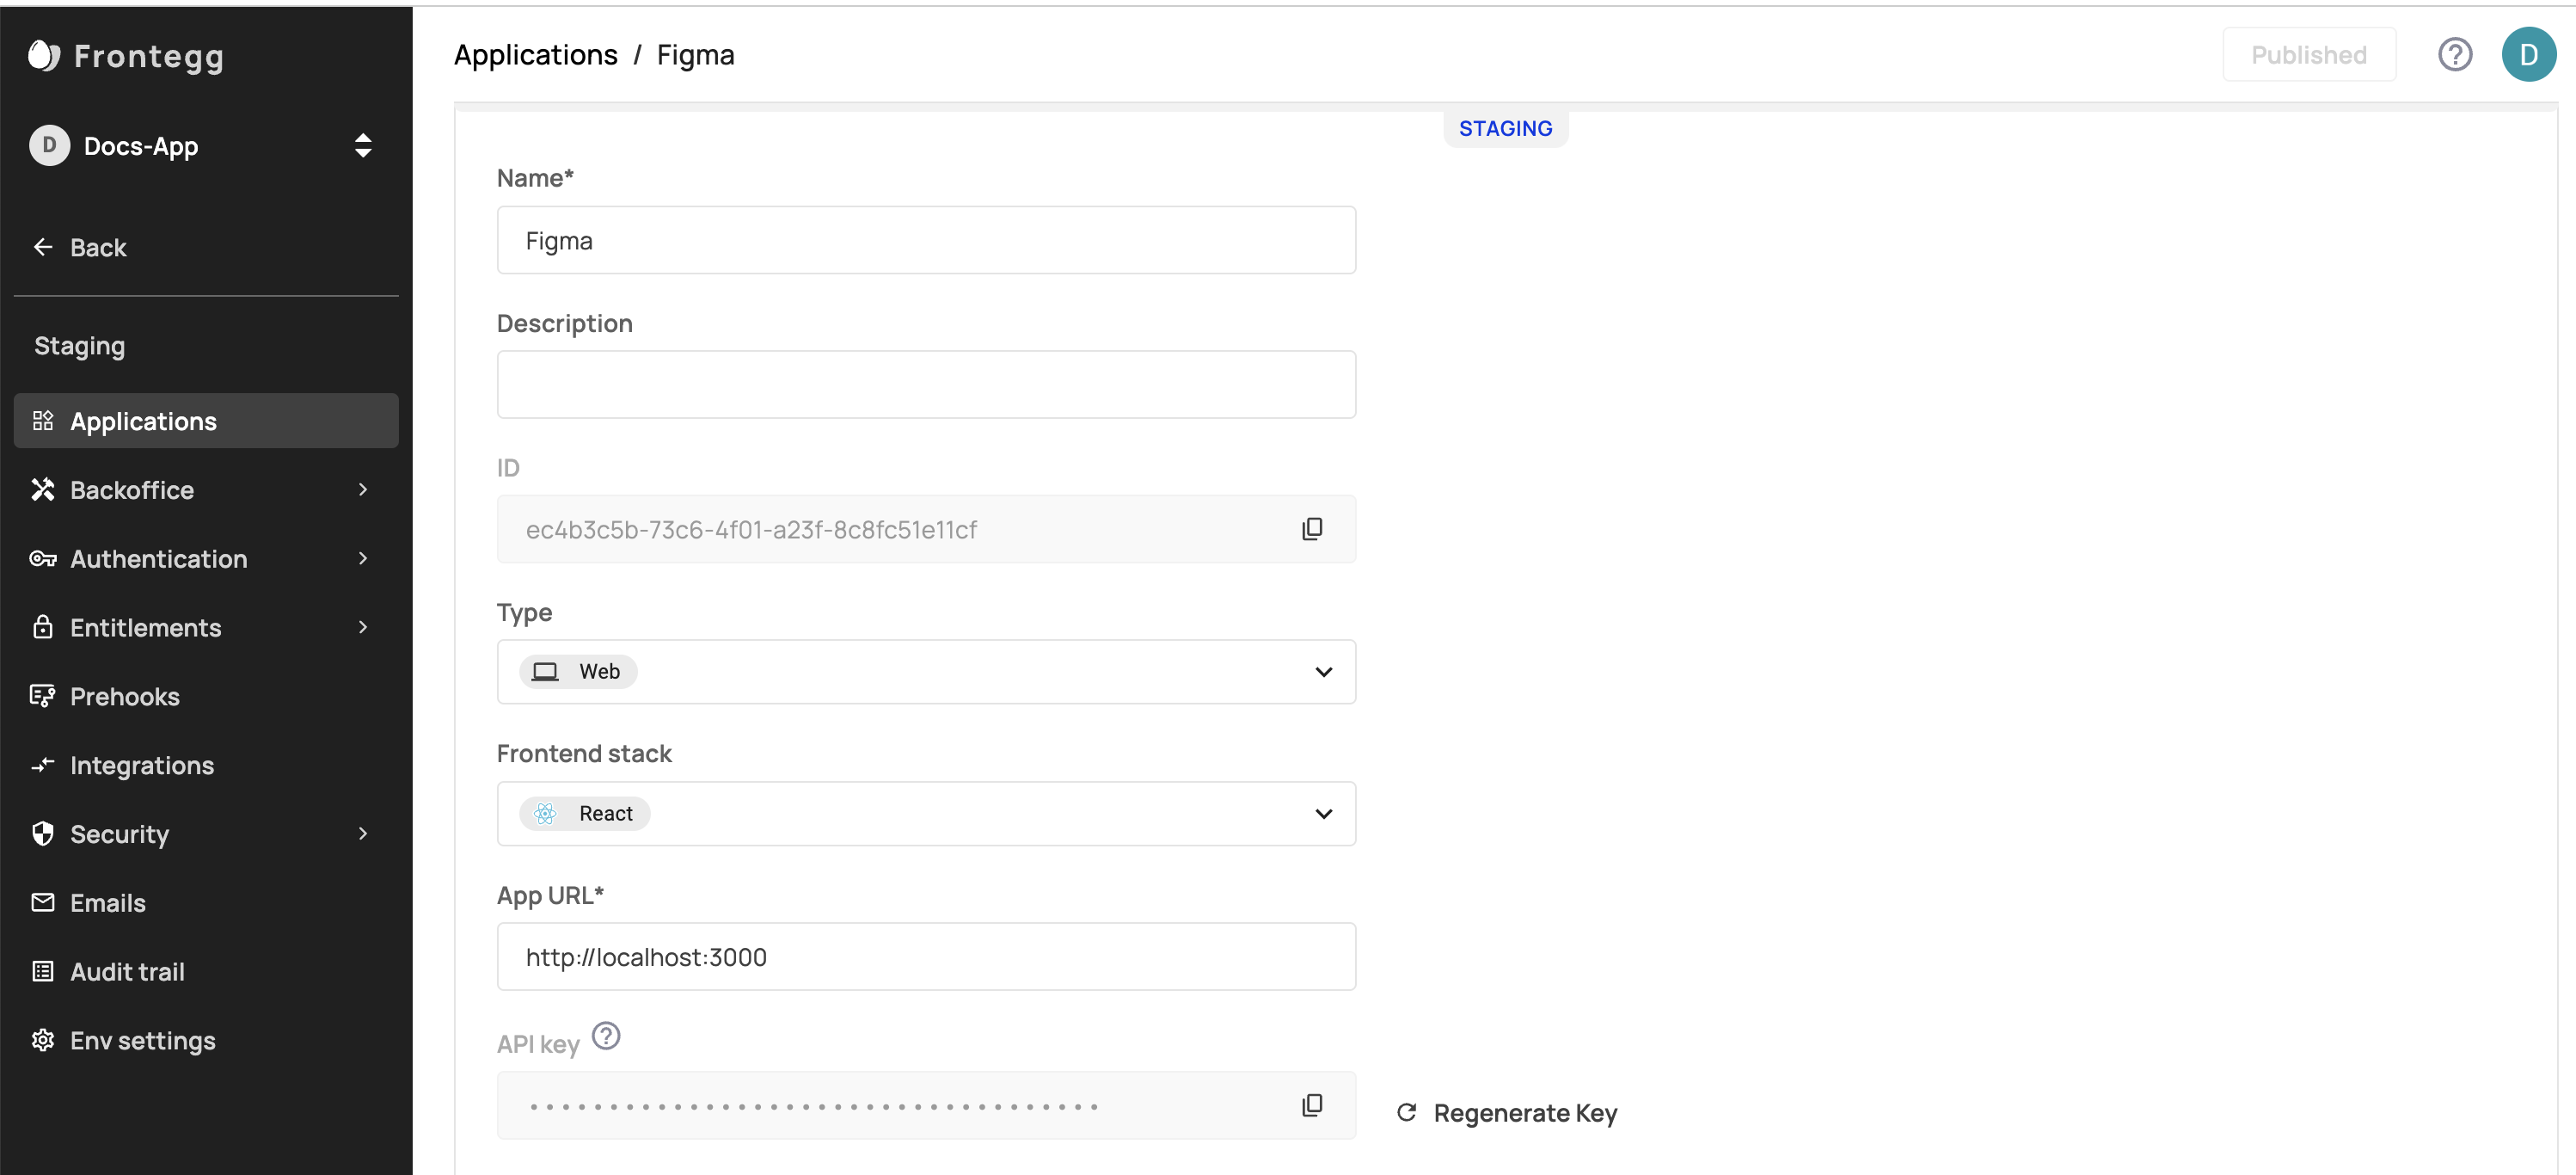
The App URL is used as {{APP_URL}} variable in Allowed origins, Email template Redirects, Hosted Login Authorized URLs, Social Logins Redirect URLs, SSO Redirect URLs. The App URL is found under each application's Settings section.
The login URL is used as {{LOGIN_URL}} variable in Allowed origins, Email template Redirect URLs, Hosted Login Authorized URLs, Social Logins Redirect URLs, SSO Redirect URLs. The Login URL is under Env Settings.
URLs
Note that all the sections that are listed above - i.e. allowed origins - can accept explicit values in addition to variables.
Environment Specific API Requests
Environment tokens can be created from the Frontegg Portal by clicking your profile picture ➜ Administration ➜ API tokens. These tokens access all of the 4 environments of your Frontegg account.
Note that if you don’t add afrontegg-environment-id to your header, Frontegg applies the call to your Development environment by default.
When performing Management type requests, you must indicate the environment you wish to apply the changes to. To do so, you would need to add a frontegg-environment-id header to your request. This will allow Frontegg to know to which environment you are performing the request. The frontegg-environment-id is the Client ID that is located under the environment's Env Settings tab.
--location -g --request GET <'https://api.frontegg.com/identity/resources/users/v3/me'>
--header 'frontegg-user-id: xxxxxxx'
--header 'frontegg-tenant-id: xxxxxxx'
--header 'Authorization: Bearer {{vendor-JWT}}'
--data-raw ''
Don't forget to indicate your account location
Note that you will need to indicate the geo-location of your Frontegg account in your endpoint. (
--location -g --request) . The differentiation would be in theapipart of yourhttps://**api**.frontegg.com/identity/resources/users/v3/meendpoint, and will change according to your account's location. If your account is located in Europe, theapipart will remain the same. For US accounts, it would change toapi.us, and for Australian accounts you would need to useapi.au.
Domains
Frontegg Domain
This is the unique domain of your environment that is being used as a baseUrl in Frontegg SDKs. You can change the default subidentifier app-xxxxxx that is generated upon the creation of the environment and choose a more meaningful subdomain that is unique on Frontegg.
Custom domain
We recomment the use of a Custom Domain option to avoid frustrating cookie issues and to prevent the complexities of changing your domain after you perform
By default, you have a Frontegg Domain. This domain ends with .frontegg.com. By using this Frontegg Domain, however, you may encounter unwanted cookie issues and use a domain that is not consistent with your brand.
Custom Domain Best Practice
A common practice is to use a subdomain as the custom domain because if your app is hosted on app.sample.com and you have an existing A Record for that domain, you cannot use
app.sample.comas a custom domain on Frontegg. Instead, use a subdomain as the custom domain, likeauth.sample.com.Learn more about Adding Custom Domains.
Avoid Cookie Issues
Some browsers block third-party cookies by default. Providing a custom domain as your application UI domain will give you the ability to support these browsers. Learn more about Custom Domains.
Enhance Your Brand
Instead of seeing .frontegg.com in your domain, you might prefer to have your customers see your custom domain. For instance, when your customers use your application to login, your application will direct them to the following URL. Rather than see a domain with .frontegg.com in it, you might prefer that your customer see your domain instead https://your-custom-domain.frontegg.com/oauth/account/login
In the Frontegg portal, go to Environments ➜ [NAME OF ENVIRONMENT] ➜ Settings ➜ Domains.
On this page, you can manage your Frontegg Domains. You should see your Frontegg Domain and also a place to add a Custom Domain.
In the Custom Domain section, click the Configure button. You should see a dialog appear that asks for your domain name and gives you the information you need for creating the CNAME record in your DNS configuration.
As the instructions in the dialog indicate, add the CNAME record to the DNS configuration with your DNS provider.
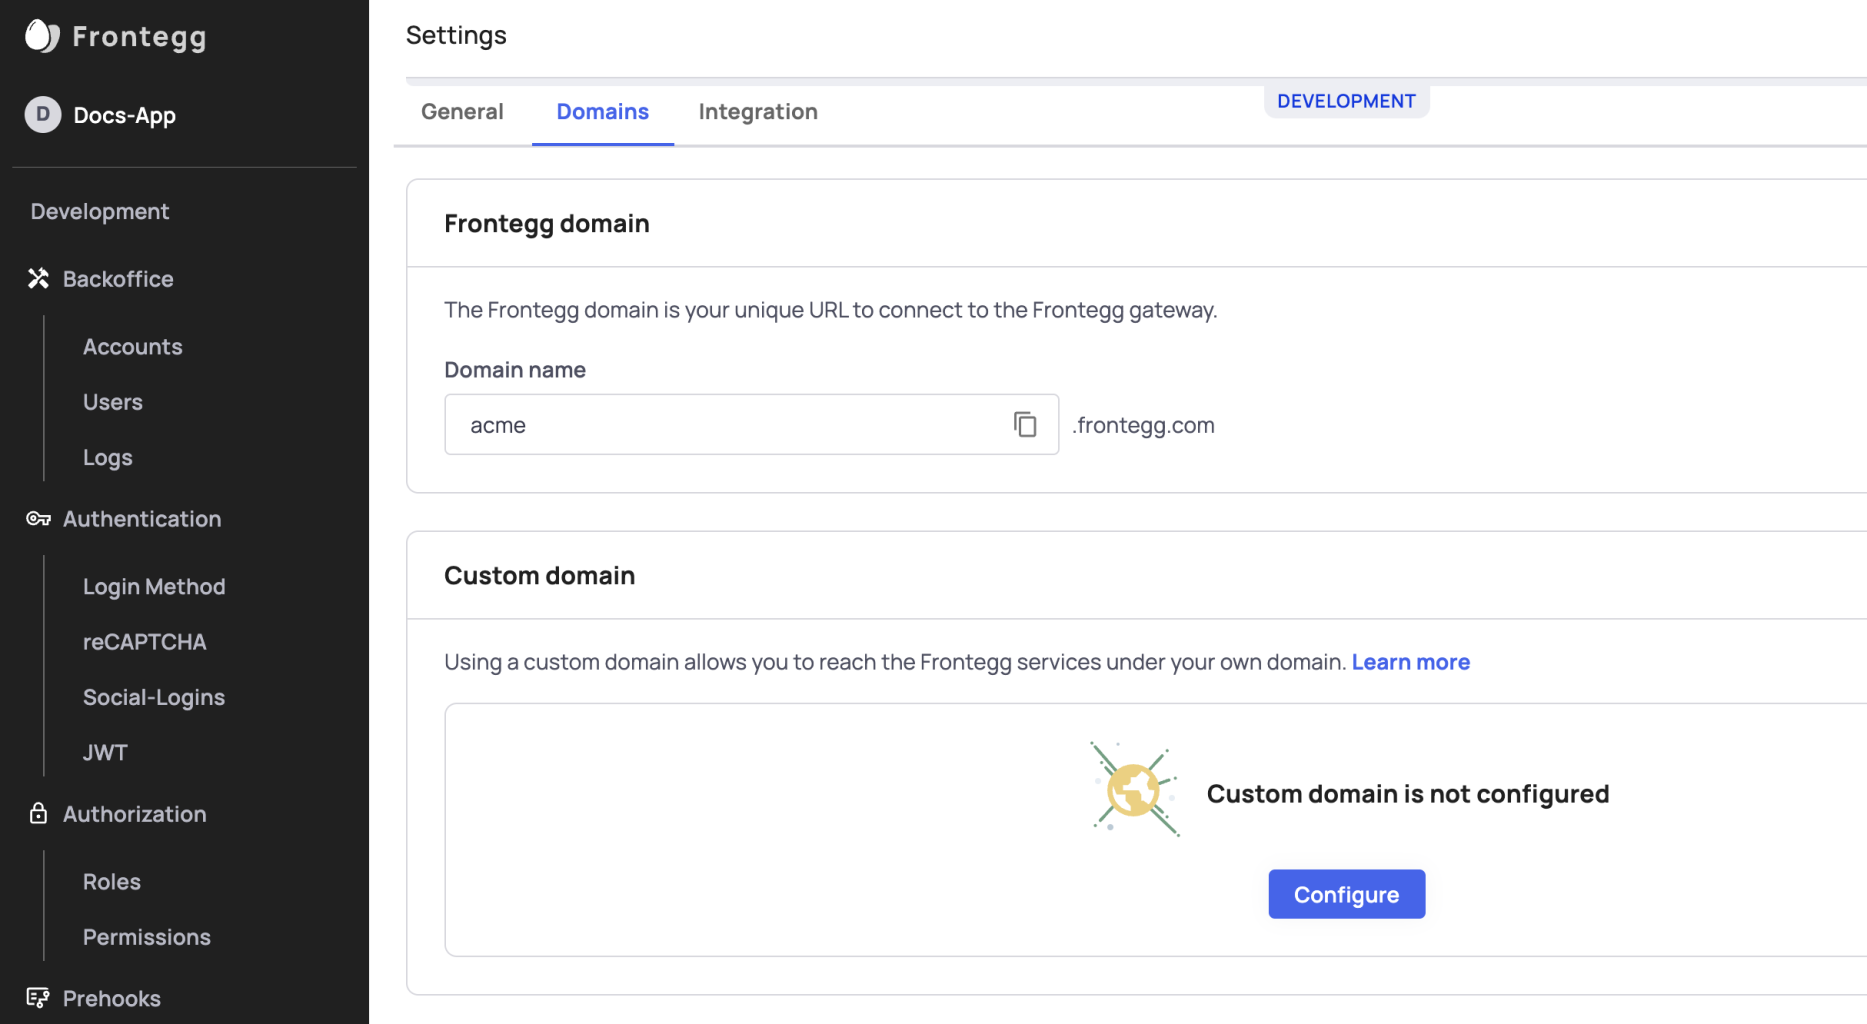
After adding the CNAME to your DNS configuration, click the Verify button.
Frontegg generates an SSL certificate for your custom domain.
If Frontegg can verify the CNAME record, you will see a success message. If encounter an error if Frontegg is unable to verify your custom domain. If that happens to you, double-check that you entered your CNAME correctly with your DNS provider and try again.
After a successful setup, you should also see your custom domain listed on the Administration Page's Domain tab with a verified tag.
Updating URLs and contextOptions
If you change your Frontegg domain or if you're using a custom domain on Frontegg, that should be also the domain that you're passing as the
baseUrlin thecontextOptionsin your Frontend integration package. TheURLsshould be also updated accordingly, so if you decided to use a custom domain or chose a new Frontegg domain, you should update it in the Login URL as well (for Hosted Login).
Allowed origins
This section controls which origins will be able to access your Frontegg application. By default, on environment creation, it will include the {{APP_URL}} and {{LOGIN_URL}}. You can add additional explicit URLs to the list.
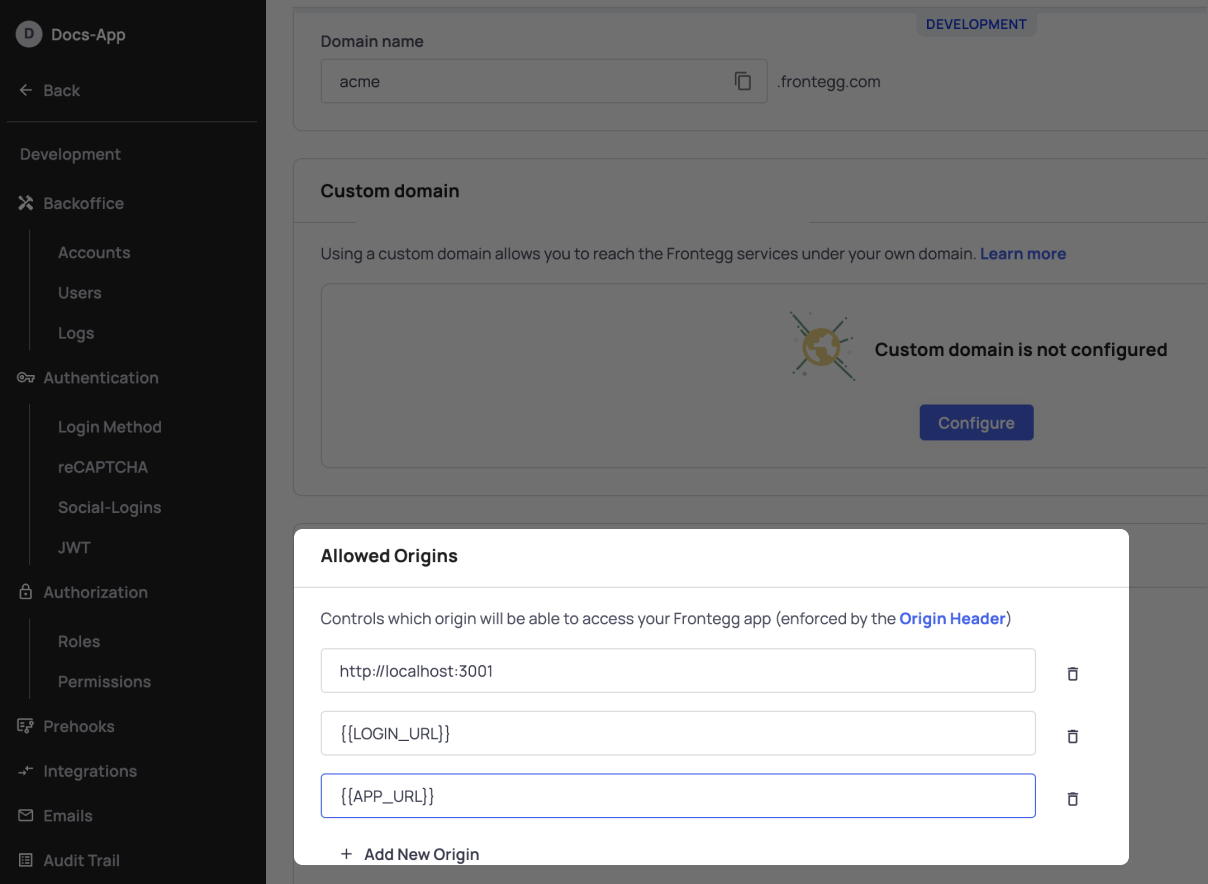
The URLs in this section allow the use of wildcards .
Account Domain Restriction (User Sign-up)
To enhance control over user activity in your app, Frontegg offers you the option to restrict users' ability to sign-up to your application according to their email domain address. The feature allows you to block/allow specific domains from/to signing-up, as well as the ability to block public domain addresses (e.g., Gmail). Customization of this feature is done within your environment settings. Learn more about Account Domain Restriction here.
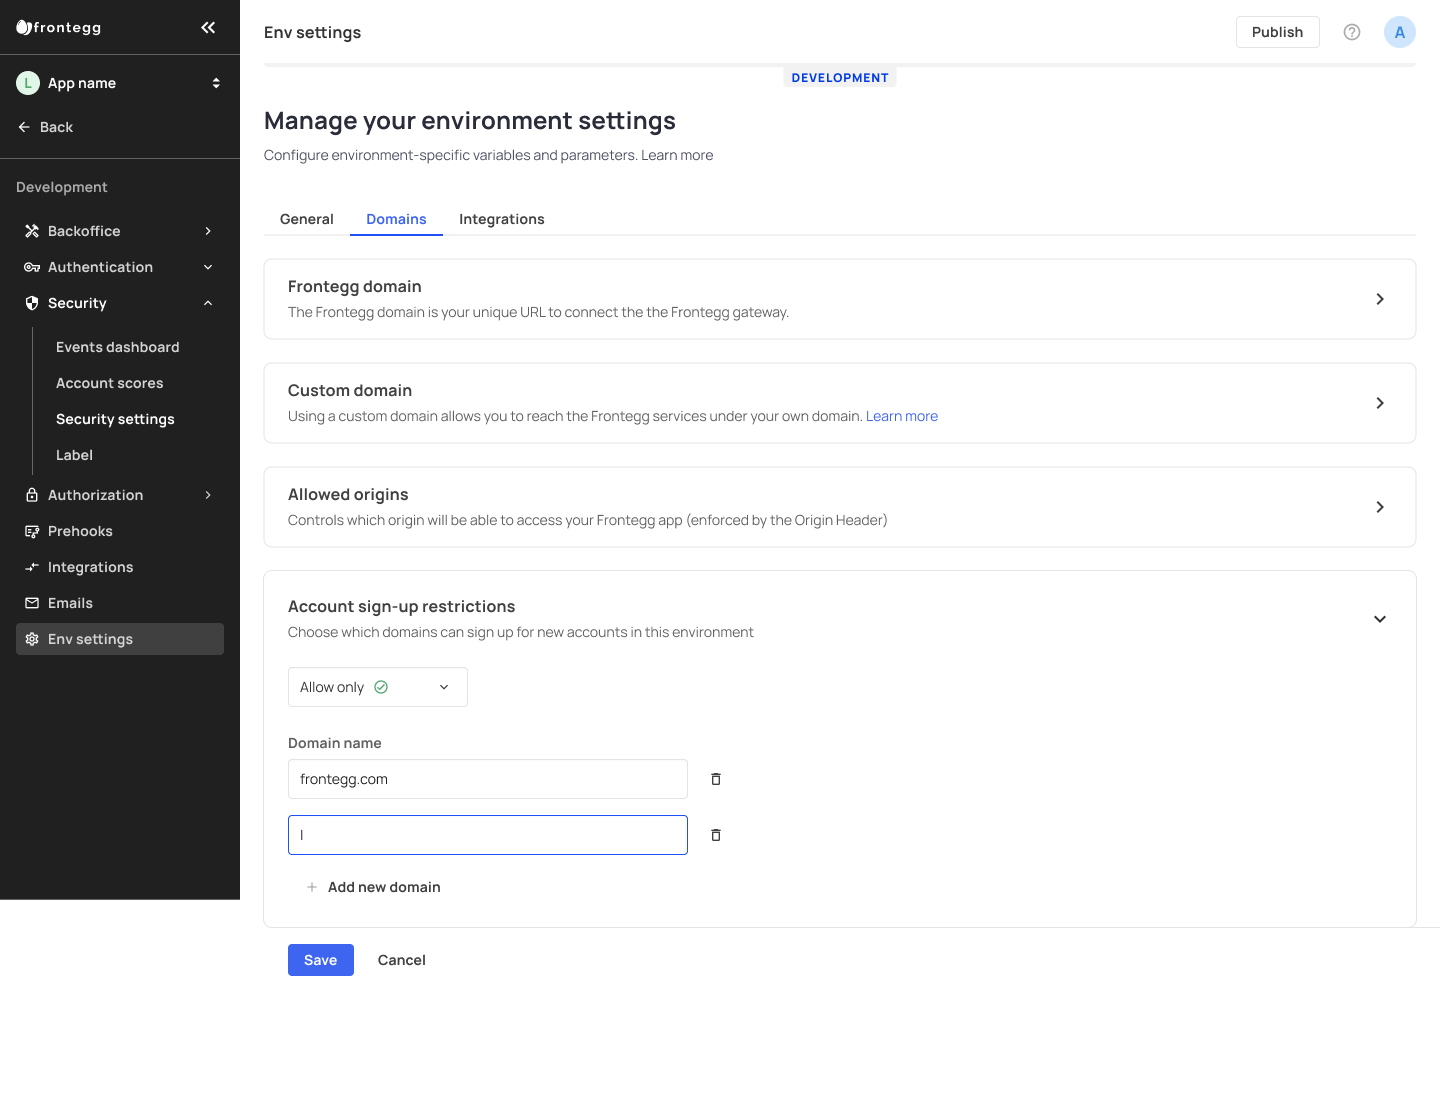
Allow Specific Domains to Sign-up
Hosted Login Redirect URLs
This section is located under Environments ➜ [NAME OF ENVIRONMENT] ➜ Login Method ➜ Hosted Login
Frontegg Hosted login is based on the oauth2 protocol. The Hosted login flow is that your application URL is authorized on Frontegg and hence is able to redirect to the Frontegg Hosted Login page and redirect back to your application after authentication. In order for that flow to work, your application URL needs to be in the list of Authorized URLs on Frontegg.
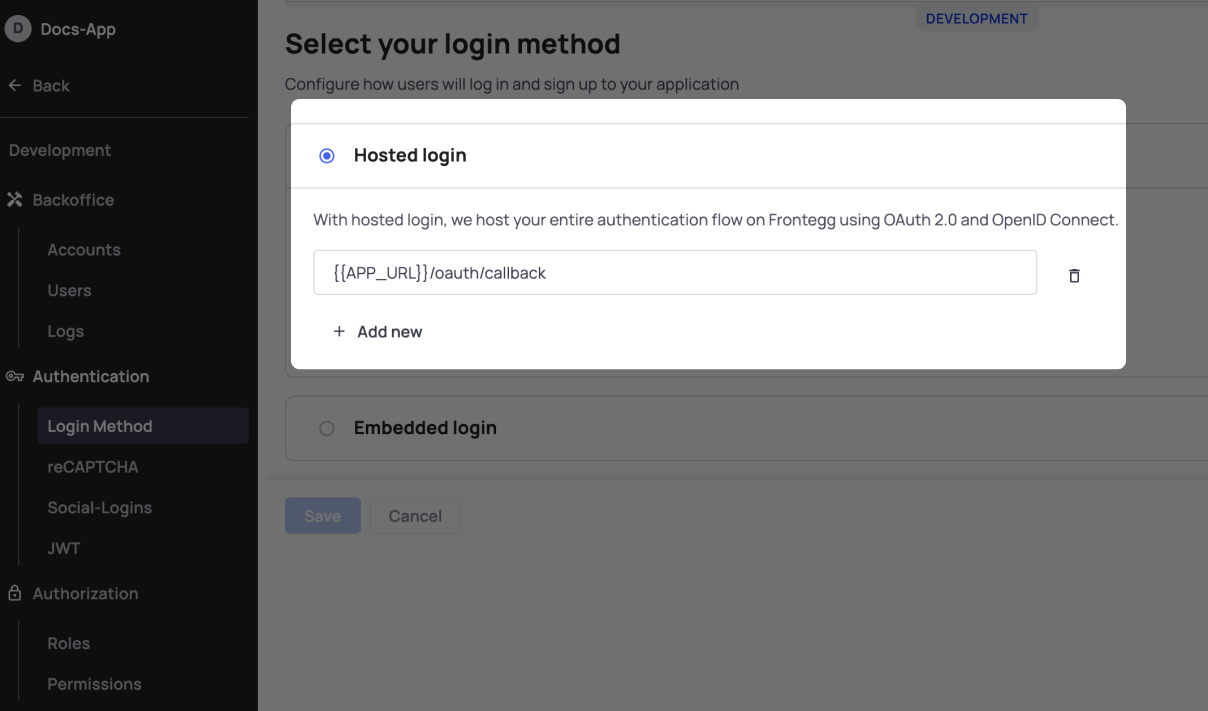
The default during environment creation will be {{APP_URL}}/oauth/callback that is taking the value for the URLs section. You can add additional explicit URLs and use wildcards in the sub-domain of the URL. For example:
https://*.acme.com is an allowed value, while https://subdomain.*.com is forbidden.
If you do not need a Frontegg development environment, you can go straight from integration to a production environment.
Read below to learn more about how Frontegg environments work and how you can use them.
What happened to workspaces?
Frontegg Environments replaced the old workspaces approach, so you no longer need to create multiple workspaces and manually copy their configurations from one to the other.
Using Your Development and Production Environment
After setting up your environment as per the instructions above, each Environment can then be adjusted and set with different features and configurations to test your user's authentication experience, security enablement, access, and more. After testing your settings in the Development environment and going to Production, all of the settings your see in your Builder will be transferred to the new environment, but advanced fetures like user Entitlements and user roles will need to be set individually for each environment.
Configurations Copied from Development to Production
While Frontegg copies many of the settings from development to production but not all of them. Currently, the environment configurations that Frontegg copies are: Social Logins, SSO / SAML, Captcha, Emails, and Hooks.
After integration, you will see your Development environment in the Frontegg Portal sidebar (Environments ➜ Development).
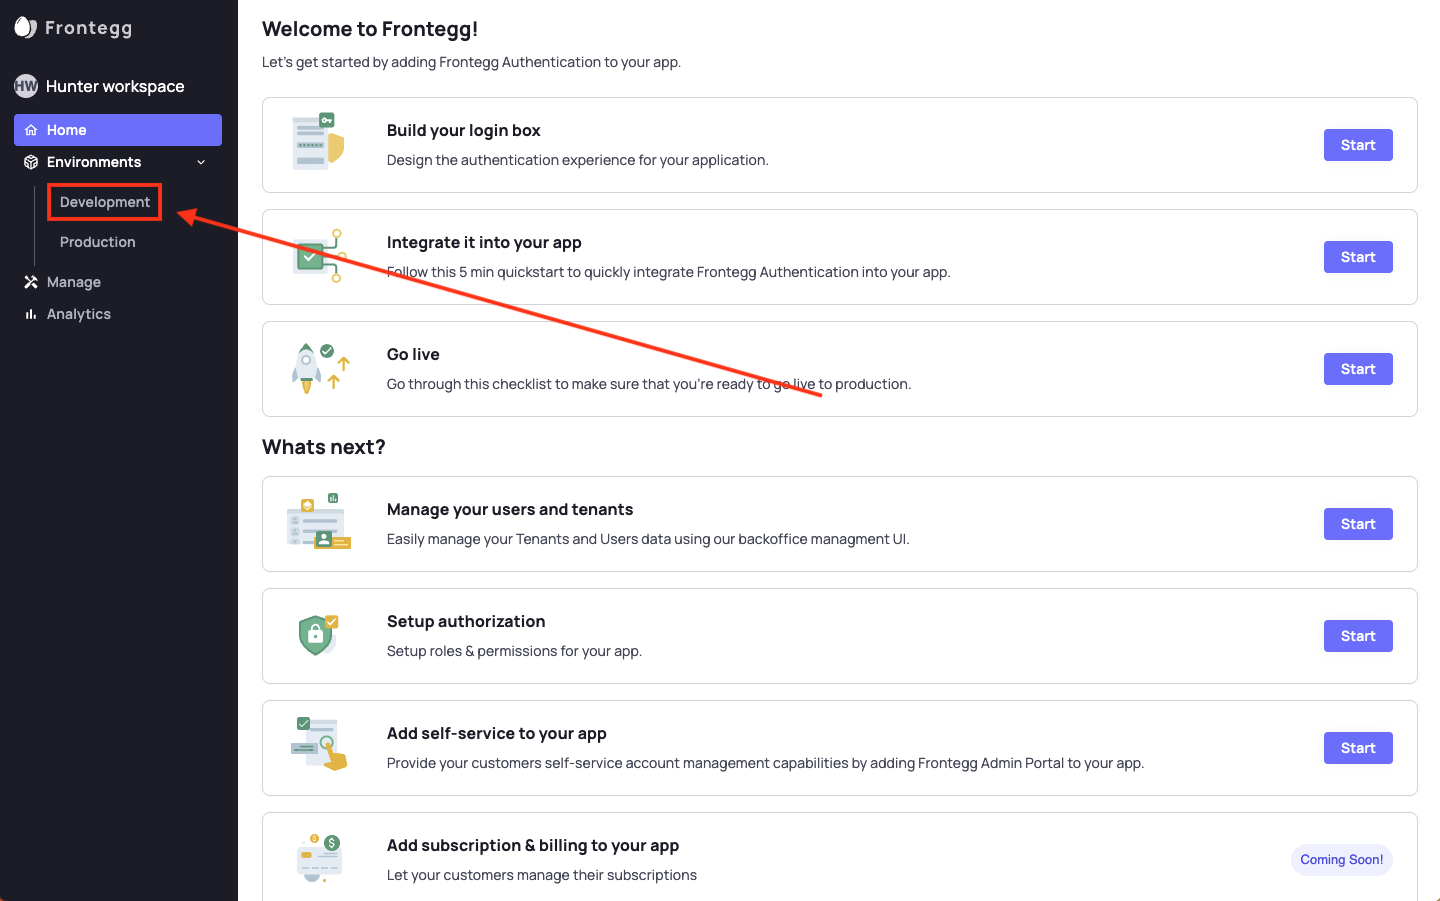
In the Development environment, you can set up your authentication preferences, add and manage users, create and use webhooks, edit email templates, and more.
Managing Your Production Environment
To access your Production environment, go to Environments ➜ Production in your portal's sidebar.
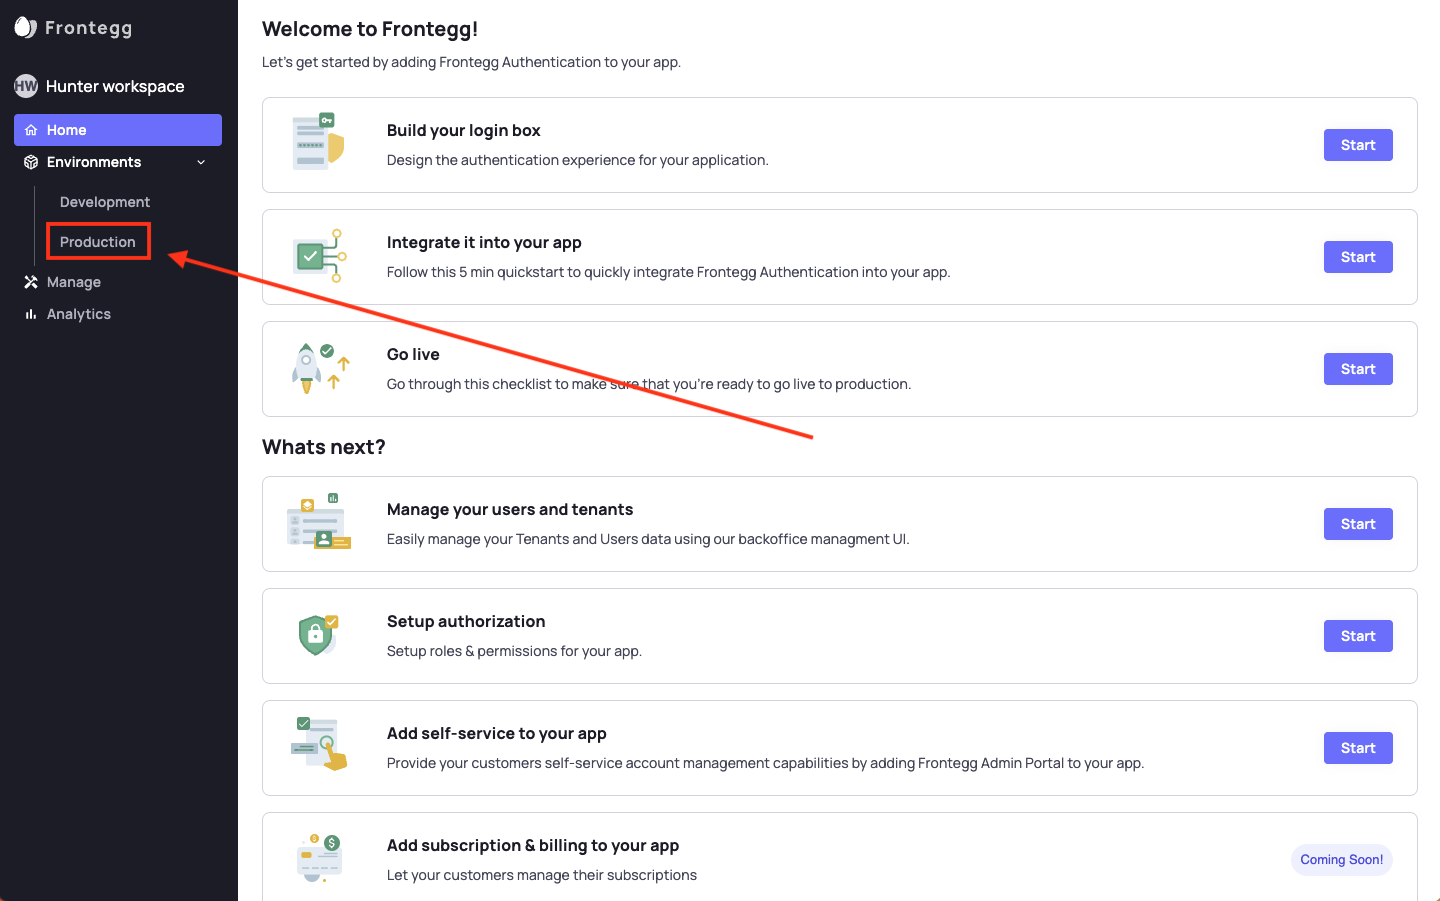
The Production environment looks virtually identical to the development environment, and you should see the same configurations in Production that you already set up for your Development environment.
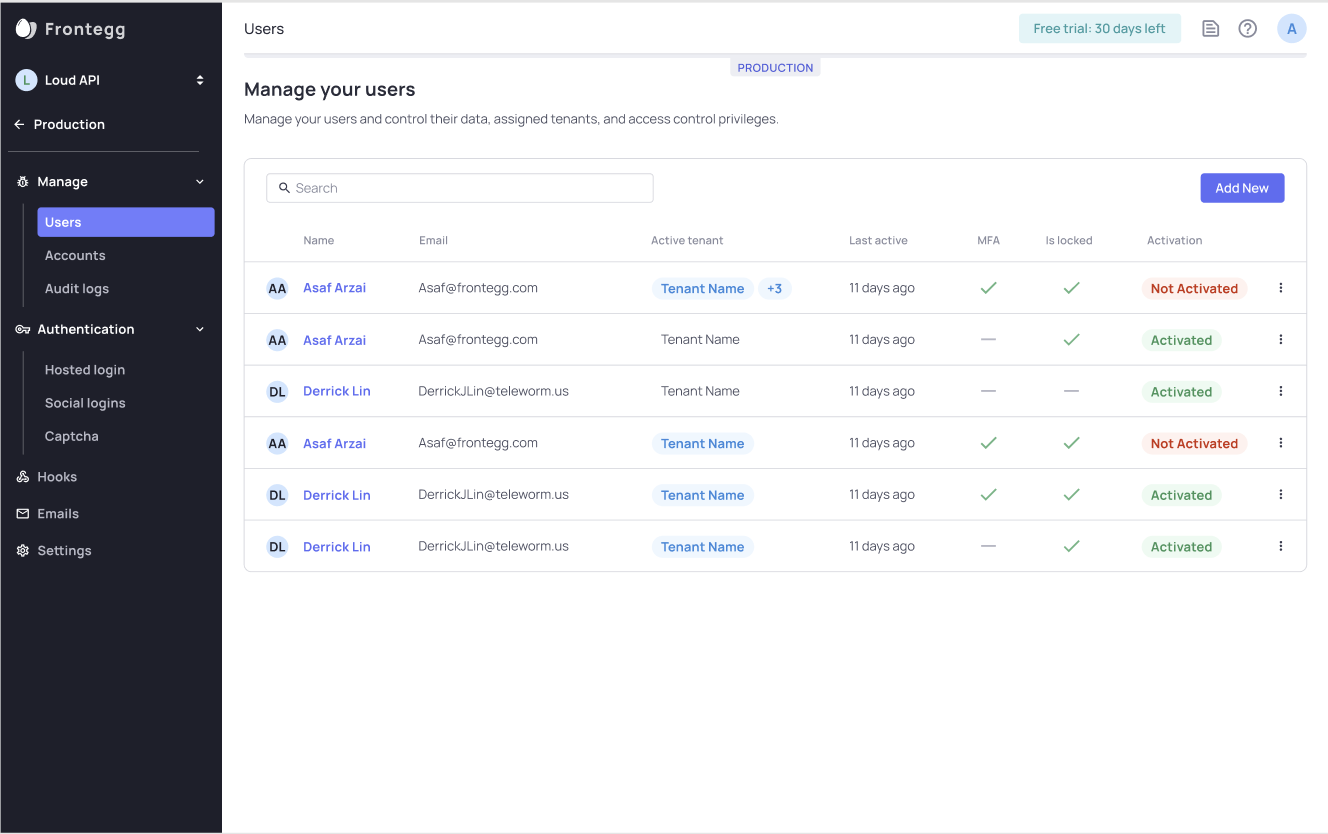
First Production
When you are ready to start using Frontegg live in your application, effortlessly deploy your Frontegg development settings to a Frontegg Production environment.
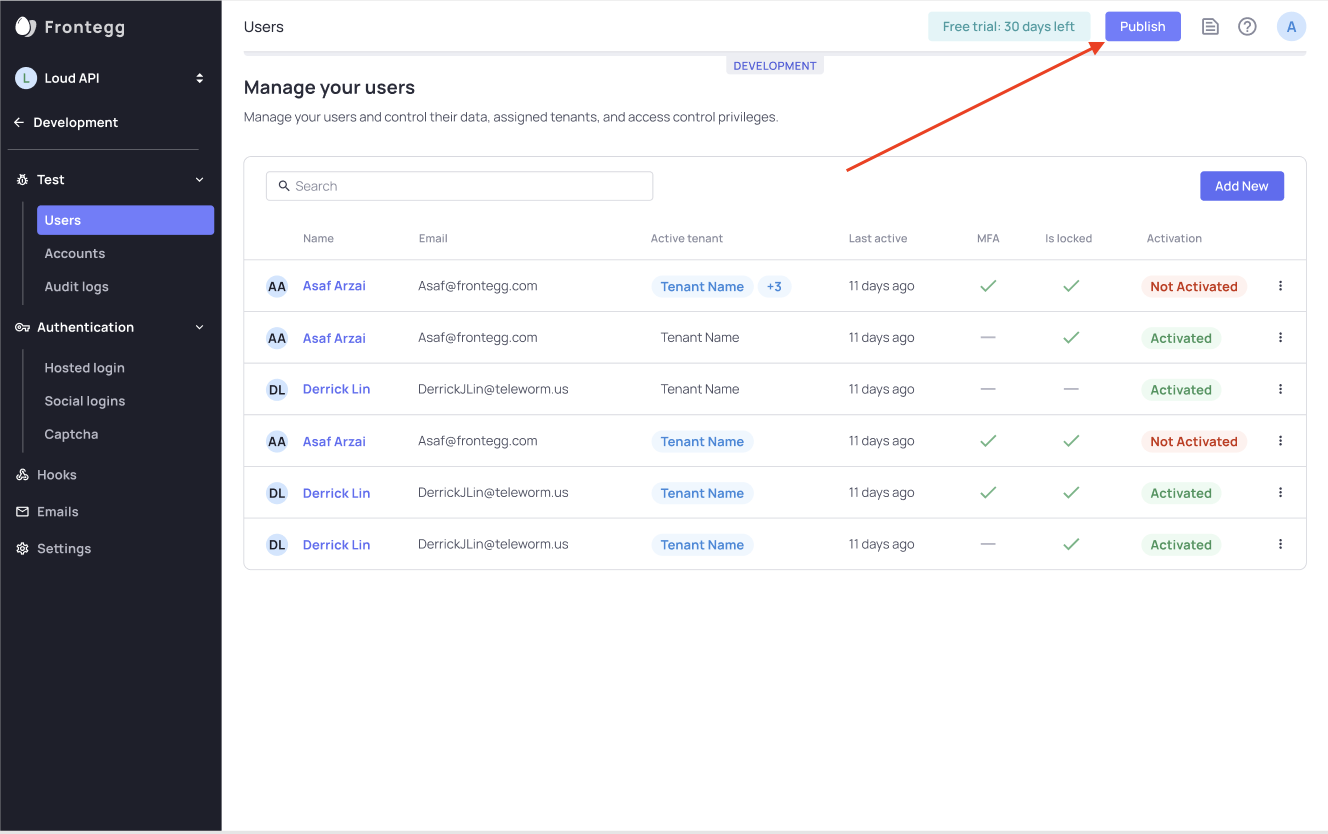
If it is your first time deploying from Development to Production, go to the Portal and click Publish to production, and enter your production URL in the ensuing form.
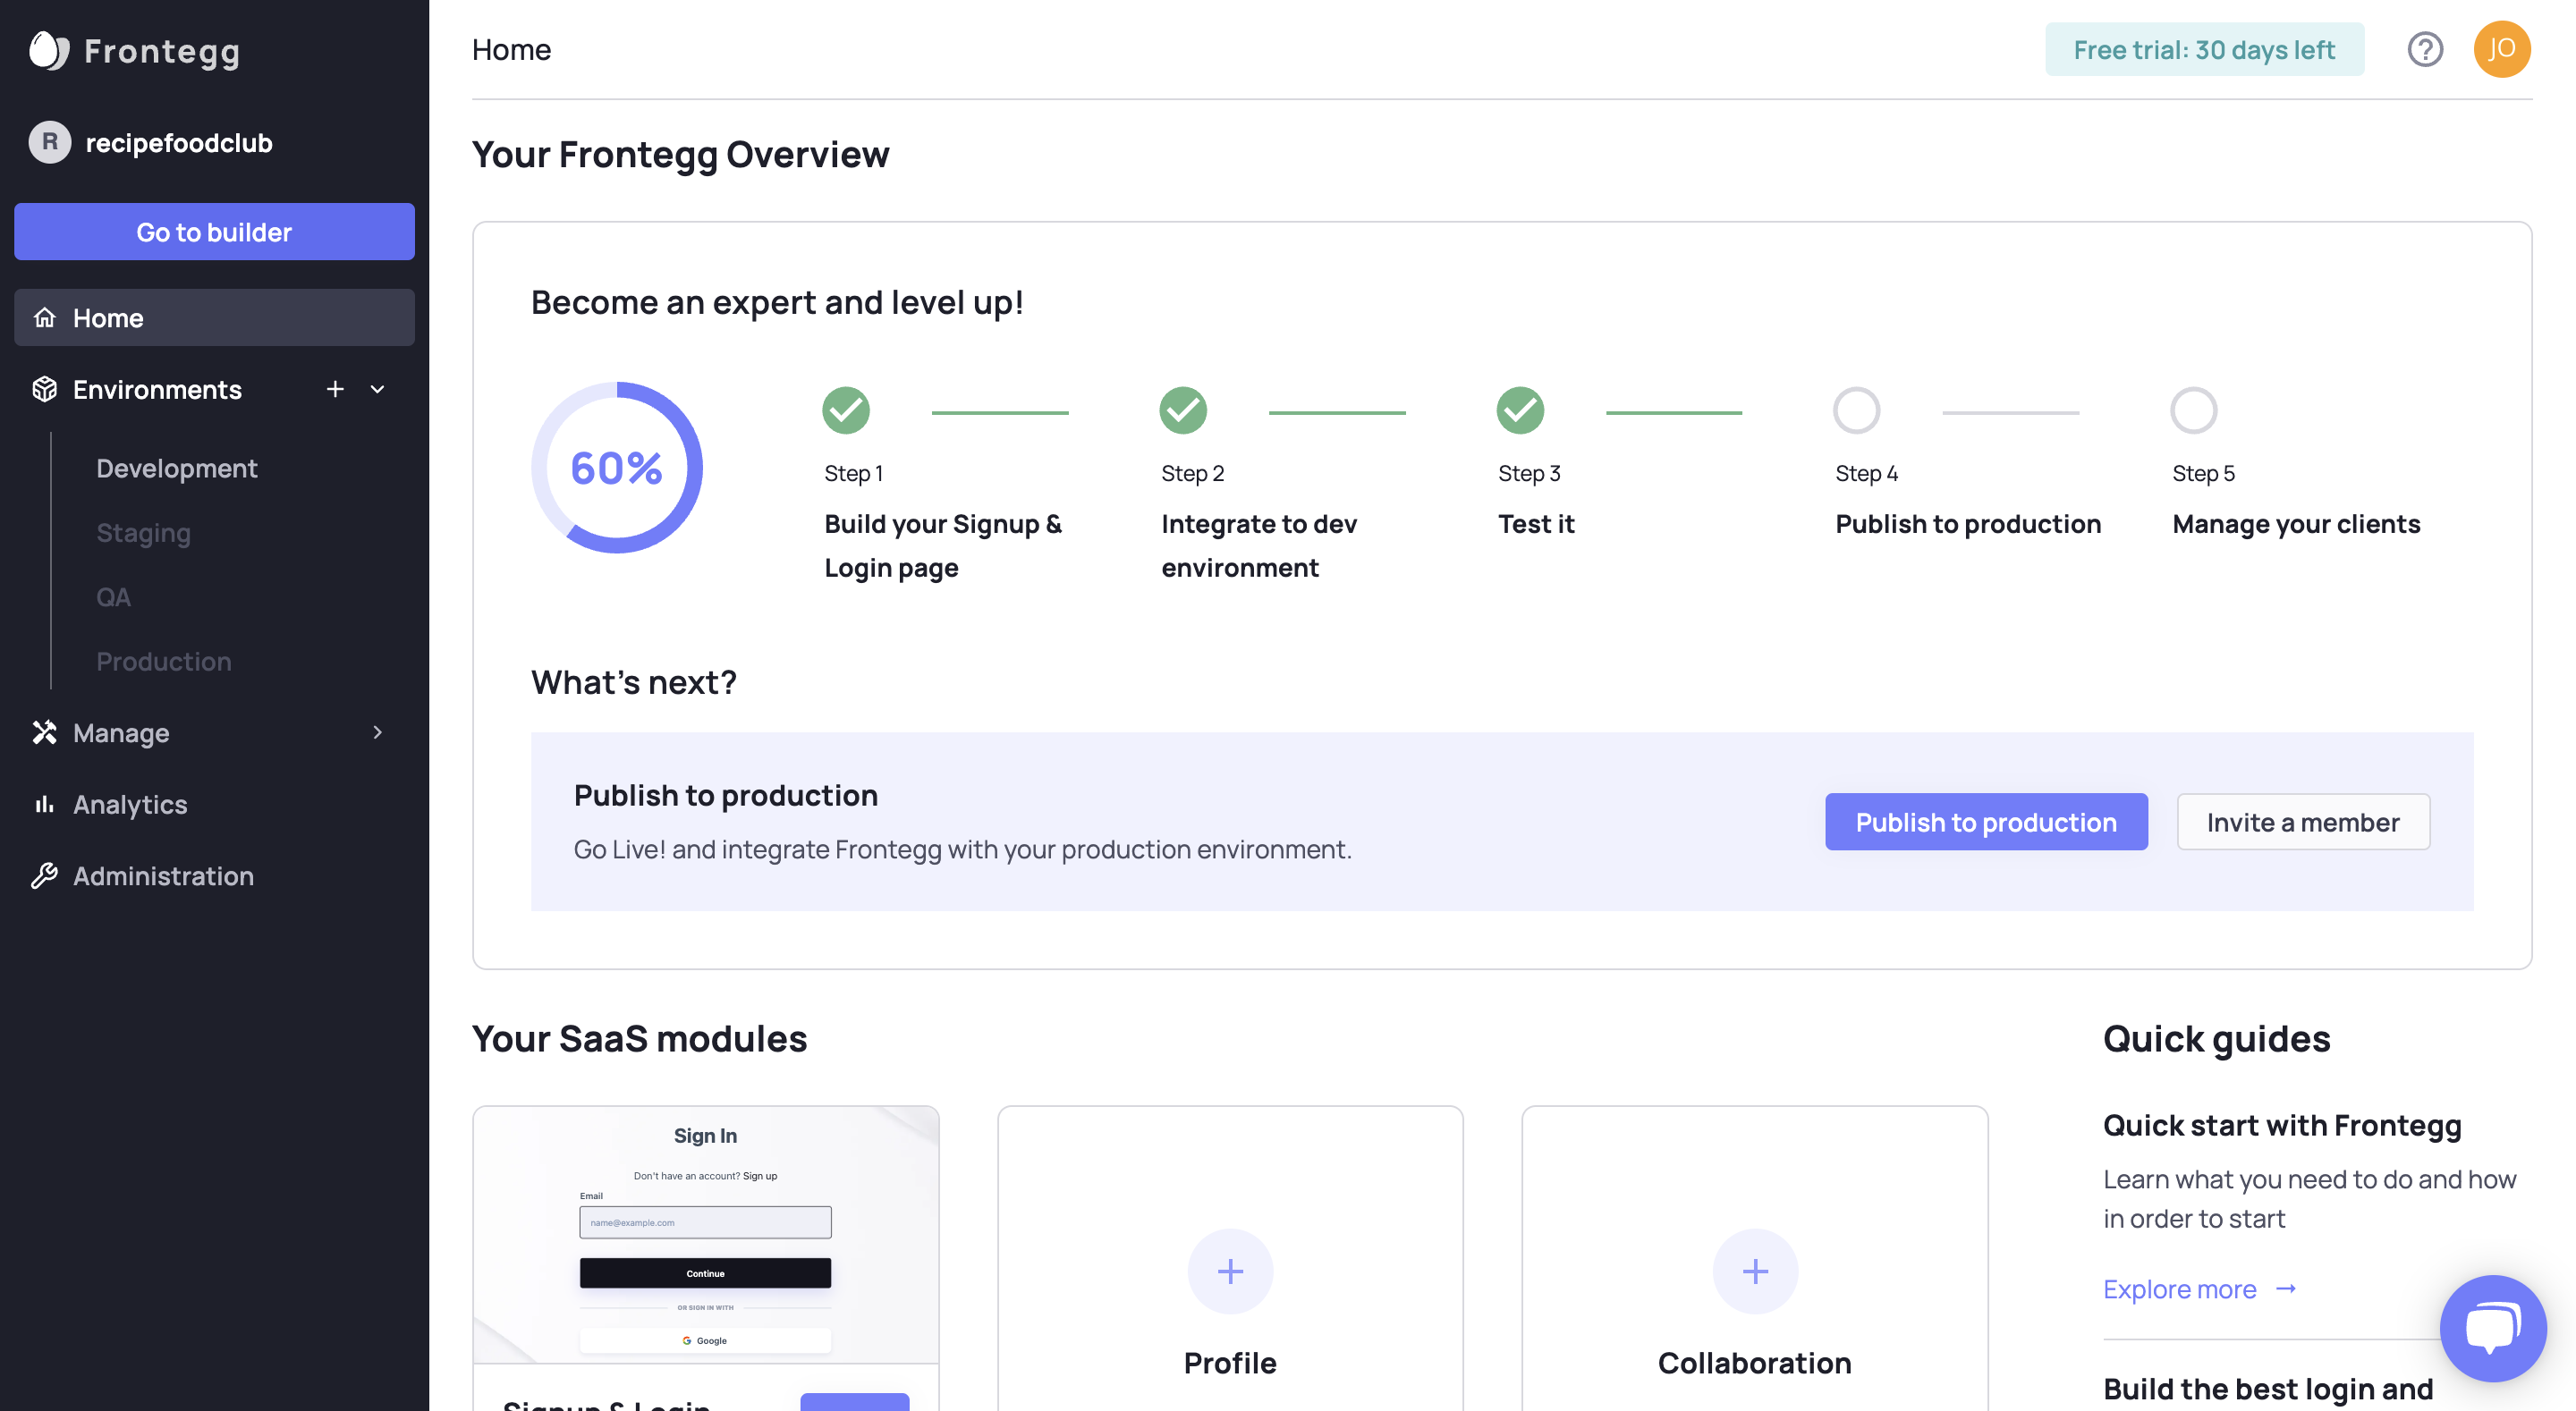
The Frontegg API is waiting for your application to send a call to it from the URL that you input.
In a separate browser window, go to your production application URL and open the Frontegg Login Box. This makes a call from your application's production URL to the Frontegg API.
Ensure Environment Activation
If you do not send a message from your application to the Frontegg API, Frontegg cannot activate your production environment. The easiest way is to just open the Frontegg Login Box from your application as described above.
After making the call, you should see a welcome to production message in your Frontegg Portal.
When you go to production, Frontegg automatically copies your Development environment configurations to your Production environment.
Settings and Data Deployment
Note that Frontegg does not deploy the data from your development environment to your production environment.
This means that the tenants and users and other data you created and managed in your development environment will not be in your production environment.
Adding New Environments
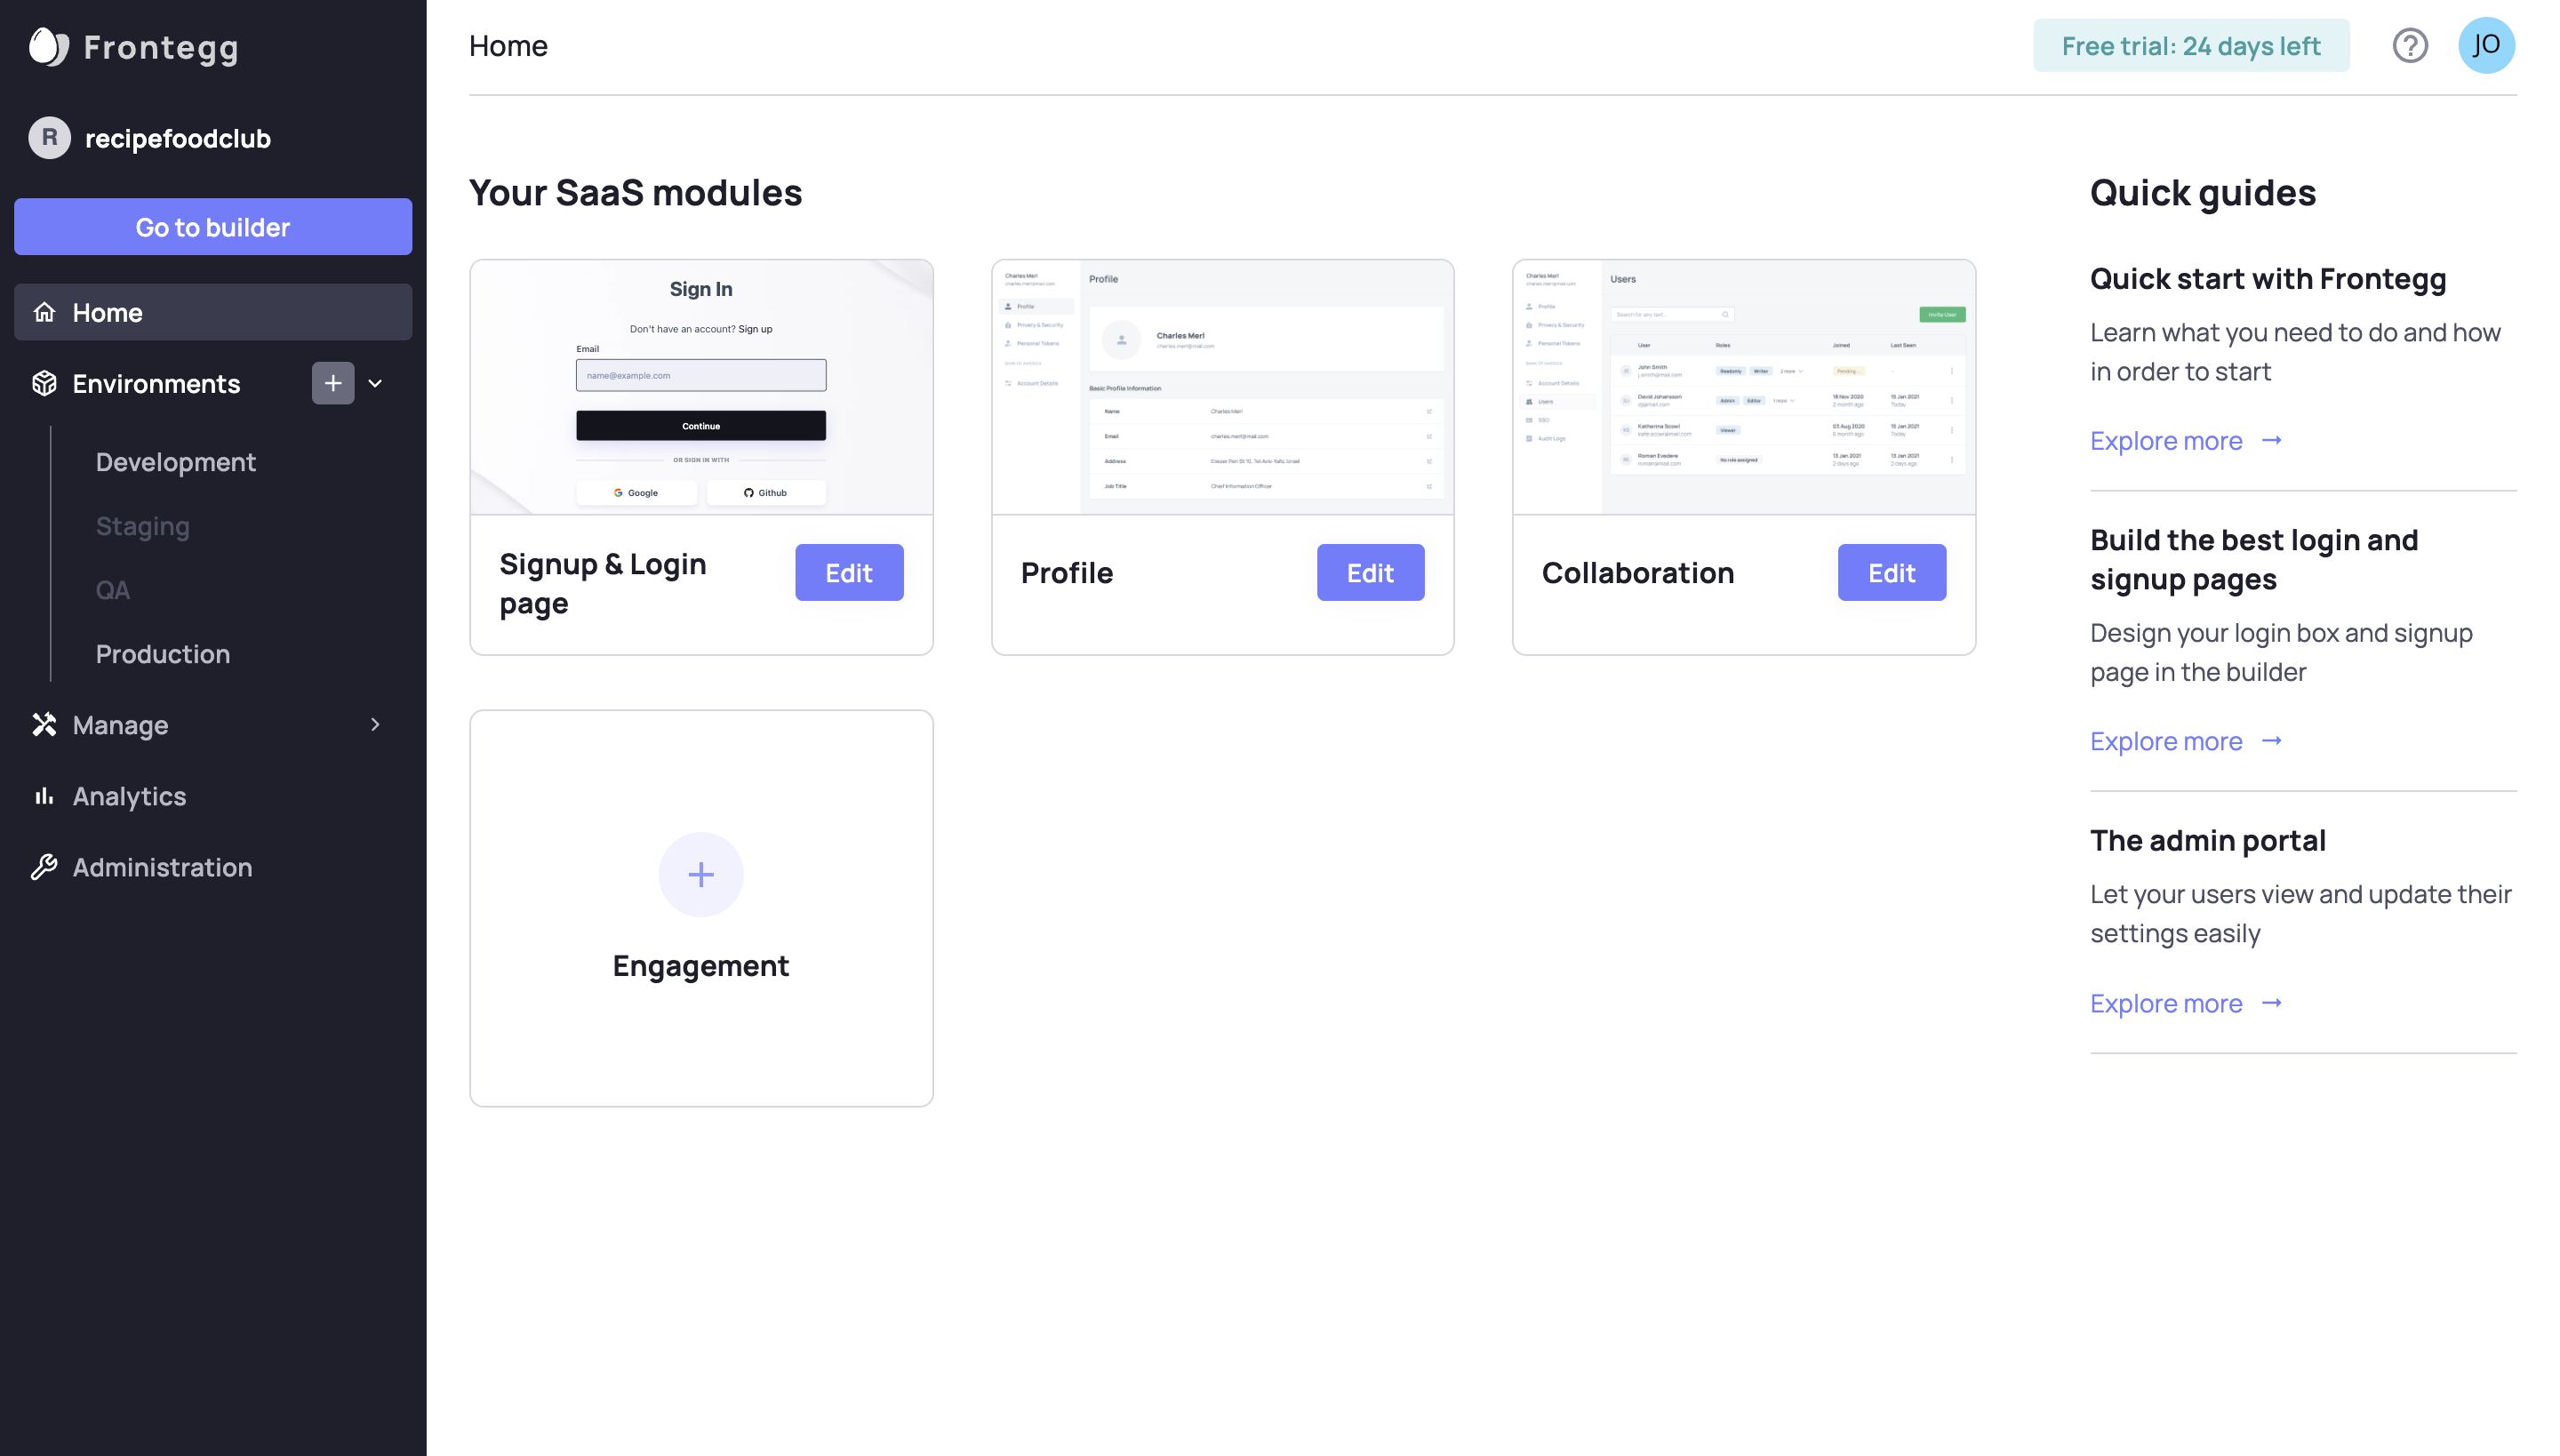
Add a new environment from the sidebar. In addition to development and production, Frontegg offers Staging and QA environments.
To add a new environment, click the + icon next to the Environments.
Select the environment and enter your application's URL. This will create a new environment you can play with!
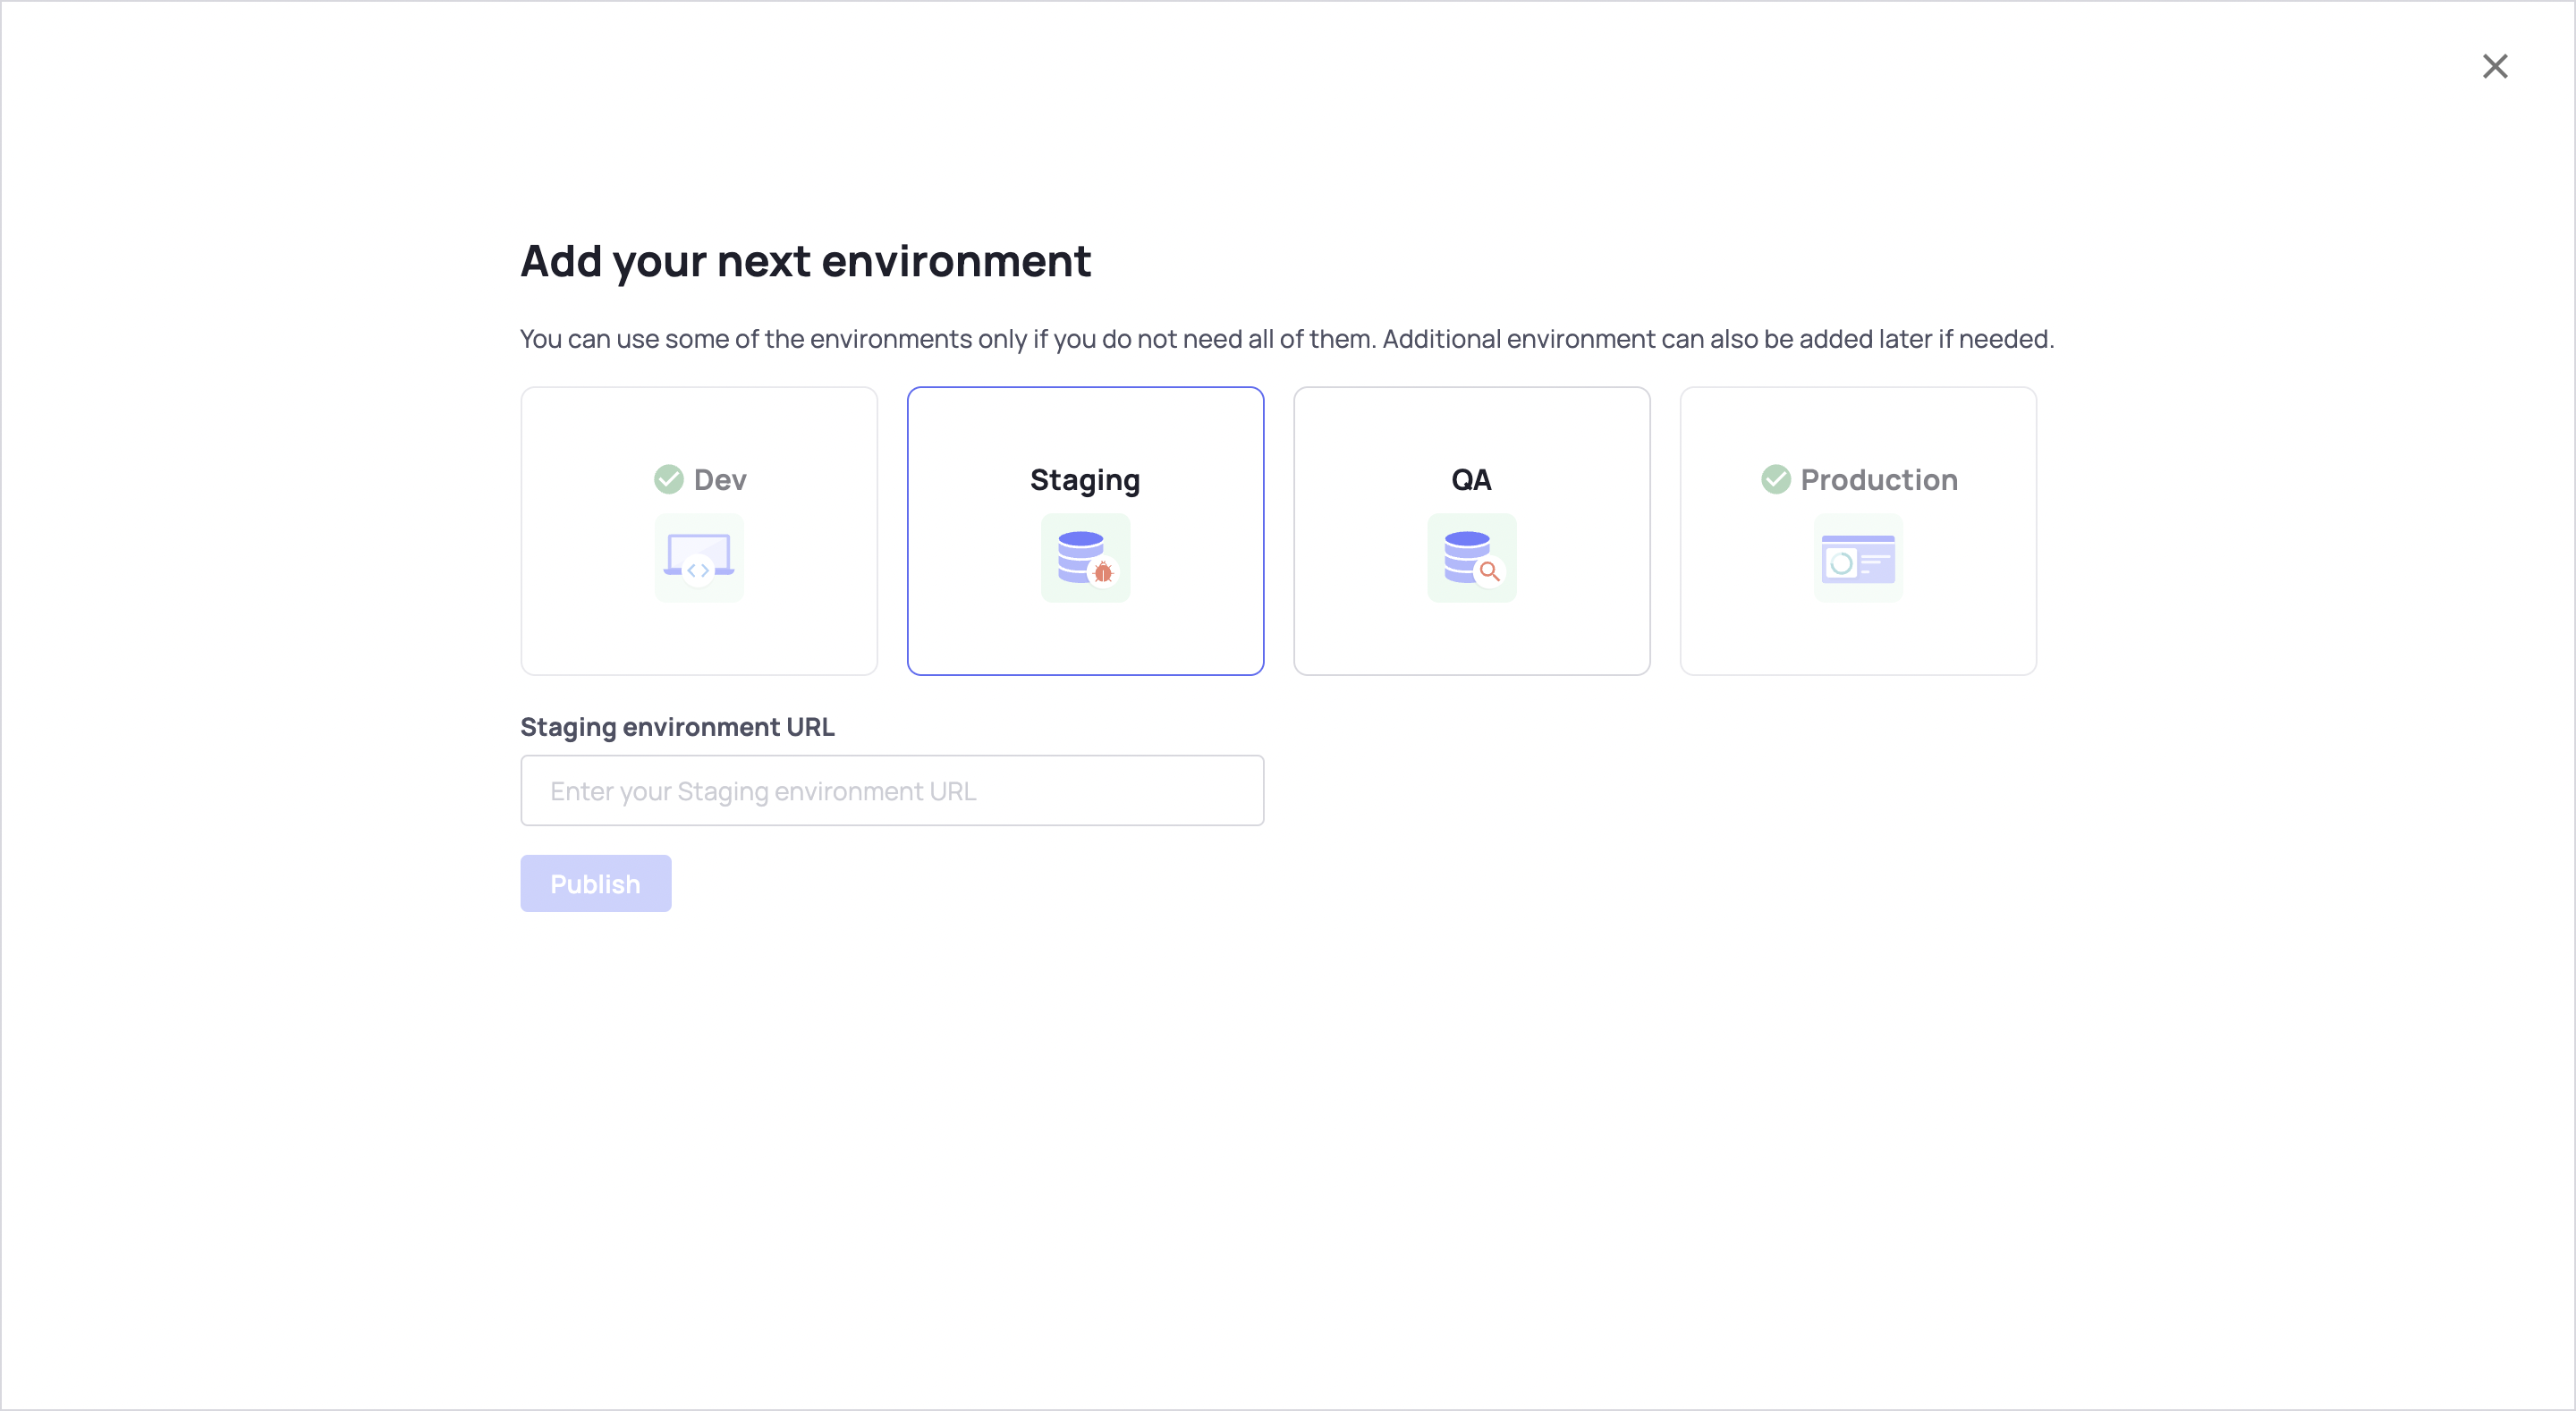
When viewing environments in the Portal, you can tell which environment you are viewing because it says so in the sidebar and at the top of the page.
User Data in Different Environments
Because Frontegg does not move your tenant and user data from development to production, you will have different tenant and user data in your development and production environments.
Using Multiple Environments
Use an environment and make changes to it without worrying about impacting other environments until you want to.
For instance, use your Development environment and make changes after deploying them to production without worrying about impacting the Production environment until you want to.
Best Practice
The order of implementing and deploying changes in your environments is via Development ➜ Staging ➜ QA ➜ Production.
Updated 2 months ago