App protection
It goes without saying that one serious security incident in your app could be the end of it all. Luckily, Frontegg goes above and beyond to ensure your app security is state-of-the-art, all while keeping the authentication user experience top-notch.
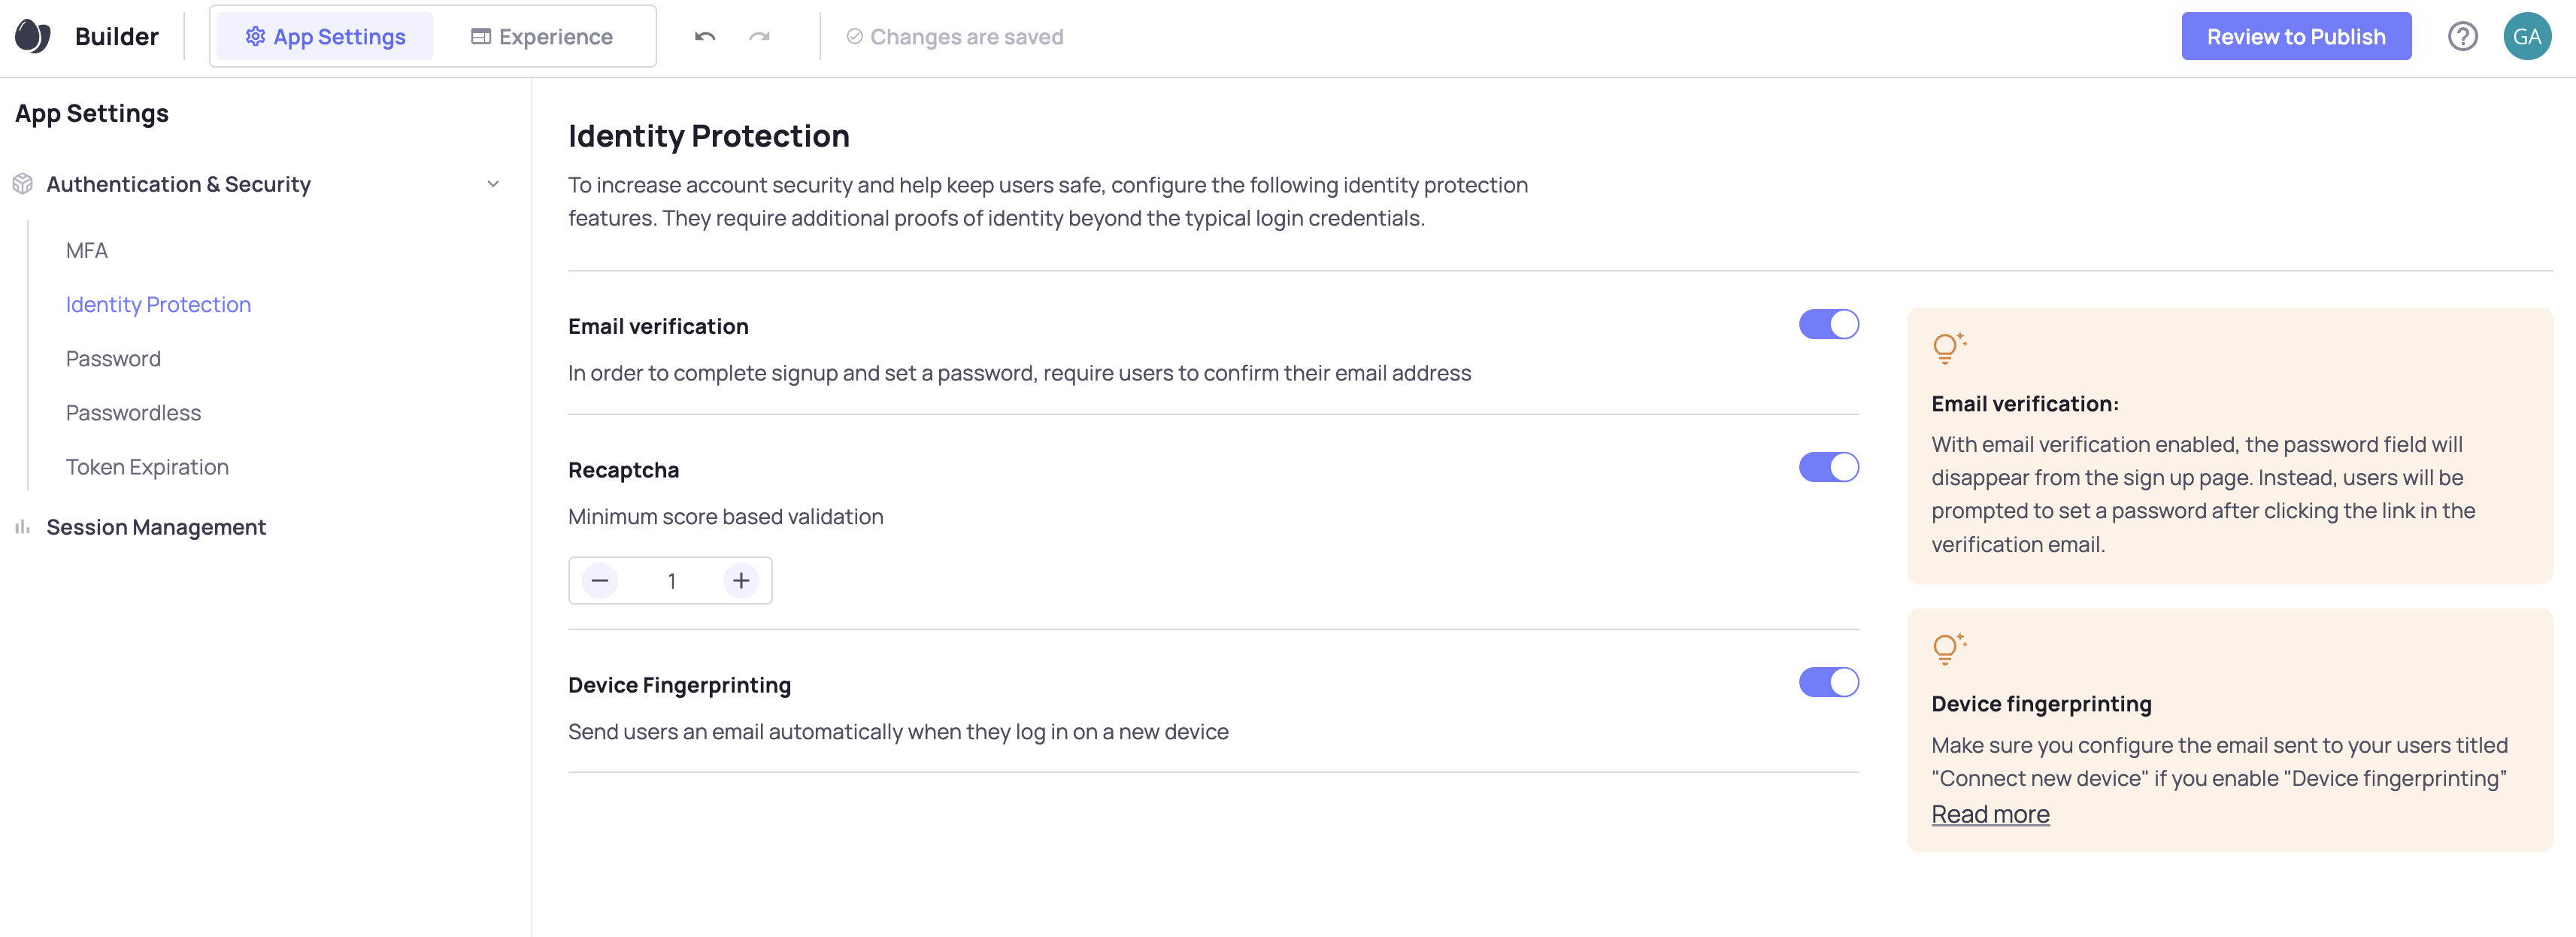
Luckily, Frontegg makes this a cinch. With just a few toggles, you can add a number of layers of identity protection.

Let's have a look at each one:
Bot Detection (reCAPTCHA)
reCAPTCHA is an invisible protection layer for your app that stops fake users but lets the real ones in. Unlike older versions of reCAPTCHA, version 3 (which Frontegg uses) requires no user action so there is no friction added to your sign up flow.
By toggling reCAPTCHA on in the App Settings, it will check all users are real on signup and login. A small box will appear on your Frontegg signup and login screens as a result.
On every user visit, reCAPTCHA scores that user on a scale from 0.0 to 1.0
What does the score mean?
The score is a value that each requests gets. A value of 1.0 is very likely a good interaction and a value of 0.0 is very likely a bot. The greater your minimum score, the stricter your security.
Once toggled on, you can decide the minimum score your users need to pass reCAPTCHA.
Frontegg recommends 0.5 as a good starting point.
Setting Up reCAPTCHA in Your Environments
In order for reCAPTCHA to work in your app, there are a few small configurations you need to define in each of your envornments
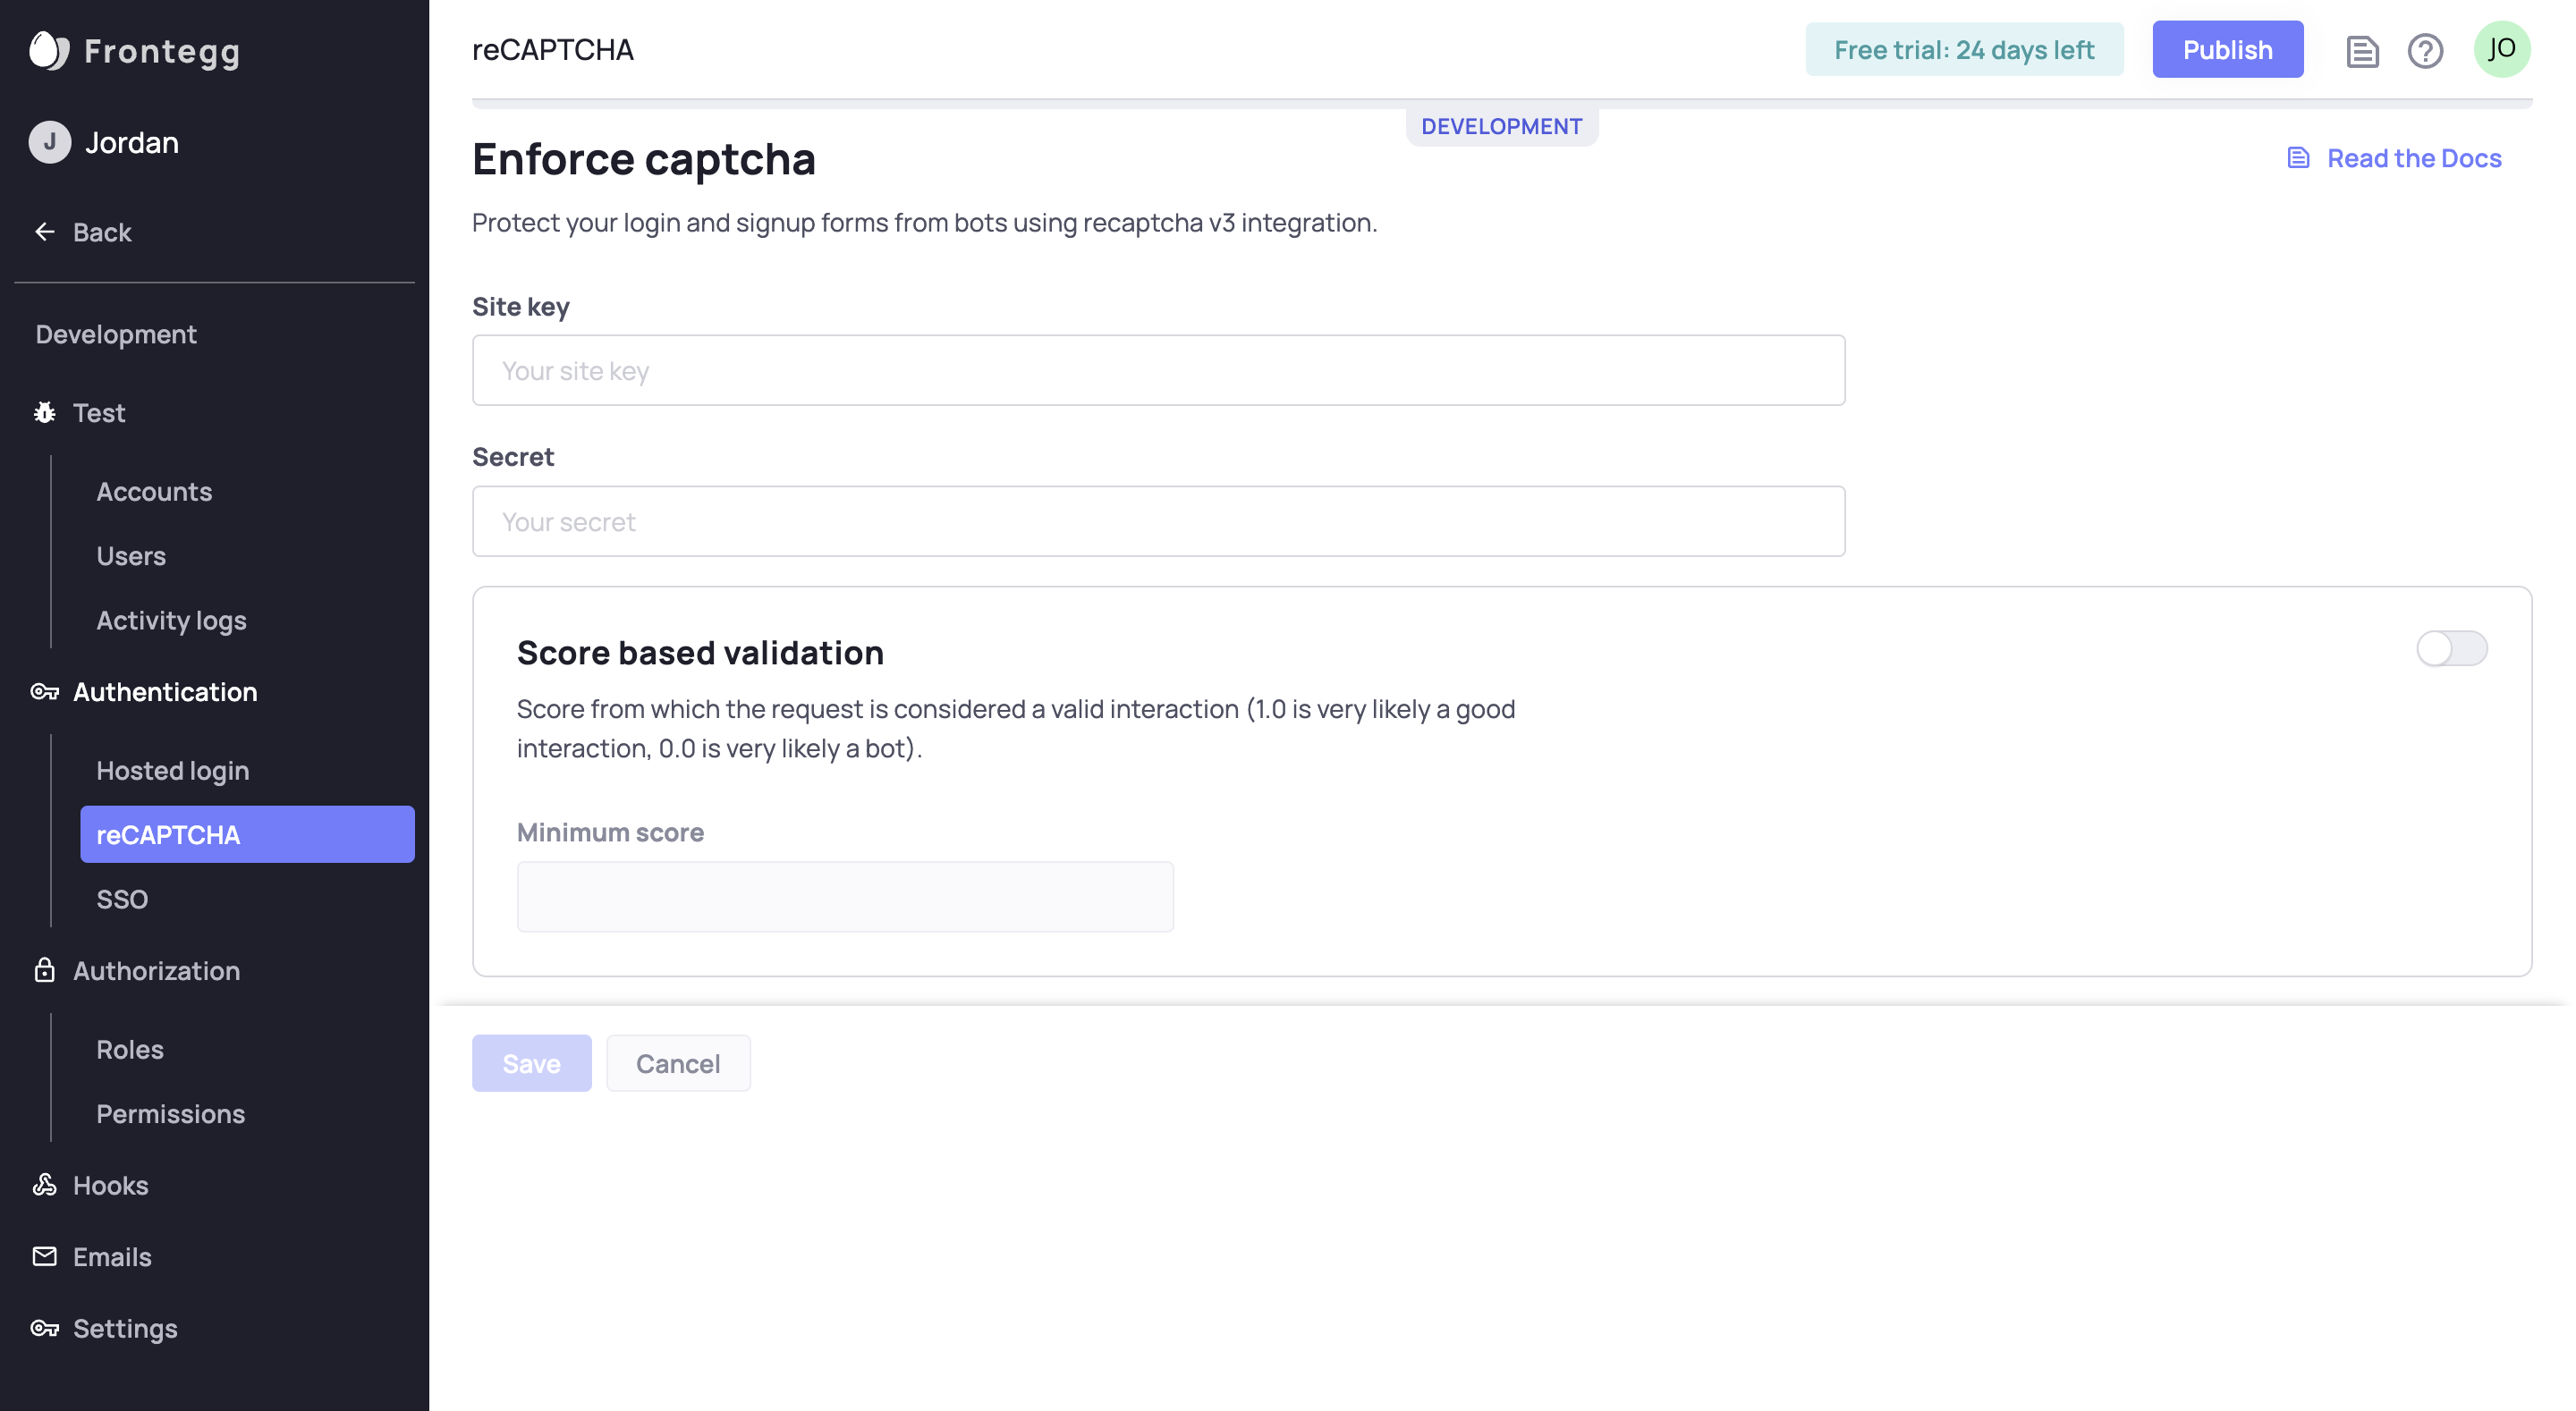
In your Frontegg Portal, go to Environments ➜ [NAME OF ENVIRONMENT] ➜ Authentication ➜ reCAPTCHA.
For instance, go to the development environment at Environments ➜ Development ➜ Authentication ➜ reCAPTCHA.
This is where you configure the reCAPTCHA credentials. You should see inputs for Site Key and Secret in addition to controls for score-based validation.

Configurations Between Environments
When moving a project from one environment to another, Frontegg moves the reCAPTCHA configurations for you. For instance, if moving from development to production, Frontegg moves the development reCAPTCHA configuration to production.
Read below to learn where to get the information to input into this form.
Get reCAPTCHA Keys
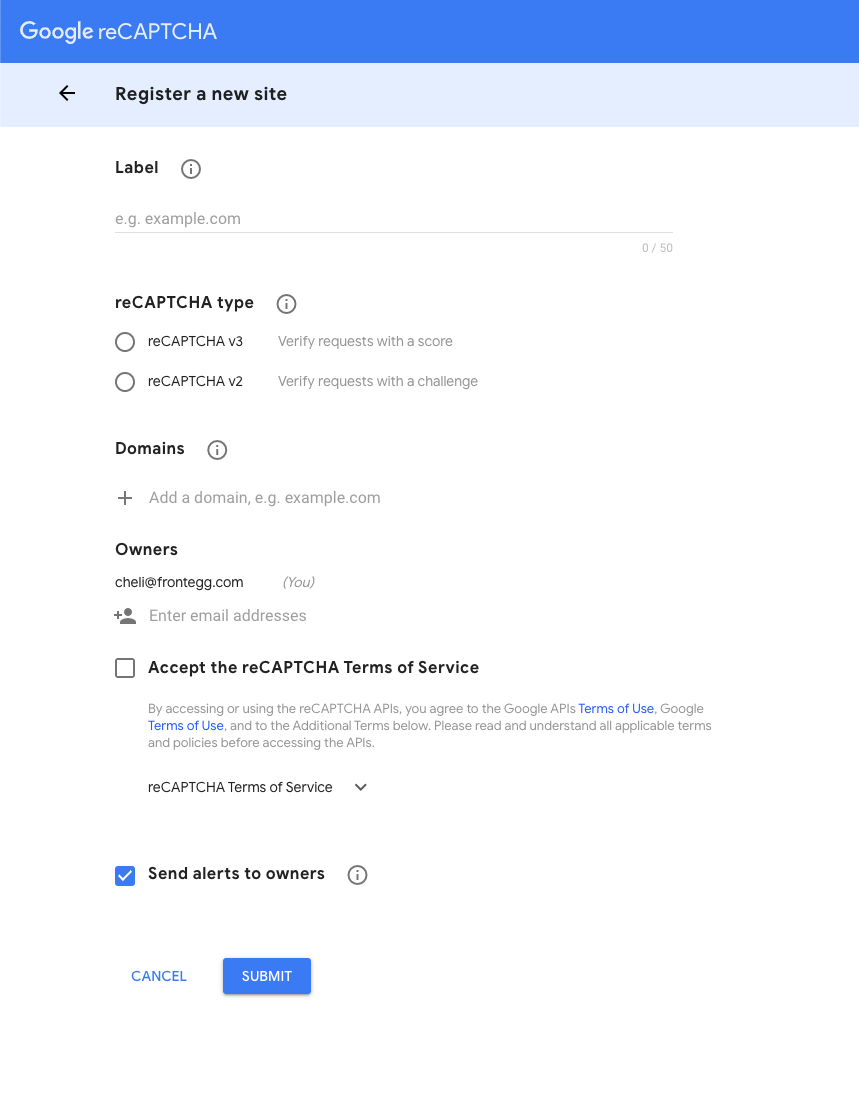
Obtain your Site Key and Secret Key from Google reCAPTCHA v3.

As displayed in the image above, here is what you do:
- Fill in the label.
- Select reCAPTCHA v3.
- Add your domain.
- Select Accept the reCAPTCHA Terms of Service.
- Submit.
Google then should present you with your keys.
Copy the Site and Secret keys from Google.
Paste them into your Frontegg Portal.
Here you also can set the minimum passing score required to accept reCAPTCHA validation. To use this feature, toggle the switch to on and set your score.
Now reCAPTCHA is up and running in your login box!
Brute Force Protection
Brute force attacks are probably the oldest authentication attacks out there as they are very straightforward. A brute force attack entails attempting all possible passwords or encryption keys to gain unauthorized access to a system, account, or data.
Email Verification
When users sign up for your app with their email, you have two options. You can either let them through to your app right away, or you can send them an email and have them click a link. Sending them this verification email ensures that the user using this email actually has access to it.
However, email verification is only necessary for users who don't sign up with enterprise SSO (SAML or OpenID Connect) or social logins like Google or Github. That's because users verify their emails on every login by using SSO or social logins.
When 'Email verification' is enabled, for password or passwordless authentication, the user will have to click the link in the email in order to gain access to their account.
For password authentication, users will get an activation page after they click the verification link, where they will be able to set their password.
Disabling Email Verification
If you disable the "Email verification" feature, users will be redirected to your app upon sign-up without the need to verify their email address
Device Fingerprinting
Just like a fingerprint, all devices have a certain uniqueness that allows us to differentiate them. Using this uniqueness, we can warn users when their account is accessed from a device they haven't used before - a device with a unique, unrecognized fingerprint.
Once toggled on, users will receive an email whenever a new device is used to access their account. If they don't recognize the device, they can take an action like logging out of all sessions.
Customize the Device Fingerprinting Email
Once environments are set up, you can customize the email that gets sent to users when a new device logs into their account. You can customize this email by going to any environment, navigating to "Emails", and choosing "Connect New Device"
Updated 2 months ago