Single Sign-on Strategies
Single Sign On allows users to sign in using credentials they already have. This eliminates the need to create a new username and password just for your application.
Two popular SSO protocols are SAML and OpenID Connect. They manage and authenticate individual users across multiple applications.
This guide is the starting point for adding SSO to your Frontegg application so that users can sign in using their IDP credentials via SAML 2.0 or OpenID Connect.
The following are required to get SSO up and running for your customers and their organizational users.
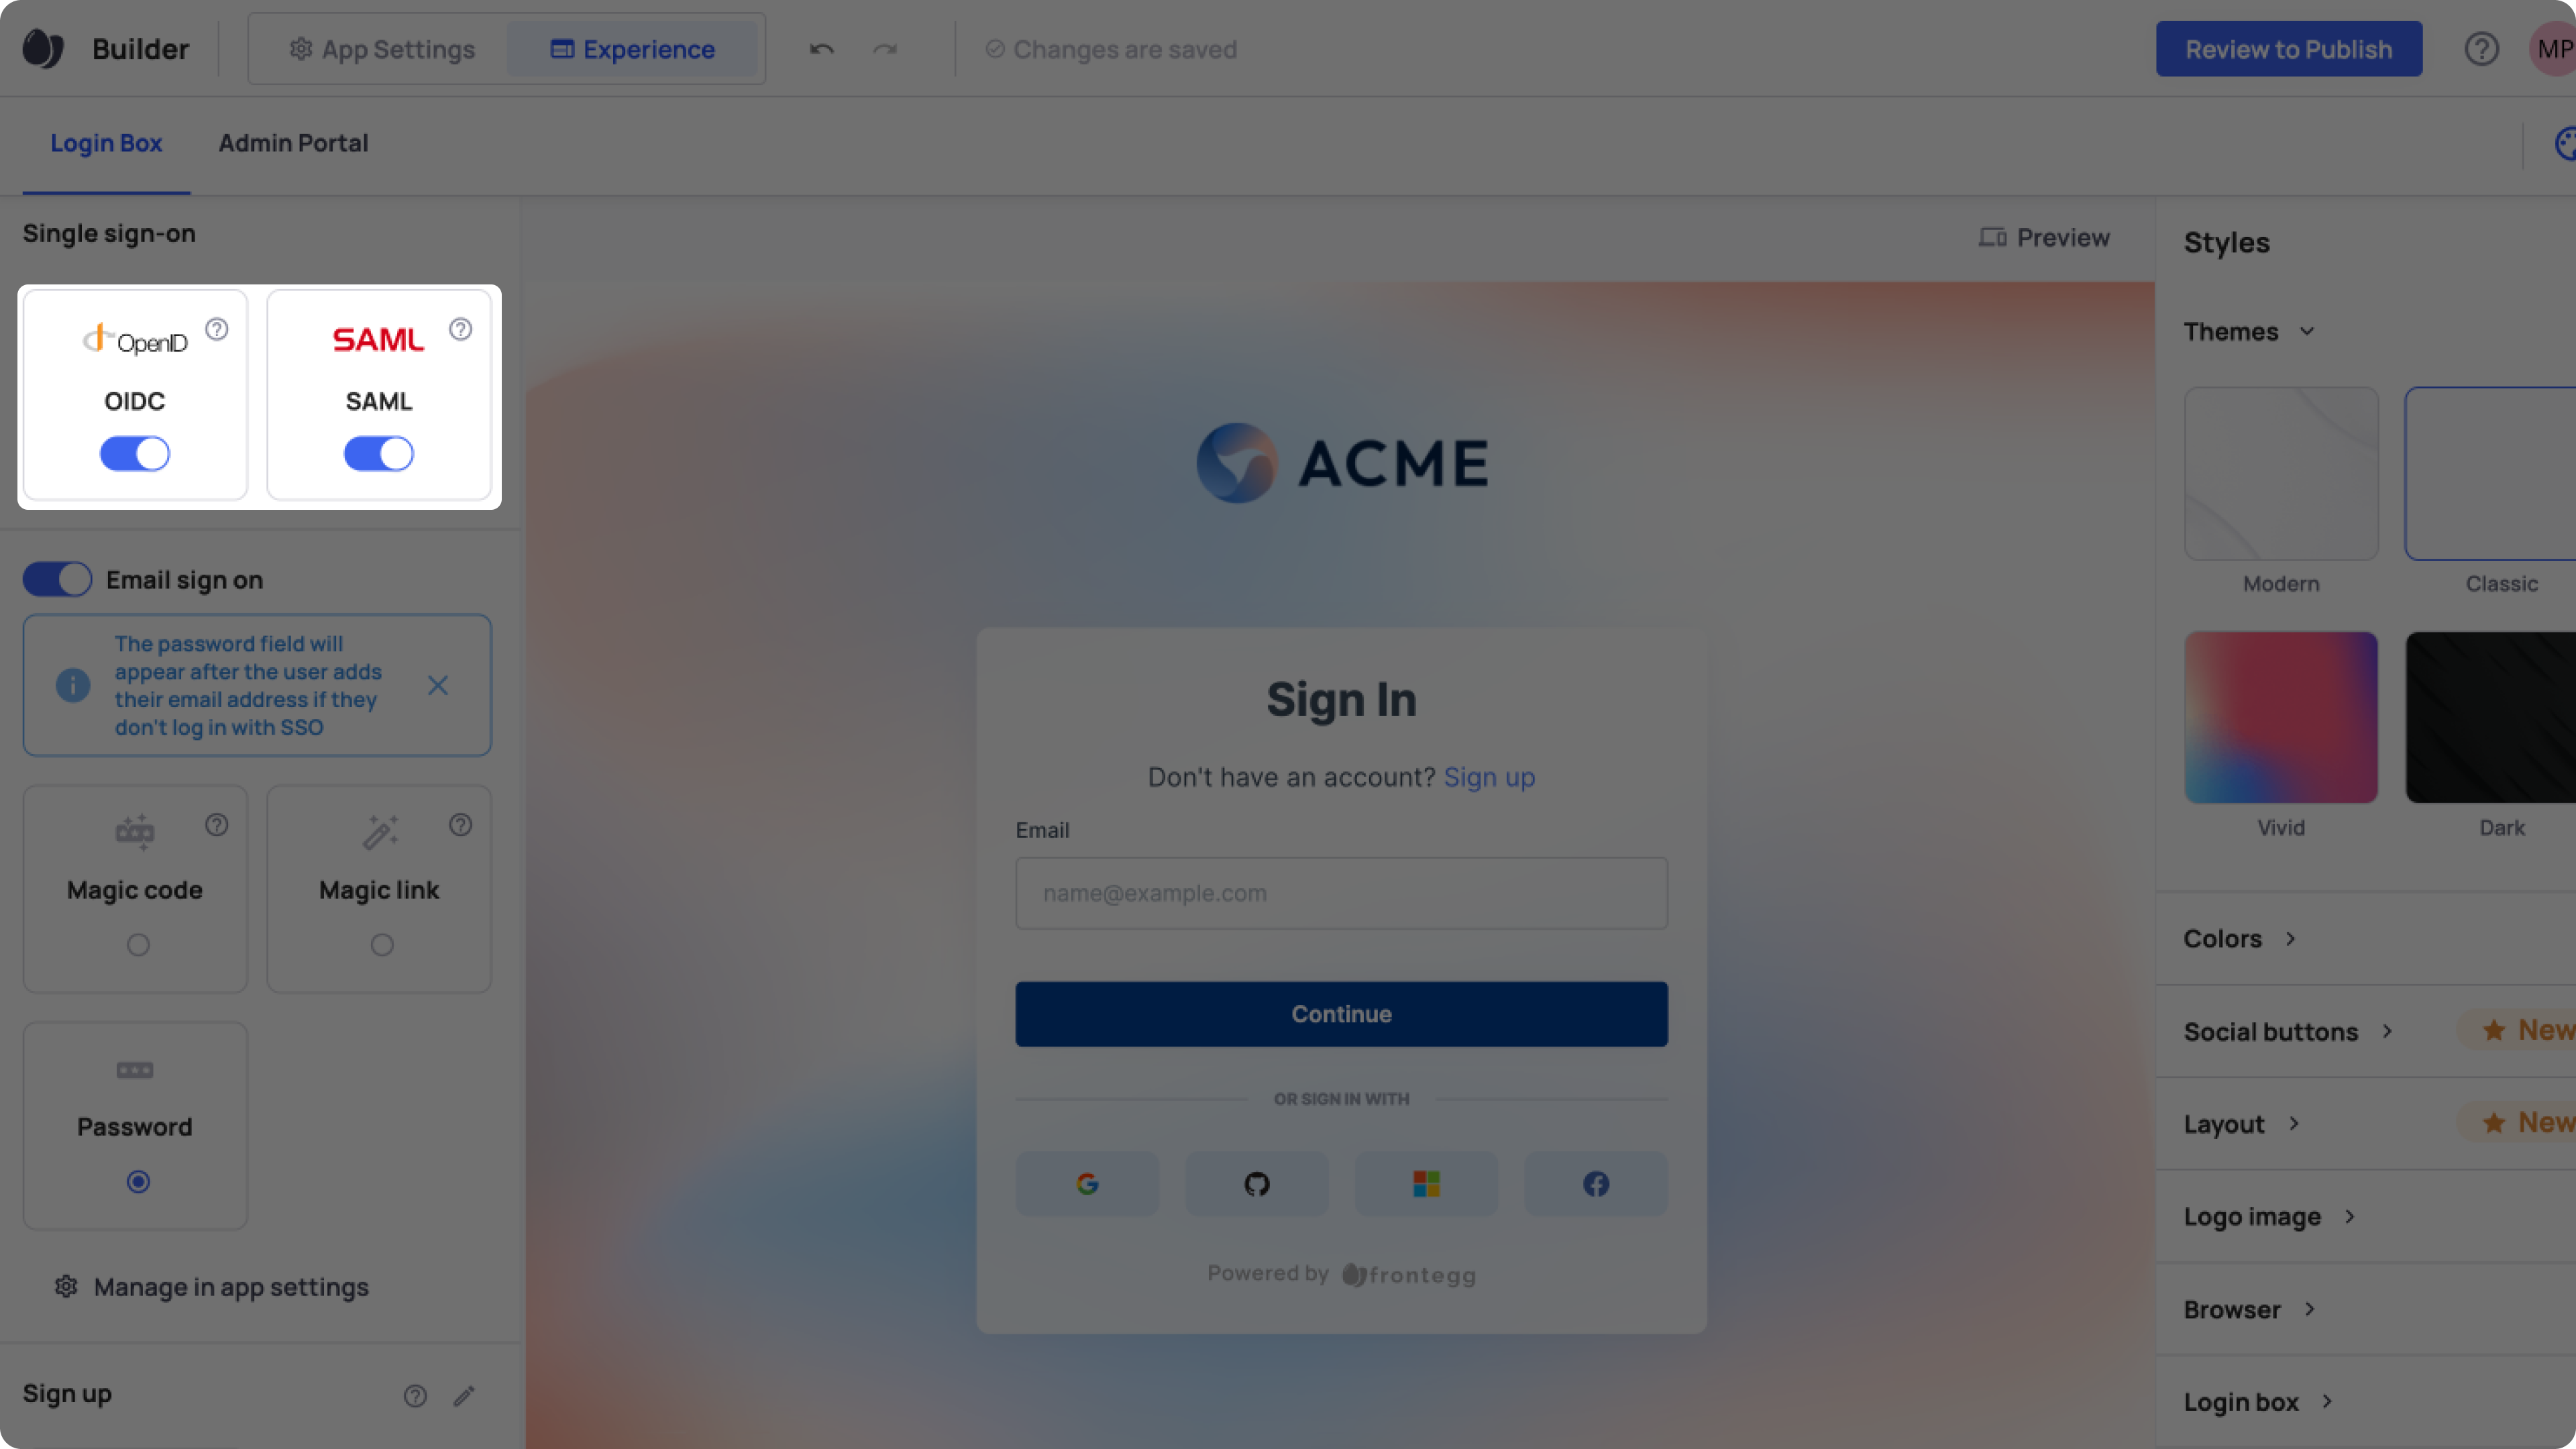
Enable SSO in the Frontegg Portal. The SSO options include SAML and OpenID Connect.
Go to Home ➜ Builder ➜ Login Box.
In the left panel, toggle the switch to on for each SSO standard you want to enable.
Commit and publish your changes in the Builder for them to take effect and to configure OpenID and SAML in your Environments.

Additional resources
APIs related to SSO
Create SSO configuration (manual)
Create SSO configuration automatic (XML)
Create SSO domain and link to a configuration
Validate SSO domain (when using TXT records)
Force validate an SSO domain (No TXT records needed)
Create SSO roles to groups mapping
For examples and explanations, follow the relevant configuration guide below.
Configuring SAML and OpenID
To Configure SAML or OpenID Connect, go to the designated guides:
Updated 12 months ago