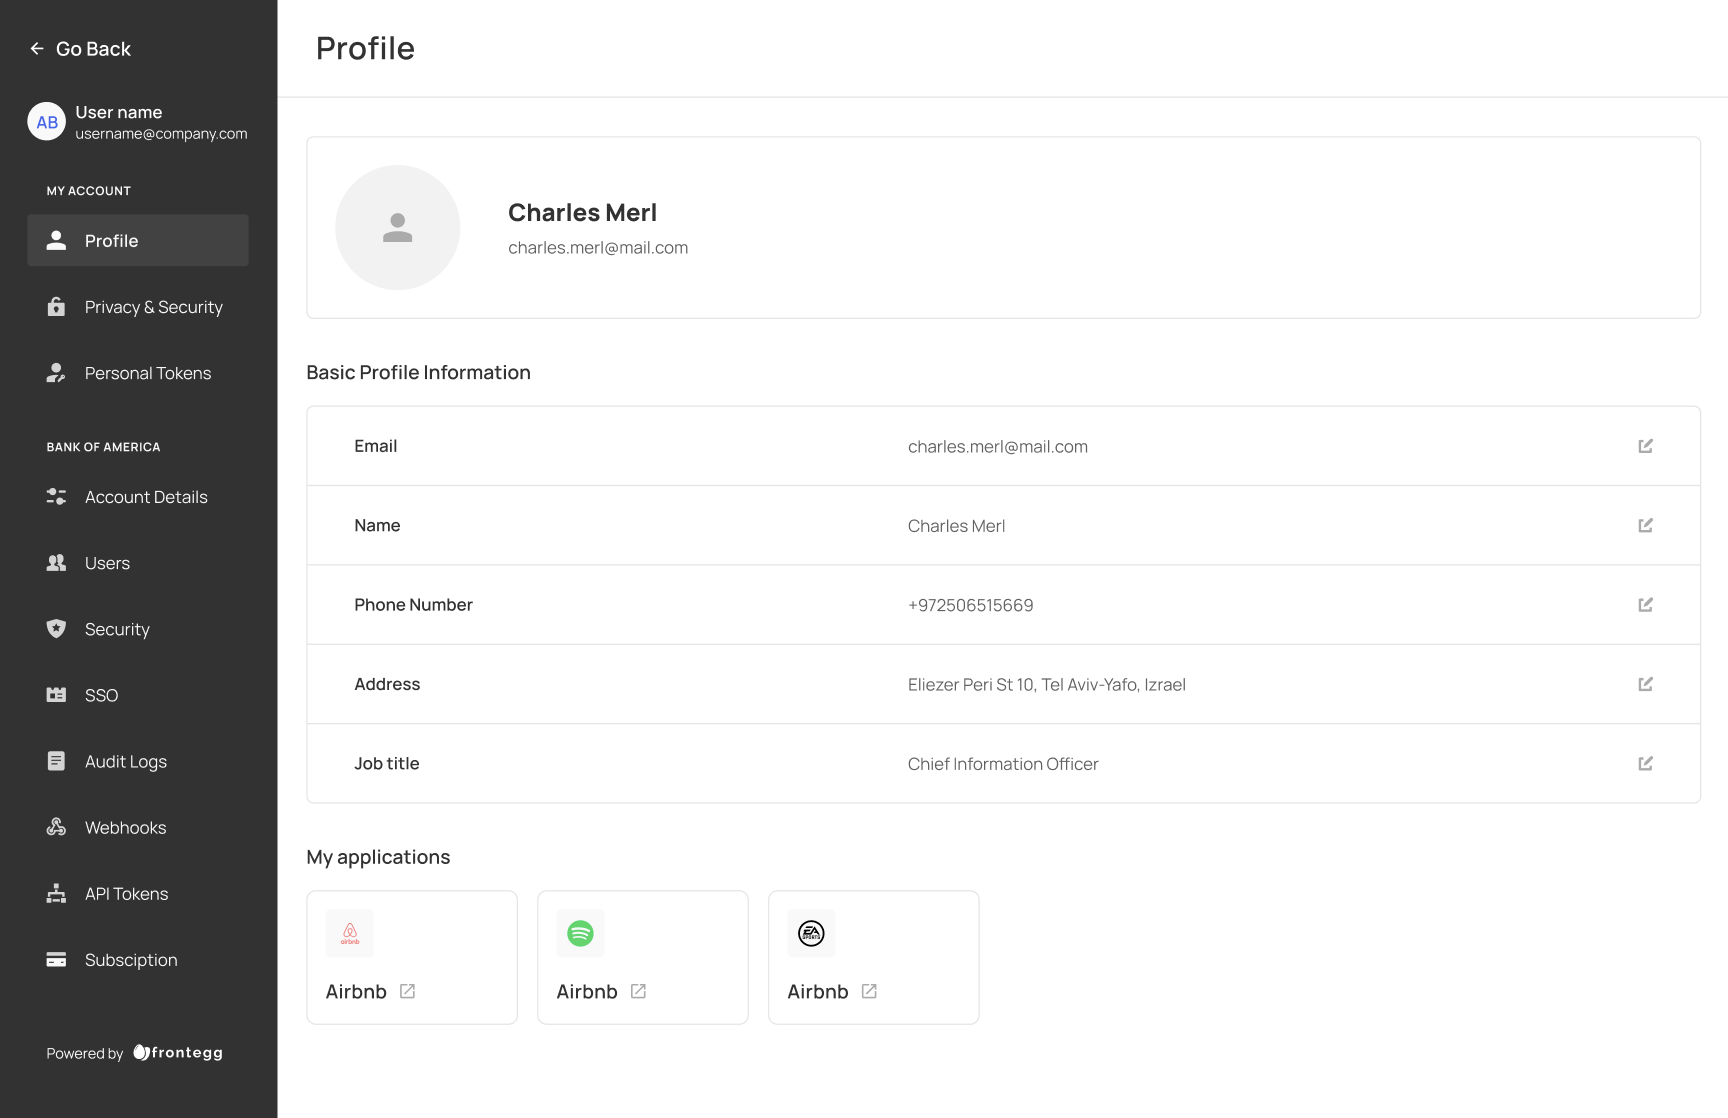
Users
When your customers use your app, it's not just them using the app of course. Ideally, they'll invite all their teammates to work with them. In that case, they'll want a place where they can manage their team - like invite users, edit roles, and more.
However, you may decide that certain user management actions performed by your customers should only be done by certain roles.
By using Frontegg's Admin Portal, your customers (or users in your customers accounts with certain roles) can easily manage users in the "Users" tab.

If you choose not to use the admin portal, you can still manage users for your customers from the Frontegg portal.
How to enable user management in the admin portal
A user must be assigned to a tenant
Go to the tenants screen to create a tenant and assign your first user to it.
Enable User Management
To allow customers to manage and invite team members on their own, go to Builder ➜ Experience ➜ Admin Portal ➜ Workspace, and toggle it on.

After toggling it on (and publishing it to the appropriate environment), your customers should see a "Users" tab in their admin portal.

If you'd rather your customers don't manage users and invite them themselves, you can keep this toggle off.
(But you can always manage users for your customers from the Backoffice).
Actions you can perform on other users
Aside from seeing a list of users and inviting new ones to the app, there are a few other actions that can be taken on individual users based on roles (see the end of this guide for help configuring them).
For each user, you can:
- Edit their roles
- Resend an activation email
- Log them out of all their sessions
- Delete that user

Ways Your Customers Invite Other Users
There are two ways your customers can invite users to their accounts.
1. Invite by email
This invite method requires users to fill out the invitee's name, email, and role, after which the invitee will receive an email inviting them to join their team on the app.

When a user is invited by email, they will receive one of two emails:
- If they are a completely new user, they will receive the "Activate Account" email
- If they already belong to another account, they will receive the "Invite to Account" email
Both emails can be edited by going to any environment and going to "Emails".
2. Bulk invite option
You can streamline user invitations by removing unnecessary fields and adding the option to invite 5 users at once.
This customization is available through themeOptions in the App file.
As you can see in the code below, inside the 'inviteByEmail', you can choose whether to enable/disable the bulk mode.
import React from "react";
import {FronteggProvider, FronteggThemeOptions} from "@frontegg/react";
import contextOptions from './context-options';
const themeOptions: FronteggThemeOptions = {
adminPortal: {
pages: {
users: {
inviteUserModal: {
inviteByEmail: {
enabled: true,
inviteBulk: {
enabled: true,
},
},
},
},
},
},
};
const Provider = () => (
<FronteggProvider contextOptions={contextOptions} themeOptions={themeOptions}>
<div />
</FronteggProvider>
);
export default Provider;
The result will be:


3. Invite with link
This invite method lets users create an invite link that they can send to other users however they like. When users join the app using an invite link, they will receive the default roles that were configured in Roles and Permissions. You can manage default roles here: Managing Roles
If disable the "invite with email" mode, you will get a modal with the "invite with link" mode as the only option to invite users.
You can do it in this way:
import React from "react";
import {FronteggProvider, FronteggThemeOptions} from "@frontegg/react";
import contextOptions from './context-options';
const themeOptions: FronteggThemeOptions = {
adminPortal: {
pages: {
users: {
inviteUserModal: {
inviteByEmail: {
enabled: false,
},
},
},
},
},
};
const Provider = () => (
<FronteggProvider contextOptions={contextOptions} themeOptions={themeOptions}>
<div />
</FronteggProvider>
);
export default Provider;
And the result will be:

For extra customization options of the user invite modal, visit this documentation
Working with Invite Links
Click on "Copy Invite Link"

Then, click "Edit" and change the expiration time to your liking. Then click "Save".
When this link is used, an email titled "User Used Invitation" may be sent to the user who created the link, if it's active.
If active, the user will then have the option to choose whether to receive an email notification when someone uses the link.

If inactive, the user will not have the option and therefore will not receive an email.
However, you can choose to deactivate this email by going to any environment > Emails and toggling the "User Used Invitation" to Inactive.
You can also deactivate the link at any time.
Domain Restrictions When Inviting Users
When inviting users by email, or when users try joining an account through an invite link, the invited user may be blocked if their email domain is not allowed according to domain restrictions. Domain restrictions can be configured in the security tab of the Admin Portal.
Frontegg also gives you the option to only allow your customers to invite users by email, which is generally a much more controlled way of inviting users.
If you'd like to disable invite links, you can toggle them off here:

Permissions
In addition to deciding what appears in the Admin Portal, you can also decide which roles can perform the following actions:
Revoking user sessions
Key: fe.secure.delete.sessions

Deleting invite links
Key: fe.secure.delete.tenantInvites
Deleting users from an account
fe.secure.delete.users

Deleting roles from user
fe.secure.delete.usersRoles

Reading users in an account
fe.secure.read.users

Resending activation email to a non-verified user
fe.secure.write.resendActivationEmail

Creating and editing invite links
fe.secure.write.tenantInvites

Adding users to accounts
fe.secure.write.users

Assigning roles to users
fe.secure.write.usersRoles

Updated 5 months ago