Login Box Integration (Hosted vs. Embedded)
When proceeding with your Frontegg's Login Box Integration, your next steps rely on whether you want to opt for the Hosted or Embedded options.
Embedded and hosted login both come with the same pre-built but highly customizable login box and robust set of authentication functionality.
The main difference is that embedded login allows you to embed the login box into your code, whereas with hosted login you host the login box on Frontegg servers.
With embedded login, you import one of our software packages into your application and then use components, links, and subdomains to handle authentication for you with. You actually embed the login box into your code. When your customers click a button on your application to log in or sign up, your application handles authentication for you.
Hosted Login Box Integration
To Integrate using Frontegg's Hosted Login Box, go to Integration (Hosted Login)
Embedded Login Box Integration
To Integrate using Frontegg's Embedded Login Box, go to Integration (Embedded Login)
Embedded Login Limitations
Embedded login operates using cross-site authentication using cross-site
http-onlycookies. For this to operate flawlessly on modern browsers (which block 3rd party cookies by default) it is required to Add Custom Domains
With hosted login, Frontegg hosts the authentication. When your customers click a button on your application to log in or sign up, your application redirects the user to the login page hosted by frontegg. The user is then authenticated and redirected using Open ID connect protocol back to your application.
This mode is extremely useful if your application is protected using standard API gateways such as Kong or NGINX
An additional very popular use case is when the login dialog is used by multiple applications and you want to share the user pool. In these use cases, hosted login will be a perfect choice.
Moving from Hosted to Embedded
To move from hosted to embedded login, do the following:
- STEP 1: Change Cookie Policy
- STEP 2: Update Redirect URLs
- STEP 3: Integrate Embedded
- STEP 4: Turn Off Hosted
STEP 1: Change Cookie Policy
Change cookie policy to none using the Frontegg API. You can use postman or any other api tool.
Call the update identity management configuration route.
Send the following payload in the POST body.
{
   cookieSameSite: NONE
}
Learn how to get started with the Frontegg API and how to authenticate as a vendor.
STEP 2: Update Redirect URLs
Your application uses Redirect URLs for various features, like Email Templates, Social Logins, and SSO.
How you update the Redirect URLs depends upon whether you are using the {{LOGIN_URL}} template in your Redirect URLs.
Here is an example of Email Templates using the {{LOGIN_URL}} template as their base URL.
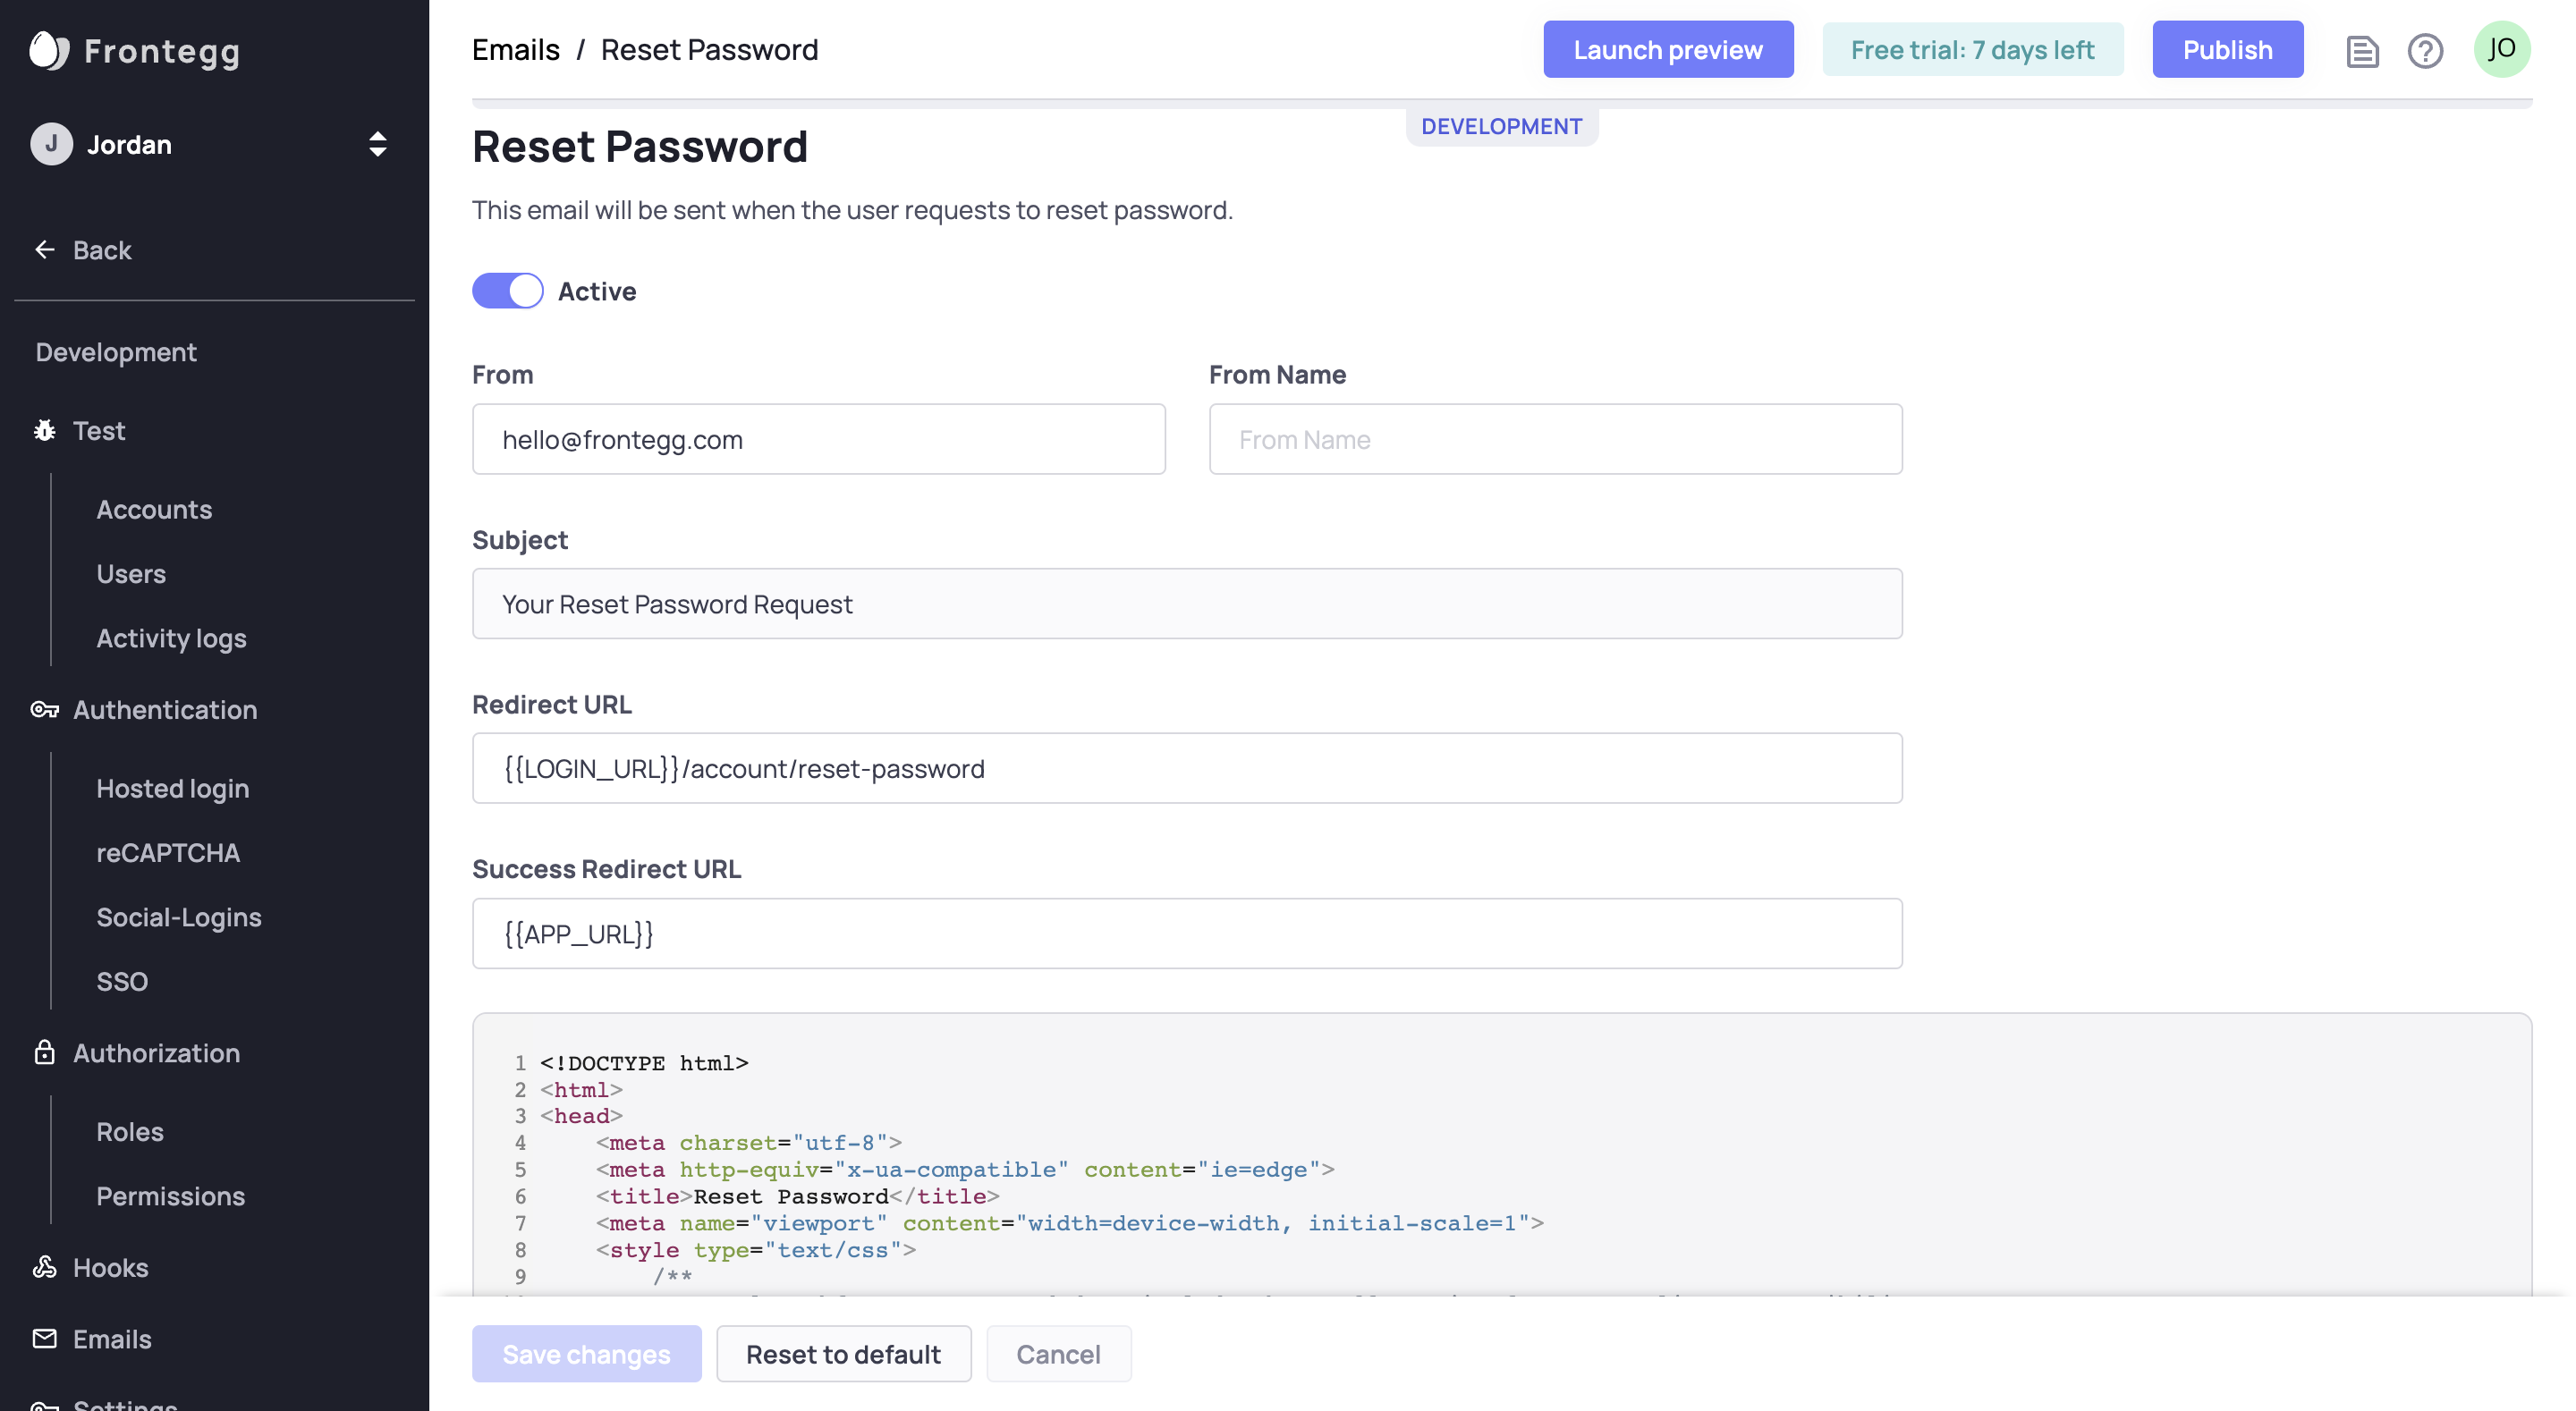
If all of the Redirect URLs on Email Templates, Social Logins, and SSO use the {{LOGIN_URL}} template.
Change your Login URL to be the same as App URL.
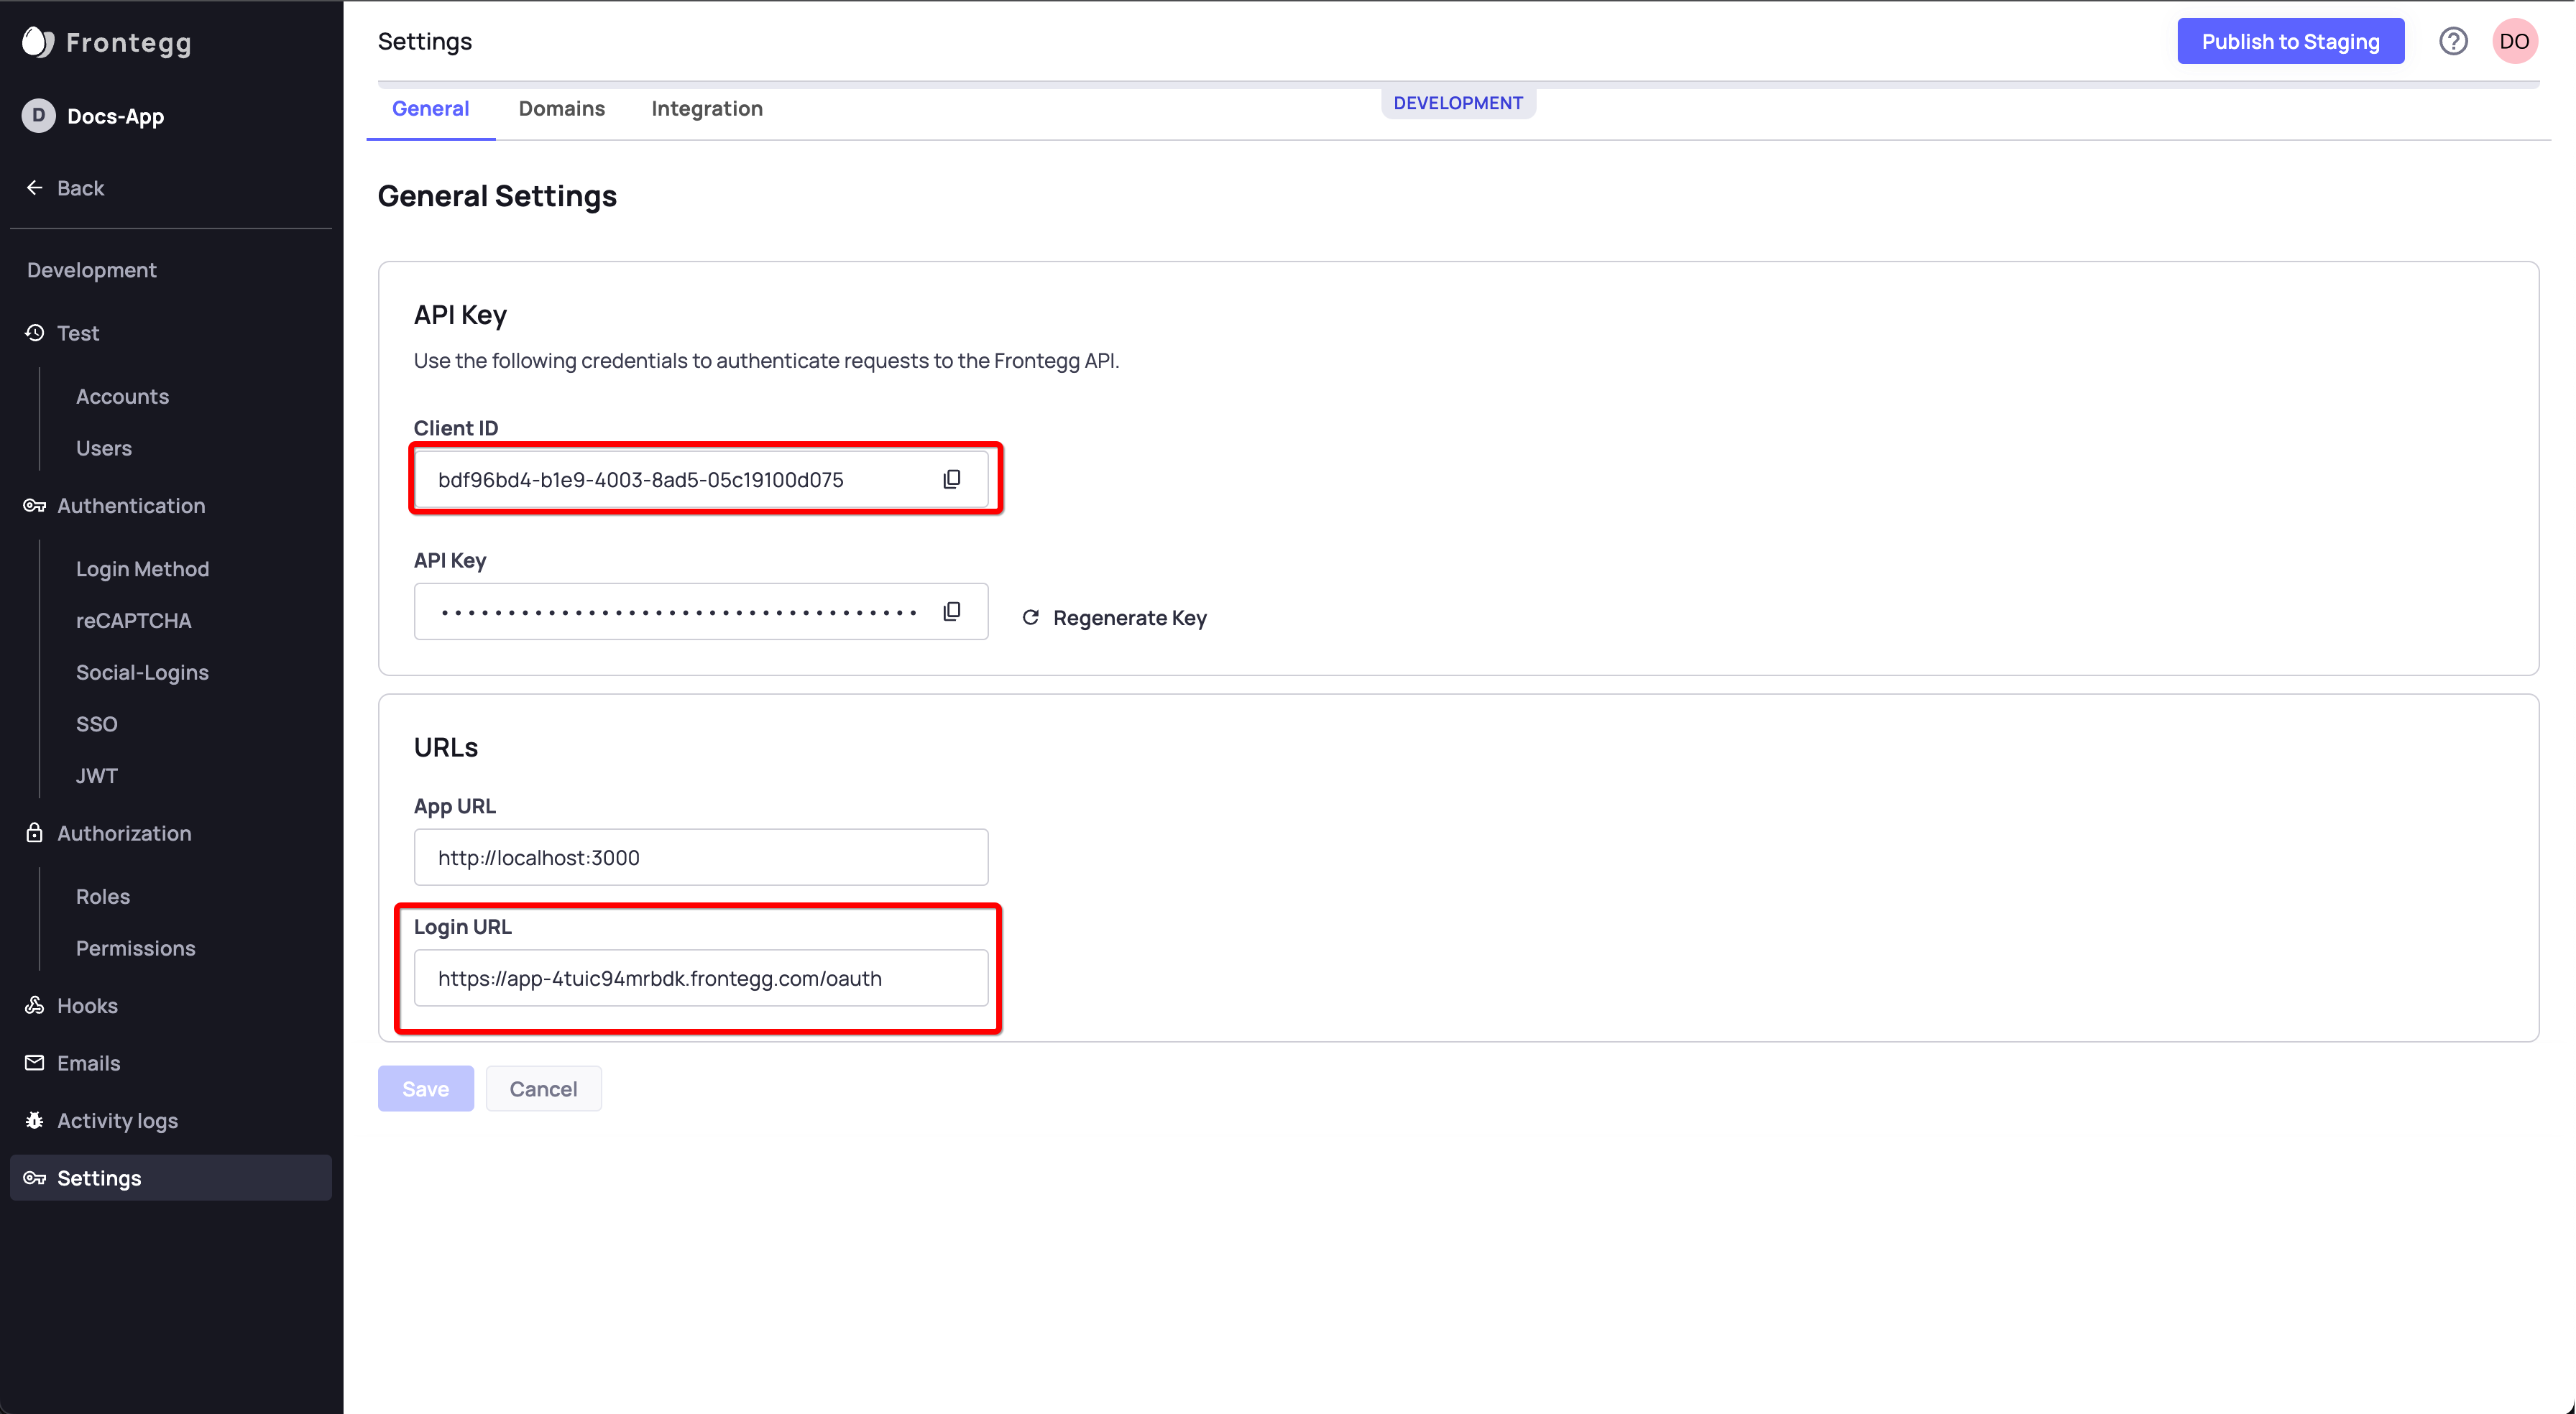
Go to Environments ➜ [NAME OF ENVIRONMENT] ➜ Settings ➜ URLs to manage Login URL and App URL.
If the Redirect URLs on Email Templates, Social Logins, and SSO do NOT use the {{LOGIN_URL}} template.
Check the following to make sure the Redirect URLs use {{APP_URL}} as the base.
Here is an example email template with the Redirect URL using {{APR_URL}} as its base.
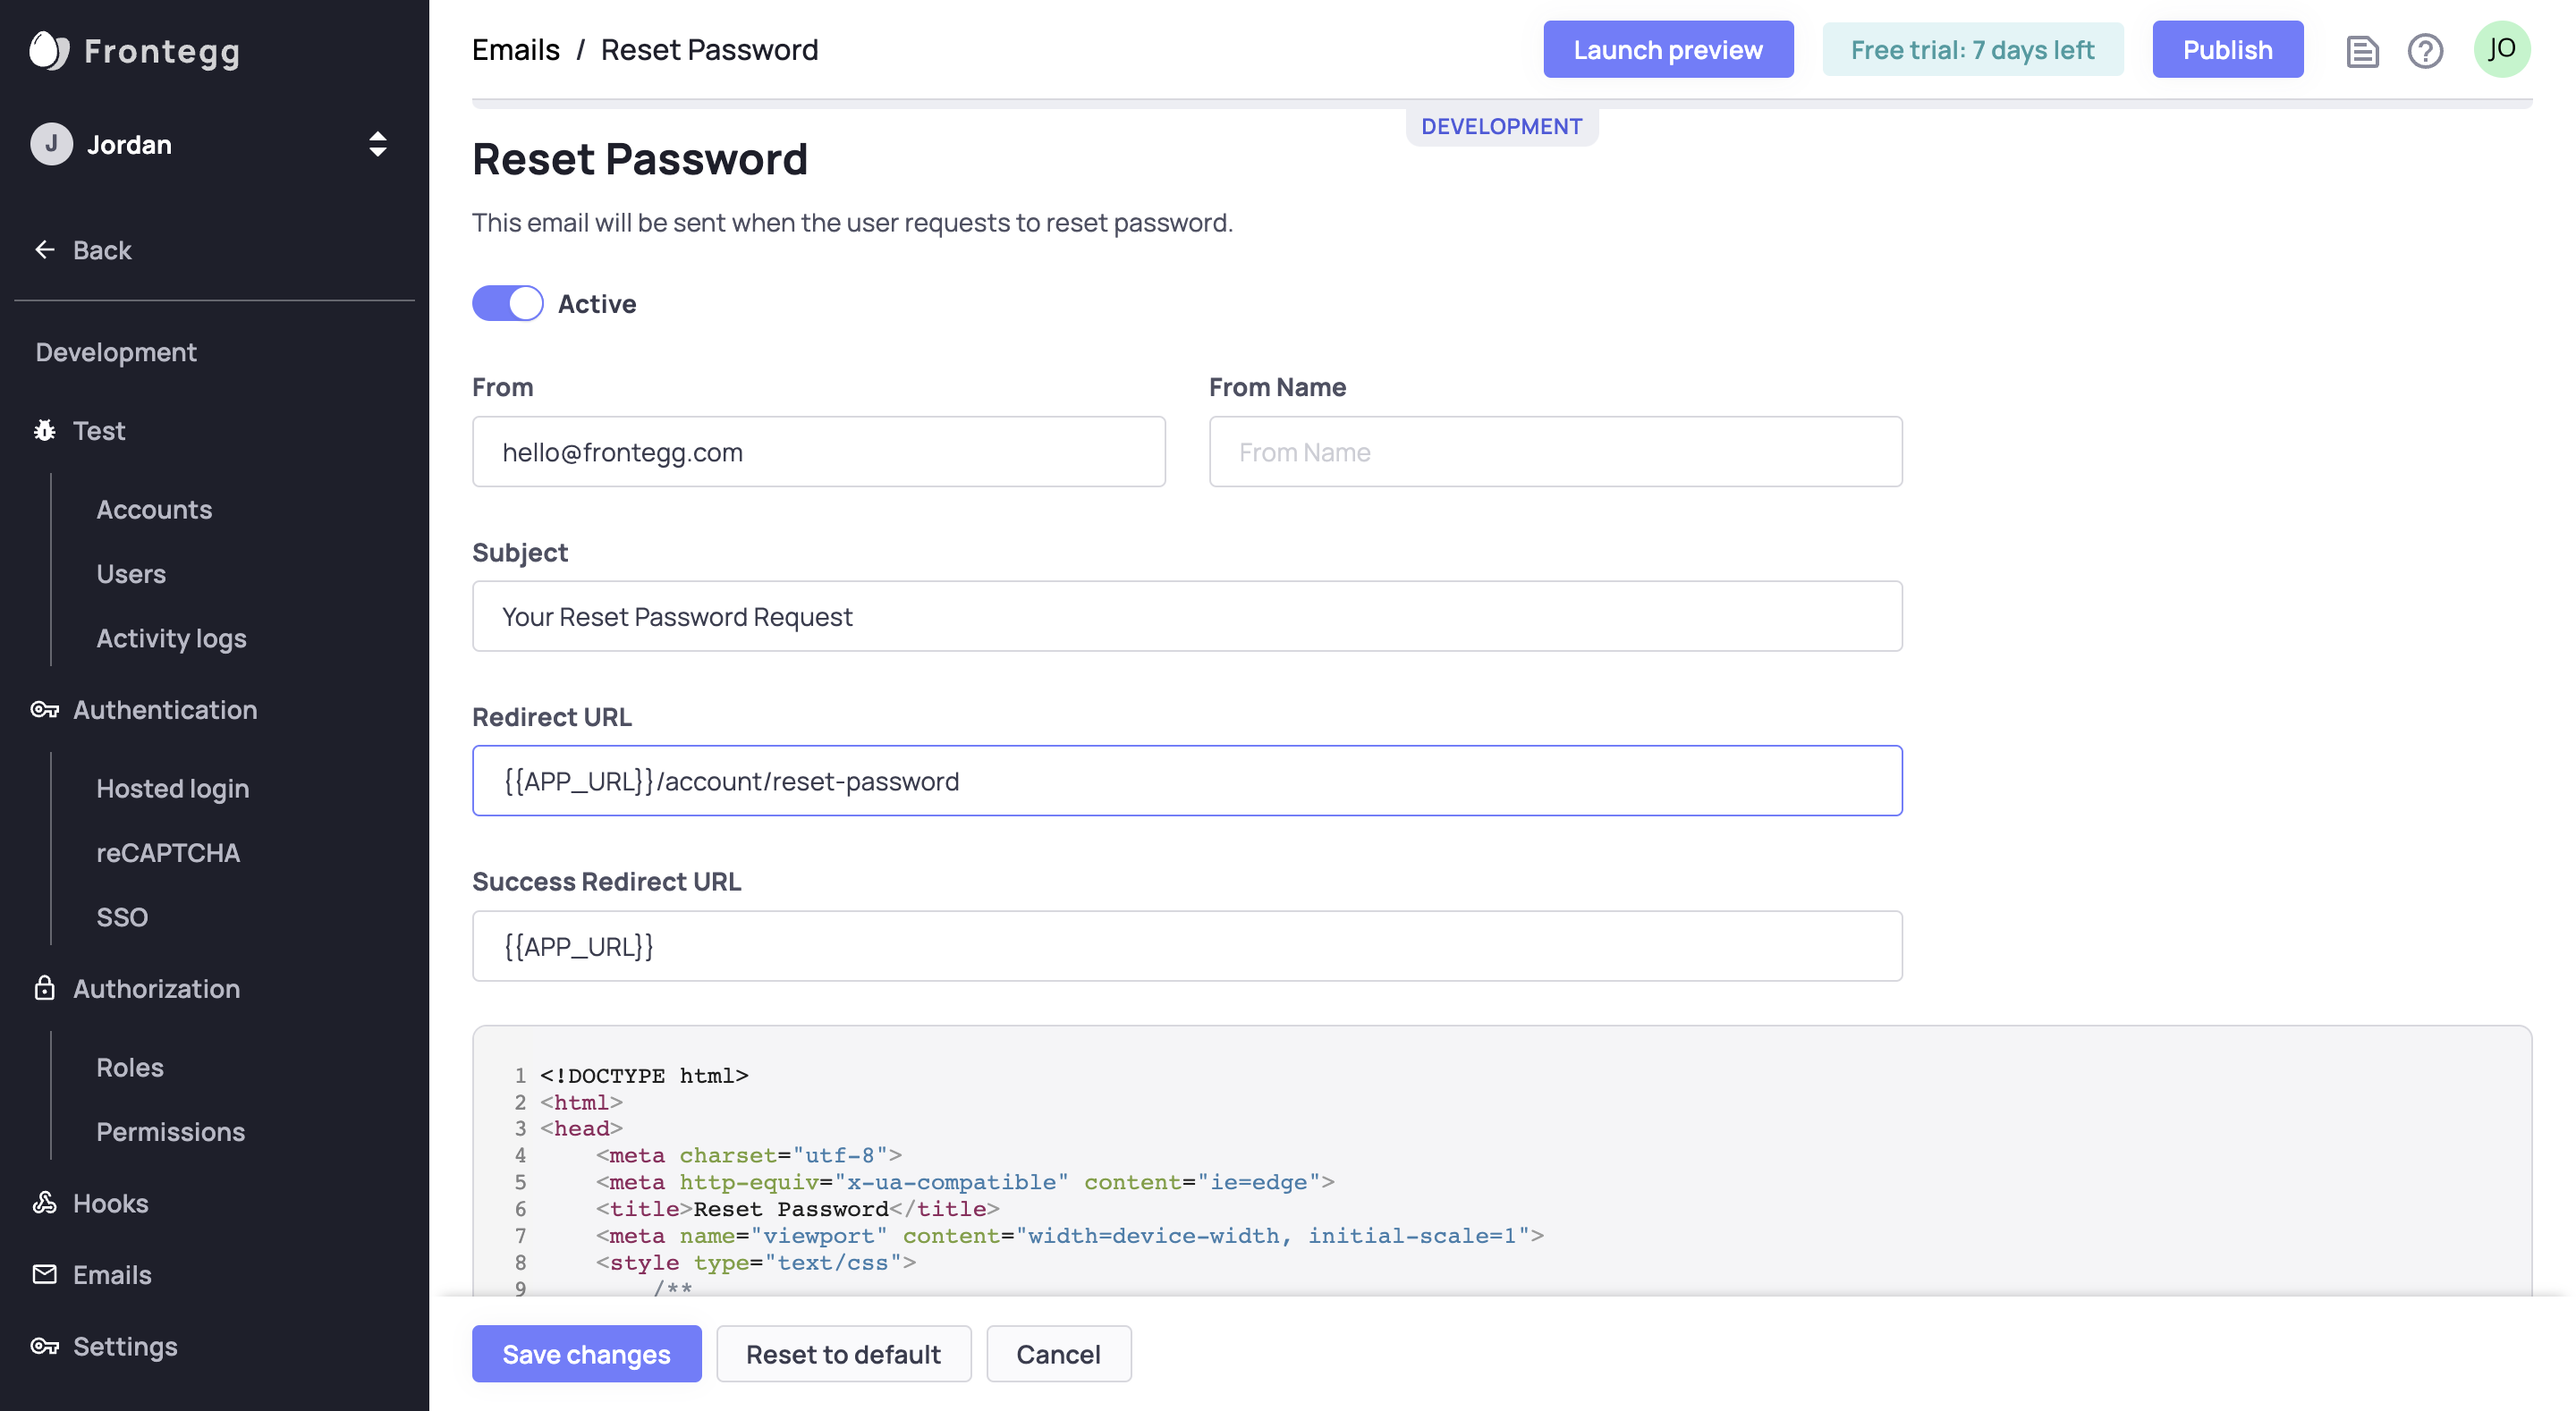
STEP 3: Integrate Embedded
If you already integrated your application with Frontegg
You just need to change option hostedLoginBox to false in your Frontegg wrapper.
Or follow the relevant guide to integrate embedded login into your code.
STEP 4: Turn Off Hosted
Go to Environments ➜ [NAME OF ENVIRONMENT] ➜ Login Method.
Choose Embedded login.
Please complete the steps above before turning off hosted login. Otherwise, your users will no longer have access to the login/signup page.
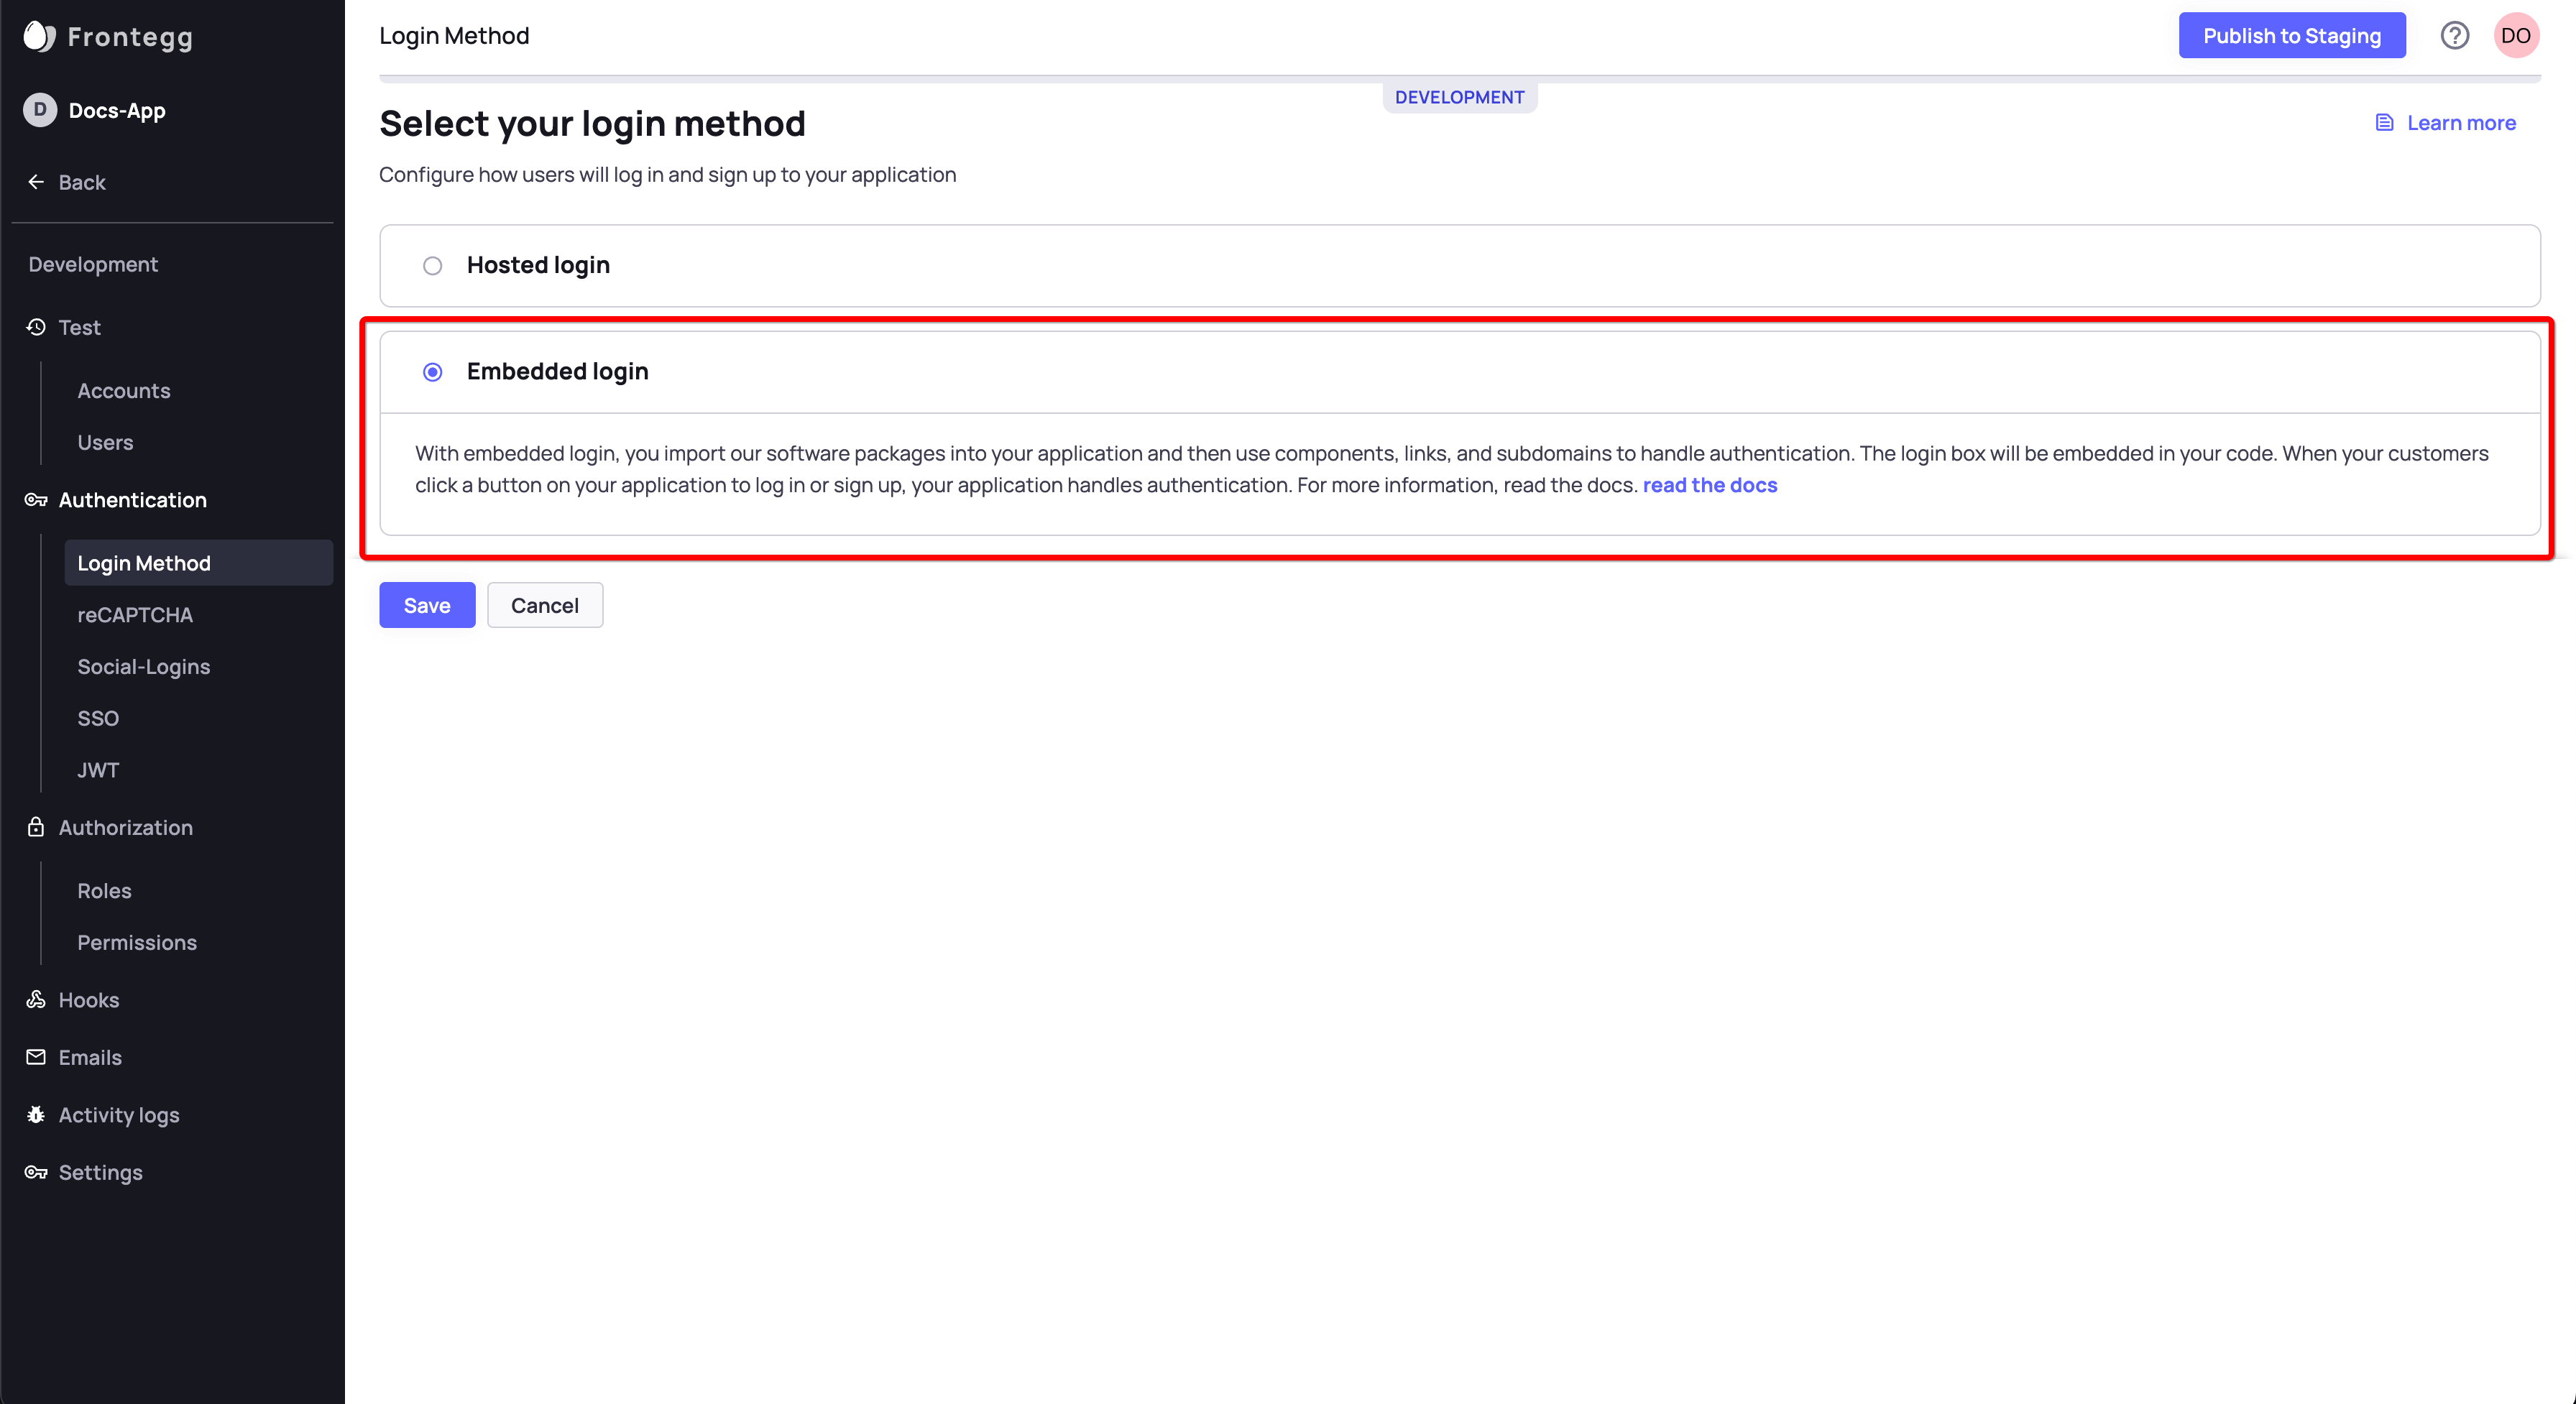
You need to manually update the hosted login status for each environment separately.
Updated 12 months ago
