Configuration

Customizing your first flow
Before you begin
- To get the full scope of what Flows can do, we encourage you to read this topic's overview to understand the full scope and effect on your user's journeys.
- Note that prehooks and webhooks can be created via the backoffice prehook/integrations tabs, or from within the flows themselves. If created within a flow, they will be added simultaneously to the prehook/integration backoffice section as well (read on for more information).
- To extend your flow capabilities, you can also create subflows within flows, which can also be used across multiple flows.
To customize your first flow, head to the Flows tab via [environment] -> Flows. The dashboard will open to the right and will showcase our supported user flows with ready-made templates that you can use as a base for your flows. Pick one of them to start customizing manually or use the AI prompt in the upper right side to adjust the flow based on your written requirements (e.g., "I need a user login flow that enrolls users in MFA only upon their initial login").
Flow builder
Flows can be built in several easy steps: First you pick a flow, then customize it by adding hooks and sub-flows, test it, and publish it.
Step 1: Choose a flow to customize
Frontegg offers several native workflows that cover multiple options: user sign-up, user update, user delete, user invite, user login with password, user login with OIDC/SAML, and user login with social.
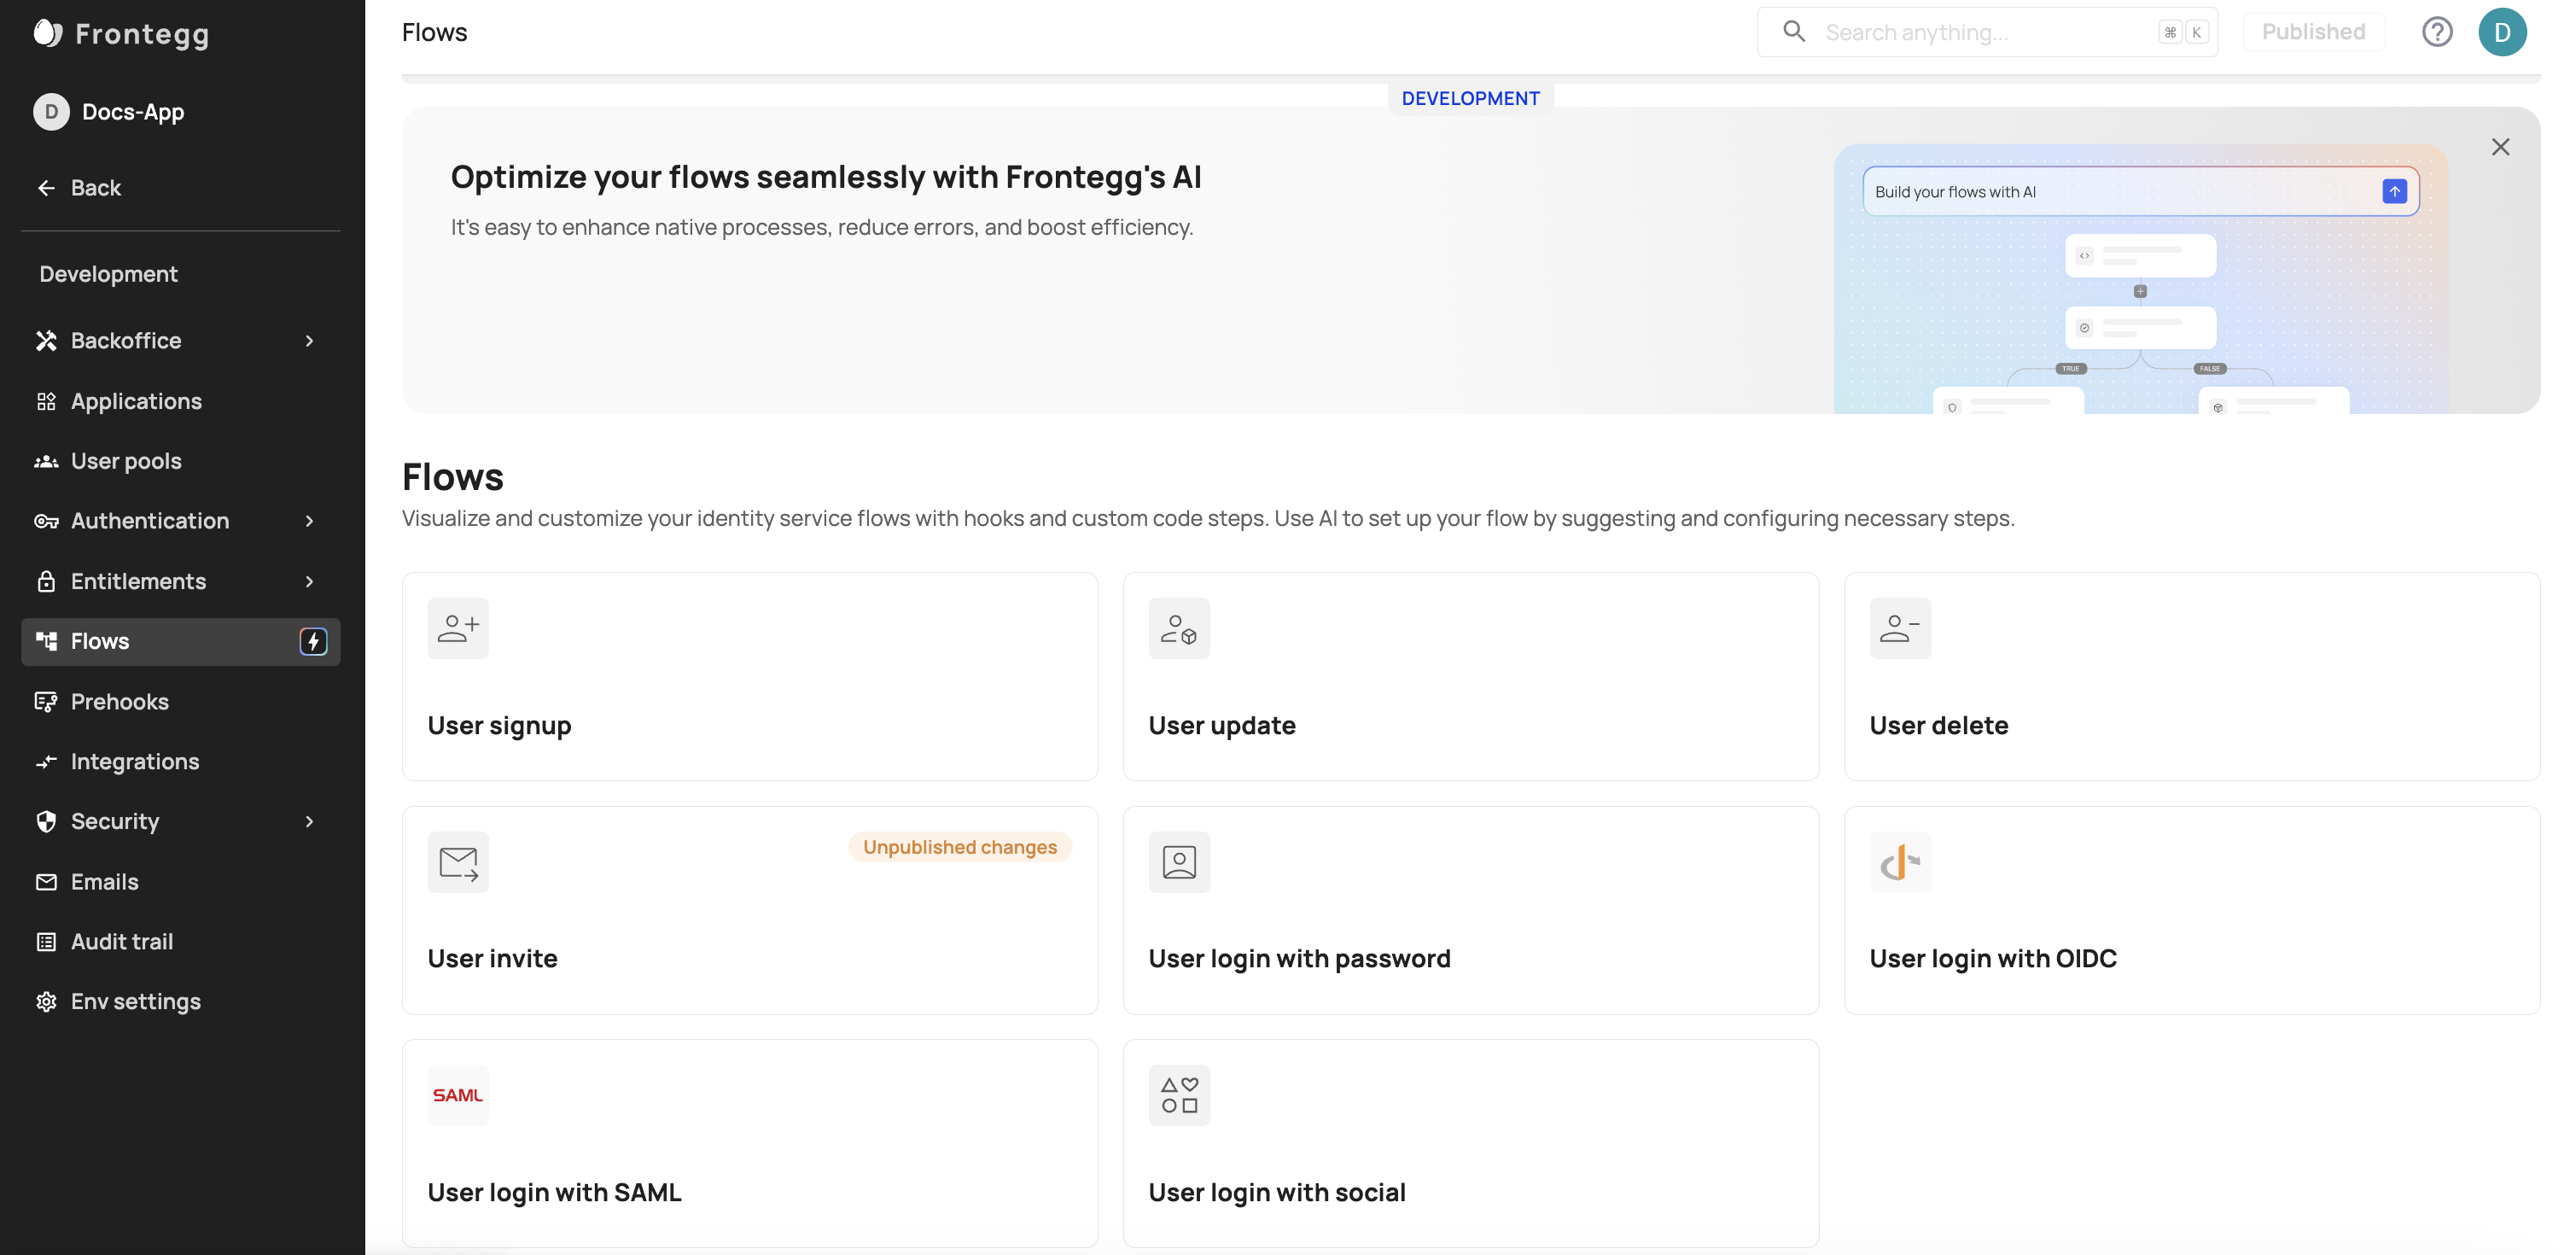
Flows have a singular starting point but can have multiple endings, depending on how they diverge and their possible sub-flows.
Press any of the '+' to customize the flow
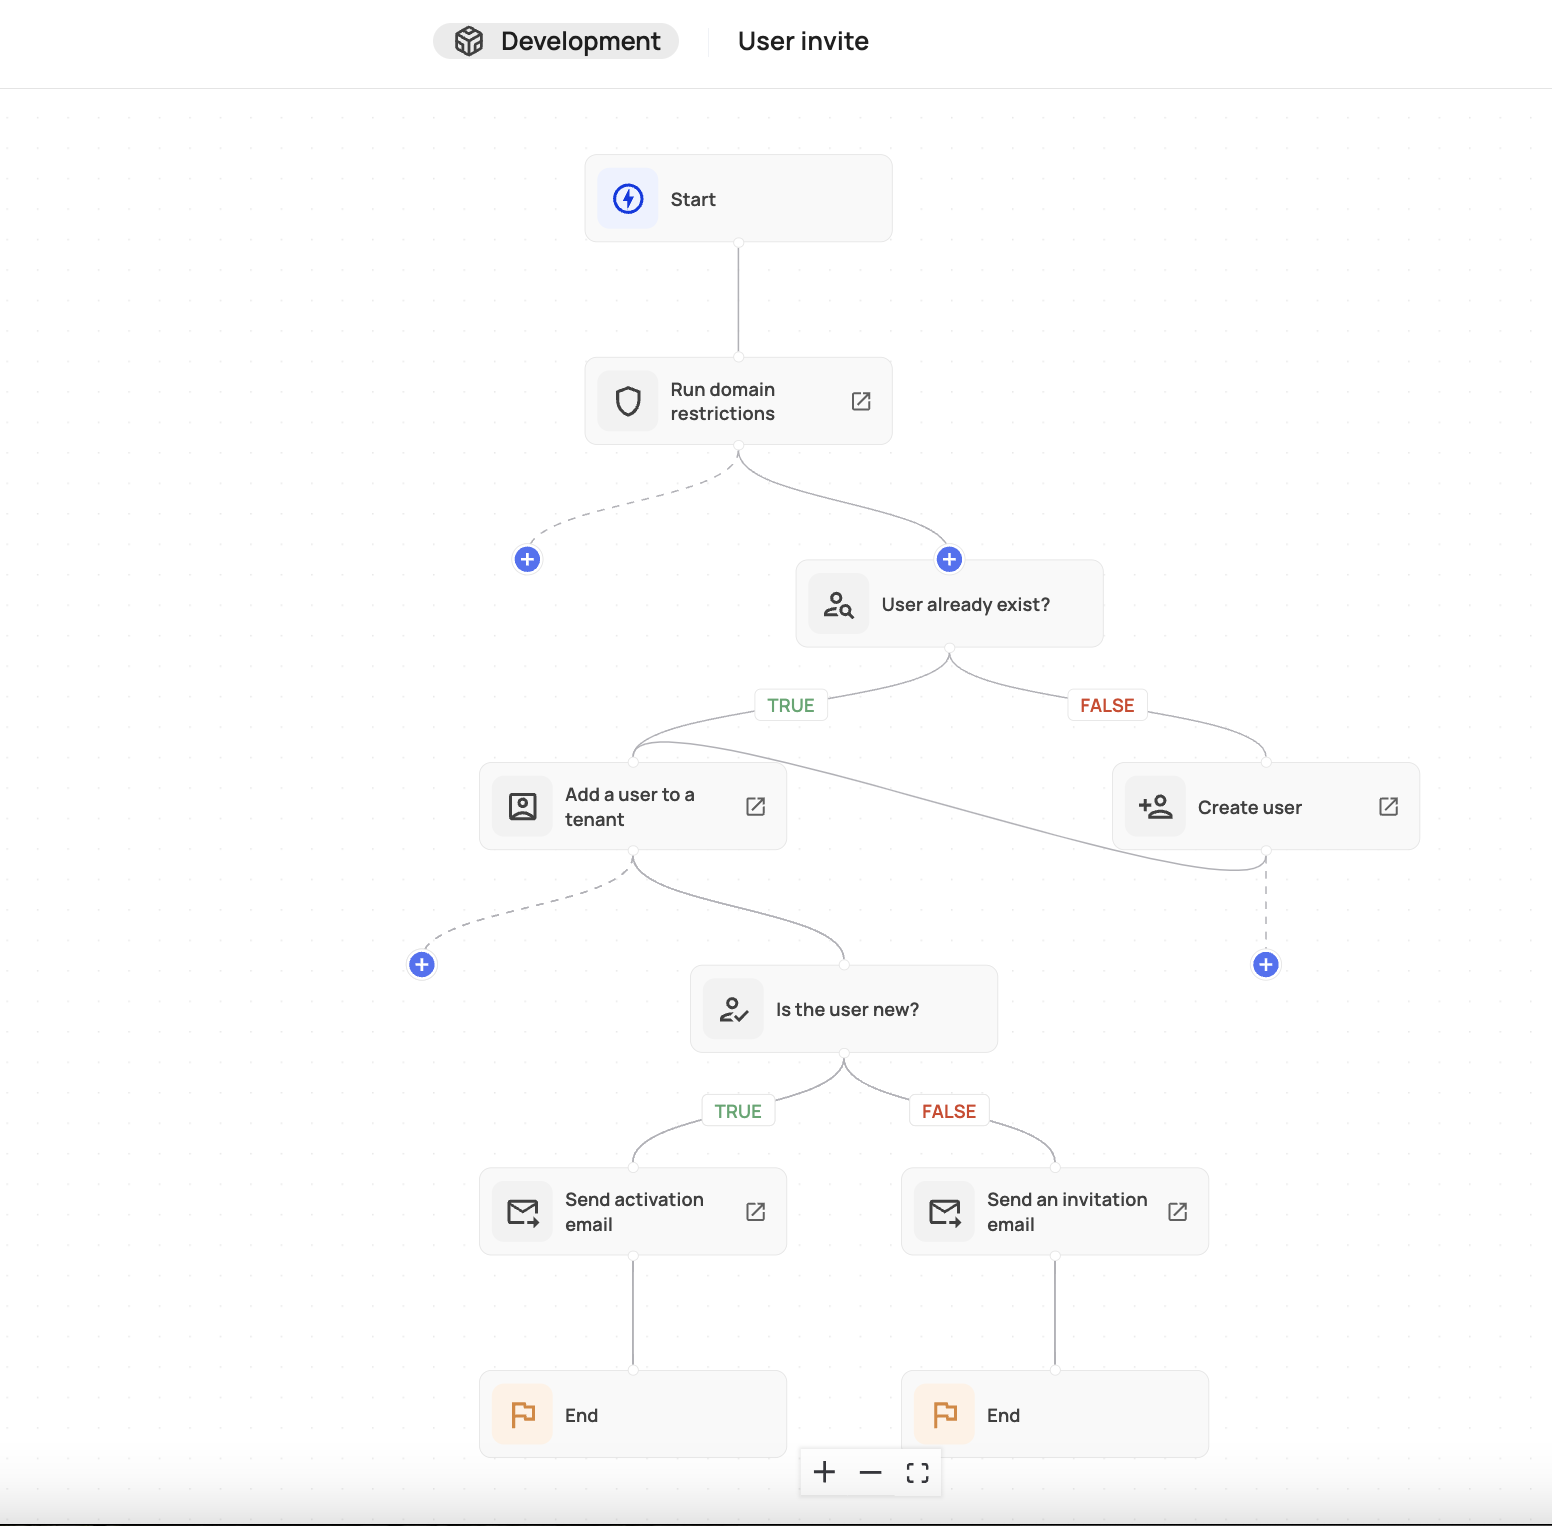
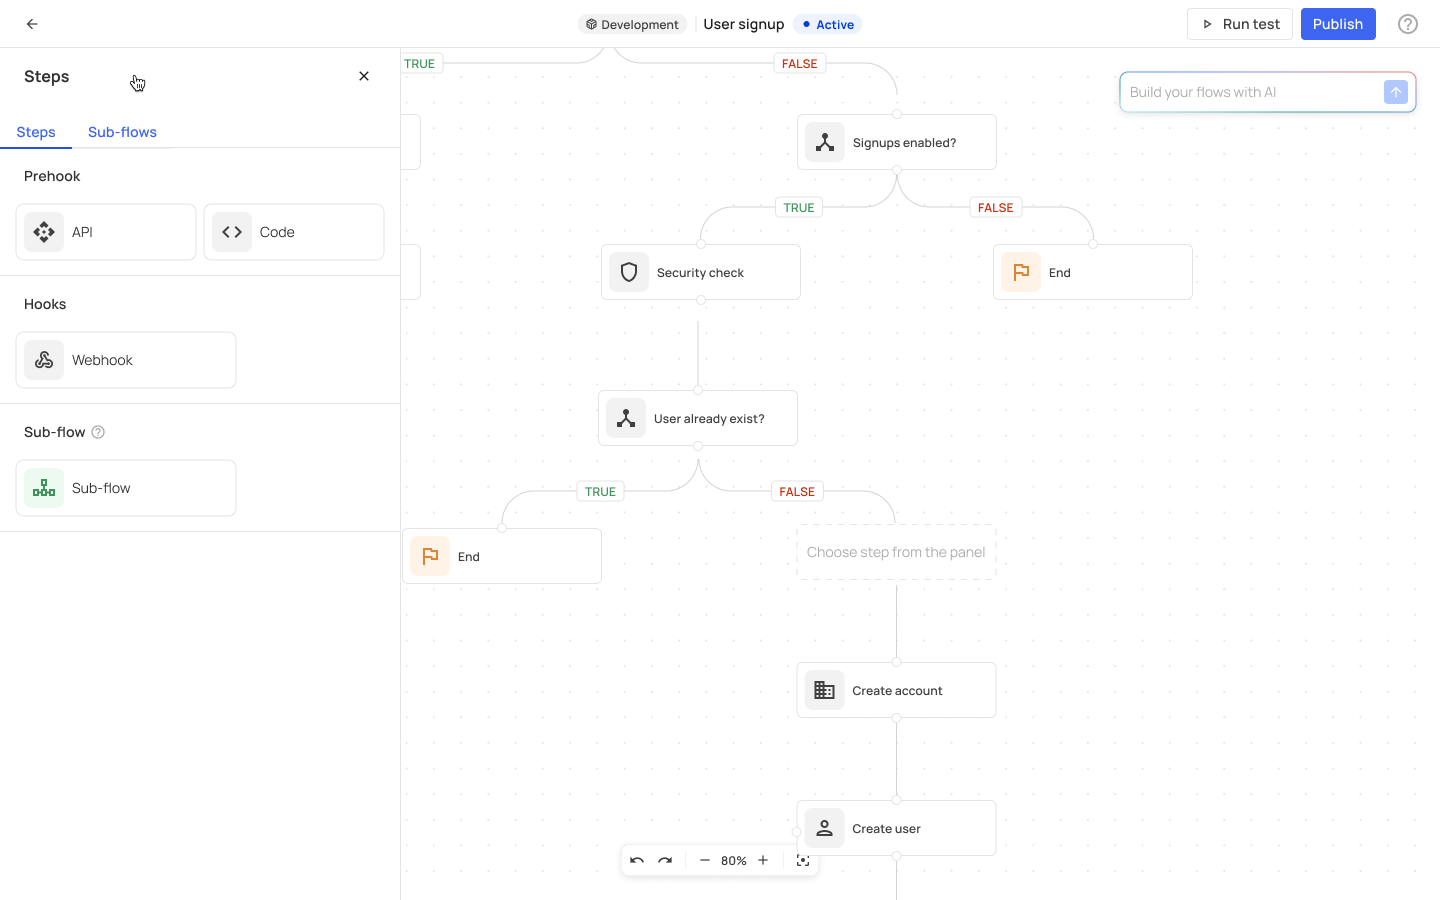
Step 2: Customize a flow with hooks and sub-flows
After choosing one of Frontegg's flows, it's time to customize. You will see tree "branches" with a '+' sign located in strategic locations within your flow— signaling where you can add a new step. A dotted line will signal that only a webhook can be added as a next step. A solid line will indicate that the next step in the flow can either be a prehook or a subflow. You can choose to customize the flow manually or use the AI prompt to write your requirements and get the engine to create the steps for you. After pressing the '+' sign, a side view will be opened with the options you can customize as a next step.
-
Re-using hooks
Note that if you created a prehook/webhook (e.g., a JWT token) in flow A, it will be the same prehook if you use it in flow B as well, and its logic will be replicated between these two flows. So you need to ensure it is compatible with all flows in the environment.
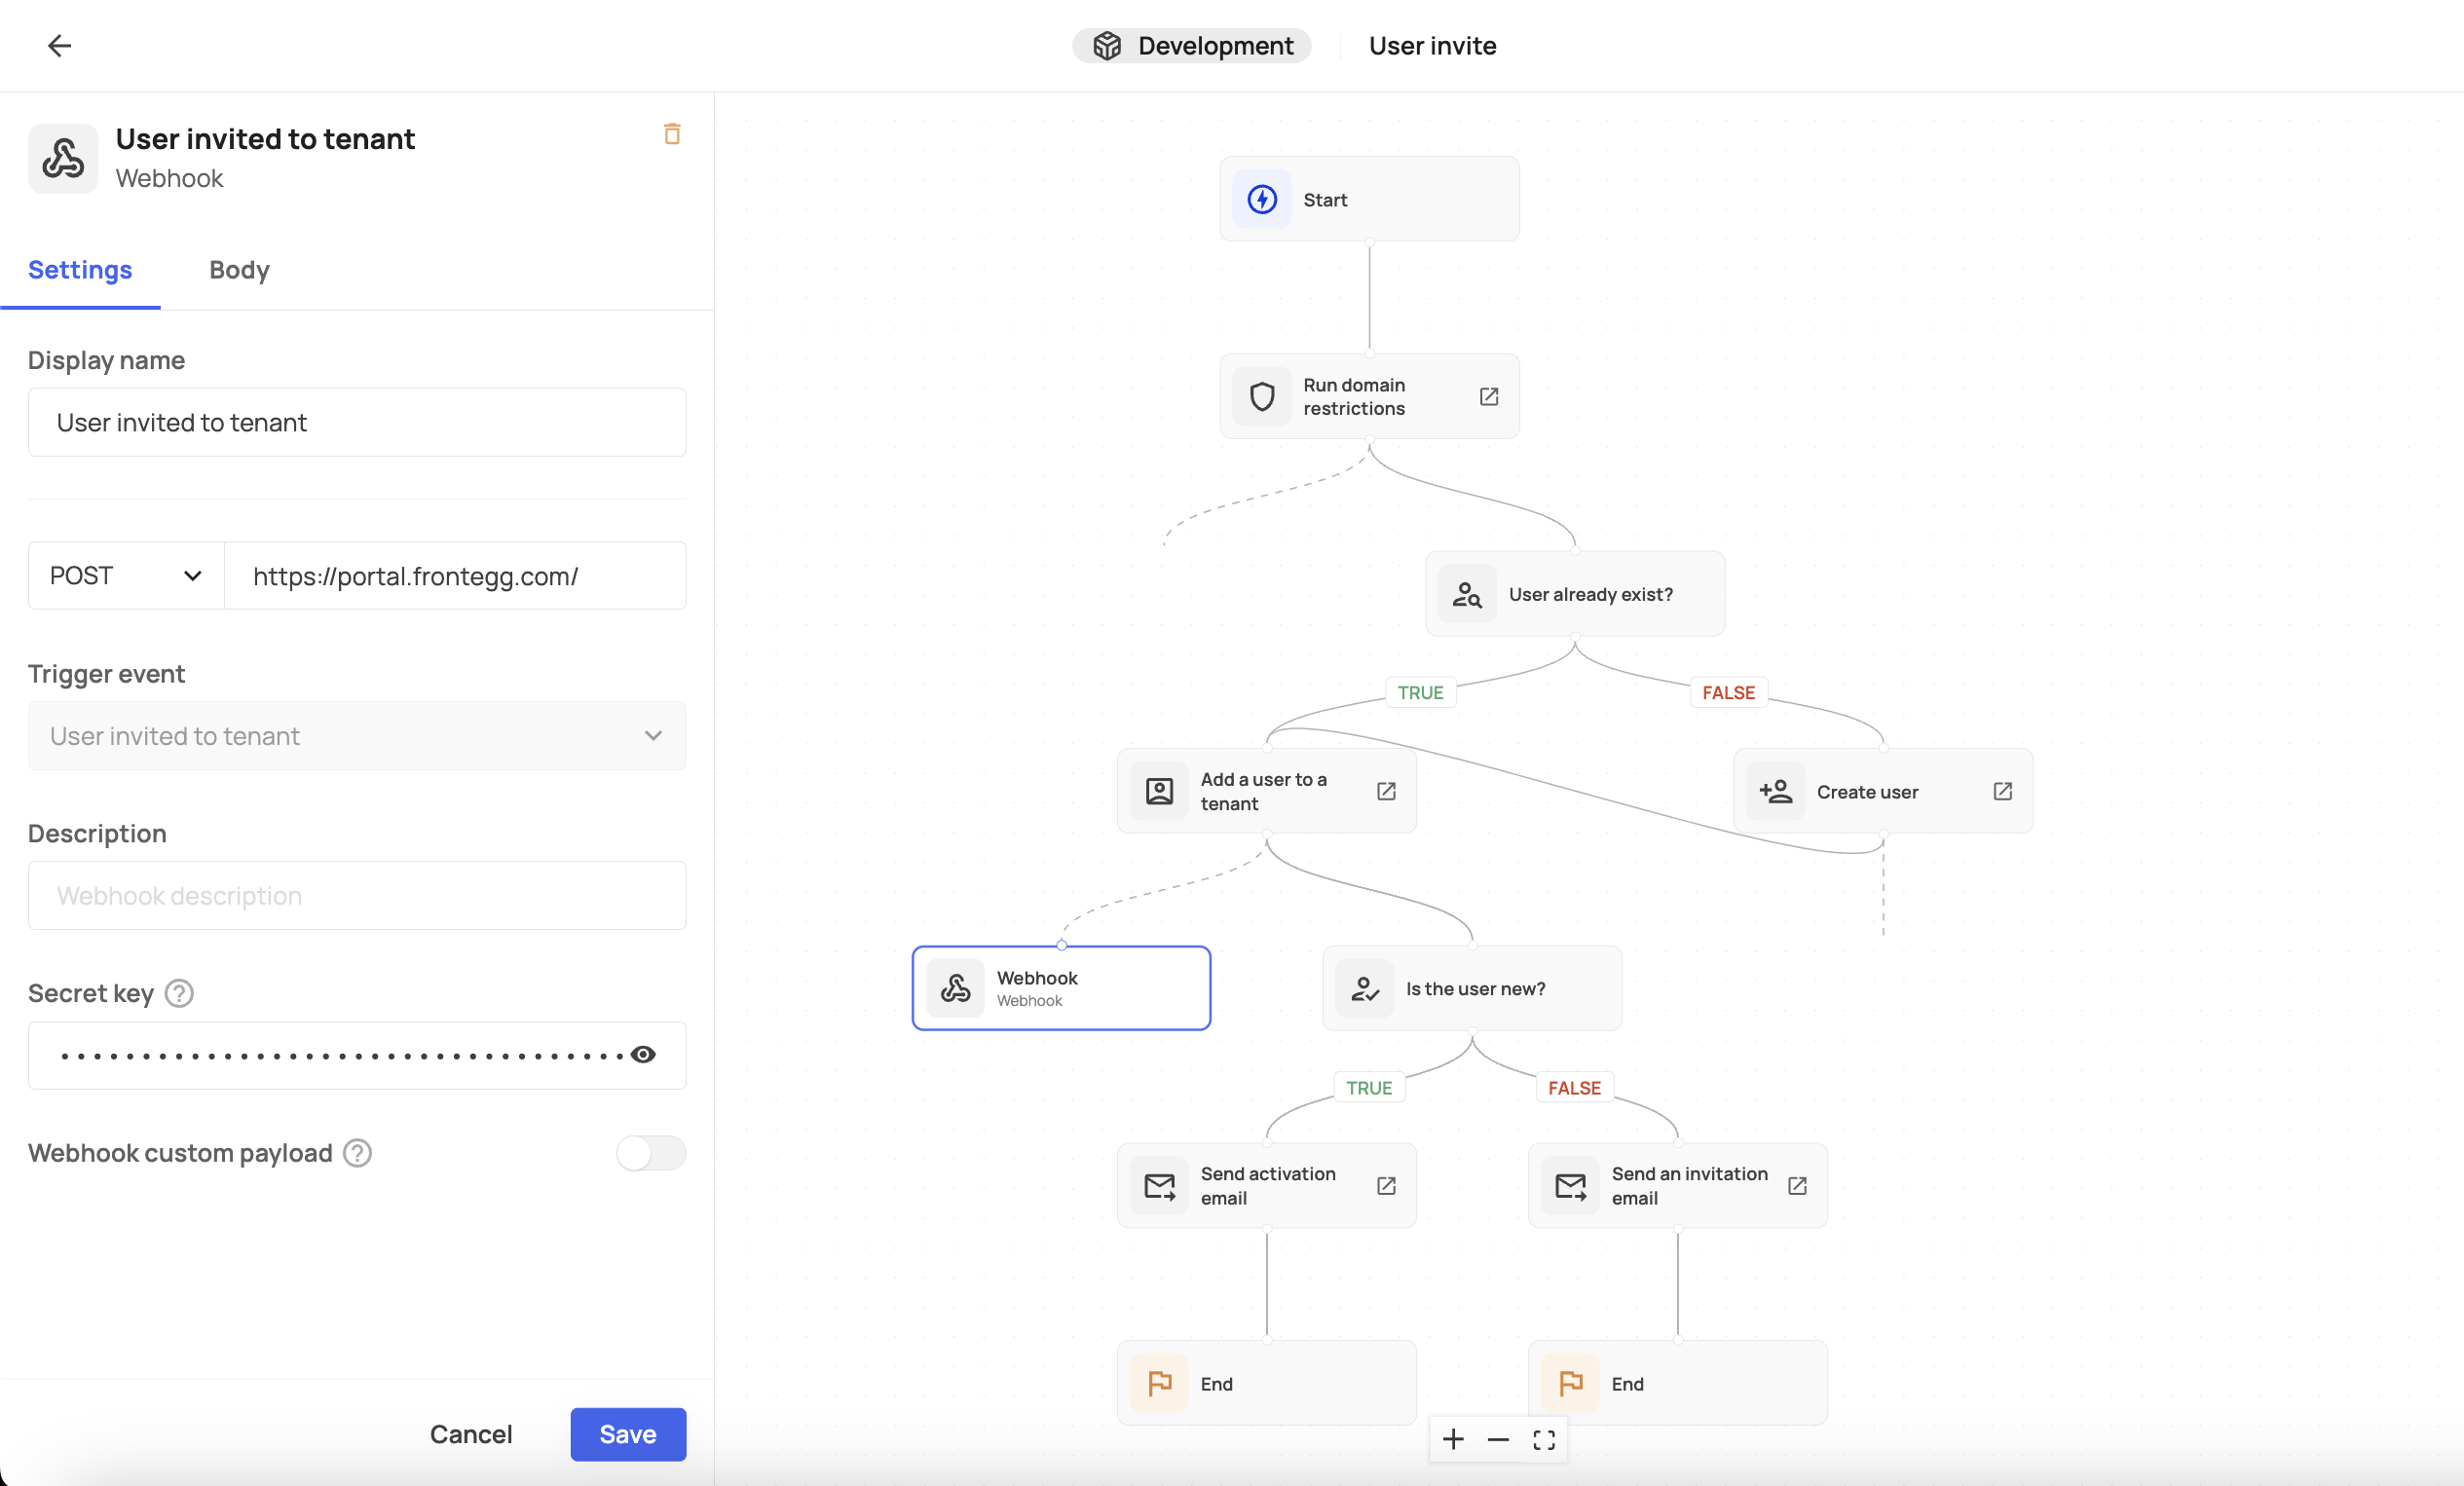
Step 3: Fill in the step information
Fill in the required information for your prehook/webhook, or create a subflow, where available (see next section). Once done, press Save.
Creating sub-flows
To extend your ability to customize your flows, we allow you to easily create sub-flows within a flow. You can use sub-flows created in multiple flows, and they will be saved and presented in your menu when you customize subsequent flows.
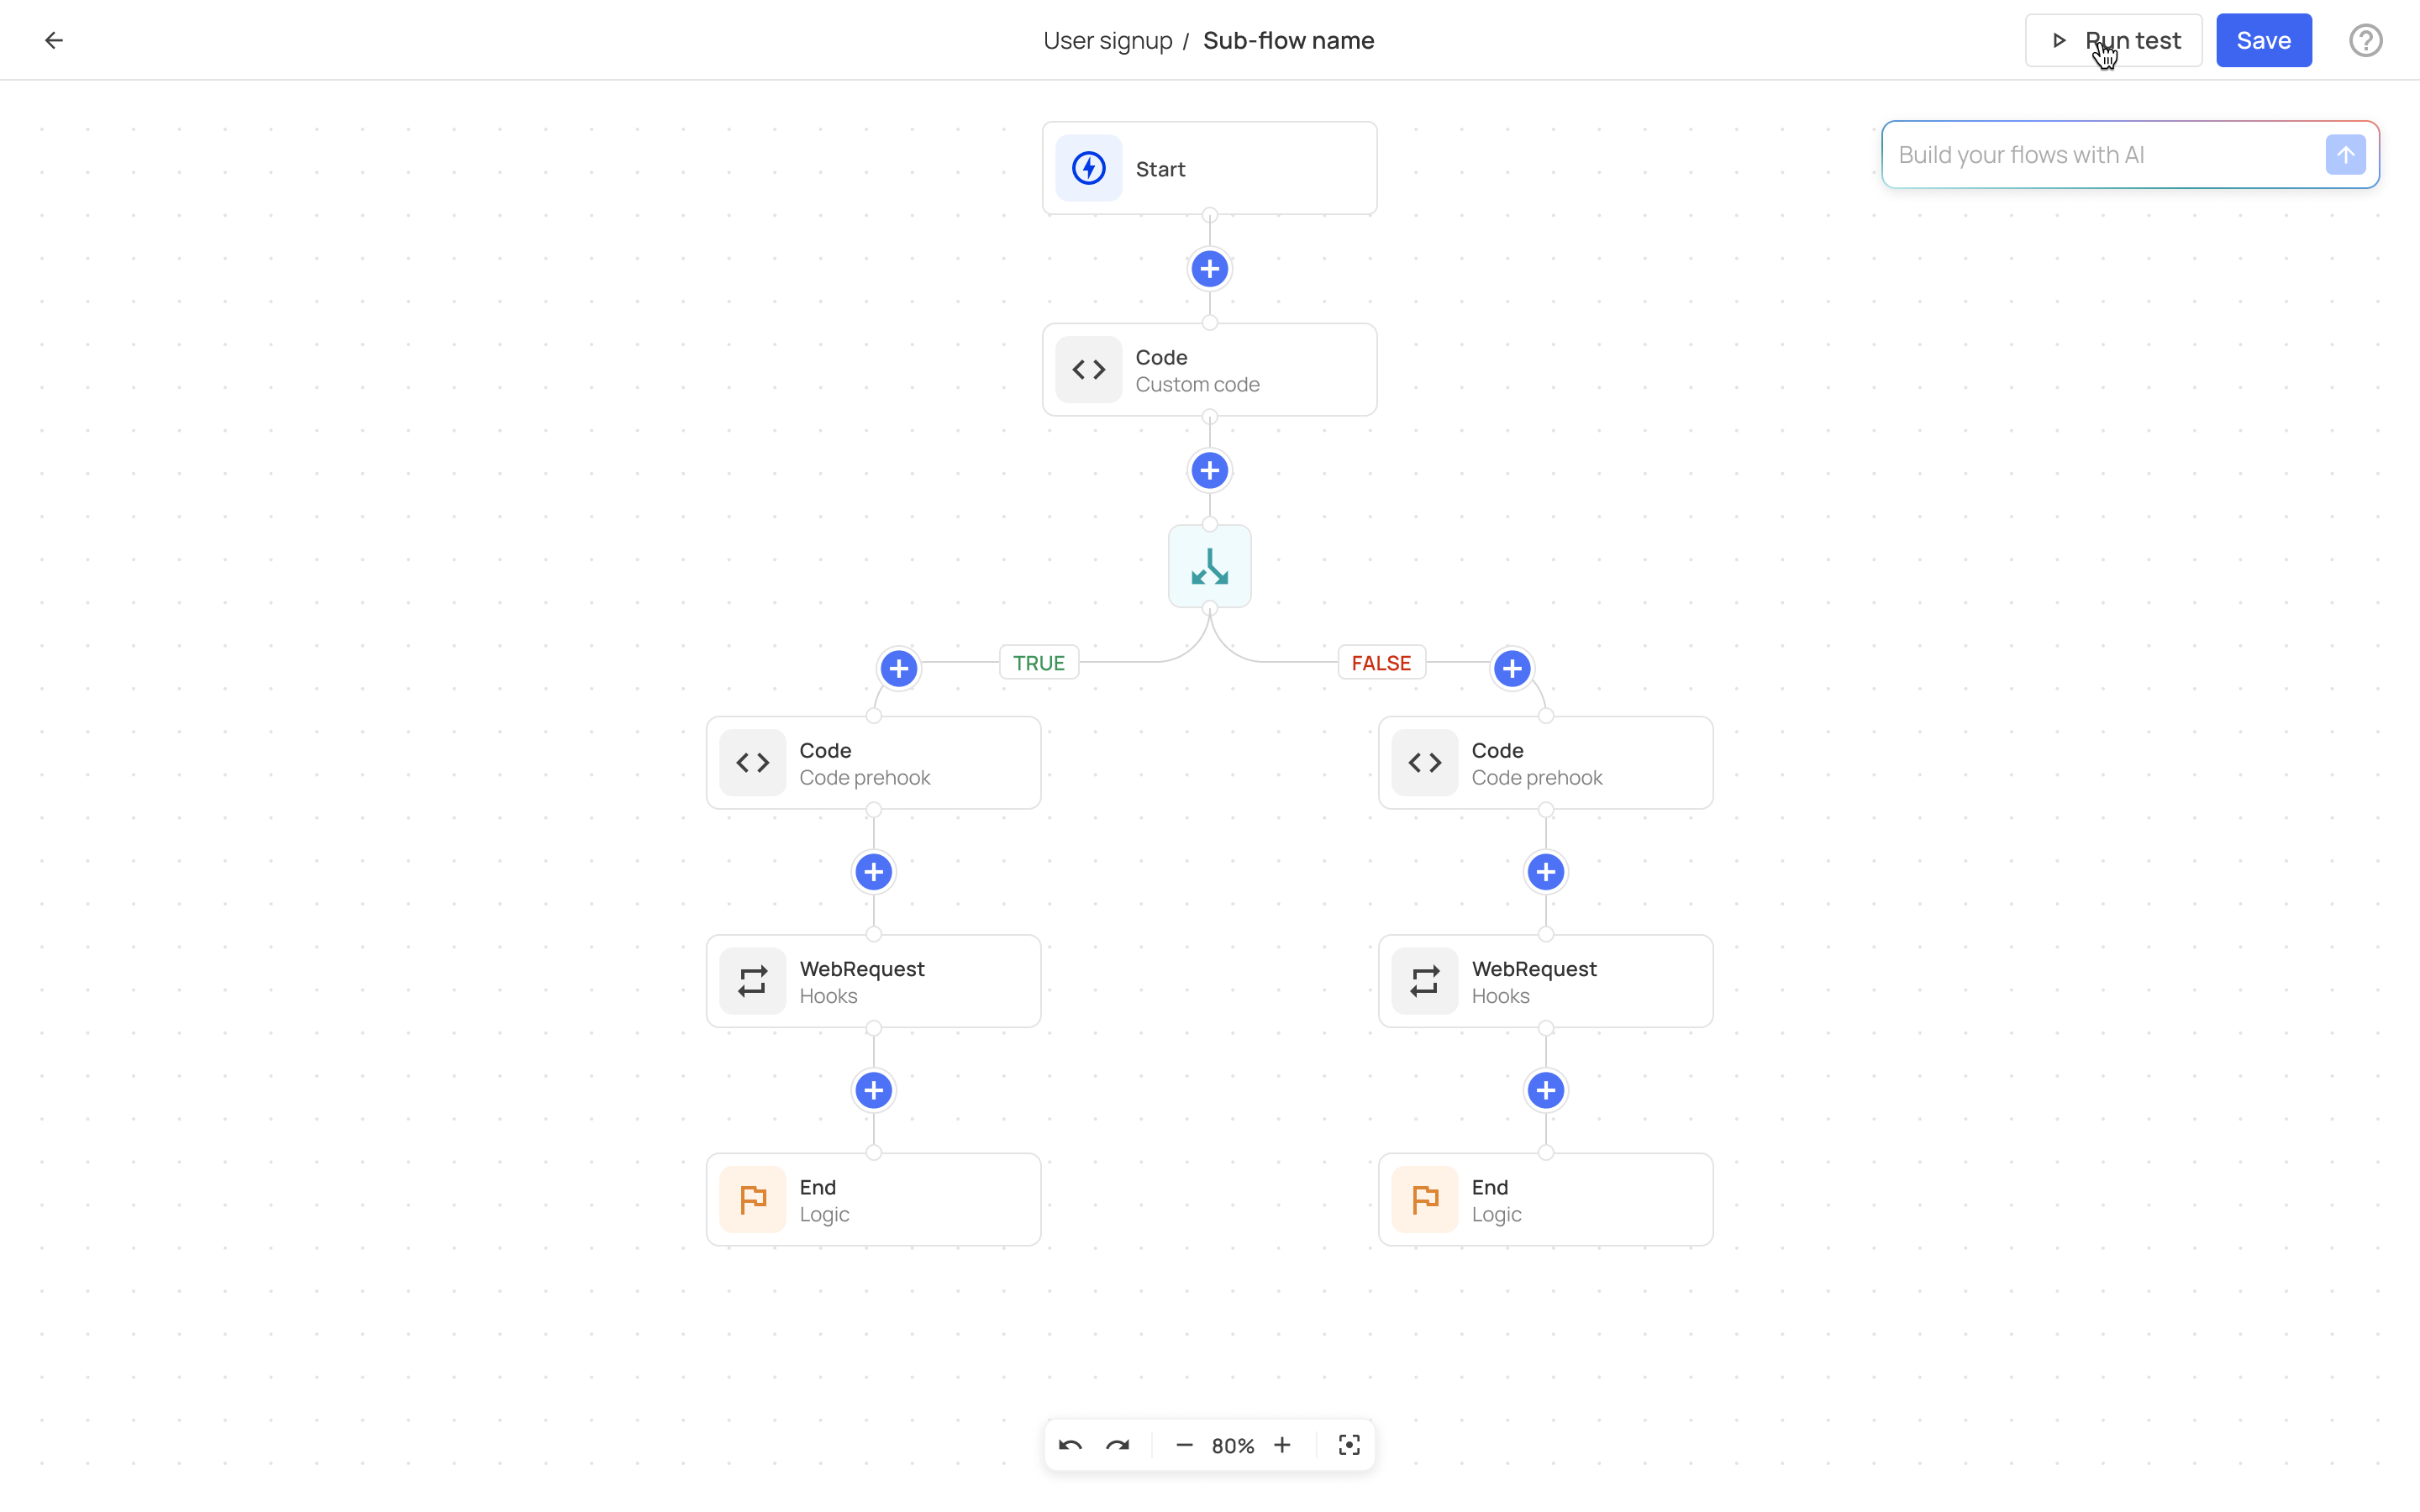
The subflows will be executed whenever a user answers the conditions as part of the flow they're enrolled in. Subflows will have a beginning and end, and can be customized with the following:
- Logic (false/true)
- WebRequest (webhooks):
- external (synchronous)
- external (asynchronous)
- Custom code
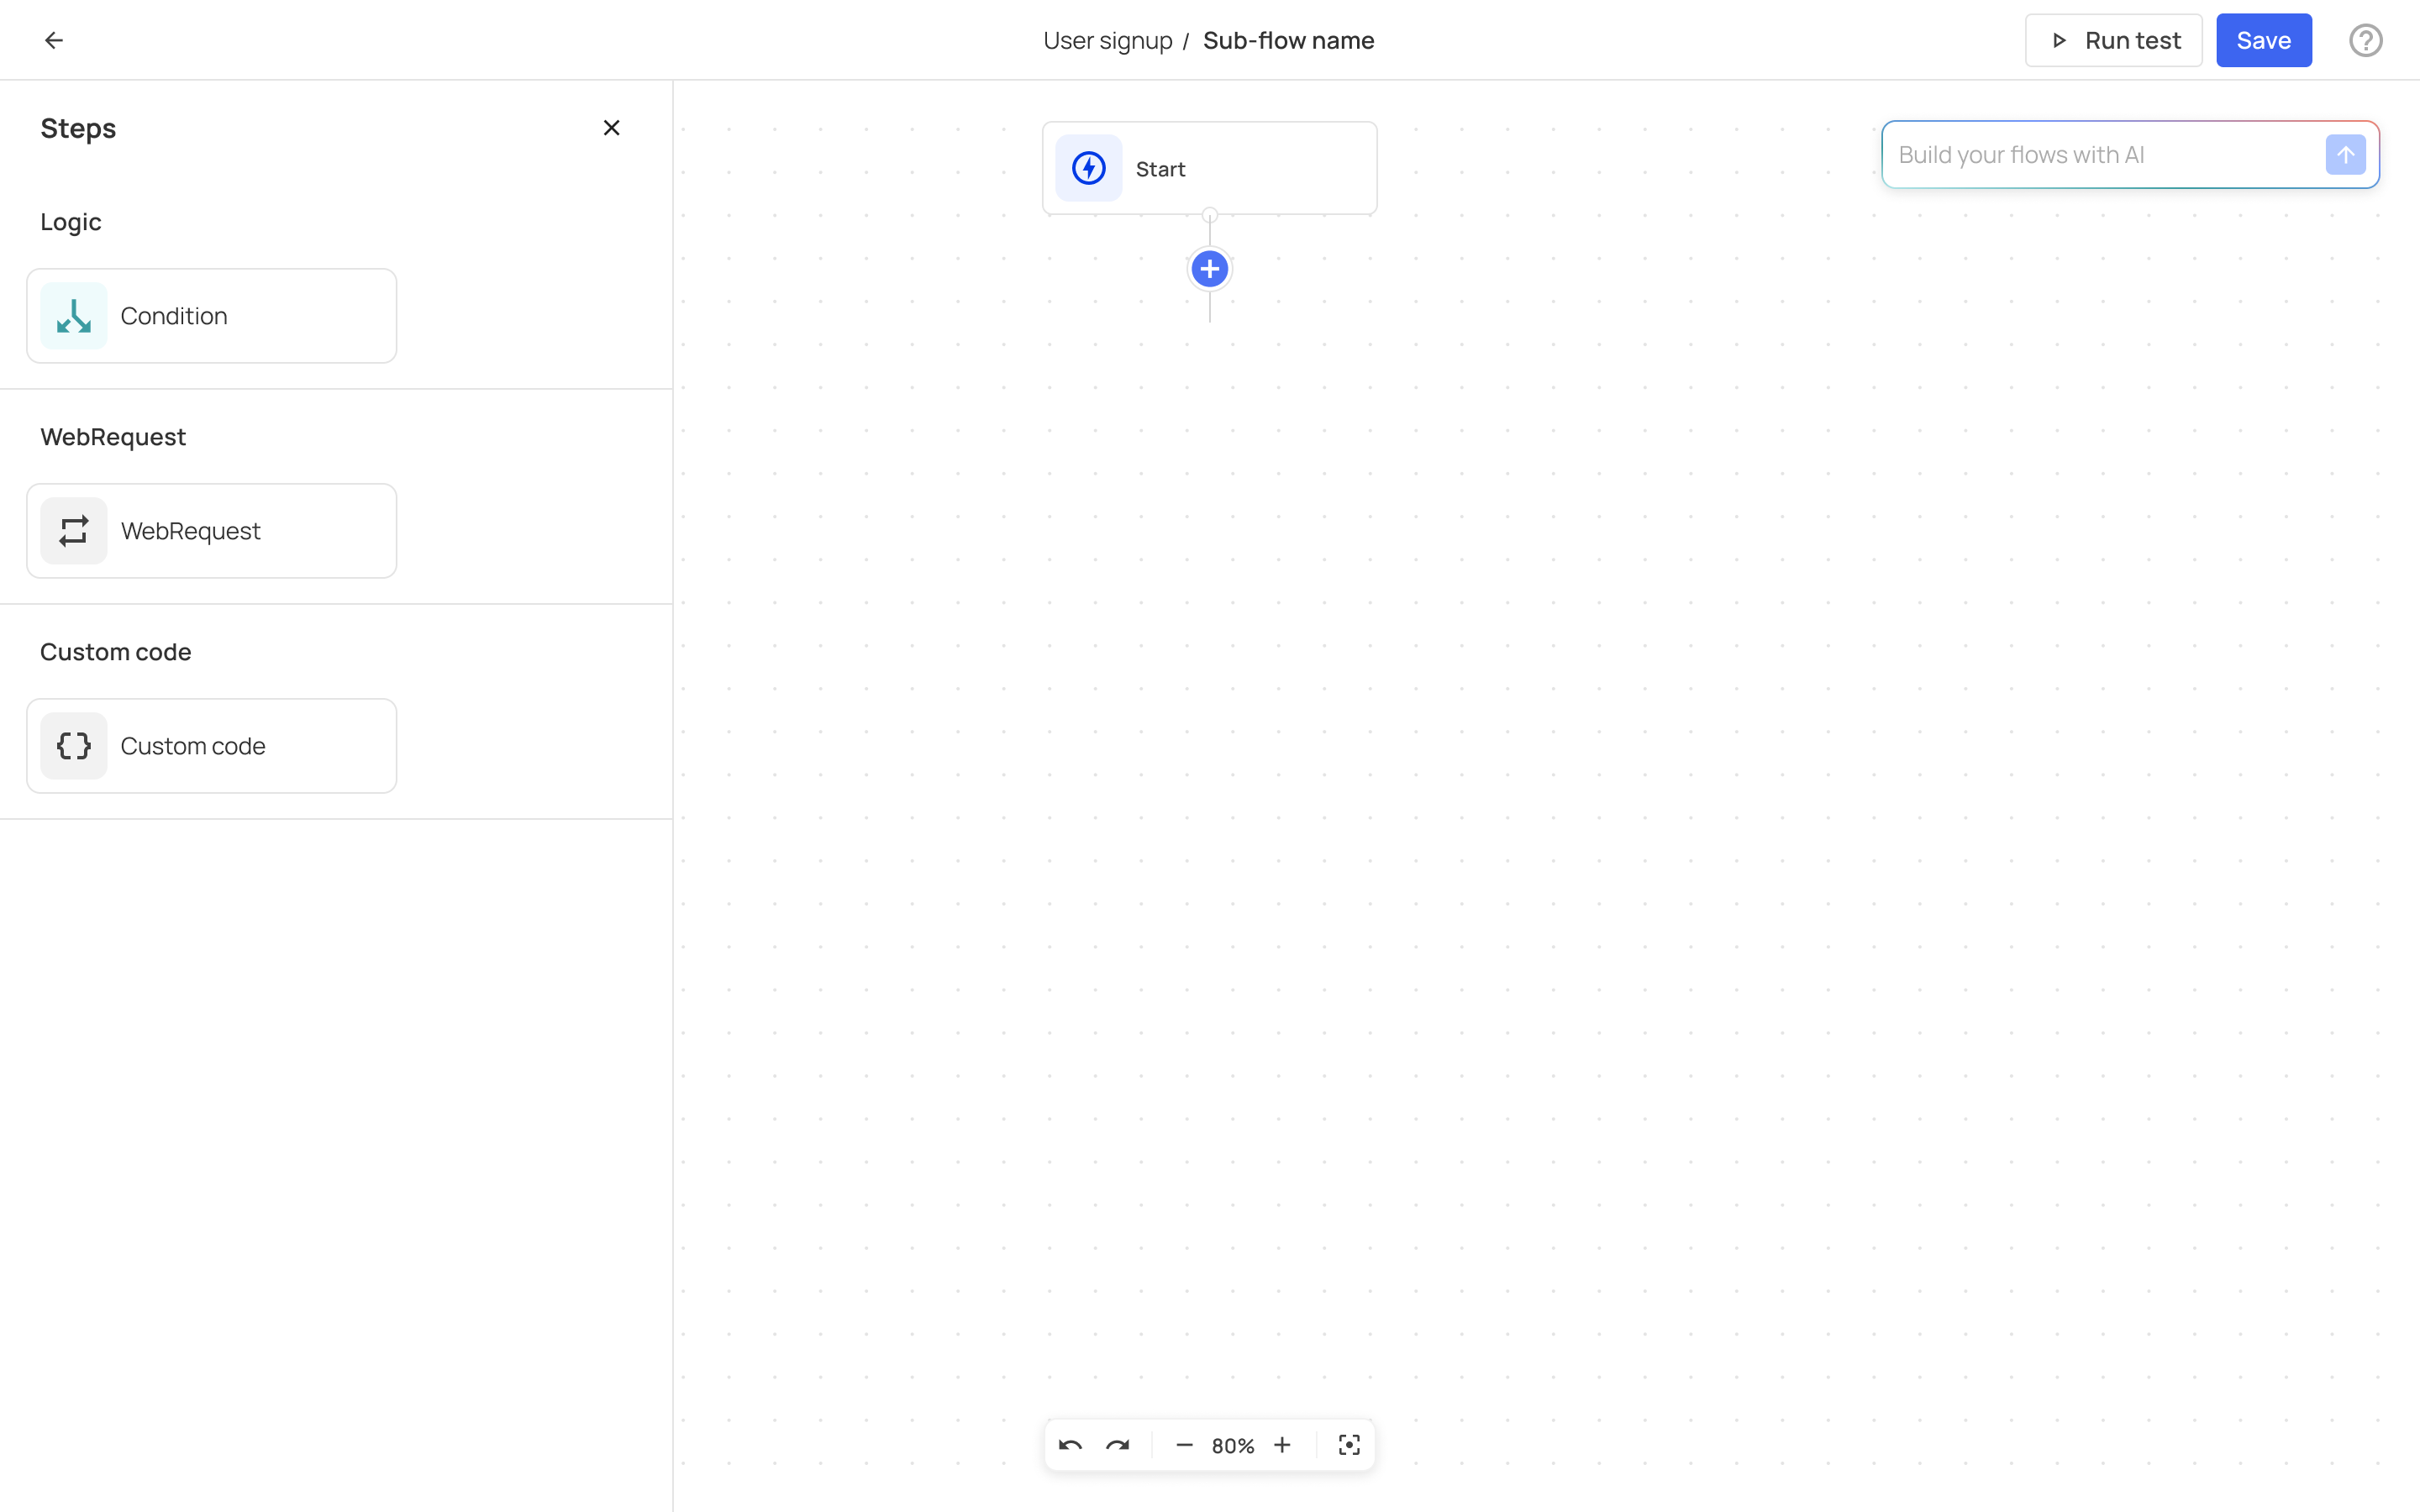
Sub-flow architecture
When you wish to have a sub-flow as your next step, after pressing the '+' you can create a new sub-flow or choose an existing sub-flow from the sub-flows tab (adjacent to the Steps tab).
Flow view
Add a new subflow
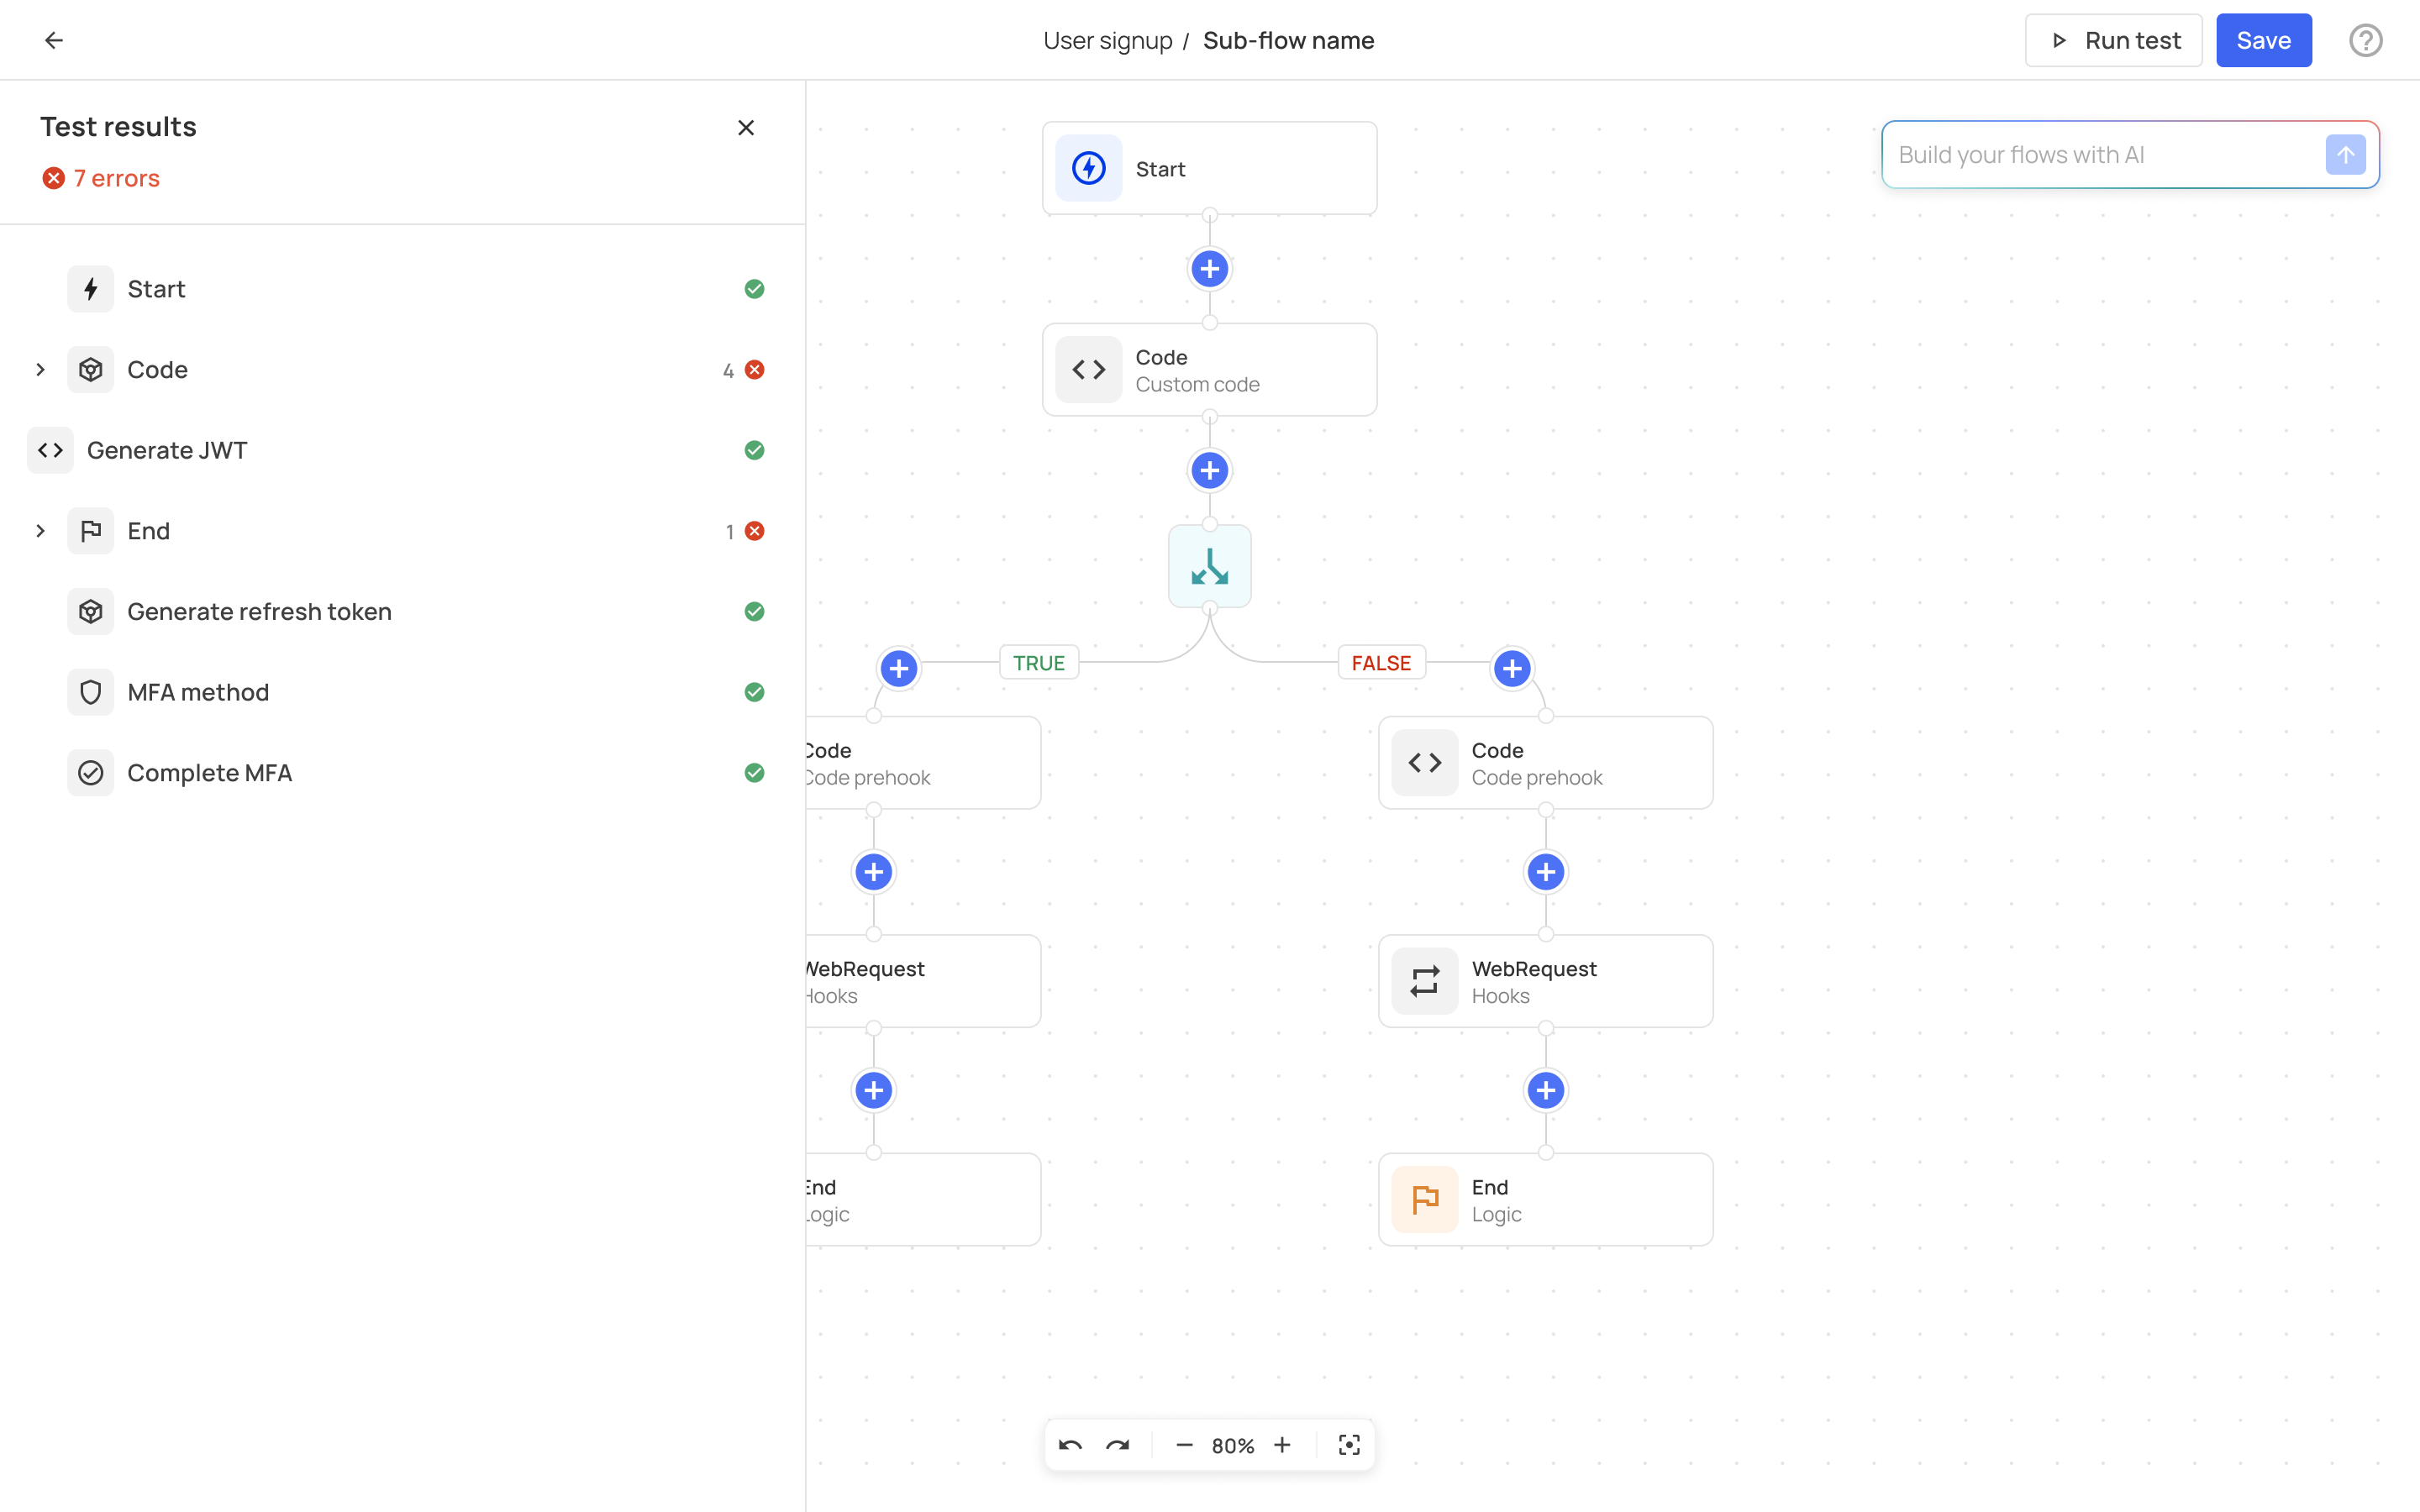
Testing sub-flows
After you are happy with the structure and logic you chose for your sub-flow, it's time to test it. Use the Run test functionality on the upper right side. The test results will be displayed to your left where you can see if and where they are failing. Once you are happy with the results, press Save.
Step 3: Test and publish
After completing your flow customization, you can use the Run test functionality to test the flow logic and see whether it is successful. If you are happy with the result, you can Publish your flow.
Sub-flows testing
Sub-flows are tested separately. See previous section to learn more.
Prehooks, webhooks, and published changes
Note that prehooks and webhooks can be created via the prehooks/integration tabs or from within the flows themselves. If created from within a flow, they will be added simultaneously to the prehook/integrations sections. That also means that changes performed in either place will affect the other—i.e., if you Publish changes in your flow, the corresponding prehook/webhook will be changed in its corresponding section as well. If you disable it via the prehooks section, the flow will have an "unpublished changes" tag in your flows section to signify that the status has changed. Please refer to the video above for further clarification.
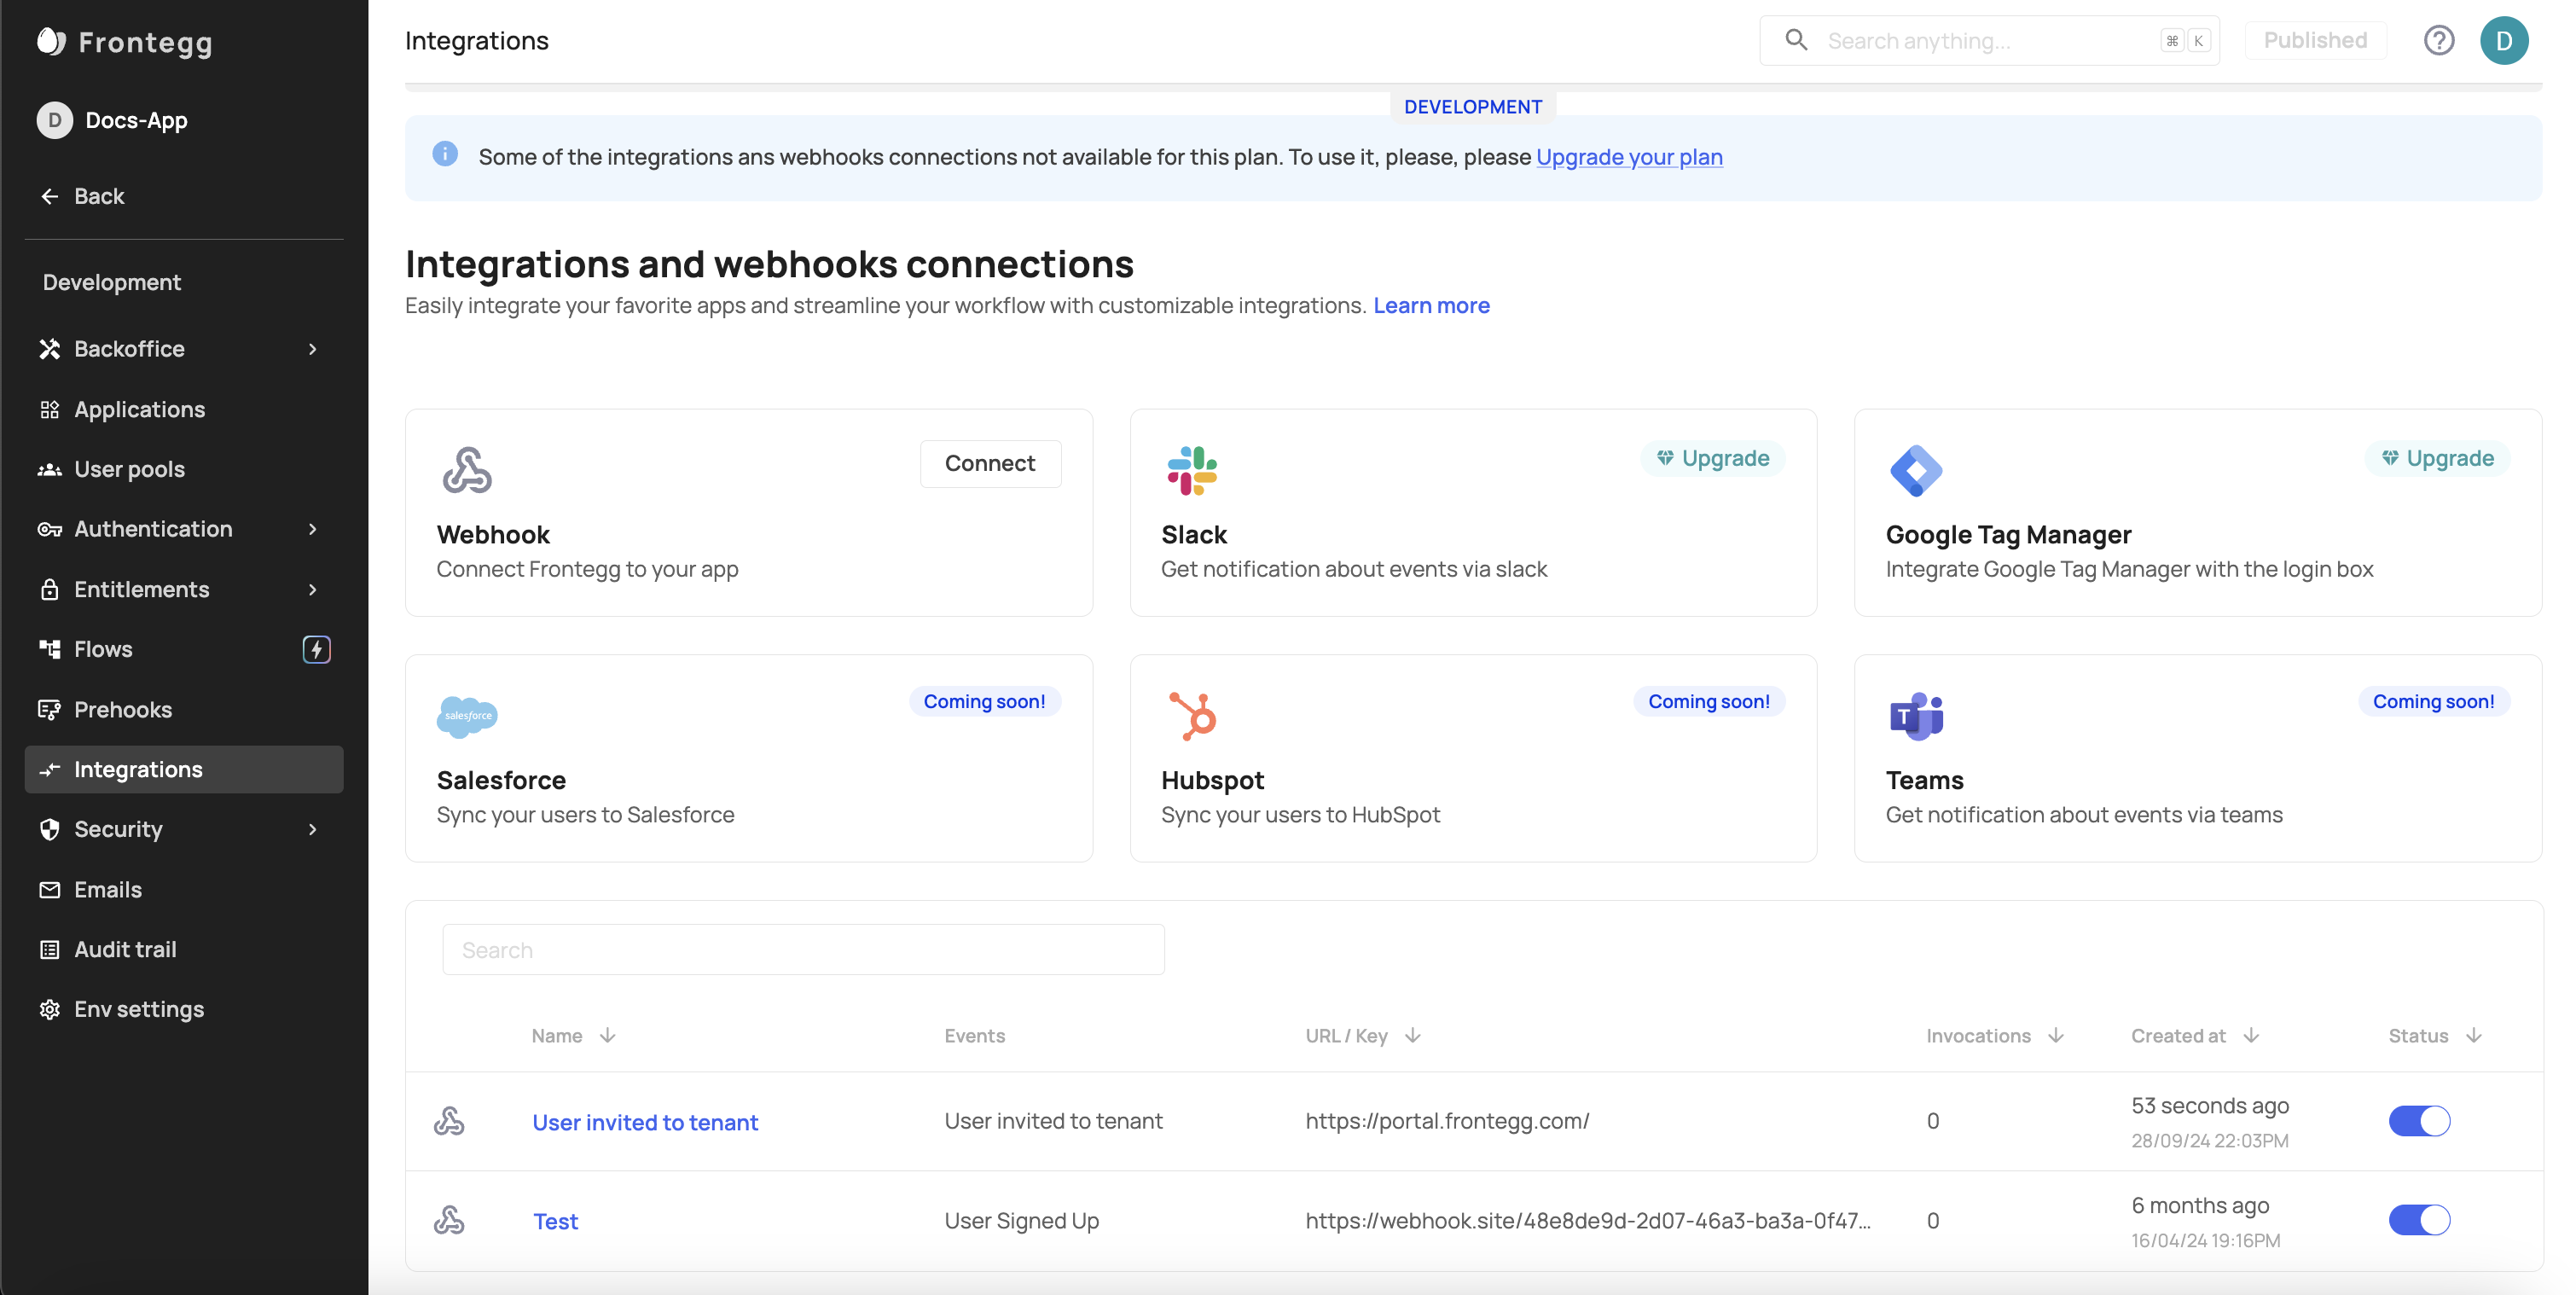
After a flow is published, its associated hooks will have an 'enabled' status
(toggle= 'on')
Audit logs
Whenever users are enrolled in a flow, their relevant activity will be recorded in your audit logs as well.
Updated 27 days ago